
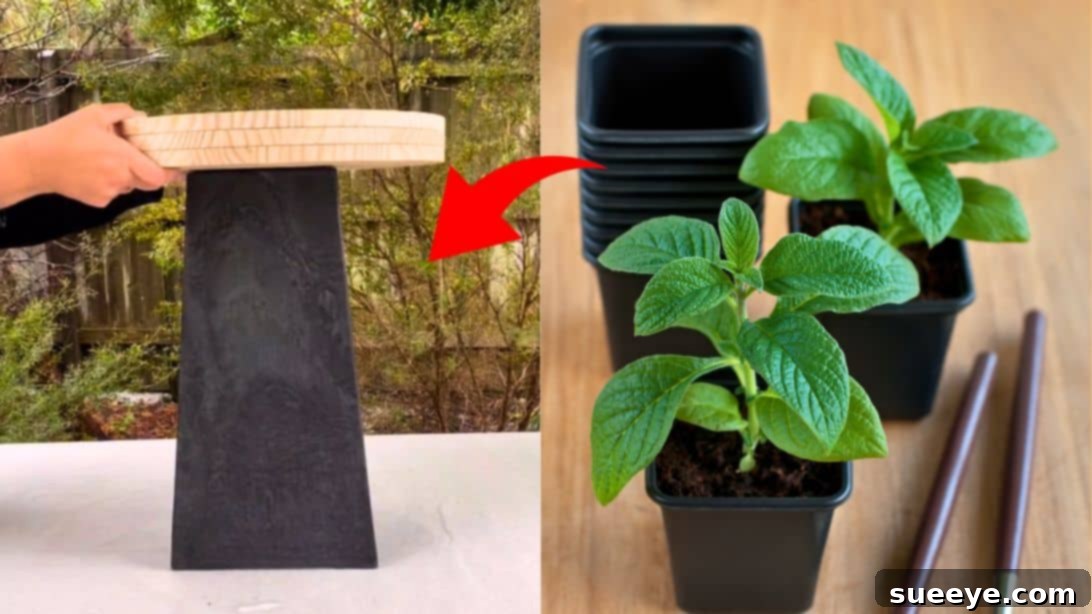
Transform Your Home: Build a Stunning DIY Console Table Using Plant Pots
Console tables are more than just furniture; they are versatile staples that elevate the aesthetic and functionality of any living space. From grand entryways and bustling hallways to cozy living rooms, these slender tables excel at filling awkward spaces, offering a designated spot to display treasured decor pieces, and providing crucial additional storage. However, anyone who has shopped for a stylish console table knows that their beauty often comes with a hefty price tag. But what if we told you that creating a bespoke, designer-look console table doesn’t require breaking the bank? Imagine crafting a gorgeous, custom piece using something as unexpected and affordable as… plant pots!
In the world of creative home decor, innovation often springs from simplicity, and a recent viral sensation on TikTok perfectly embodies this spirit. Tiktoker @smorhome captivated millions with her ingenious tutorial, demonstrating how ordinary plant pots and round pine panels could be transformed into a breathtaking console table. Her video, proudly captioned “One year later and I’m still obsessed with my DIY console table,” resonated deeply with DIY enthusiasts and budget-conscious decorators alike. And truly, how could anyone not be obsessed? The finished product is not just lovely; it’s a testament to creativity, affordability, and the satisfying reward of crafting something unique with your own hands. You’ll undoubtedly want one for your own home after discovering how simple and impactful this project can be.
@jaharnquinn One year later and I’m still obsesssssed with my DIY Console Table, which I made using plant pots! You’ll find my tutorial (including materials) on my website 🛠️
#diy
#diytable
#diyhomedecor
#diyfurniture
#diyhome
#diyconsoletable
@Bunnings♬ original sound – anastasia
Why Choose a DIY Plant Pot Console Table?
Embracing a DIY project like this console table offers a multitude of benefits beyond just saving money:
- Cost-Effectiveness: High-end console tables can cost hundreds, if not thousands, of dollars. By utilizing readily available and inexpensive materials like plant pots and pine panels, you drastically cut down on expenses, making stylish decor accessible on any budget.
- Unparalleled Customization: Unlike mass-produced furniture, a DIY project allows for complete creative control. You can select plant pots of different sizes, shapes, and materials (terracotta, plastic, ceramic), choose your preferred wood type for the panels, and most importantly, paint the entire structure in any color or finish that perfectly complements your existing home decor scheme. Want a rustic look? Go for distressed paint. Craving modern chic? Opt for a sleek, matte finish.
- A Sense of Accomplishment: There’s immense satisfaction in looking at a beautiful piece of furniture and knowing you created it with your own hands. It adds a personal touch and a unique story to your home.
- Sustainability and Upcycling: This project is an excellent example of creative upcycling. Instead of purchasing new materials entirely, you’re giving new life to everyday items, contributing to a more sustainable lifestyle.
- Unique Aesthetic Appeal: This isn’t your average console table. The use of plant pots as structural elements gives it a distinctive, sculptural quality that’s bound to be a conversation starter. It’s truly a unique blend of functionality and artistic expression.
Materials You’ll Need for Your Custom Console Table
Before diving into the creation process, gathering all your materials is key to a smooth and enjoyable DIY experience. Here’s a detailed list of what you’ll need, along with some considerations:
- Plant Pots: For each stand, you’ll need at least one tall rectangular pot and one round pot. Consider the height and diameter to achieve your desired table height and stability. You can experiment with different materials like terracotta (for a natural look), plastic (lightweight and affordable), or ceramic (more substantial and sleek). Ensure they are clean and dry.
- Round Pine Panels: The TikToker used three for added thickness and stability for each stand. You’ll need six in total. Choose a diameter that is slightly larger than your round plant pot to create a visible base and top. Pine is easy to work with and cost-effective, but other wood types like MDF or plywood can also work if properly sealed.
- Long Wooden Panel (for the tabletop): This will be the main surface of your console table. Select a length and width appropriate for your space. Common choices include pine, MDF, or even a pre-finished shelf. The thickness should be sufficient to support your decor items without sagging.
- Strong Adhesive: A high-quality construction adhesive or wood glue is essential for securely bonding the wood panels and pots. Look for products designed for multi-surface bonding and strong, long-lasting hold.
- Wood Filler or Spackle: Crucial for achieving a seamless, professional finish. This will fill any gaps between the pots and panels, creating a smooth surface for painting.
- Sandpaper: Various grits will be useful: coarse (e.g., 80-100 grit) for initial smoothing after filler application, and finer grits (e.g., 180-220 grit) for a perfectly smooth finish before painting. A sanding block can make this process easier.
- Primer: Especially important if you’re painting over different materials (wood, plastic/terracotta). Primer ensures better paint adhesion, a more even color, and enhanced durability of your paint job.
- Paint: Choose a color and finish that matches your aesthetic. Acrylic latex paint is a popular choice for furniture due to its durability and ease of use. Consider a semi-gloss or satin finish for easy cleaning. Spray paint can offer a very smooth finish but requires proper ventilation.
- Paint Brushes and/or Rollers: Depending on the size of your pots and panels, a combination of brushes for intricate areas and a small roller for larger flat surfaces will be ideal.
- Protective Gear: Always wear gloves, safety glasses, and a mask (especially when sanding or spray painting) to ensure your safety.
- Clamps (optional but recommended): To hold pieces together while adhesive dries, ensuring a strong bond.
- Measuring Tape and Pencil: For accurate placement and marking.
Step-by-Step Guide to Building Your Plant Pot Console Table
Step 1: Prepare Your Work Area and Materials
Before you begin, ensure you have a clean, well-ventilated space to work. Lay down drop cloths or old newspapers to protect your floor or surfaces. Clean all your plant pots and wooden panels to remove any dust or debris, which could interfere with adhesion and paint application. Make sure all materials are completely dry.
Step 2: Constructing the Table Stands
The console table is supported by two identical, sturdy stands. Let’s focus on building one first:
- Glue the Pine Panels: Take three of your round pine panels. Apply a generous amount of strong wood glue or construction adhesive to the surface of one panel. Carefully place a second panel directly on top, aligning the edges perfectly. Repeat this process with the third panel. Clamping them together and allowing the adhesive to cure completely, as per the product instructions, will ensure maximum strength and stability. This triple layer creates a robust base and top for your stand.
- Assemble the Pot Structure: Once your triple-layered pine panel is dry and secure, apply adhesive to its center. Carefully place the rectangular tall plant pot on top, ensuring it’s centered and level. Hold it firmly in place or use temporary weights until the adhesive begins to set.
- Add the Round Pot: On top of the rectangular pot, apply another layer of adhesive. Then, place the round plant pot centrally. This creates a unique, sculptural shape for your stand. Allow ample drying time for all adhesive bonds to fully cure. This is crucial for the structural integrity of your console table.
Step 3: Filling and Smoothing for a Seamless Finish
This step is vital for achieving that high-end, store-bought look:
- Apply Wood Filler: Once all the adhesive is dry, you’ll likely notice small gaps or seams where the pots and panels meet. Use wood filler or spackle to generously fill these gaps. Apply it smoothly with a putty knife, ensuring it’s pushed into all crevices. Don’t be afraid to apply a little extra; you can always sand it down.
- Cure and Sand: Allow the filler to dry completely. This might take several hours, depending on the product and thickness of application. Once dry, use coarse-grit sandpaper (e.g., 80-100 grit) to sand down any excess filler, focusing on creating a smooth, continuous surface between all components. Follow up with finer-grit sandpaper (e.g., 180-220 grit) for a perfectly smooth finish, ready for paint. Wipe away all sanding dust with a damp cloth before proceeding.
Step 4: Priming and Painting Your Stands
A good paint job makes all the difference:
- Apply Primer: Before painting, apply an even coat of primer to the entire stand. Primer helps the paint adhere better, provides a uniform base color, and makes your paint job more durable. Allow the primer to dry completely according to the manufacturer’s instructions.
- Paint the Stands: Once the primer is dry, it’s time for your chosen paint color. Apply thin, even coats, rather than one thick coat, to prevent drips and ensure a smooth finish. If using spray paint, maintain a consistent distance for even coverage. If brushing, use long, smooth strokes. Allow each coat to dry thoroughly before applying the next. You will likely need two to three coats to achieve full opacity and a beautiful finish.
- Repeat for the Second Stand: Follow all the above steps to construct, fill, sand, prime, and paint your second identical table stand. Ensure both stands are completely dry before assembly.
Step 5: Final Assembly – Adding the Tabletop
- Position the Stands: Carefully place your two finished and dried stands on your desired location. Leave a small, even space between them, determining the overall length of your console table. Ensure they are parallel and stable.
- Attach the Tabletop: Place the long white wooden panel on top of the two stands. Center it precisely and ensure it’s level. For added security, you can apply a strong adhesive to the top surfaces of the stands before placing the tabletop. Alternatively, if you’re comfortable with tools, you could use discreet L-brackets or screws from underneath the tabletop into the top pine panels of the stands for a more permanent fixture.
Decorating Your Beautiful New Console Table
With your new DIY console table proudly assembled, the final and most enjoyable step is to infuse it with your personal style and make it truly shine. The TikTok creator provided an excellent starting point, demonstrating how simple yet elegant decor can transform the piece. She strategically placed a lamp and a tray for small essentials on one side, creating a functional zone, while balancing it with a stack of books, a mirror, and a decorative vase on the other. A thoughtfully chosen painting on the wall above and a complementary wooden chair completed her sophisticated entryway look.
However, the beauty of a DIY console table lies in its versatility. Consider these additional decorating ideas to make it uniquely yours:
- Seasonal Decor: Easily swap out items to match holidays or seasons. Think miniature pumpkins and autumnal leaves for fall, fresh flowers for spring, or festive garlands for winter.
- Framed Memories: Display cherished photographs in elegant frames to add a personal and inviting touch.
- Greenery: Embrace the plant pot origins! Small potted plants (real or artificial) can add life and freshness to your table. Succulents, snake plants, or a small trailing plant can work wonders.
- Scented Elements: Incorporate diffusers, elegant candles, or potpourri bowls to add a pleasant aroma to your space, enhancing the overall ambiance.
- Functional Storage: Utilize decorative baskets or small bins beneath the tabletop or on the lower shelf (if you incorporated one) to discreetly store keys, mail, or other everyday clutter, keeping your entryway tidy.
- Lighting: Beyond a lamp, consider a string of delicate fairy lights woven around decor items for a warm, inviting glow, especially in the evenings.
- Styling by Theme:
- Minimalist: Opt for clean lines, neutral colors, and sparse, carefully chosen items like a single sculptural vase and a minimalist lamp.
- Bohemian: Introduce natural textures like woven baskets, macramé wall hangings, eclectic trinkets, and vibrant potted plants.
- Rustic Farmhouse: Incorporate distressed wood elements, metal accents, mason jar decor, and perhaps a small antique find.
- Modern Glam: Use metallic accents (gold, silver), mirrored trays, crystal vases, and sleek, high-sheen finishes.
- Wall Art and Mirrors: The space above your console table is just as important. A large statement mirror can visually expand the space and bounce light, while a gallery wall of art or a single striking piece can anchor the table visually.
Why This DIY Project Is a Must-Try for Every Home Enthusiast
The overwhelming positive response to the original TikTok video, garnering over 1.9 million views and countless compliments, speaks volumes about the appeal of this project. It’s a powerful testament to the fact that beautiful, functional, and stylish furniture doesn’t have to come with a premium price tag. In an era where individuality and sustainability are highly valued, creating your own console table using humble plant pots offers an unparalleled opportunity to blend these principles.
This DIY plant pot console table is undeniably a fantastic option if you’re seeking a unique-looking piece that stands out from generic store offerings and allows you to avoid spending hundreds, if not thousands, on designer items. It challenges the conventional idea of what furniture can be made from, encouraging creativity and resourcefulness. It’s a project that is accessible to most skill levels, requiring basic tools and materials, yet yielding results that look professionally made.
Conclusion
From a simple TikTok idea to a viral sensation, the DIY plant pot console table has proven to be a game-changer for budget-friendly home decor. It’s more than just a piece of furniture; it’s a statement of creativity, resourcefulness, and personal style. By following these detailed steps, you can confidently craft a bespoke console table that not only serves its functional purpose but also adds a significant touch of elegance and uniqueness to your home. Say goodbye to expensive store-bought options and hello to the immense satisfaction of creating something truly beautiful with your own hands. We encourage you to embark on this rewarding home improvement journey and transform your space with a custom, affordable, and undeniably charming plant pot console table. Share your creations and inspire others to discover the joy of DIY!