
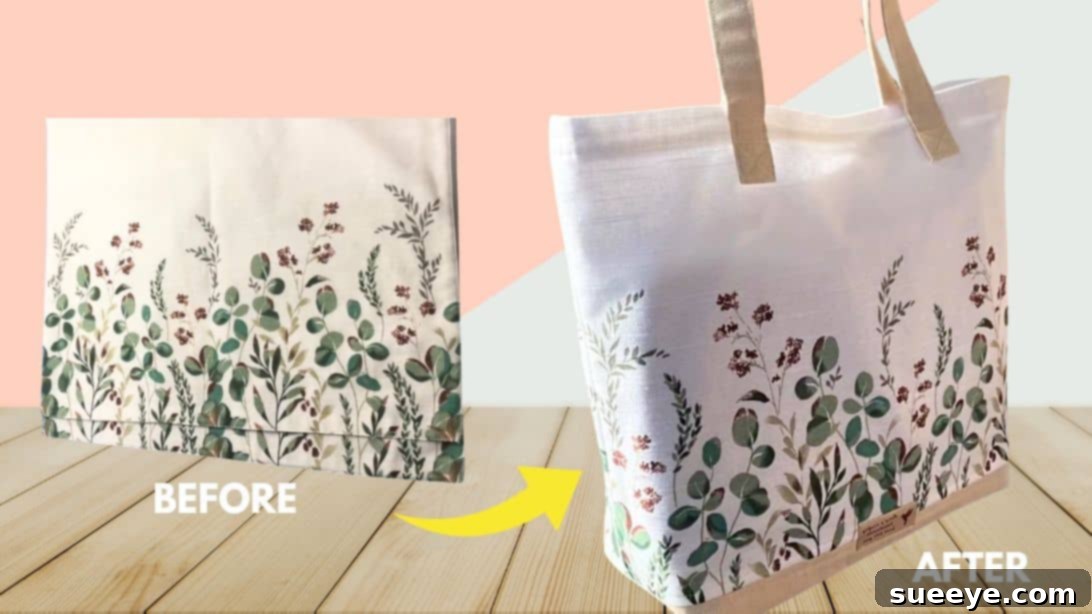
Transform Dollar Store Placemats into Stylish Tote Bags: An Easy DIY Sewing Project
Are you searching for an incredibly simple yet rewarding sewing project that even beginners can master? Look no further! This fantastic idea, inspired by the creative insights of Nora’s Crafty, shows you how to convert affordable placemats into a trendy and functional tote bag. Placemats are a true hidden gem for crafting – they are readily available, incredibly inexpensive, and come in a dazzling array of prints, colors, and textures, making them an excellent foundation for small, personalized projects. This guide will walk you through every step, ensuring you create a beautiful bag with minimal effort and maximum satisfaction.
Why Choose Placemats for Your DIY Tote Bag?
The choice of placemats for this project isn’t just about cost-effectiveness; it’s a smart crafting decision with multiple benefits. First, their inherent durability means your tote bag will be sturdy enough for everyday use, whether carrying groceries, books, or beach essentials. Second, placemats often feature pre-finished edges, which drastically reduces the amount of hemming you need to do, saving time and simplifying the process for new sewers. Third, the sheer variety of designs available, from intricate patterns to solid hues and different fabric types like woven cotton, jute, or even vinyl, allows for endless customization. You can easily find placemats that match your personal style or create bags for specific purposes, making each project unique and truly your own.
The Enduring Appeal of DIY Tote Bags
In a world increasingly focused on sustainability and personalization, DIY tote bags hold a special place. Crafting your own bag allows you to express your creativity while contributing to a more eco-friendly lifestyle by reducing the need for single-use plastic bags. Beyond environmental benefits, a handmade tote bag makes a thoughtful and unique gift, showcasing your effort and care. For the maker, it’s a fantastic way to develop or refine sewing skills, building confidence with each successful stitch. This particular placemat tote bag project is especially appealing because it delivers a professional-looking result without requiring advanced techniques or complicated patterns.
Beginner-Friendly Sewing: No Pattern, No Problem!
One of the most intimidating aspects of sewing for newcomers can be understanding and working with complex patterns. This placemat tote bag project eliminates that hurdle entirely! It requires no elaborate pattern pieces, just simple measurements and straight-line sewing, making it perfect for those who are just starting their sewing journey. If you’ve been looking for an accessible entry point into the world of sewing, this is it. The instructions are clear, concise, and designed to be easily followed, ensuring a successful outcome even if you’ve never touched a sewing machine before.
Essential Materials for Your Placemat Tote Bag
Gathering your supplies is the first exciting step in any creative project. For this charming tote bag, you’ll find that the material list is short and sweet, yet yields impressive results. Focus on quality and color coordination to make your bag truly stand out. Here’s what you’ll need:
- Two 18.75″ Placemats: These are the stars of your bag! Look for placemats that are sturdy but not too stiff, allowing them to be easily sewn. Cotton or a blend is usually ideal. Consider patterns and colors that reflect your style.
- Scissors: A sharp pair of fabric scissors is crucial for clean cuts, preventing fraying, and ensuring accuracy. Avoid using them on paper to keep them sharp.
- Two Pieces of 20″ x 10″ Fabric for the Bottom Panel: This fabric will form the base of your bag, providing extra strength and structure. We recommend a durable material like canvas, duck cloth, or a heavy cotton twill. Choose a complementary or contrasting color to your placemats.
- Two Pieces of 4.5″ x 31.5″ Canvas Cloth for the Handles: Canvas is excellent for handles due to its strength and resilience. If you prefer, you can also use pre-made cotton webbing of a similar width and length.
- Sewing Machine: Any basic sewing machine capable of straight stitches will work perfectly.
- Matching Thread: Select a high-quality polyester thread that matches the dominant color of your placemats or your handle/bottom panel fabric for a cohesive look.
- Sewing Clips or Pins: These are indispensable for holding fabric pieces together securely before and during sewing, ensuring everything stays aligned.
- Erasable Fabric Pen or Tailor’s Chalk: For marking measurements and guidelines on your fabric without leaving permanent marks.
- Ruler or Measuring Tape: Accuracy is key in sewing, and these tools ensure precise cuts and placements.
- Iron and Ironing Board: Pressing seams open or flat as you go makes a huge difference in the professional finish and crispness of your final product.
Step-by-Step Guide: Crafting Your Placemat Tote Bag
Now that you have all your materials ready, let’s dive into the sewing! Follow these instructions carefully, and remember to take your time. Each step builds upon the last, so precision will pay off.
Step 1: Preparing the Bottom Panels
Begin with one of your 20″ x 10″ bottom panel fabric pieces. Fold it in half crosswise, ensuring the right sides of the fabric are facing each other. Using your sewing machine, stitch along the raw edges with a 0.4-inch seam allowance. Crucially, remember to leave a small opening, approximately 3-4 inches wide, in the center of one of the longer sewn edges. This opening is vital for turning the fabric right side out later. Once sewn, carefully press the seams open. This flattens the seam allowances, reducing bulk and creating a neater finish. Finally, turn the fabric right side out through the opening you left, gently pushing out the corners to create crisp edges. Repeat this entire process for the second 20″ x 10″ bottom panel piece.
Step 2: Attaching the Bottom Panels to the Placemats
First, remove any tags or labels from both placemats. These tags might create bulk or be visible in your finished bag. Next, take one prepared bottom panel and align its bottom edge with the bottom edge of one placemat. Make sure the right sides of both fabrics are facing each other. Use sewing clips or pins to secure the bottom panel in place along the edge. With a 0.4-inch seam allowance, sew the bottom panel to the placemat. After stitching, locate the small opening in the bottom panel (from Step 1) and carefully stitch it closed. Press this newly sewn seam open for a clean look. To reinforce the seam and add a professional touch, topstitch just above and just below the seam line. This not only makes the seam stronger but also helps it lie flat and look crisp. Repeat for the other placemat and bottom panel.
Step 3: Crafting the Durable Handles
Take one of your 4.5″ x 31.5″ canvas cloth pieces designated for the handles. Lay it flat and fold it lengthwise exactly in half. Press this fold to create a distinct crease, then open the fabric up again. Now, fold each of the raw long edges inward, towards the center crease you just made. This encloses the raw edges, preventing fraying and creating a clean finish. Fold the fabric in half again along the original center crease. You should now have a strip of fabric with all raw edges neatly tucked inside. Secure this folded strip with sewing clips or pins along its entire length. Stitch all around the edges of this folded handle with a precise 0.2-inch seam allowance. This ensures a strong, neat handle. Repeat this process for the second canvas handle piece.
Step 4: Positioning and Securing the Handles
Using an erasable fabric pen or chalk, mark the exact center of the top edge of each placemat. From this center point, measure 3 inches to the right and 3 inches to the left, marking these spots. These marks indicate where the inner edges of your handles will be placed. Now, position the ends of your finished handles onto the placemat. The handle ends should align with your 3-inch marks, meaning there will be a 6-inch gap between the inner edges of the handles. Furthermore, measure 4 inches down from the very top edge of the placemat and place the bottom of your handle ends at this mark. Pin each handle end securely in place. To ensure maximum durability and prevent the handles from tearing off, stitch a “box-x” pattern on each handle end. This involves sewing a small square around the perimeter of the handle’s attachment point, then sewing an ‘X’ diagonally across that square. This reinforcement is crucial for a long-lasting tote bag.
Step 5: Shaping the Bag Body and Preparing for Boxed Corners
Lay your two placemat pieces on top of each other, ensuring the right sides of the fabric are facing inwards. Make sure all edges are perfectly aligned. At each of the bottom corners, use your ruler and erasable pen to draw a 2.5″ x 2.5″ square. Carefully cut out these two squares from both layers of fabric. These cutouts are what will allow you to create the distinct boxed bottom of your tote bag, giving it depth and structure. With the right sides still together, stitch along the two sides and the bottom edge of the bag (the edge between the cutouts) using a consistent 0.4-inch seam allowance. Remember to backstitch at the beginning and end of each seam for added security.
Step 6: Creating the Boxed Corners for Structure
Now, it’s time to give your tote bag its iconic shape! Take one of the cut-out bottom corners. Gently pull the two edges of the opening apart so that the side seam and the bottom seam align, creating a flat, straight line. Essentially, you are opening up the corner and matching the raw edges. Pin or clip these aligned edges together. Sew across this newly formed seam with a 0.4-inch seam allowance. This stitch will close off the corner, creating the three-dimensional, boxed bottom. Repeat this process for the other bottom corner. Press these new corner seams for a clean finish.
Step 7: The Finishing Touch: Topstitching the Bottom Panel
For a truly polished and professional look, and to further reinforce the structure, it’s beneficial to topstitch the bottom panel again. This means sewing an additional line of stitches on the right side of the fabric, just above where the main body of the bag meets the bottom panel. This topstitching helps the seam lie flat, adds durability, and provides a crisp, decorative detail. Carefully iron the entire bag, especially the seams, to ensure everything is neat and tidy. This final press can make all the difference in the overall appearance of your finished tote bag.
Tips for Success and Customization Ideas
To ensure your placemat tote bag turns out perfectly and truly reflects your style, consider these additional tips and customization ideas:
General Sewing Tips
- Use a Walking Foot: If your sewing machine has one, a walking foot can be very helpful when sewing thicker fabrics like placemats and canvas, as it feeds all layers of fabric evenly.
- Change Your Needle: A fresh, sharp needle (especially one designed for denim or heavy fabrics) will prevent skipped stitches and make sewing much smoother.
- Press, Press, Press: Ironing after almost every step is the secret to professional-looking sewing. It sets stitches, flattens seams, and makes subsequent steps easier.
- Go Slow: Especially around corners or when dealing with bulk, reduce your sewing speed. Control is more important than speed for a neat finish.
- Test Stitches: Always test your stitch length and tension on a scrap piece of your placemat or bottom panel fabric before sewing on your actual project.
Personalize Your Tote
- Fabric Paint or Stencils: Add unique designs, monograms, or quotes to your placemats before assembling the bag.
- Embroidery or Appliqué: Hand or machine embroidery can add intricate details. Patches or fabric appliqués are also a great way to personalize.
- Add Pockets: Consider adding an internal pocket or even an external slip pocket to one of the placemat pieces before assembling the bag for extra functionality.
- Lining: For an even more professional finish and added durability, you could add a simple fabric lining to your tote bag.
- Decorative Trim: Incorporate ribbon, pom-pom trim, or fringe along the top edge or side seams for a playful touch.
Your New Handmade Tote Bag Awaits!
Congratulations! You’ve successfully transformed ordinary placemats into a fabulous and functional tote bag. This project is a testament to how simple materials and basic sewing skills can create something truly wonderful and useful. Your new placemat tote bag is perfect for carrying your essentials, making a statement at the farmer’s market, or giving as a heartfelt handmade gift. Enjoy the satisfaction of having created something beautiful with your own hands, and don’t be afraid to show it off!
Explore More Easy Sewing Projects
Loved this project? There are plenty more easy and fun sewing adventures waiting for you. Continue honing your skills and expanding your collection of handmade items:
- For another straightforward approach to bag making, check out The Easiest Way to Sew a Tote Bag.
- If you’re looking for a project that requires absolutely no sewing at all, you might enjoy this creative tutorial: No-Sew DIY Tote Bag Using Old T-Shirt Tutorial.