
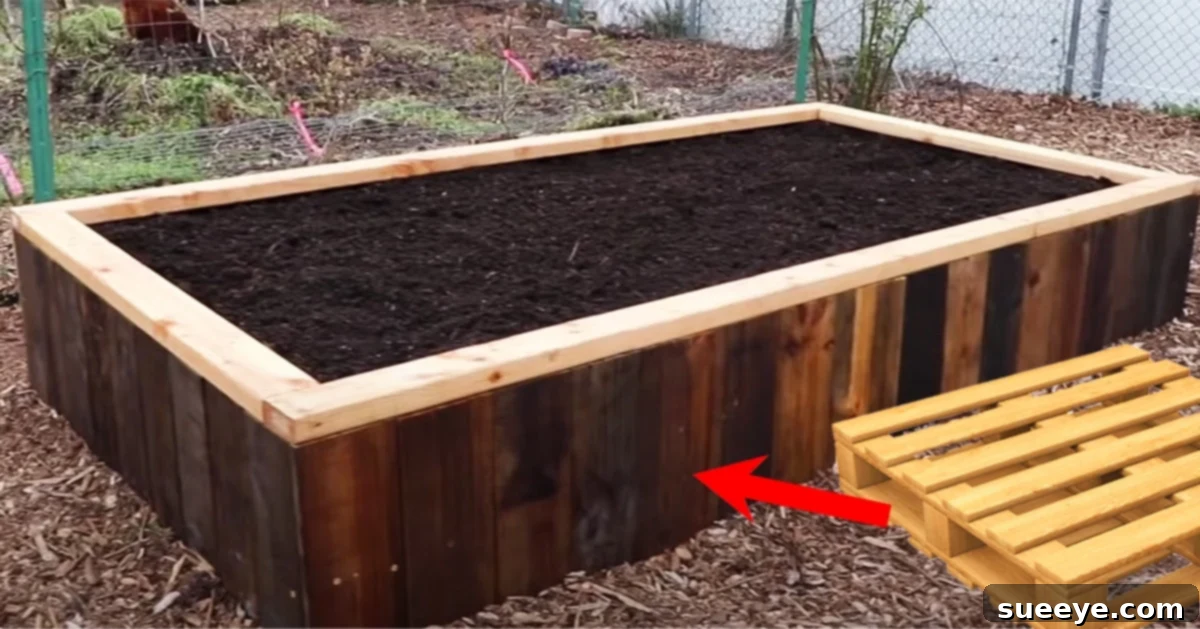
Build Your Dream Raised Garden Bed: An Easy Pallet DIY Guide for Sustainable Gardening
Embarking on a gardening journey doesn’t have to be an expensive endeavor. In fact, with a little creativity and a few readily available materials, you can cultivate a thriving garden space that’s both environmentally friendly and incredibly rewarding. One of the most brilliant and budget-conscious ways to achieve this is by repurposing wooden pallets into robust raised garden beds. This approach not only provides a fantastic home for your herbs, vegetables, and flowers but also champions the spirit of recycling and sustainable living. My own journey into this world was inspired by a lifelong observer of resourcefulness – my father, a true master of turning discarded items into functional garden marvels.
Raised garden beds offer numerous advantages over traditional in-ground planting, from improved soil drainage and fertility to easier weed management and enhanced accessibility. When constructed from recycled pallets, these benefits come with the added bonus of significant cost savings. Imagine a beautifully organized garden where every plant has its designated spot, making maintenance a breeze and pest control more effective. This comprehensive guide will walk you through the process, inspired by resourceful gardeners like James Prigioni from “The Gardening Channel,” demonstrating just how simple and satisfying it is to build your own raised garden bed using pallets.
Why Choose Pallets for Your Raised Garden Bed?
The decision to use pallets for your raised garden bed project is a smart one, offering a multitude of benefits:
- Cost-Effective: Pallets are often available for free or at a very low cost from local businesses, recycling centers, or even online marketplaces. This dramatically reduces the initial investment compared to purchasing new lumber.
- Sustainable & Eco-Friendly: By repurposing pallets, you’re diverting waste from landfills and contributing to a more sustainable lifestyle. It’s a fantastic way to “go green” in your gardening practices.
- Durability: Pallets are designed to withstand heavy loads and transportation, making them surprisingly sturdy when disassembled and reconfigured into a garden bed frame.
- Versatility: The individual wooden slats and blocks can be easily cut, shaped, and assembled to create various sizes and designs, fitting perfectly into almost any garden space, big or small.
- Accessibility: Raised beds inherently make gardening more accessible, reducing the need to bend or stoop excessively. Pallets, being of a standard height, lend themselves well to creating comfortable working levels.
However, it’s crucial to select your pallets carefully. Always look for pallets stamped with “HT” (Heat Treated), which indicates they were sterilized with heat and are safe for gardening. Avoid pallets marked “MB” (Methyl Bromide), as these have been chemically treated and could leach harmful substances into your soil and plants. Also, inspect pallets for any signs of spills, stains, or damage before bringing them home.
The Manifold Benefits of Raised Bed Gardening
Beyond the cost savings of using pallets, raised beds themselves offer a superior gardening experience:
- Optimized Soil Control: With a raised bed, you have complete control over your soil composition. You can fill it with a rich, custom blend of topsoil, compost, and other amendments tailored precisely to the needs of your chosen plants. This ensures better drainage, aeration, and nutrient availability, promoting robust plant growth.
- Enhanced Drainage: Raised beds prevent soil compaction and waterlogging, common issues in traditional gardens, especially in areas with heavy clay soil. Excess water drains away efficiently, protecting roots from rot and disease.
- Weed Suppression: A well-constructed raised bed significantly reduces weed pressure. By starting with fresh, weed-free soil, you minimize the introduction of weed seeds, and any weeds that do appear are much easier to spot and remove. You can also add a weed barrier at the bottom for extra protection.
- Pest Management: Raised beds can create a physical barrier against some ground-dwelling pests like slugs and snails. Integrating hardware cloth at the bottom can further deter burrowing rodents.
- Extended Growing Season: The soil in raised beds warms up faster in the spring, allowing you to plant earlier. It also stays warmer longer into the fall, extending your harvest period.
- Accessibility and Comfort: For gardeners with back pain, knee issues, or mobility challenges, raised beds reduce the need for extensive bending and kneeling, making gardening a more comfortable and enjoyable activity.
- Neat and Organized Appearance: Raised beds give your garden a tidy, structured, and professional look. They help define garden spaces and can be aesthetically pleasing additions to any backyard landscape.
Supplies: Gathering Your Tools and Materials
Before you begin construction, ensure you have all the necessary tools and materials. Safety should always be your priority, so wear appropriate personal protective equipment, including gloves, safety glasses, and hearing protection, especially when using power tools.
- Pallets: A minimum of 3-4 heat-treated (HT) pallets, depending on the desired size of your raised bed. More pallets will be needed for larger or multi-tiered designs.
- Circular Saw: Essential for quickly and efficiently cutting pallet slats to size. A reciprocating saw can also be useful for more intricate cuts or disassembling stubborn pallets.
- Drop Saw (Miter Saw): While a circular saw can suffice, a drop saw offers greater precision for square and angled cuts, ensuring a neater finish for your frame.
- Power Drill: Necessary for pre-drilling holes and driving screws to assemble the frame.
- Exterior Screws: Opt for galvanized or coated screws (e.g., deck screws) that are resistant to rust and corrosion, ensuring the longevity of your raised bed. Various lengths will be useful (e.g., 2-inch and 3-inch).
- Measuring Tape: For accurate measurements to ensure all cuts are precise and your bed is square.
- Pencil or Marker: For marking cut lines on the wood.
- Linseed Oil (or alternative wood preservative): To protect the wood from moisture, rot, and insect damage, significantly extending the life of your raised bed.
- Paintbrush or Rag: For applying the linseed oil or preservative.
- Work Gloves: To protect your hands from splinters and rough wood.
- Safety Glasses: Crucial for protecting your eyes from flying debris when cutting and drilling.
- Optional: Sandpaper or an electric sander for smoothing rough edges.
- Optional for Lining: Landscape fabric, cardboard, or hardware cloth (for pest control).
Directions: Step-by-Step Construction of Your Pallet Raised Bed
Step 1: Disassembling Pallets and Preparing Boards
The first crucial step involves transforming your raw pallets into usable lumber. This can be the most challenging part, but with the right tools and technique, it’s straightforward.
- Safety First: Put on your safety glasses and gloves. Ensure your workspace is clear and stable.
- Identify Usable Boards: Pallets consist of top and bottom deck boards connected by stringers (the thicker pieces). Your goal is to separate these components to get individual boards.
- Cut Along Stringers: Using your circular saw, carefully cut along the inner side of the stringers, as close to the stringer as possible without hitting any metal fasteners (nails or screws). This technique allows you to remove the deck boards in longer, more usable lengths, minimizing damage and avoiding stubborn nails. Repeat this for all sides of the pallet and for both the top and bottom deck boards.
- Inspect and Refine: Once the boards are separated, inspect them for any remaining nails. Use a hammer or pry bar to remove any protruding fasteners. You can also lightly sand any excessively rough edges or splinters at this stage for a smoother finish and safer handling.
- Sort Your Lumber: You’ll now have a collection of reclaimed wooden boards. Sort them by length and quality. The best, longest boards will be ideal for the main frame of your raised bed.
Step 2: Designing and Assembling the Frame
Now that you have your individual boards, it’s time to bring your raised bed to life. Decide on the dimensions of your bed. A common size is 4×8 feet, but you can adjust this to fit your space. For a simple rectangular bed, you’ll need four long side pieces and four shorter end pieces for each layer of the bed.
- Measure and Cut: Using your measuring tape and pencil, mark the desired lengths on your pallet boards. Use your drop saw (or circular saw) to cut the boards precisely. For a standard two-layer raised bed, you’ll likely need four boards for the long sides (e.g., 8 feet each) and four boards for the short ends (e.g., 4 feet each).
- Construct the First Layer: Lay out two long boards and two short boards to form a rectangle on a flat surface. These will form the first tier of your raised bed.
- Join the Corners: Secure the corners using your exterior screws and power drill. Pre-drilling pilot holes can prevent the wood from splitting, especially with reclaimed pallet wood. Drive at least two screws through the end of one board into the face of the perpendicular board at each corner. Ensure the frame is square by measuring the diagonals – they should be equal.
- Add Subsequent Layers: If you desire a taller raised bed (which is often recommended for root vegetables and deeper soil), repeat the process by stacking and screwing additional layers of boards onto the first. Offset the seams if possible for added strength, but ensure structural integrity with plenty of screws. You may also consider adding vertical corner posts (from pallet blocks) for extra stability, screwing the horizontal boards into these posts.
Step 3: Applying Wood Preservation
To ensure your pallet raised bed stands up to the elements and serves your garden for many years, treating the wood is essential. Linseed oil is an excellent natural choice, penetrating the wood to protect it from moisture and rot without introducing harmful chemicals.
- Clean the Wood: Before applying any treatment, ensure the assembled wood frame is clean and dry. Brush off any sawdust or dirt.
- Apply Linseed Oil: Using a paintbrush or rag, generously apply linseed oil to all surfaces of the raised bed frame, paying extra attention to cut ends and areas that will be in contact with the soil. Linseed oil needs time to soak in and dry, so follow the manufacturer’s instructions for application and reapplication times.
- Consider Alternatives: While linseed oil is a great natural option, you could also use other exterior-grade wood sealants or stains designed for garden use. Ensure any product you choose is non-toxic and safe for use around food-producing plants. Some gardeners opt for an exterior paint to match their garden aesthetic, which also provides a protective layer. Let the wood fully dry and cure before moving on to the next step.
Step 4: Preparing the Site and Lining the Bed (Optional but Recommended)
Once your raised bed frame is dry and treated, it’s time to place it in its permanent location and prepare it for soil.
- Choose Your Location: Select a spot in your yard that receives adequate sunlight (most vegetables need at least 6-8 hours of direct sun daily) and is easily accessible for watering and harvesting. Ensure the ground is relatively level.
- Weed Barrier: To prevent weeds from growing up into your raised bed, lay down a layer of cardboard (remove all tape and labels), newspaper, or landscape fabric at the bottom of the bed. This acts as an effective weed barrier while still allowing drainage. For added protection against rodents, you can also lay down a layer of hardware cloth before adding your weed barrier.
Step 5: Filling Your Raised Bed – The Heart of Your Garden
The way you fill your raised bed is critical for its long-term success. You have several options, from traditional soil mixes to more layered, nutrient-rich approaches like the “lasagna gardening” method often demonstrated by gardeners like James Prigioni.
- The Lasagna Gardening Method (Hugelkultur-inspired): This method builds a rich, self-fertilizing soil from the bottom up.
- Bottom Layer (Drainage & Nutrients): Start with larger organic matter like logs, branches, and wood chips (ensure they are untreated). These decompose slowly, providing nutrients and improving drainage over time.
- Middle Layers (Nutrient-Rich): Add layers of green waste (grass clippings, fresh leaves, kitchen scraps) alternating with brown waste (shredded cardboard, dry leaves, straw). Each layer should be a few inches thick.
- Top Layer (Growing Medium): Finish with a generous layer of high-quality topsoil mixed with compost. This is where your plants will directly grow, providing immediate access to essential nutrients.
- Traditional Soil Mix: If the lasagna method seems too involved, a simpler approach is to fill your bed with a high-quality blend of garden soil and compost. A good ratio is often 60% topsoil, 30% compost, and 10% perlite or vermiculite for drainage and aeration. Purchase soil specifically formulated for raised beds for best results.
- Water Thoroughly: Once filled, water the bed thoroughly to help settle the soil and activate the decomposition process if using the lasagna method. You may need to top off the soil again after a few days as it settles.
Planting and Maintenance Tips
With your beautiful new raised bed complete, it’s time to bring it to life with plants!
- Choose Your Plants Wisely: Raised beds are perfect for a wide variety of plants. Consider a mix of herbs (basil, mint, rosemary), vegetables (lettuce, spinach, tomatoes, peppers, carrots), and even some companion flowers (marigolds, nasturtiums) that can deter pests.
- Companion Planting: Research companion planting to maximize yields and minimize pest problems. Certain plants grow better together and can even enhance each other’s flavors.
- Watering: Raised beds tend to dry out faster than in-ground gardens, so monitor soil moisture regularly. Drip irrigation systems or soaker hoses are excellent, water-efficient options.
- Fertilizing: Even with a rich soil mix, your plants will benefit from regular feeding. Use organic fertilizers or compost tea to replenish nutrients throughout the growing season.
- Crop Rotation: To maintain soil health and prevent disease buildup, practice crop rotation. Don’t plant the same type of crop in the same spot year after year.
- Mulching: Apply a layer of organic mulch (straw, wood chips, shredded leaves) on top of the soil. This helps retain moisture, suppress weeds, and regulate soil temperature.
Customization and Aesthetics
The beauty of a DIY pallet raised bed is its potential for personalization. While the natural wood look has a charming rustic appeal, you can easily customize it to match your personal style and garden aesthetic.
- Painting or Staining: Once the linseed oil has cured, you can paint or stain your raised bed in any color you desire. Choose exterior-grade, non-toxic paints or stains that are safe for garden use. A vibrant color can add a pop to your garden, while a deep stain can enhance the wood’s natural grain.
- Adding Decorative Elements: Consider attaching decorative trim, stenciling patterns, or even adding small plaques to label your plants.
- Multi-Tiered Designs: For an even more dynamic look and to maximize planting space, you can design multi-tiered or stepped raised beds using more pallets. This is great for creating visual interest and separating different plant types.
Conclusion: Your Sustainable Garden Awaits
In conclusion, building a raised garden bed from reclaimed pallets is an incredibly rewarding project that combines sustainability, cost-effectiveness, and practical gardening benefits. It’s a testament to how simple materials, often overlooked, can be transformed into something beautiful and highly functional for your home and garden. Whether you’re a seasoned gardener looking for an efficient new planting system or a beginner eager to start your first patch of green, this DIY approach is accessible and deeply satisfying.
There’s immense joy in harvesting fresh herbs and vegetables from a garden you built with your own hands, especially knowing you’ve given new life to materials that might otherwise have gone to waste. So, gather your tools, find those pallets, and get ready to cultivate not just plants, but a sense of accomplishment and connection to nature. This amazing idea, brilliantly demonstrated by resourceful gardeners, proves that starting a productive garden doesn’t require breaking the bank—just a little ingenuity and a desire to grow. Happy gardening!