
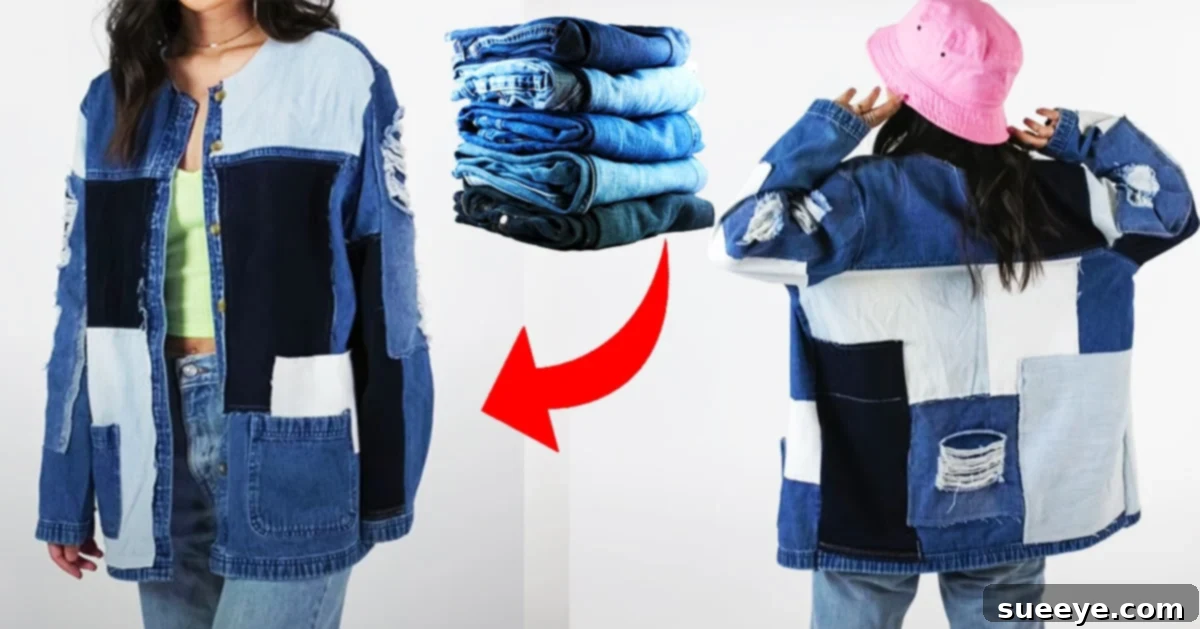
Few garments possess the timeless appeal and versatility of a classic jean jacket. It’s a true wardrobe hero, effortlessly transitioning from casual outings to more dressed-up occasions. But what if you could take this iconic piece and infuse it with unparalleled personal style and a touch of sustainable flair? Enter the DIY patchwork jean jacket – a fantastic project that not only breathes new life into your old, unworn denim but also allows you to craft a truly one-of-a-kind fashion statement.
Inspired by the brilliant step-by-step tutorial from coolirpa on YouTube, this project demystifies the process of transforming discarded jeans into a fashionable staple. If your closet is home to a pile of jeans that no longer fit or have simply fallen out of favor, this comprehensive guide offers a perfect opportunity to unleash your creativity, learn valuable sewing skills, and contribute to a more sustainable fashion cycle. Get ready to embark on a rewarding sewing adventure that culminates in a custom denim jacket that’s uniquely yours.
Unleash Your Creativity: Why DIY a Patchwork Jean Jacket?
The allure of a patchwork jean jacket extends far beyond its aesthetic appeal. Choosing to create your own comes with a myriad of benefits:
- Express Your Unique Style: Unlike mass-produced items, a DIY patchwork jacket is a canvas for your individuality. You control every detail, from the selection of denim shades to the placement of each patch, resulting in a piece that perfectly reflects your personal taste.
- Sustainable Fashion Choice: Upcycling old jeans directly contributes to reducing textile waste. Instead of sending denim to a landfill, you’re giving it a stylish second life, embracing eco-friendly practices, and supporting circular fashion.
- Cost-Effective Customization: High-quality, uniquely designed patchwork denim jackets can come with a hefty price tag. By DIYing, you save money while still achieving a designer look. All you need are some basic sewing supplies and your collection of old jeans.
- A Rewarding Creative Outlet: The process of planning, cutting, and sewing each patch is deeply satisfying. It’s a project that engages your creativity and offers a tangible sense of accomplishment once completed.
- Nostalgia and Sentiment: Those old jeans likely hold memories. Incorporating them into a new garment means carrying those stories with you, adding a sentimental layer to your new favorite jacket.
Gather Your Toolkit: Essential Supplies for Denim Upcycling
Before diving into the creative process, gathering the right tools is crucial for a smooth and enjoyable sewing experience. While the core idea is simple, having the proper equipment makes all the difference, especially when working with sturdy denim fabric.
- Old Jeans (different shades): This is your primary raw material. Aim for at least 3-5 pairs of jeans in varying washes – from light blue to dark indigo, black, or even colored denim – to create visual interest and depth in your patchwork design. Ensure they are clean and free of excessive stretch.
- Jean jacket or button-up shirt (for the jacket base): This will be the foundation of your patchwork creation. An old denim jacket you already own, a thrift store find, or even a sturdy denim button-up shirt can serve as the base. Consider its fit and overall condition.
- Fabric Clips: These are invaluable for holding multiple layers of thick denim together without leaving holes, unlike traditional pins. They provide a strong grip, making sewing bulky seams much easier.
- Fabric Scissors: A sharp pair of scissors specifically for fabric is essential for clean, precise cuts. Avoid using them on paper to maintain their sharpness.
- Fabric Marking Pen/Chalk: For transferring pattern lines, seam allowances, or marking patch placements directly onto your denim. Choose a type that disappears with water or heat.
- Seam Ripper: An indispensable tool for carefully dismantling your base jacket and for correcting any sewing mistakes. Patience is key when using this tool!
- Clear Ruler: A sturdy clear ruler (ideally 6×24 inches or similar) is crucial for accurate measuring and cutting of your patches, ensuring straight lines and consistent sizes.
- Rotary Cutter: While optional, a rotary cutter with a sharp blade significantly speeds up and improves the accuracy of cutting straight lines, especially when paired with a cutting mat.
- Rotary Cutting Mat: Protects your work surface and provides a non-slip base for using a rotary cutter. A self-healing mat is highly recommended for longevity.
- Universal Needles (size 90/14 or 100/16): These needles are robust enough to handle the density of denim. Having several on hand is wise, as they can break or dull when sewing through multiple layers.
- Ballpoint Needle (optional, for stretch denim): If you plan to incorporate any stretch denim into your patches, a ballpoint needle (also known as a jersey needle) can prevent skipped stitches and fabric damage by pushing through the fibers rather than piercing them.
- Strong Polyester Thread: Choose a high-quality thread that matches or complements your denim shades. Polyester thread is durable and suitable for heavy-duty fabrics like denim.
- Sewing Machine: A sturdy sewing machine capable of handling thick fabrics is essential. Make sure it’s in good working order and you’re familiar with its basic functions.
- Iron and Ironing Board: Pressing seams is a critical step in achieving a professional-looking finish. It helps to flatten bulky seams and keep your project neat.
Your Step-by-Step Guide to a Unique Patchwork Denim Jacket
Creating your patchwork masterpiece involves several key stages, each building upon the last to ensure a cohesive and well-constructed garment. Following these steps, complemented by coolirpa’s visual guide, will lead you to a fantastic result.
Step 1: Preparing Your Base and Denim Scraps
Begin by carefully disassembling your chosen base jacket or shirt. Using your seam ripper, gently take apart the side seams, shoulder seams, and underarm seams. The goal is to lay the front, back, and sleeve panels flat, providing a clean canvas for your patchwork. If you’re using a button-up shirt, you might need to detach the collar and cuffs as well, depending on your desired final look. Always wash and dry all your old jeans beforehand to pre-shrink the fabric and ensure colorfastness. This also removes any stiffness, making them easier to work with.
Step 2: Designing Your Patches
Now comes the fun part: cutting your patches! From your collection of old jeans, cut out various rectangular and square pieces. Don’t be afraid to experiment with different sizes to add dynamic visual interest to your jacket. A key tip, as coolirpa suggests, is to always keep your initial cuts on the larger side. This provides flexibility, allowing you to trim and reshape the patches as you arrange them on your base garment, ensuring a perfect fit and pleasing composition. You can achieve perfectly straight lines using a rotary cutter and clear ruler on a cutting mat, or simply freehand with sharp fabric scissors for a more organic feel. Consider cutting strips, squares, and rectangles in various dimensions to offer a diverse range of patching options.
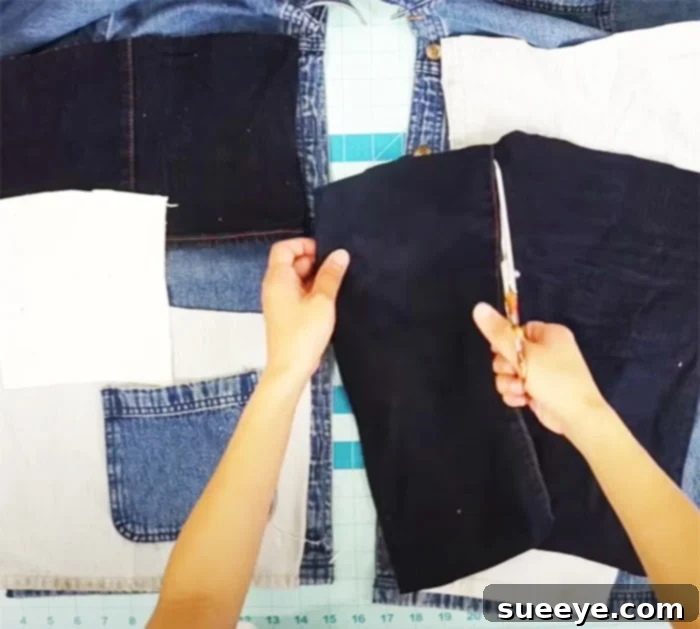
Step 3: Arranging Your Patchwork Design
Before you commit to sewing, it’s incredibly helpful to visualize your patchwork design. If you have a dress form, it’s an excellent tool to drape the base fabric and arrange your denim cut-outs directly on it. This allows you to see how the patches will lay on a three-dimensional form. If not, simply lay your disassembled jacket panels flat on a large surface – the floor, a large table, or a design wall. Start experimenting with different arrangements, playing with shades, sizes, and orientations of your patches. Think about creating a gradient effect, a completely random look, or a more structured geometric pattern. Don’t be afraid to rearrange pieces multiple times until you’re completely happy with the visual balance. This stage is purely creative, so let your imagination guide you. Take photos of different layouts to compare and decide on your favorite. Once satisfied, use fabric clips or a marking pen to temporarily hold patches in place. For a full visual demonstration and detailed tips on this crucial creative stage, be sure to watch the coolirpa tutorial on YouTube.
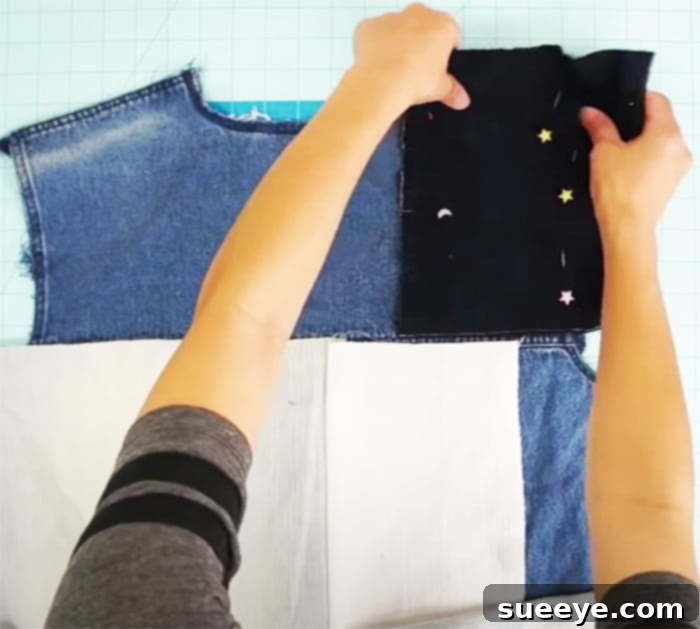
Step 4: The Art of Sewing Your Patches
Once your design is finalized, it’s time to start sewing. The basic technique involves sewing patches together with a straight stitch and a consistent seam allowance (typically 1/2 inch or 5/8 inch for denim). Begin by sewing smaller groups of patches together to create larger panels. Press your seams open or to one side after each stitch to reduce bulk and ensure a flat, neat finish. This is crucial for a professional look. As you build your patchwork fabric, you will then attach these larger patchwork panels to the corresponding sections of your base jacket (front, back, sleeves). Work systematically, carefully aligning edges and using fabric clips to hold everything securely. Remember to use a sturdy needle (universal 90/14 or 100/16) and strong polyester thread. A longer stitch length (3-3.5mm) often works best for denim, as shorter stitches can perforate the fabric too much. Take your time, especially when dealing with multiple layers of denim, to prevent your machine from struggling or skipping stitches. You might also want to topstitch along some seams for added durability and a classic denim look.
Step 5: Reassembling and Finishing Touches
After all your patchwork pieces are sewn onto the respective panels of the jacket, you’ll need to reassemble the entire garment. Sew the side seams, shoulder seams, and underarm seams back together, just as they were originally. Pay close attention to matching up the seams and edges for a clean finish. Once the jacket is fully reassembled, give it a thorough press to flatten any remaining bulky seams and ensure everything lies smoothly. You can also add additional reinforcement stitches to any areas that will experience more stress, like around the armholes or collar. Consider personalizing your jacket further with embroidery, fabric paint, studs, or distressed elements for an even more unique look. Trim any loose threads, and your custom patchwork jean jacket is ready to wear!
Pro Tips for a Flawless Patchwork Jacket
- Pre-wash Everything: Always wash and dry all denim pieces (base jacket and old jeans) before cutting and sewing. This prevents future shrinkage and color bleeding, ensuring your finished jacket remains the correct size and vibrant.
- Invest in Good Scissors/Rotary Cutter: Sharp tools make cutting denim much easier and more precise, reducing frustration and improving the final look.
- Press, Press, Press: Ironing after every seam is not optional; it’s fundamental. It helps to flatten bulky denim, makes subsequent sewing steps easier, and gives your project a professional, crisp finish.
- Use the Right Needle and Thread: Denim is a heavy fabric. Using a universal needle designed for denim (size 90/14 or 100/16) and strong polyester thread will prevent skipped stitches, broken needles, and thread breakage.
- Patience is Key: Don’t rush the process. Take your time with measuring, cutting, arranging, and sewing. Patchwork is an art that benefits from careful attention to detail.
- Experiment with Stitch Length: A slightly longer stitch length (around 3-3.5mm) is often recommended for denim as it prevents perforating the fabric too much, which can weaken it.
- Consider Fraying: If you want a distressed, frayed edge look, you can leave some patch edges raw. If not, ensure all raw edges are enclosed in seams or finished to prevent excessive fraying.
- Practice on Scraps: If you’re new to sewing denim, practice sewing a few layers of scrap denim together to get a feel for your machine settings before working on your main project.
Beyond the Basic: Customization Ideas for Your Denim Creation
While a simple patchwork design is beautiful, there are countless ways to further personalize your DIY jean jacket. Once you’ve mastered the basic technique, consider these ideas to truly make it your own:
- Embroider and Appliqué: Add intricate embroidery details, hand-stitched motifs, or appliqué fabric shapes to some of your patches.
- Fabric Paint and Stencils: Use fabric paints to add unique designs, lettering, or patterns to plain denim patches before or after sewing.
- Distressing and Fraying: Carefully distress certain areas with sandpaper, a seam ripper, or scissors to create a worn, vintage look. Allow some patch edges to fray naturally for texture.
- Studs, Patches, and Pins: Embellish your jacket with metal studs, enamel pins, or iron-on patches that reflect your interests and personality.
- Mix Textures: Incorporate small patches of corduroy, canvas, or even leather alongside your denim for varied textures and visual interest.
- Quilting Details: For advanced sewers, consider adding some quilted patterns on larger denim patches for an added layer of complexity and warmth.
- Different Jacket Styles: Apply the patchwork technique to an oversized boyfriend jacket, a cropped jacket, or even a denim vest for diverse silhouettes.
Caring for Your Upcycled Masterpiece
To ensure your custom patchwork jean jacket lasts for years to come, proper care is essential. Due to the varied denim washes and potentially intricate stitching, it’s best to wash your jacket gently. Turn it inside out and wash on a cold, delicate cycle with a mild detergent. Air drying is highly recommended to preserve the integrity of the denim and prevent any potential shrinkage or damage to the patchwork. Avoid harsh chemicals or excessive heat, which can compromise the fabric and stitching.
Conclusion: Embrace Your Unique Style
Creating a DIY patchwork jean jacket is more than just a sewing project; it’s an opportunity to embrace sustainable fashion, express your unique personality, and craft a truly meaningful piece for your wardrobe. The satisfaction of transforming old, forgotten denim into a chic, custom-made item is incredibly rewarding. As an enthusiastic admirer of this style, I can confidently say that the process is far simpler and more accessible than it appears, offering significant savings compared to buying a ready-made version.
So, gather your old jeans, fire up your sewing machine, and prepare to embark on this creative journey. Follow the insightful guidance from coolirpa’s tutorial, use this comprehensive guide as your companion, and soon you’ll be rocking a bespoke patchwork denim jacket that truly tells your story. It’s time to turn those forgotten fabrics into your next fashion favorite!