
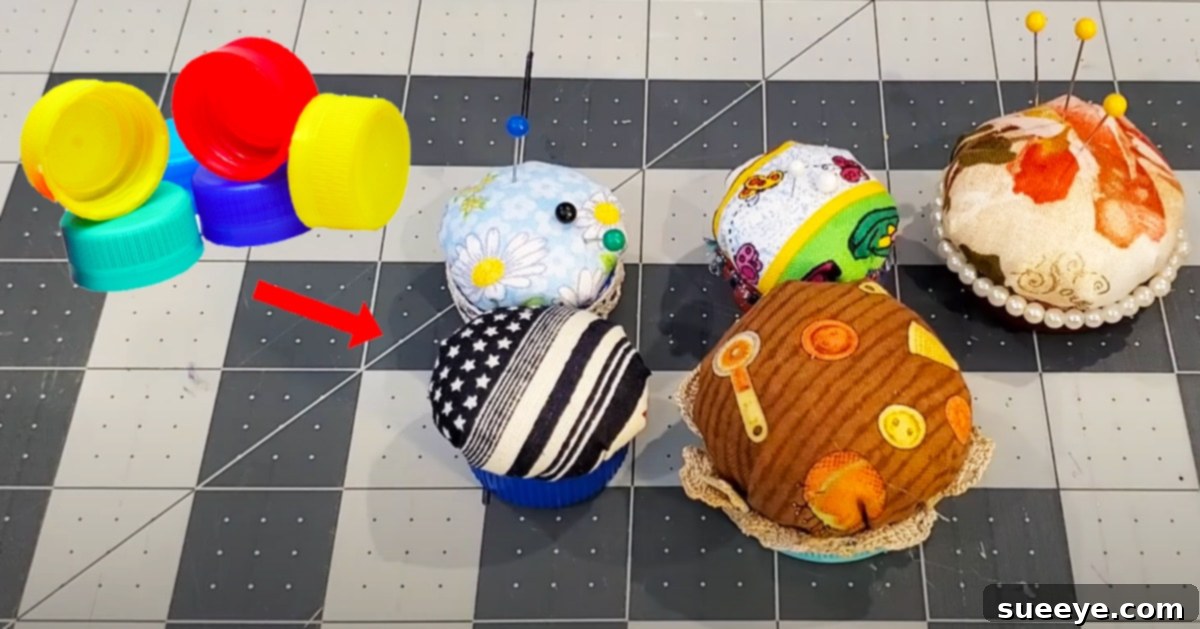
DIY Bottle Cap Pincushions: An Easy No-Sew Upcycling Craft for Every Seamstress
Are you looking for a creative, budget-friendly, and incredibly practical way to keep your sewing pins organized? Look no further than the charming world of bottle cap pincushions! Inspired by the brilliant and accessible tutorial from Lisa Capen Quilts on YouTube, this project transforms ordinary plastic bottle caps into delightful and essential accessories for any crafter’s toolkit. What makes this DIY particularly appealing is its simplicity: there’s no need for a sewing machine, making it perfect for beginners, young crafters, or anyone who prefers the ease of hand-stitching. All you’ll need is a needle, thread, and a little bit of creative spirit to bring these miniature marvels to life.
These pincushions are not just about functionality; they’re also a fantastic way to embrace sustainable crafting by upcycling materials that might otherwise end up in landfills. If you’re a seasoned sewist, chances are you already have most of the materials readily available in your stash. Even if you’re new to the craft world, sourcing these items is both easy and inexpensive. In a matter of minutes, you can create a collection of cute, small, and highly customizable pincushions from any plastic cap you can find. Let’s delve into how you can make these adorable and useful additions to your crafting space.
Why Craft Bottle Cap Pincushions?
Beyond their undeniable charm, bottle cap pincushions offer a multitude of benefits that make them a standout DIY project:
- Eco-Friendly Upcycling: This project is a fantastic example of turning waste into treasure. By repurposing plastic bottle caps, you contribute to reducing plastic waste and promote sustainable crafting practices. It’s a small step that makes a big difference.
- Incredibly Cost-Effective: Most of the materials required are either items you already have around the house (like bottle caps and fabric scraps) or are very inexpensive to purchase. This makes it an ideal craft for those on a budget, allowing you to create functional items without breaking the bank.
- Beginner-Friendly & No-Sew Required: One of the biggest advantages is that you don’t need a sewing machine or advanced sewing skills. The entire project relies on simple hand stitches and hot glue, making it accessible to crafters of all ages and experience levels, including children with supervision.
- Quick and Easy to Make: These pincushions come together in a flash! Once you’ve gathered your materials, you can create one in under 15-20 minutes, making it a perfect last-minute craft or a project for when you have limited time.
- Highly Customizable: The possibilities for personalization are endless. Choose fabrics that match your sewing room decor, reflect your personality, or suit a specific theme. You can also decorate the bottle caps themselves with paint, ribbon, or lace to make each pincushion truly unique.
- Perfectly Portable and Practical: Their small size makes them ideal for travel sewing kits, or for simply keeping a few pins close at hand at different workstations. They are stable enough to sit on your desk, and with a bit of Velcro, can even attach directly to your sewing machine.
- Wonderful Handmade Gifts: These cute pincushions make thoughtful and practical gifts for fellow sewers, quilters, or anyone who enjoys crafting. They’re a heartfelt token that shows you care, often appreciated more than store-bought items.
Materials You’ll Need
Gathering your supplies is the first exciting step in any DIY project. For these bottle cap pincushions, you’ll find most items are likely already in your home or can be easily acquired:
- Plastic Bottle Caps: The star of our show! Collect various plastic caps from water bottles, soda bottles, milk jugs, or even condiment containers. Ensure they are clean and dry before use. The size of the cap will determine the size of your finished pincushion.
- Fabric Scraps: This is your chance to use up those small, beautiful pieces of fabric you’ve been saving! Cotton, felt, linen, or even lightweight denim scraps work wonderfully. Choose patterns and colors that inspire you. You’ll need pieces approximately 4-5 inches square per pincushion.
- Needle and Thread: A standard hand-sewing needle and a sturdy thread (polyester all-purpose thread is ideal) will do the trick. Choose a thread color that either matches your fabric or provides a pleasing contrast.
- Poly-Fil (Polyester Fiberfill): This soft, fluffy material will give your pincushion its plumpness. A small handful is sufficient for each cap. Alternatives include cotton balls, wool roving, or even tightly packed fabric scraps for a more eco-friendly stuffing.
- Hot Glue Gun and Glue Sticks: Essential for securely attaching your fabric cushion to the bottle cap. Always exercise caution when using a hot glue gun to prevent burns.
- Sharp Scissors: A good pair of fabric scissors will ensure clean cuts when preparing your fabric circles.
- Lace, Ribbon, or Other Trims (Optional): For adding a decorative touch around the rim of your bottle cap. Small strips of lace, thin ribbon, or decorative twine can elevate the look of your pincushion.
- Adhesive Velcro or Double-Sided Tape (Optional): If you wish to attach your pincushion to the side of your sewing machine, a magnetic surface, or any other convenient spot, these adhesives are perfect.
- Multi-Surface Paint (Optional): For painting the bottle caps themselves, offering another layer of customization and allowing you to match specific themes or colors. Acrylic paints work well.
- Circular Template: To ensure you cut a perfectly round fabric piece. This can be anything circular – a drinking glass, a small bowl, a lid – that is approximately one inch larger in diameter than your chosen bottle cap on all sides.
Step-by-Step Directions
Creating your bottle cap pincushions is a straightforward and enjoyable process. Follow these detailed steps to craft your own:
1. Prepare Your Fabric Circle
- Select Your Fabric: Choose a fabric scrap that is large enough to accommodate your circular template. Lay it flat and smooth on your work surface.
- Position the Template: Place your chosen circular template (e.g., a glass, a small lid) firmly on top of the fabric. Remember, this template should be roughly one inch larger in diameter than your bottle cap. This extra inch provides the necessary fabric to create a puffy cushion.
- Trace and Cut: Using a fabric marker, tailor’s chalk, or even a regular pencil (if it won’t show through), carefully trace around the edge of your template to create a perfect circle on the fabric. Once traced, use your sharp scissors to meticulously cut along the marked line. Precision here will contribute to a neat and evenly gathered cushion.
2. Create the Gathered Fabric Pouch
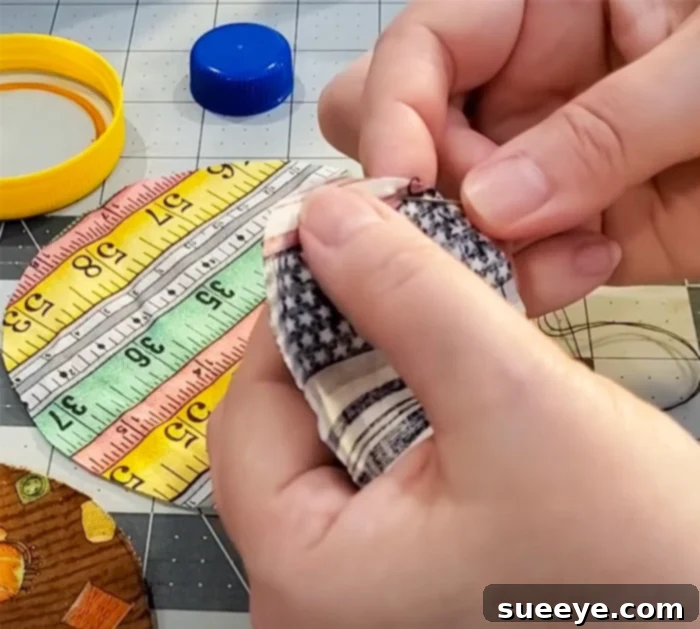
- Thread Your Needle: Cut a length of thread, about 18-24 inches long, and thread it through your needle. Tie a secure knot at the very end of the thread.
- Begin the Running Stitch: Starting from the inside edge of your fabric circle, approximately a quarter-inch (about 0.5 cm) from the raw edge, begin a running stitch. A running stitch involves weaving the needle in and out of the fabric in small, even stitches.
- Work Around the Circle: Continue making running stitches all the way around the entire circumference of your fabric circle. Try to keep your stitches consistent in size and distance for an even gather. This creates a channel that will form the base of your pincushion.
- Gather the Fabric: Once you’ve stitched all the way around, gently pull on the thread, much like pulling a drawstring. The fabric will begin to gather and pucker, forming a small pouch or cup shape. Do not pull it completely closed yet.
3. Stuff and Secure Your Cushion
- Add the Stuffing: Take a small amount of Poly-Fil (or your chosen stuffing material) and gently push it into the center of your gathered fabric pouch. You want to fill it enough so that it feels firm and plump, creating a nice dome shape, but not so much that you can’t close the opening.
- Tighten the Gather: Once the stuffing is inside, pull the thread tightly to close the opening of the fabric pouch around the stuffing. Gently shape the cushion with your fingers to ensure it’s evenly rounded and firm.
- Secure the Thread: With the thread pulled tight, make a few small stitches across the gathered opening to secure it firmly. Tie a knot to finish off the thread, ensuring the stuffing is fully enclosed and the cushion maintains its shape. You now have the top part of your pincushion ready!
4. Attach the Cushion to the Bottle Cap
- Prepare the Cap: Ensure your plastic bottle cap is clean and dry. If desired, you can paint the outside of the cap with multi-surface paint beforehand and allow it to dry completely for an extra decorative touch.
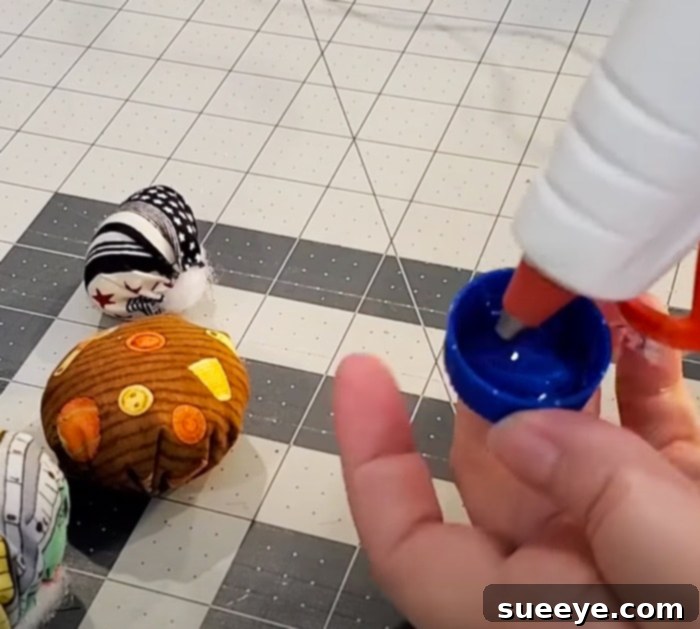
- Apply Hot Glue: Carefully apply a generous amount of hot glue to the inside base of the bottle cap. Be careful not to apply too much that it overflows, but enough to create a strong bond.
- Place the Cushion: Immediately and carefully place the gathered fabric cushion (the flat, gathered side down) directly into the hot glue inside the bottle cap.
- Press and Hold: Press the cushion firmly into the cap and hold it in place for several seconds until the hot glue cools and sets. This ensures a secure attachment. Your basic bottle cap pincushion is now complete!
5. Decorate Your Pincushion (Optional)
- Add Lace or Ribbon: For extra embellishment, apply a thin bead of hot glue around the outer rim of the bottle cap, just below where the fabric cushion sits. Carefully press a strip of lace, ribbon, or decorative trim onto the glue, working your way around the entire circumference. Overlap the ends slightly and secure with a final dab of glue.
- Paint Details: If you didn’t paint the cap earlier, you can add small details or patterns with paint now.
- Other Embellishments: Consider adding small buttons, beads, or charms to the base of the cap for more flair.
6. Optional: Attach for Convenience
- Velcro or Tape Application: To make your pincushion even more convenient, especially if you want to keep it handy while sewing, attach a piece of adhesive Velcro or strong double-sided tape to the bottom of the bottle cap.
- Placement: You can then stick your pincushion directly to the side of your sewing machine, a nearby desk, or any other smooth surface. This allows for quick and easy access to your pins, preventing them from scattering across your workspace while you sew.
Tips for Success and Creative Variations
To make your bottle cap pincushion project even more rewarding, consider these tips and ideas for customization:
- Fabric Choice Matters: Opt for tightly woven fabrics like quilting cotton or felt. These materials are durable and prevent pins from easily slipping out or damaging the fabric over time. Avoid stretchy or very loose weaves.
- Varying Cap Sizes: Don’t limit yourself to small soda caps! Experiment with larger caps from milk jugs, peanut butter jars, or even wide-mouth lids. This creates pincushions of different sizes, useful for various types of pins or needles.
- Alternative Stuffing: If Poly-Fil isn’t available, wool roving provides a nice firmness and naturally keeps pins sharp. Crushed walnut shells or rice can also be used for a heavier, more stable pincushion, though they might require a tightly sewn inner bag to prevent leakage.
- Embellish the Caps: Before attaching the cushion, you can paint the caps in solid colors, polka dots, stripes, or even decoupage them with small fabric scraps or paper. This adds another layer of personalized charm.
- Group Crafting: These pincushions are perfect for craft groups, workshops, or even a fun activity with children (with adult supervision for hot glue and needles). Everyone can customize their own!
- Holiday Themes: Create festive pincushions for different seasons or holidays. Use red and green fabric for Christmas, pastels for Easter, or spooky prints for Halloween. They make adorable themed decorations for your craft space.
- Gift Sets: Combine a few handmade bottle cap pincushions with a pack of new pins or a small sewing kit for a thoughtful and practical gift for any crafter.
- Safety First: Always supervise children when using hot glue guns and sharp needles. Ensure proper ventilation when painting.
Conclusion: A Small Craft with Big Impact
Overall, these cute and functional bottle cap pincushions are more than just simple DIY projects; they represent a harmonious blend of practicality, creativity, and sustainability. They are an effortless way to organize your sewing room, add a touch of handmade charm to your workspace, and make excellent personalized gifts for your crafty friends and family. The joy of transforming a discarded item into something beautiful and useful is incredibly satisfying.
Whether you’re a seasoned quilter, a casual sewer, or just someone looking for a fun and easy craft to try, these bottle cap pincushions offer a quick and rewarding experience. So, start saving those plastic caps, dive into your fabric stash, and let your imagination soar. You’ll soon have a collection of these adorable, sturdy little pincushions that prove even the smallest everyday items can hold immense potential for creative upcycling. Happy crafting!