
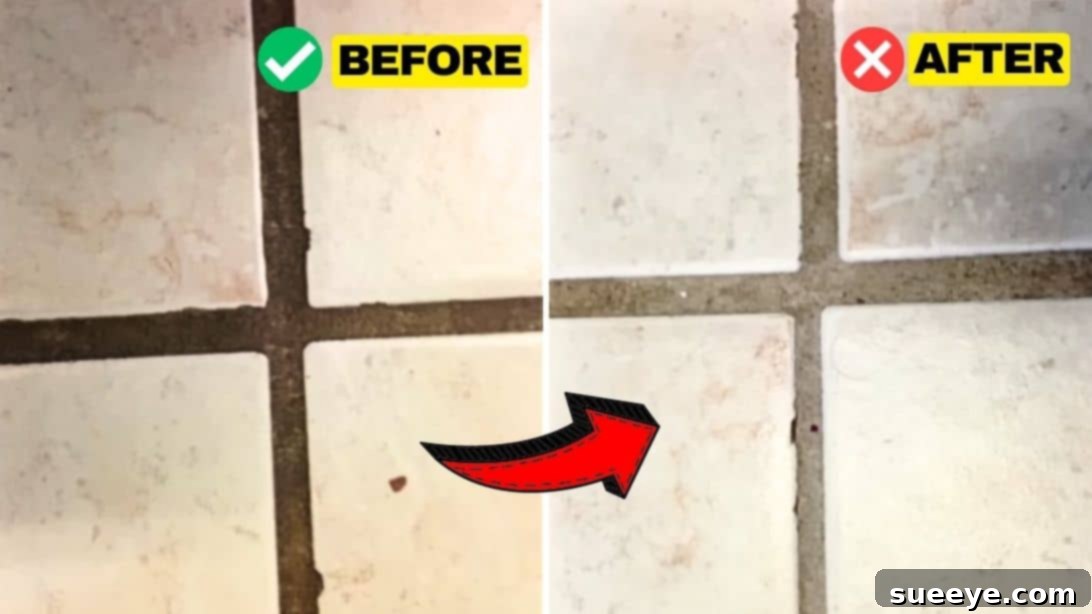
Transform Your Tiles: The Ultimate Guide to Cleaning Grout Like a Pro
Are you tired of staring at discolored, grimy grout lines that diminish the beauty of your tiled floors? Grout cleaning can often feel like a never-ending, back-breaking chore, leaving many homeowners frustrated with less-than-stellar results. Traditional methods, often involving just soapy water and endless scrubbing, rarely deliver the deep clean needed to restore grout to its original pristine condition. But what if there was a simpler, more effective way to achieve sparkling clean grout without hours of struggle?
Like many, I’ve spent countless hours on my hands and knees, attempting various tricks and tips found online, only to be disappointed. That was until I stumbled upon an incredibly straightforward and highly effective method shared by the cleaning experts at Clean With Confidence on YouTube. Their practical, direct-to-the-point tutorial completely revolutionized my approach to grout maintenance, transforming a dreaded task into a manageable and rewarding one. If you’re ready to say goodbye to dirty grout and hello to immaculate tiles, this comprehensive guide, inspired by their invaluable advice, is for you.
Why Grout Gets Dirty (And Why It’s So Stubborn)
Grout, the porous material that fills the spaces between your tiles, is a magnet for dirt, grime, and mildew. Its textured surface easily traps contaminants from daily foot traffic, spills, soap scum in bathrooms, and cooking grease in kitchens. Over time, these particles embed themselves deep within the grout lines, leading to discoloration and an unhygienic appearance. Because grout is porous, it acts like a sponge, absorbing liquids and staining agents, making it incredibly challenging to clean with just surface-level wiping. Understanding this inherent characteristic is the first step toward effective cleaning and prevention, ensuring you tackle the problem at its root rather than just its surface.
The Professional Approach: Essential Materials You’ll Need
Before you begin your deep clean, gathering the right tools is crucial. Having everything ready will make the process smoother and more efficient, ensuring you achieve professional-level results. Skimping on materials can lead to frustration and less effective cleaning. Here’s a detailed list of what you’ll need to transform your grout:
- Vacuum or Broom: The initial step for any floor cleaning. A powerful vacuum with a crevice tool is ideal for getting into the grout lines and lifting loose debris, dust, and crumbs. A good sweep with a stiff broom can also work wonders, ensuring the cleaning solution can directly target the embedded grime.
- High-Quality Grout Cleaner (e.g., Grout Eez): This is the hero product! Choose a specialized grout cleaner specifically formulated to penetrate porous grout and dissolve tough dirt, grease, and mildew. While Grout Eez is mentioned, many effective brands are available. Always opt for a cleaner that is safe for your specific tile and grout type (e.g., sealed vs. unsealed, cement-based vs. epoxy). Read product labels carefully for instructions and precautions.
- Grout Brush: Don’t underestimate the power of the right brush. A dedicated grout brush features stiff, durable bristles designed to agitate dirt out of narrow grout lines without scratching or damaging your tiles. You can choose between a handheld version for precise control or one with a long handle to avoid bending over, providing ergonomic comfort for larger areas.
- Mop: A quality mop, such as a traditional string mop or a sponge mop, will be indispensable for rinsing the floor thoroughly. This helps remove the loosened dirt and cleaning solution, preventing residue buildup.
- Bucket: You’ll need at least one sturdy bucket for clean rinse water. For optimal results and to avoid spreading dirty water, having a second bucket for dumping soiled water is highly recommended, especially when tackling extensive tiled areas.
- Protective Gloves: Absolutely non-negotiable! Grout cleaners often contain strong chemical agents (acidic or alkaline) that can cause skin irritation or chemical burns. Always wear sturdy rubber or nitrile gloves to protect your hands throughout the entire cleaning process.
- Optional but Highly Recommended: Knee pads for comfort during scrubbing, old towels for quick spills or drying, and possibly a small detail brush for tackling intricate corners or unusually stubborn spots. Adequate ventilation (open windows/fans) is also crucial when working with chemical cleaners.
Step-by-Step Guide to Sparkling Grout
Follow these steps closely to transform your dirty grout lines into a spotless masterpiece. This method prioritizes safety, efficiency, and professional results, ensuring a deep clean that lasts.
Step 1: Preparation is Key – Clear the Way for a Deep Clean
Before introducing any cleaning solutions, it’s vital to clear the surface of your tiled area. Begin by thoroughly sweeping the floor with a broom or, even better, using a powerful vacuum cleaner. A vacuum, especially one equipped with a strong suction and appropriate attachments (like a crevice tool), will effectively remove all loose dirt, dust, hair, crumbs, and any other surface debris that could hinder the cleaning solution’s ability to penetrate the grout. This preparatory step is crucial; it prevents you from simply creating mud when you introduce liquids and ensures the cleaner can act directly on the embedded grime, maximizing its efficacy and preventing unnecessary spreading of debris during scrubbing.
Step 2: Applying Your Specialized Grout Cleaner
Once the floor is free of loose debris, it’s time to apply your chosen grout cleaner. Don your protective gloves now and ensure they remain on throughout the entire cleaning process to safeguard your skin. Carefully apply a generous amount of the grout cleaner directly onto each grout line. The goal is even and thorough coverage, ensuring the solution makes robust contact with all the discolored and dirty areas. While some incidental contact with tiles is usually fine for short periods, try to focus the application on the grout itself. For larger areas, consider working in smaller sections to prevent the cleaner from drying out prematurely before you get a chance to scrub.
Step 3: Allowing the Solution to Work its Magic
This is a crucial, passive waiting period where the chemistry does most of the heavy lifting. After applying the cleaner, allow it to dwell on the grout lines for approximately 5 to 10 minutes, as recommended by the product instructions. This dwell time is essential; it permits the active chemical agents in the solution to penetrate the porous grout, effectively breaking down stubborn dirt, grease, soap scum, and mildew, thereby loosening the embedded grime. It’s important not to let the solution dry completely, as this can reduce its effectiveness and make it harder to remove. If you notice it drying too quickly, particularly in warmer environments or direct sunlight, you may need to lightly reapply or adjust your working section size.
Step 4: The Power of Agitation – Scrubbing for Deep Clean Results
After the recommended dwell time has passed, it’s time for some manual effort to physically lift the loosened dirt. With your gloves still firmly on, grab your dedicated grout brush. Begin vigorously agitating the grout lines using a consistent back-and-forth motion. The stiff bristles of the grout brush are expertly designed to reach deep into the textured surface of the grout, physically dislodging the dirt and grime that the chemical solution has softened. Apply consistent, firm pressure to ensure effective scrubbing, paying extra attention to areas that appear particularly soiled. You should observe the dirt lifting and the grout lines beginning to lighten as you work. For exceptionally stubborn spots, a bit more elbow grease or even a targeted repeat application might be necessary to achieve the desired clarity.
Step 5: Rinsing Away the Grime for a Pristine Finish
Once you’ve thoroughly scrubbed all the treated grout lines and are satisfied with the agitation, it’s time to rinse everything away. Fill your bucket with clean, fresh water. Use a clean, wet mop to rinse the entire floor area, making sure to wash the mop head frequently in the bucket of water. It is absolutely essential to change the water as soon as it becomes dirty; rinsing with murky water will simply redeposit grime back onto your freshly cleaned grout and tiles. If the water gets murky, empty it. Crucially, do NOT dump this acidic or chemical-laden water into your toilet or household drains, as it can be harmful to plumbing systems and the environment. Instead, dispose of it outside in a suitable area like a lawn or utility sink, if available. Continue mopping with fresh water until all traces of the cleaning solution and lifted dirt are completely removed, and the floor appears clean and residue-free.
Step 6: Inspect and Repeat if Necessary – Achieving Perfection
After the floor has been thoroughly rinsed and allowed to dry slightly, take a moment to carefully inspect your work. Are the grout lines uniformly clean, bright, and restored to their original color? If you notice any areas that are still noticeably dirty, discolored, or show residual grime, do not hesitate to repeat the process. Stubborn stains or heavily soiled sections sometimes require a second application of cleaner and an additional round of scrubbing. It’s better to address these persistent areas now than to live with residual grime. Once you’re fully satisfied with the sparkling results, allow the floor to dry completely, and then step back to marvel at your beautifully clean, like-new grout!
Advanced Tips for Grout Cleaning Success and Long-Term Maintenance
To take your grout cleaning efforts to the next level and maintain those pristine results for an extended period, consider incorporating these additional tips into your routine:
- Pre-Treat Stubborn Stains: For exceptionally dark, ingrained, or mildew-ridden stains, consider a stronger pre-treatment before applying your general cleaner. A paste made from baking soda and hydrogen peroxide can be remarkably effective. Apply the paste, let it sit for 15-30 minutes, then scrub gently with a grout brush before proceeding with the regular cleaning steps.
- Consider a Steam Cleaner: While not strictly necessary for this method, a steam cleaner can be a powerful, chemical-free tool for sanitizing and loosening grime from grout lines. The high heat and pressure effectively break down dirt and kill bacteria, making it an excellent addition for chemical-sensitive individuals or as a booster for deep cleaning efforts.
- Grout Sealing is Your Best Friend: Once your grout is sparkling clean, applying a high-quality grout sealer is highly recommended. Sealing creates an invisible protective barrier that repels water, dirt, oil, and stains, significantly making future cleaning much easier and preventing rapid discoloration. Reapply the sealer every 1-2 years, or more frequently in high-traffic or high-moisture areas.
- Implement Regular Maintenance: Don’t wait until your grout is severely discolored again. Incorporate regular, light cleaning with a pH-neutral cleaner and a soft brush into your weekly or bi-weekly routine. This proactive approach will prevent significant dirt and grime buildup and significantly extend the life and appearance of your deep clean.
- Ensure Ample Ventilation: Whenever using chemical cleaners, always ensure adequate ventilation. Open windows and doors, or use exhaust fans to circulate air and effectively disperse any fumes, protecting your respiratory health.
- Always Test in an Inconspicuous Area: Before applying any new cleaning product to your entire floor, always perform a patch test on a small, hidden section of grout and tile. This precaution ensures the cleaner doesn’t cause discoloration, etching, or any other damage to your specific grout or tile type.
Benefits of Spotless Grout
Beyond the immediate satisfaction of a visually appealing clean floor, maintaining your grout offers several significant advantages that contribute to a healthier, more beautiful, and more valuable home:
- Enhanced Aesthetics: Clean grout dramatically improves the overall appearance of your tiled surfaces, making your entire room look brighter, fresher, and more inviting. It truly brings out the original beauty of your tiles.
- Improved Hygiene: Grout is notoriously porous and can harbor bacteria, mold, mildew, and allergens. Regular deep cleaning eliminates these unwelcome guests, contributing significantly to a healthier living environment, particularly crucial in moisture-prone areas like kitchens and bathrooms.
- Increased Property Value: Well-maintained and sparkling tiles and grout speak volumes about the overall care taken in a home. This attention to detail can significantly increase a property’s appeal and perceived value, especially if you ever consider selling.
- Extended Tile Lifespan: By preventing dirt, abrasive particles, and corrosive agents from embedding deeply and degrading the grout, you protect the structural integrity of your grout and, by extension, your tiles. This proactive maintenance prolongs their lifespan and delays the need for costly re-grouting or tile replacement.
- Psychological Boost: There’s an undeniable sense of accomplishment, pride, and peace that comes with a truly clean and well-maintained home. Successfully tackling notoriously difficult grout lines can be incredibly satisfying and contribute positively to your home environment.
Common Grout Cleaning Mistakes to Avoid
To ensure your cleaning efforts are not only successful but also safe and don’t inadvertently damage your tiles or grout, steer clear of these common pitfalls:
- Using Harsh Abrasive Tools: Avoid steel wool, overly abrasive scrubbers, or wire brushes. These tools can scratch your tiles, strip away grout sealer, and even erode the grout itself, making it more porous and even more susceptible to dirt and staining in the future. Stick to dedicated grout brushes with appropriate bristles.
- Neglecting Protective Gear: As emphasized, always wear durable gloves. Furthermore, eye protection is highly recommended, especially when applying or spraying chemical cleaners, to prevent accidental splashes or fumes from irritating your eyes.
- Improper Ventilation: Using strong chemical cleaners in enclosed spaces without proper airflow can lead to the buildup of noxious fumes, causing respiratory irritation, headaches, or other health issues. Always open windows and doors, or use fans.
- Ignoring Product Instructions: Different grout cleaners have specific formulations, recommended dwell times, and application methods. Always read and diligently follow the manufacturer’s guidelines to ensure effectiveness and safety.
- Not Testing Cleaners: Skipping the patch test in an inconspicuous area is a common mistake that can lead to unforeseen discoloration, etching, or permanent damage to your specific grout or tiles. Always test first!
- Leaving Residue: Failing to thoroughly rinse the floor after scrubbing can leave behind a sticky, invisible residue from the cleaning solution. This residue acts like a magnet, attracting dirt and grime even faster, effectively counteracting your cleaning efforts and making the grout appear dirty more quickly.
- Using Acidic Cleaners on Cement Grout: While some specialized cleaners contain mild acids, using strong acidic solutions (like undiluted vinegar or harsh bathroom cleaners) on traditional cement-based grout can erode the grout, making it crumbly and porous. Always confirm the cleaner is suitable for your grout type.
Frequently Asked Questions About Grout Cleaning
How often should I deep clean my grout?
The frequency depends heavily on the area’s traffic, usage, and exposure to moisture. High-traffic areas like kitchen and bathroom floors might benefit from a thorough deep clean every 3-6 months. Less-used areas, such as guest bathrooms or utility rooms, could be cleaned annually or as needed when noticeable discoloration occurs.
Can I use homemade cleaners like vinegar or baking soda?
While a paste of baking soda and hydrogen peroxide can be quite effective for targeting specific mildew stains, caution is advised with vinegar. Vinegar is acidic and can erode cement-based grout over time, especially if the grout is unsealed. It can also strip existing grout sealers, making the grout more vulnerable to future staining. For regular maintenance, pH-neutral commercial cleaners or specific grout cleaners are generally safer and more effective.
What if my grout is permanently discolored or chipped beyond cleaning?
If your grout is beyond the point of cleaning due to deep-seated, irreversible stains, extensive damage, or chipping, you have a couple of options. Consider professional grout color sealing, which involves applying a fresh layer of color and sealant over the existing grout, restoring its appearance and adding protection. Alternatively, for severe damage, re-grouting involves removing the old, compromised grout and applying new grout, offering a complete refresh and a truly like-new look.
Conclusion: Reclaim Your Beautiful Tiles
Cleaning grout doesn’t have to be a daunting or overwhelming task. By diligently following this expert-inspired, step-by-step guide, you can confidently achieve professional-level results and truly restore the lost beauty of your tiled floors. Remember the critical importance of thorough preparation, proper product application, vigorous yet appropriate scrubbing, and diligent rinsing. With the right tools, a bit of effort, and these proven techniques, you’ll not only enjoy cleaner, more hygienic spaces but also significantly prolong the life and pristine appearance of your tiling. So, roll up your sleeves, put on those protective gloves, and get ready to witness the incredibly satisfying transformation of your grout from grimy to gleaming!
This comprehensive guide was inspired by the valuable cleaning wisdom shared by Clean With Confidence on YouTube. For more expert tips, practical demonstrations, and inspiring cleaning tutorials, be sure to visit and subscribe to their channel!