
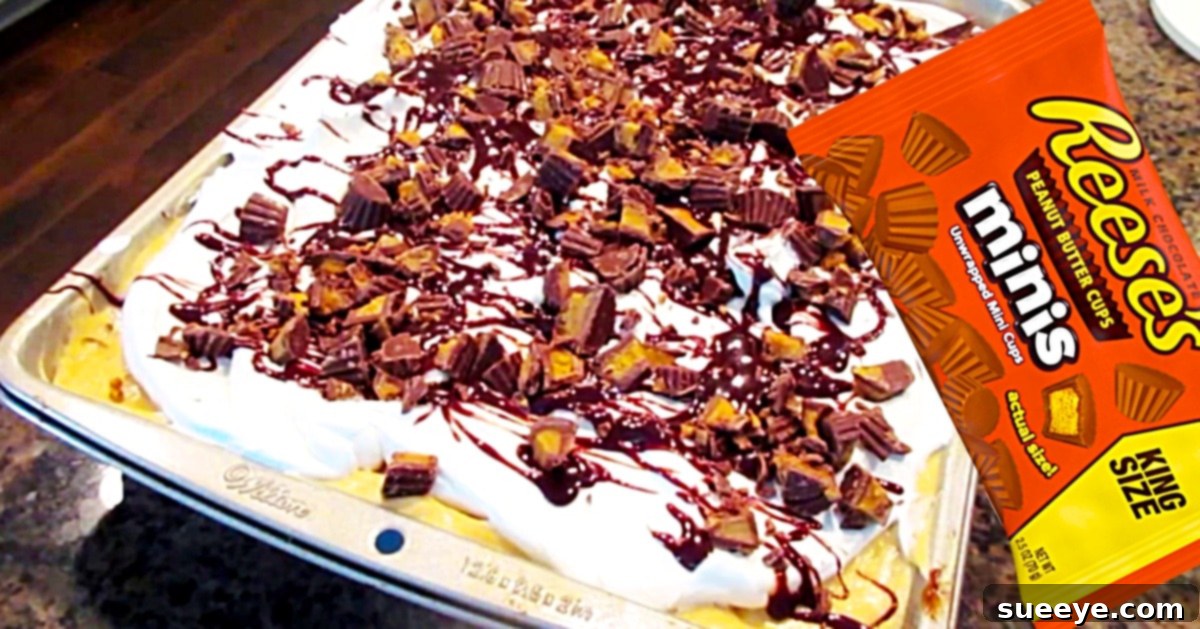
Ultimate Reese’s Peanut Butter Poke Cake: An Irresistible Dessert Recipe
Are you searching for a dessert that combines beloved flavors into one unforgettable treat? Look no further than the Reese’s Peanut Butter Poke Cake! This recipe transforms a simple box cake into a show-stopping dessert, infused with rich hot fudge, creamy peanut butter, and generous chunks of America’s favorite candy – Reese’s Peanut Butter Cups. Inspired by a fantastic video tutorial by Britney Elizabeth on YouTube, this easy-to-follow guide ensures a moist, flavorful, and absolutely decadent experience that will delight family and friends alike. Get ready to bake a cake that everyone will rave about!
The concept of a “poke cake” is a culinary stroke of genius, often credited with origins in places like Texas, as beloved chef Paula Deen frequently mentions. It’s a method where a freshly baked cake is pierced with holes, then drenched with a liquid or creamy filling, allowing the flavors to seep deep into every crumb. This technique guarantees an incredibly moist and flavorful cake, a far cry from dry, ordinary desserts. When you combine this brilliant method with the iconic chocolate and peanut butter pairing of Reese’s, you create a dessert masterpiece that is truly irresistible. Prepare yourself for a dessert experience that is as fun to make as it is delicious to eat.
Essential Ingredients for Your Reese’s Poke Cake
Crafting this sensational Reese’s Poke Cake requires a few straightforward ingredients, many of which you might already have in your pantry. Using a box cake mix simplifies the baking process, making this an accessible recipe for bakers of all skill levels. Here’s what you’ll need to create this peanut butter chocolate dream:
- 1 Devil’s Food Box Cake Mix: Choose your favorite brand. This provides a rich, dark chocolate base that perfectly complements the peanut butter. Ensure you have the additional ingredients required by the cake mix (usually eggs, oil, and water or milk).
- 1 Jar of Hot Fudge Sauce (approx. 12-16 oz): A high-quality hot fudge sauce is key for that deep chocolate flavor infusion. Brands like Smucker’s or Hershey’s are excellent choices for their rich, gooey texture.
- 1 (8 oz) Package Block of Cream Cheese: It’s crucial for the cream cheese to be at room temperature. This ensures a smooth, lump-free filling that blends effortlessly with other ingredients.
- 1 Can (14 oz) Sweetened Condensed Milk: This adds a luscious sweetness and incredibly smooth texture to the peanut butter layer, making it wonderfully creamy.
- 1 Cup of Creamy Peanut Butter: A good quality creamy peanut butter (such as Jif or Skippy) works best here. Avoid natural peanut butter that separates, as it can alter the texture of the filling.
- 1 Tub (12 oz) Whipped Topping (e.g., Cool Whip): This lightens the topping and adds an airy finish. You’ll divide this for two layers, so a standard 12-ounce tub is ideal. Thaw it in the refrigerator before use.
- 1 Bag (approx. 10-12 oz) Reese’s Mini Cups: Freezing these beforehand is a clever trick! It makes them much easier to chop without melting or sticking, ensuring perfect little peanut butter and chocolate nuggets for garnishing.
Gathering these ingredients is the first step towards a truly exceptional dessert. Each component plays a vital role in building layers of flavor and texture that make this Reese’s Poke Cake so incredibly special.
Step-by-Step Directions: Crafting Your Reese’s Peanut Butter Poke Cake
Creating this delicious Reese’s Peanut Butter Poke Cake is a rewarding experience, and with these detailed steps, you’ll achieve a perfect dessert every time. The process is broken down into manageable stages, ensuring a smooth and enjoyable baking journey. Follow along with the inspiring guidance from Britney Elizabeth’s YouTube tutorial for visual cues, and prepare to impress!
Part 1: Baking and Preparing the Chocolate Cake Base
- Bake the Devil’s Food Cake: Begin by preparing your devil’s food box cake mix according to the package directions. Typically, this involves combining the mix with eggs, oil, and water or milk. Pour the batter into a greased 9×13 inch baking pan and bake in a preheated oven to the specified temperature and time. Always check for doneness by inserting a toothpick into the center; if it comes out clean, your cake is ready. Allow the cake to cool slightly in the pan for about 10-15 minutes.
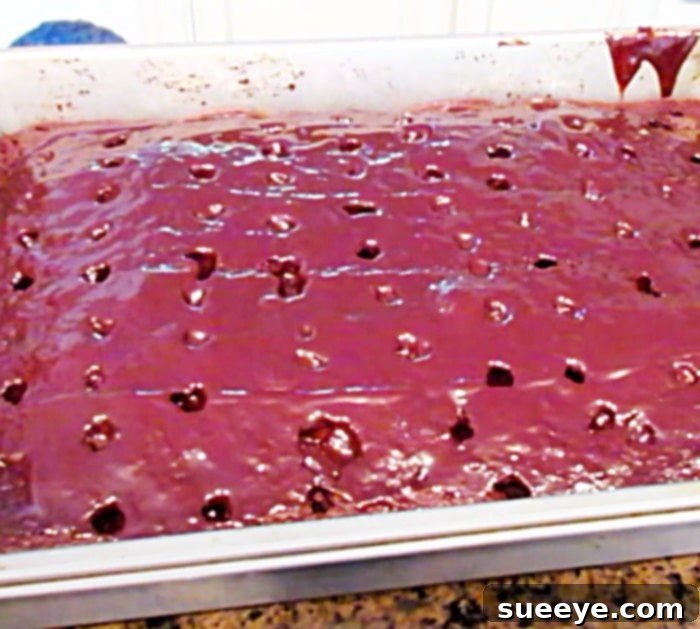
- Poke the Holes: Once the cake has cooled slightly but is still warm, it’s time for the signature “poke” step. Using the handle of a wooden spoon, the blunt end of a chopstick, or even a large fork, gently poke holes evenly across the entire surface of the cake. Aim for holes that are deep enough to reach the bottom but not so wide they tear the cake apart. Space them about 1 inch apart. These holes are essential for allowing the rich fudge sauce to penetrate deeply, ensuring every bite is moist and flavorful.
- Infuse with Hot Fudge: Open your jar of hot fudge sauce. If it’s very thick, you can gently warm it in the microwave for 15-30 seconds (or in a saucepan over low heat) to make it more pourable. Carefully pour approximately 3/4 of the jar of hot fudge sauce evenly over the poked cake. The warm cake will absorb the fudge, filling those holes and creating pockets of gooey chocolate deliciousness. Use an offset spatula or the back of a spoon to gently spread the fudge across the entire surface, ensuring it seeps into all the crevices. Reserve the remaining fudge for garnish.
- Cool the Cake: Place the cake in the refrigerator for at least 30 minutes to allow the fudge to set and the cake to cool completely. This step is crucial before adding the next layers, ensuring they don’t melt or combine prematurely.
Part 2: Preparing the Creamy Peanut Butter Topping
- Prepare the Peanut Butter Layer: While your cake is cooling, prepare the luscious peanut butter topping. In a large mixing bowl, combine the room-temperature block of cream cheese, the entire can of sweetened condensed milk, and 1 cup of creamy peanut butter. Using an electric mixer (handheld or stand mixer), beat these ingredients together on medium speed until the mixture is completely smooth and well combined. Scrape down the sides of the bowl as needed to ensure everything is incorporated. The key is to achieve a uniform, creamy consistency.
- Fold in Whipped Topping (First Half): Gently fold in half of your thawed whipped topping into the peanut butter mixture. Use a spatula to carefully incorporate it, maintaining the airy texture of the whipped topping while blending it with the rich peanut butter cream. Do not overmix. This creates a light yet indulgent peanut butter layer.
- Spread Over the Cake: Once the cake is thoroughly chilled and the fudge is set, retrieve it from the refrigerator. Evenly spread the peanut butter-whipped topping mixture over the top of the cooled, fudge-infused cake. Take your time to create a smooth, consistent layer across the entire surface. This forms the delightful creamy middle of your poke cake.
Part 3: Final Touches and Garnish
- Add the Second Whipped Topping Layer: Carefully spread the remaining half of the whipped topping over the peanut butter layer. This creates a beautiful, light, and fluffy white topping that contrasts wonderfully with the darker cake and peanut butter layers. Smooth it out with an offset spatula for a professional finish.
- Chop the Reese’s Mini Cups: Remove your bag of frozen Reese’s Mini Cups from the freezer. Because they are frozen, they will be firm and easy to chop without becoming a sticky mess. Roughly chop them into smaller pieces. You can make them as fine or as chunky as you prefer, depending on the texture you desire. These will be the star of your garnish!
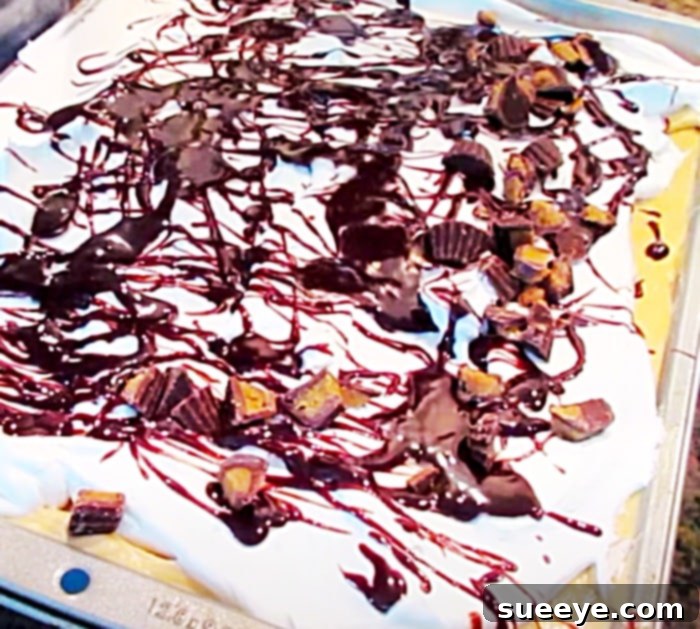
- Garnish and Serve: Generously sprinkle the chopped Reese’s Mini Cups over the entire surface of the cake. For an extra touch of indulgence, drizzle the reserved hot fudge sauce artistically over the top. You can warm the remaining fudge slightly again to make it easier to drizzle.
- Chill Before Serving: For best results and to allow all the flavors to meld beautifully, place the finished cake back into the refrigerator for at least 2-3 hours, or ideally overnight, before serving. This chilling time firms up all the layers and makes the cake easier to slice and enjoy.
Why This Reese’s Peanut Butter Poke Cake Is a Must-Try
This Reese’s Poke Cake is not just a dessert; it’s an experience. The combination of moist chocolate cake, gooey hot fudge, a creamy peanut butter layer, and crunchy Reese’s pieces creates a symphony of textures and flavors that is truly addictive. It’s an ideal dessert for potlucks, parties, or simply as a special treat for your family. The ease of using a box mix combined with the “wow” factor of the finished product makes it a go-to recipe for any occasion. Once you try it, you’ll understand why this cake is highly recommended and quickly becomes a crowd favorite!
Tips for Achieving the Perfect Reese’s Poke Cake
- Room Temperature Cream Cheese: This cannot be stressed enough. Cold cream cheese will result in a lumpy filling. Take it out of the fridge at least an hour before you plan to mix.
- Don’t Overmix Whipped Topping: When folding in the whipped topping, be gentle. Overmixing can deflate it, leading to a denser peanut butter layer.
- Evenly Spaced Holes: Ensure your holes are uniformly spaced and deep enough for the fudge to penetrate throughout the cake. This ensures every slice gets a burst of chocolate.
- Chill Time is Key: While it’s tempting to dive in, allowing the cake ample time to chill in the refrigerator truly makes a difference. It helps all the layers set, meld their flavors, and makes for cleaner, more beautiful slices.
- Frozen Reese’s Cups: This simple trick makes chopping much easier and prevents the chocolate from melting and sticking to your knife.
- Quality Ingredients: While a box mix simplifies things, using good quality hot fudge and creamy peanut butter can elevate the overall taste significantly.
Variations and Customizations for Your Poke Cake
While the classic Reese’s Poke Cake is perfect as is, don’t hesitate to get creative with variations:
- Different Cake Flavors: Try a yellow cake mix or a chocolate fudge cake mix for a slightly different base.
- Alternative Toppings: Instead of Reese’s Mini Cups, consider chopped Butterfingers, Snickers, or even a mix of your favorite candies.
- Nut Butter Alternatives: If peanut allergies are a concern, you could experiment with almond butter or sunbutter, though the classic Reese’s flavor profile would change.
- Extra Drizzle: Beyond hot fudge, a caramel sauce drizzle could add another layer of flavor.
- Homemade Whipped Cream: For a truly homemade touch, substitute the store-bought whipped topping with freshly made whipped cream (heavy cream, powdered sugar, vanilla extract).
Storage and Serving Suggestions
This Reese’s Poke Cake is best stored in an airtight container in the refrigerator for up to 3-5 days. Be sure to cover it well to prevent it from drying out or absorbing other food odors. While delicious chilled, allowing it to sit at room temperature for about 15-20 minutes before serving can soften the layers slightly, enhancing the creamy texture. Serve it as a standalone dessert, or pair it with a scoop of vanilla bean ice cream for an extra indulgent treat. A sprinkle of sea salt on top can also beautifully enhance the sweet and savory notes of the peanut butter and chocolate.