
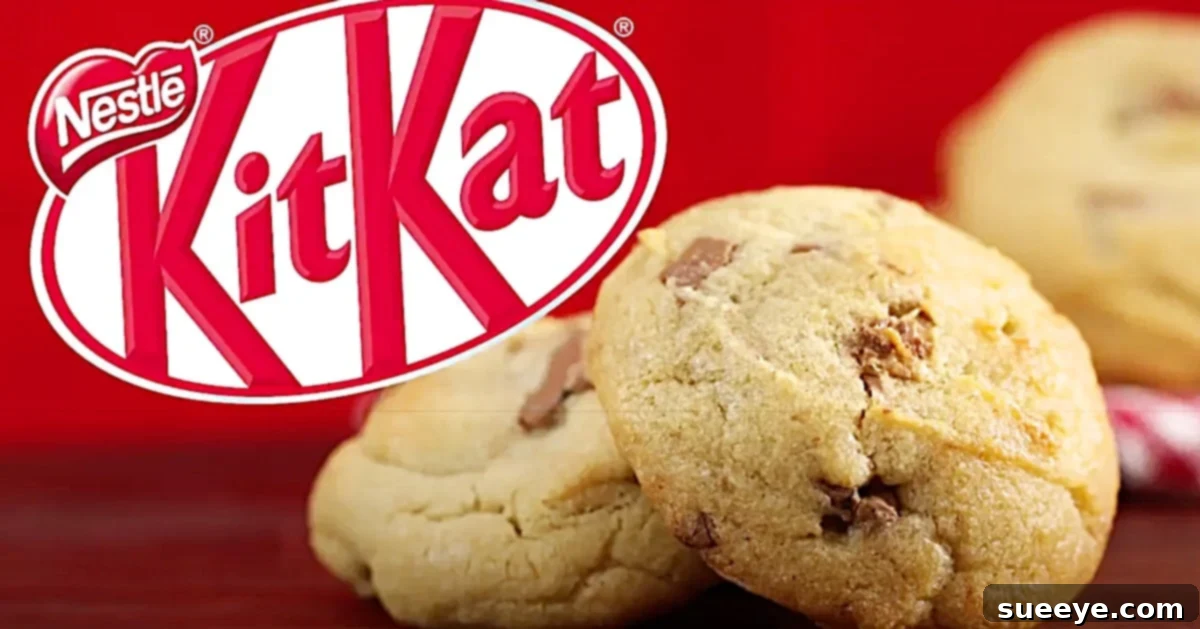
Kit Kat Cookies: The Ultimate Wafer-Infused Dessert Experience
For anyone who adores the irresistible crunch and creamy chocolate goodness of a Kit Kat bar, imagine that delightful experience transformed into a warm, chewy cookie. That’s precisely the magic we’re delving into today with this incredible Kit Kat cookie recipe. Far from being just another chocolate chip cookie, these treats elevate a classic by incorporating crumbled Kit Kat bars, creating a unique texture and flavor profile that will undoubtedly become a new favorite in your baking repertoire. Inspired by a fantastic video recipe tutorial by KitKatArabia, these cookies are surprisingly simple to make and yield truly spectacular results.
The beauty of these cookies lies in how the Kit Kat pieces interact with the dough during baking. As the cookies heat, the chocolate and wafer layers of the Kit Kat bars melt into pockets of deliciousness within the cookie. Then, as they cool, these pockets firm up again, providing a satisfying, almost caramelized crunch that perfectly complements the soft, buttery cookie base. It’s a delightful interplay of textures and flavors that will have everyone reaching for another.
Why You’ll Fall in Love with Kit Kat Cookies
There are countless reasons why these Kit Kat cookies stand out from the crowd. Firstly, they offer a creative twist on a beloved classic. While chocolate chip cookies are timeless, adding Kit Kat pieces introduces a fun, unexpected element that sparks curiosity and delight. Secondly, the texture is simply divine. The combination of a perfectly chewy cookie with the occasional crisp bite of re-hardened Kit Kat wafer creates a sensory experience unlike any other cookie you’ve tasted. It’s a delightful blend of soft, crunchy, and melting all in one bite. Thirdly, these cookies are a fantastic way to utilize leftover Kit Kat bars (if such a thing even exists!). They’re also incredibly easy to make, making them perfect for bakers of all skill levels, from beginners to seasoned pros looking for a quick yet impressive dessert. Whether you’re baking for a special occasion, a casual gathering, or simply to satisfy a sweet craving, these homemade Kit Kat cookies are guaranteed to be a hit.
Essential Ingredients for Perfect Kit Kat Cookies
Crafting these delectable Kit Kat cookies requires a few pantry staples and, of course, the star ingredient itself. Using high-quality ingredients will always yield the best results, so choose your butter, sugar, and flour carefully. Here’s what you’ll need to gather:
- 1 ½ cups all-purpose flour: The foundation of our cookies, providing structure and body.
- ½ teaspoon baking powder: Gives the cookies a lovely lift and tenderness.
- ¼ teaspoon salt: Balances the sweetness and enhances all the other flavors. Don’t skip it!
- ½ cup unsalted butter (softened): Provides richness and helps achieve that perfect chewy texture. Ensure it’s at room temperature for optimal creaming.
- ⅓ cup granulated sugar: Contributes to sweetness and helps with the cookie’s spread and crispness.
- ½ cup brown sugar (tightly packed): Essential for chewiness and a deeper, more molasses-like flavor. Packing it tightly ensures accurate measurement.
- 1 large egg: Acts as a binder, adding moisture and structure to the dough. Room temperature is best.
- 1 ½ teaspoon vanilla extract: A crucial flavor enhancer that complements the chocolate beautifully. Use pure vanilla for the best taste.
- 4 standard-sized Kit Kat Bars (crumbled): The star of the show! Break them into varying small pieces for maximum Kit Kat distribution throughout the cookies.
Step-by-Step Directions: Crafting Your Kit Kat Masterpiece
Making these Kit Kat cookies is a straightforward and enjoyable process. Follow these simple steps to create a batch of irresistible treats that will have everyone asking for the recipe. This method is designed to be simple and efficient, ensuring delicious results every time.
Preparation is Key:
- Preheat Oven: Begin by preheating your oven to 350°F (175°C). This ensures your oven is at the correct temperature when your cookies are ready to bake, leading to even cooking.
- Prepare Baking Sheets: Line two large baking sheets with parchment paper or silicone baking mats. This prevents sticking and makes cleanup a breeze.
Mixing Your Dough:
- Combine Dry Ingredients: In a medium bowl, whisk together the all-purpose flour, baking powder, and salt. Whisking ensures these ingredients are evenly distributed, which is important for the cookie’s texture. Set aside.
- Cream Wet Ingredients: In a large mixing bowl, using an electric mixer (stand mixer with paddle attachment or a hand mixer), cream together the softened unsalted butter, granulated sugar, and packed brown sugar on medium speed until the mixture is light and fluffy. This usually takes about 2-3 minutes. This step incorporates air, making the cookies tender.
- Add Egg and Vanilla: Beat in the egg until just combined, then stir in the vanilla extract. Mix until smooth, scraping down the sides of the bowl as needed to ensure everything is fully incorporated. Be careful not to overmix at this stage.
Next, it’s time to bring the wet and dry ingredients together. Gradually add the dry ingredient mixture to the wet mixture, mixing on low speed until just combined. Be careful not to overmix the dough, as this can lead to tough cookies. Mix only until no streaks of flour remain. At this point, the dough should be soft and pliable. Once your dough base is ready, it’s time for the star addition: your crumbled Kit Kat bars! Gently fold the crumbled Kit Kat pieces into the cookie dough by hand using a spatula. This gentle mixing ensures the Kit Kat pieces are evenly distributed without overworking the dough.
Forming and Baking:
- Scoop and Space: Using a cookie scoop (about 1.5-2 tablespoons) or a regular spoon, drop rounded balls of cookie dough onto the prepared baking sheets, leaving about 2 inches between each cookie. This spacing allows the cookies to spread without touching.
- Bake to Perfection: Place the baking sheets in the preheated oven. Bake the delicious Kit Kat infused cookies in a 350-degree oven for approximately 10 to 12 minutes. The edges should be lightly golden, and the centers should still look slightly soft. Remember that cookies continue to cook slightly even after they’re removed from the oven. This baking time is really all it takes for these Kit Kat cookies to come out perfectly, and they truly do not disappoint!
Cooling and Enjoying:
- Cooling Process: Once baked, remove the cookies from the oven and let them cool on the baking sheets for about 5 minutes. This allows them to set up and prevents them from breaking.
- Transfer and Serve: Carefully transfer the cooled cookies to a wire rack to cool completely. While they are amazing warm, allowing them to cool completely will solidify those melted Kit Kat pieces, enhancing the textural contrast.
Pro Tips for Kit Kat Cookie Perfection
To ensure your Kit Kat cookies turn out absolutely perfect every single time, keep these expert tips in mind:
- Room Temperature Ingredients: Make sure your butter and egg are at room temperature. This helps them cream together smoothly, creating a more cohesive and evenly textured dough.
- Don’t Overmix: After adding the dry ingredients to the wet, mix only until just combined. Overmixing develops the gluten in the flour, resulting in tough, dry cookies.
- Chill the Dough (Optional but Recommended): For thicker, chewier cookies that spread less, cover the dough and chill it in the refrigerator for at least 30 minutes, or even up to 2 hours, before baking.
- Vary Kit Kat Crumble Size: Crumble your Kit Kat bars into various sizes – some finer pieces will melt completely, while larger chunks will provide more substantial bites of wafer and chocolate.
- Don’t Overbake: Cookies continue to bake for a few minutes after they come out of the oven. Remove them when the edges are set and lightly golden, but the centers still look slightly soft.
- Press Extra Kit Kats on Top: For an extra visual appeal and a boost of Kit Kat flavor, gently press a few extra crumbled Kit Kat pieces onto the tops of the cookie dough balls before baking.
Creative Variations to Explore
While the classic Kit Kat cookie is undeniably delicious, don’t hesitate to get creative with your baking! Here are some ideas to customize your next batch:
- Different Kit Kat Flavors: Experiment with different types of Kit Kat bars. White chocolate Kit Kats, dark chocolate Kit Kats, or even seasonal flavors can add an exciting twist.
- Add Extra Chocolate: If you’re a true chocolate lover, toss in a handful of chocolate chips (milk, dark, or white) along with the crumbled Kit Kats.
- Nutty Crunch: For added texture and flavor, fold in half a cup of chopped nuts like pecans or walnuts into the dough.
- Caramel Drizzle: Once the cookies are cooled, drizzle them with a bit of melted caramel for an extra layer of sweetness and decadence.
- Kit Kat Cookie Sandwiches: Make slightly larger cookies and sandwich them together with a scoop of vanilla bean ice cream or a dollop of buttercream frosting for an ultimate dessert experience.
- Espresso Kick: Add a teaspoon of instant espresso powder to the dry ingredients to deepen the chocolate flavor and add a subtle coffee note.
How to Store Your Delicious Kit Kat Cookies
Once your amazing Kit Kat cookies have cooled completely, proper storage will help maintain their freshness and delicious texture. Store them in an airtight container at room temperature for up to 3-4 days. For longer storage, you can freeze the baked cookies in an airtight container or freezer bag for up to 2 months. Thaw them at room temperature or warm them slightly in the microwave for a fresh-out-of-the-oven experience. You can also freeze the unbaked cookie dough balls; simply place them on a baking sheet to freeze solid, then transfer to a freezer bag. Bake from frozen, adding a couple of minutes to the baking time.
Frequently Asked Questions (FAQs) About Kit Kat Cookies
- What kind of Kit Kat bars should I use?
Standard milk chocolate Kit Kat bars work perfectly, but feel free to experiment with any flavored Kit Kat you enjoy, such as white chocolate, dark chocolate, or even limited-edition varieties for a unique twist.
- Can I make the cookie dough ahead of time?
Absolutely! Cookie dough can be prepared up to 2-3 days in advance and stored, covered, in the refrigerator. This allows the flavors to meld and can sometimes result in an even chewier cookie. Remember to let it come to room temperature slightly before scooping, or simply scoop and then chill the balls.
- My cookies spread too much. What went wrong?
Several factors can cause excessive spreading: your butter might have been too warm, your oven temperature might be too low, or you might have over-creamed the butter and sugar, incorporating too much air. Chilling the dough before baking can also help prevent spreading.
- How do I get perfectly round cookies?
While a cookie scoop helps with uniformity, for perfectly round cookies, you can use a trick right after they come out of the oven. While still warm and pliable, use a large round cookie cutter or the rim of a glass (larger than the cookie) to gently cup the cookie and swirl it into a perfect circle.
- Can I use a different type of chocolate bar?
Yes, you can! While the unique wafer crunch of Kit Kats is central to this recipe, you could certainly substitute other chocolate bars like Snickers, Twix, or even Reese’s Peanut Butter Cups for a different but equally delicious cookie experience.
Conclusion: Your New Favorite Cookie Awaits
These Kit Kat cookies are more than just a simple dessert; they’re an experience. Combining the comforting familiarity of a homemade cookie with the exciting crunch of a beloved chocolate bar, they offer something truly special. Whether you’re a seasoned baker or just starting your culinary journey, this recipe is straightforward, forgiving, and incredibly rewarding. The compliments will undoubtedly roll in when you serve these up. So, grab your ingredients, prepare for an explosion of flavor and texture, and get ready to bake your new favorite cookie. Give this Kit Kat cookie recipe a try – you won’t regret it!