
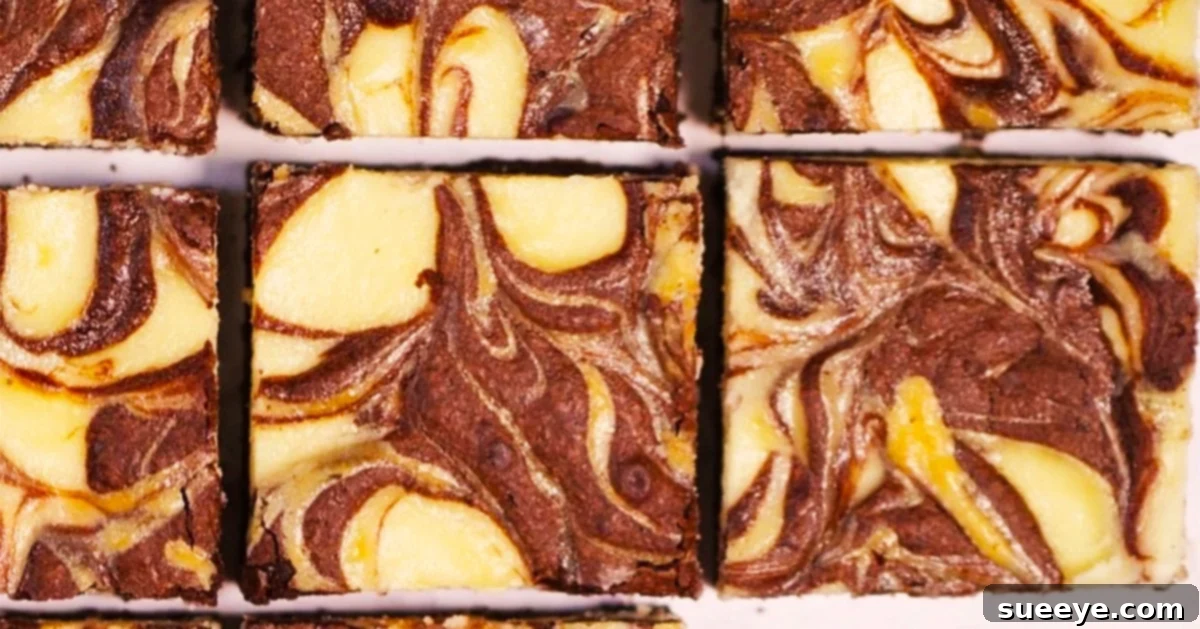
Indulge in the Decadence: The Ultimate Cheesecake Brownie Recipe
Why settle for one classic dessert when you can savor the exquisite combination of two? Cheesecake and brownies are beloved for their distinct textures and flavors, but together, they create a truly unforgettable experience. Imagine a rich, fudgy chocolate brownie base perfectly complemented by a smooth, tangy cream cheese layer, all swirled together into a single, irresistible treat. This comprehensive guide, inspired by the brilliant Cupcake Jemma’s cheesecake brownie tutorial on YouTube, will walk you through creating this delightful dessert with surprising ease.
These cheesecake brownies are more than just a dessert; they are a culinary statement. They offer a harmonious blend of deep chocolate intensity and refreshing creaminess, making them a show-stopping addition to any gathering or a luxurious personal indulgence. While the original inspiration comes from Cupcake Jemma, we’ll dive deeper into each step, ensuring you achieve perfect results every time. We’ll also provide helpful tips for customization, serving, and storage, transforming a simple recipe into a masterclass in dessert making.
One of the most appealing aspects of this recipe, beyond its incredible taste, is its versatility. If you’re not in the mood for the combined experience, the individual brownie and cheesecake recipes provided can certainly stand alone as fantastic desserts. However, once you try them together, it’s hard to go back! Cupcake Jemma’s original video is incredibly helpful for visualizing the process, and her detailed measurements for various pan sizes are a fantastic resource. This particular recipe is perfectly scaled for a standard 10-inch pan, ensuring a generous batch of these delectable squares.
Essential Ingredients for Your Cheesecake Brownie Masterpiece
Crafting the perfect cheesecake brownie starts with selecting quality ingredients. Each component plays a vital role in achieving that coveted balance of flavor and texture. For both the brownie and cheesecake layers, precise measurements and good quality ingredients will make all the difference in the final product. Remember to gather everything before you begin to ensure a smooth and enjoyable baking process.
For the Rich and Fudgy Brownie Layer:
The brownie layer forms the heart of this dessert, providing a deep chocolate foundation. Opting for good quality dark chocolate (70% cocoa solids or higher) will yield the most intense flavor. Unsalted butter allows you to control the salt content, while caster sugar dissolves beautifully, contributing to a wonderfully smooth texture. Eggs bind the mixture, cocoa powder enhances the chocolate depth, and plain flour, baking powder, and salt provide structure and balance.
- 7.8 oz (220g) Dark Chocolate (70% cocoa solids recommended for best flavor)
- 7.8 oz (220g) Unsalted Butter
- 16 oz (450g) Caster Sugar
- 4 Large Eggs
- 2 oz (55g) Unsweetened Cocoa Powder
- 6 oz (170g) Plain Flour (All-Purpose Flour)
- 3/4 tsp Baking Powder
- 3/4 tsp Salt
For the Creamy and Tangy Cheesecake Layer:
The cheesecake layer introduces a delightful contrast with its smooth, creamy texture and slight tang. Using full-fat cream cheese, preferably at room temperature, is crucial for a lump-free, silky batter. Caster sugar helps sweeten it without adding graininess, eggs provide structure, and vanilla extract enhances the overall flavor profile, adding a warm, aromatic note that complements the chocolate beautifully.
- 18 oz (510g) Full-Fat Cream Cheese, softened to room temperature
- 4 oz (115g) Caster Sugar
- 2 Large Eggs
- 1/2 tsp Vanilla Extract
Step-by-Step Directions to Bake Your Dream Cheesecake Brownies
Creating these cheesecake brownies is a rewarding experience, and following these detailed steps will ensure your success. Remember, precision and patience are key, especially during the mixing and baking stages. Don’t rush the process, and you’ll be rewarded with a truly spectacular dessert.
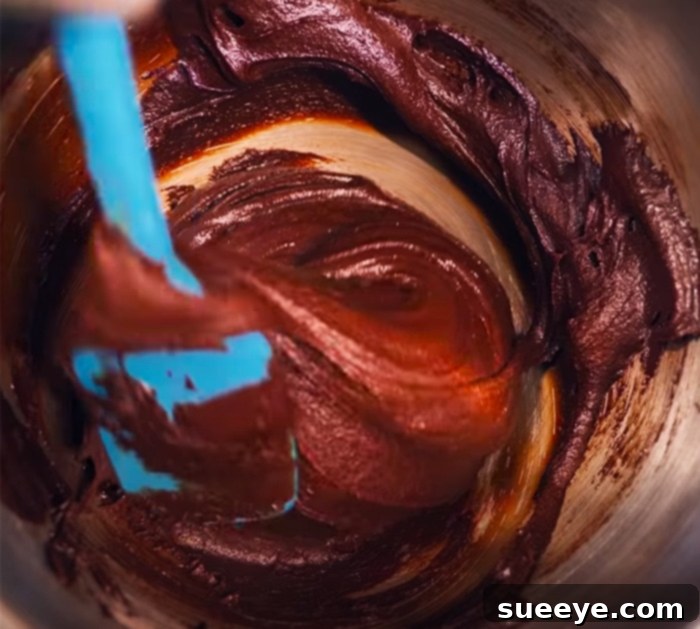
- Prepare Your Baking Pan: Begin by thoroughly greasing your 10-inch baking pan. For easy removal and clean edges, line the pan with parchment paper, allowing an overhang on two sides to act as “handles.” This simple step is vital for ensuring your brownies can be lifted out effortlessly once cooled. Preheat your oven to 325°F (160°C).
- Craft the Brownie Batter (The Foundation):
- In a heatproof bowl set over a saucepan of simmering water (a double boiler setup), melt the dark chocolate and unsalted butter together. Stir gently until completely smooth and combined. Remove from heat and allow to cool slightly.
- In a large mixing bowl, whisk the caster sugar and eggs together until light, fluffy, and pale in color. This process incorporates air, contributing to the brownie’s texture.
- Pour the slightly cooled chocolate and butter mixture into the egg and sugar mixture, folding gently until just combined.
- Sift together the cocoa powder, plain flour, baking powder, and salt. Gradually fold these dry ingredients into the wet mixture until just combined. Be careful not to overmix, as this can lead to a tough brownie.
- Pour about two-thirds of the brownie batter into your prepared pan, spreading it evenly to form the base. Reserve the remaining one-third of the batter for the swirling effect later.
- Prepare the Silky Cheesecake Layer:
- In a separate mixing bowl, beat the softened cream cheese with an electric mixer until it is completely smooth and free of lumps. This is crucial for a silky cheesecake.
- Add the caster sugar and beat until just combined.
- Crack in the two eggs, one at a time, beating on low speed until just incorporated after each addition. Be careful not to overmix, as too much air can cause the cheesecake to crack during baking.
- Stir in the vanilla extract.
- Gently pour the cheesecake batter over the brownie base in the pan, carefully spreading it out evenly with a spatula.
- Create the Iconic Swirl Effect:
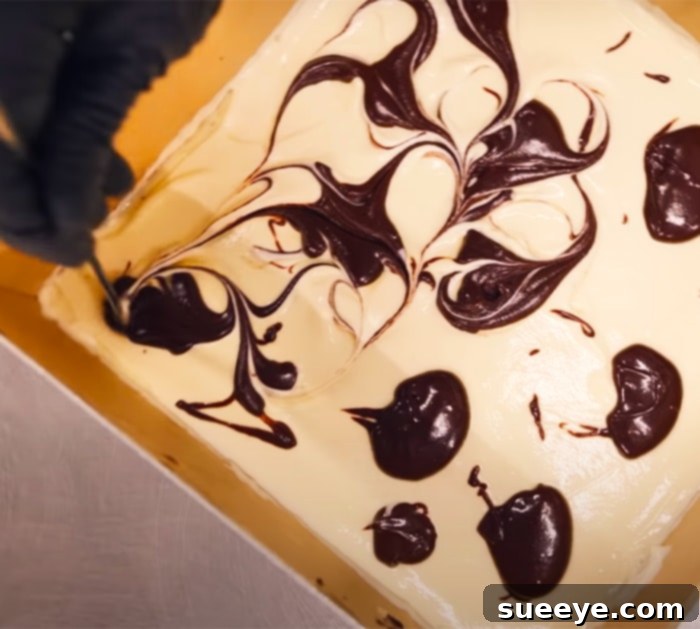
Now for the artistic touch! Take the reserved brownie batter and drop small dollops of it evenly over the top of the cheesecake layer. Don’t worry about perfection here; the beauty is in the organic swirl. Use a skewer, a butter knife, or even the tip of a spoon to gently swirl the chocolate blobs into the cheesecake mixture. Create an appealing marble pattern without overmixing the layers. The goal is distinct swirls, not fully combined batter.
- Baking to Perfection:
Place the pan into your preheated oven at 325°F (160°C). Bake for approximately 30-35 minutes. The cheesecake brownie is done when the edges are set, and the center still has a slight jiggle. Avoid overbaking, as this can lead to a dry brownie and a cracked cheesecake. A toothpick inserted into the brownie portion (avoiding the deepest part of the cheesecake) should come out with moist crumbs, not wet batter.
- Cooling and Chilling (The Crucial Step):
Once baked, remove the pan from the oven and let it cool completely on a wire rack at room temperature. This step is essential as it allows the brownies to set properly. After reaching room temperature, transfer the pan to the refrigerator and chill for at least 4 hours, or ideally overnight. Chilling is paramount for achieving clean slices and the perfect fudgy-creamy texture. Resist the temptation to cut into them too soon!
Tips for Flawless Cheesecake Brownies Every Time
To ensure your cheesecake brownies turn out perfectly delicious and picture-perfect, keep these expert tips in mind:
- Room Temperature Ingredients: For both layers, especially the cream cheese and eggs, bringing ingredients to room temperature before mixing is crucial. This ensures a smooth, lump-free batter that combines evenly.
- Don’t Overmix: Overmixing develops gluten in the flour (for brownies) and incorporates too much air (for cheesecake), leading to tough brownies and cracked cheesecake tops. Mix until just combined.
- Quality Chocolate Matters: Using good quality dark chocolate (70% or higher) will significantly elevate the flavor of your brownies.
- Parchment Paper is Your Friend: The parchment paper sling makes removing the chilled brownies from the pan incredibly easy, allowing for clean, beautiful slices.
- Chill Time is Non-Negotiable: While waiting is hard, allowing the brownies to chill completely, preferably overnight, is the secret to perfect texture and neat cuts.
- Clean Slicing: For impeccably clean slices, use a sharp knife and wipe the blade clean with a warm, damp cloth after each cut.
Variations and Serving Suggestions
While these cheesecake brownies are divine as they are, don’t hesitate to experiment with variations:
- Nutty Crunch: Add chopped walnuts or pecans to your brownie batter for extra texture.
- Flavor Boost: A pinch of instant coffee or espresso powder in the brownie batter will deepen the chocolate flavor without making it taste like coffee.
- Citrus Zest: Add a tablespoon of lemon or orange zest to the cheesecake layer for a brighter, more aromatic twist.
- Toppings Galore: Drizzle with caramel sauce, a chocolate ganache, or a sprinkle of sea salt before serving.
These decadent treats pair wonderfully with a simple glass of cold milk (unsweetened almond milk is a great choice for balancing sweetness, as I often prefer!), a cup of strong coffee, or even a scoop of vanilla bean ice cream for an ultimate dessert experience. The intense chocolate combined with the tang of vanilla cheesecake creates a symphony of flavors that is truly satisfying.
Storage Recommendations
Cheesecake brownies are best stored in an airtight container in the refrigerator for up to 5-7 days. While they can be enjoyed straight from the fridge, allowing them to sit at room temperature for about 15-20 minutes before serving can enhance their texture and flavor.
Conclusion: Your New Favorite Decadent Dessert Awaits!
Overall, the idea of combining two beloved sweets into one intensely chocolatey, yet refreshingly tangy, vanilla cheesecake creation is simply brilliant. The final results are not only incredibly delicious but also visually stunning. The swirl effect from the chocolate and cheesecake creates a super appetizing look that is sure to impress anyone who loves both desserts. I genuinely adore how beautifully these turned out, making them a perfect choice for celebrations, potlucks, or simply as a well-deserved treat for yourself. So, gather your ingredients, follow these steps, and prepare to indulge in the ultimate cheesecake brownie experience – a true testament to the magic that happens when two great things come together.