
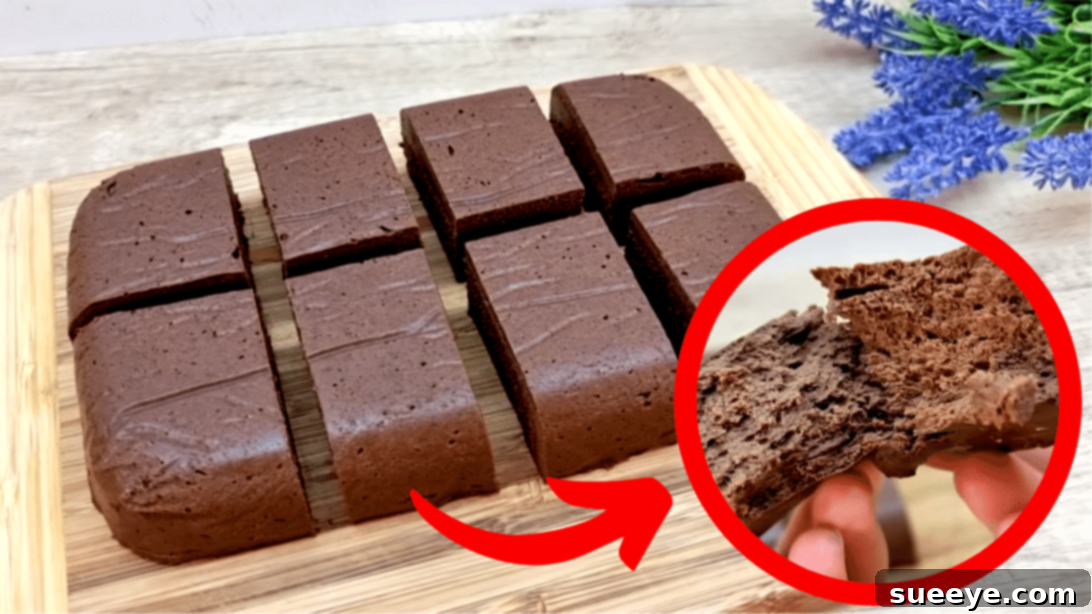
Say hello to your new favorite summer indulgence: an unbelievably simple, no-bake chocolate dessert that demands only two core ingredients and five minutes of your time! Perfect for those sweltering days when turning on the oven is unthinkable, this delightful treat promises to satisfy even the most intense sweet cravings without any fuss. Forget complicated recipes or extensive ingredient lists; this ingenious creation, inspired by the culinary wizardry of schnell rezept on YouTube, transforms humble chocolate and ripe bananas into a rich, decadent dessert that tastes far more elaborate than its preparation suggests. Despite its remarkably cake-like texture, you won’t find a single speck of flour in this recipe, making it a fantastic gluten-free option. Get ready to impress your family and friends with this refreshing, cold goodness that’s destined to become a staple in your dessert repertoire, especially during the warmer months.
This isn’t just a dessert; it’s a revelation for anyone seeking an easy yet incredibly satisfying sweet escape. Imagine a velvety chocolate treat that’s ready to chill in your refrigerator almost as soon as you start preparing it. Its rich flavor and smooth consistency make it an instant crowd-pleaser, perfect for unexpected guests, a quick after-dinner delight, or simply a luxurious personal treat. Dive into the world of effortless dessert making and discover how just two ingredients can unlock a world of delicious possibilities.
Essential Ingredients for Your No-Bake Delight
The beauty of this recipe lies in its minimalist approach to ingredients. With just two primary components, you’re on your way to creating a truly spectacular dessert. The optional addition of cinnamon elevates the flavor profile, adding a subtle warmth that perfectly complements the sweetness of chocolate and banana.
- 7 ounces (approximately 200g) of High-Quality Chocolate: The type of chocolate you choose will significantly influence the final taste. For a richer, more intense flavor, opt for dark chocolate (60% cocoa solids or higher). If you prefer a milder, sweeter dessert, milk chocolate or semi-sweet chocolate chips work wonderfully. Ensure it’s good quality melting chocolate for the best results.
- 10.5 ounces (approximately 300g) of Ripe Banana Pulp (Pureed Bananas): The key to success here is using very ripe bananas. Look for bananas with plenty of brown spots on their skin; these are naturally sweeter and easier to puree into a smooth consistency, which is crucial for the dessert’s texture. This measurement refers to the weight of the banana flesh after peeling.
- 1 teaspoon Ground Cinnamon (Optional, but Highly Recommended): While not strictly necessary, ground cinnamon introduces a delightful aromatic depth that enhances both the chocolate and banana flavors, making the dessert taste more complex and inviting. You can adjust this amount to your personal preference or explore other spices like a pinch of nutmeg or a dash of vanilla extract.
Why You’ll Adore This 2-Ingredient Chocolate Dessert
Beyond its simplicity, this no-bake chocolate and banana dessert offers a myriad of reasons to fall in love with it:
- Effortless Preparation: No baking, no complex techniques, and minimal cleanup. It’s a dream come true for novice cooks and seasoned chefs alike.
- Perfect for Summer: Keep your kitchen cool! This dessert requires no oven, making it ideal for hot weather when you crave something sweet and refreshing without heating up your home.
- Diet-Friendly Potential: Naturally gluten-free, and easily made dairy-free or vegan by selecting appropriate chocolate (dairy-free dark chocolate is readily available). It’s also a wonderful way to use up overripe bananas.
- Quick to Assemble: With just 5 minutes of active prep time, you can have this dessert chilling in the refrigerator in no time, freeing you up to enjoy your day.
- Crowd-Pleasing Flavor: The combination of rich chocolate and sweet banana is a timeless classic, guaranteed to appeal to almost everyone, from children to adults.
- Versatile Serving Options: Enjoy it chilled and firm, or let it soften slightly for a creamier, truffle-like experience. It’s delightful on its own or garnished for a more elegant presentation.
Crafting Your Delightful No-Bake Chocolate Treat
Follow these straightforward steps to create a truly irresistible dessert that will become a go-to favorite in your kitchen.
Step 1: Expertly Melting Your Chocolate
Begin by carefully unwrapping your chosen chocolate and breaking it into small, uniform pieces. This ensures that it melts more evenly and quickly. Place these chocolate pieces into a heat-proof bowl. Next, prepare a small saucepan with about an inch or two of water. Bring this water to a gentle simmer over medium-low heat. Once simmering, carefully place the bowl of chocolate directly on top of the saucepan, ensuring the bottom of the bowl does not touch the simmering water. This creates a double boiler, which is the perfect method for gently melting chocolate without scorching it. The steam from the simmering water will indirectly heat the bowl, allowing the chocolate to melt into a smooth, luxurious liquid. Stir occasionally with a clean, dry spatula until all the chocolate is completely melted and beautifully smooth. Once melted, remove the bowl from the heat but keep it over the warm water to maintain its liquid consistency while you prepare the bananas.
Step 2: Preparing Your Ripe Banana Puree
Select your very ripe bananas – the ones with noticeable brown spots are ideal as they are sweeter and softer, making them perfect for pureeing. Peel the bananas and slice them into smaller chunks. Transfer these banana pieces into a food processor or a high-speed blender. Process the bananas until they transform into a completely smooth, creamy puree, devoid of any lumps. It’s important to achieve a very fine consistency, as this will contribute to the overall smooth texture of your finished dessert. Scrape down the sides of the processor bowl as needed to ensure all banana pieces are fully incorporated into the puree. This step is crucial for the dessert’s final consistency, so take your time to get it perfectly smooth.
Step 3: Combining, Chilling, and Serving Your Decadent Treat
Once your banana puree is silky smooth and your chocolate is perfectly melted, it’s time to bring these two stars together. Pour the entire batch of pureed banana into the bowl containing the melted chocolate. If you’re using ground cinnamon, now is the time to sprinkle it in. Using a spatula, gently but thoroughly fold and mix all the ingredients together. Continue mixing until the banana and chocolate are completely combined, forming a uniform, rich brown, gooey texture. Ensure there are no streaks of unmixed banana or chocolate. The mixture should be thick and glossy. Next, prepare your chosen container for chilling. A loaf pan, an 8×8 inch baking dish, or even individual ramekins work well. Line the container with parchment paper or baking sheets, allowing some overhang on the sides to make removal easier later. Pour the chocolate-banana mixture into the prepared container and use your spatula to spread it evenly. Aim for a smooth, flat surface. Once evenly spread, transfer the container to the refrigerator and chill for a minimum of 2-3 hours, or until the dessert is firm to the touch and no longer sticky. You’ll know it’s ready when the top no longer sticks to your hand when gently touched. Once firm, use the parchment paper overhangs to lift the dessert out of the container. Place it on a cutting board, remove the parchment, and slice it into desired pieces – squares, rectangles, or even fun shapes with cookie cutters. Serve immediately and delight in sharing this incredible, easy-to-make dessert with your friends or family!
Tips for Success and Delicious Variations
To ensure your 2-ingredient chocolate dessert turns out perfect every time, and to spark your creativity, here are some invaluable tips and exciting variations:
Perfecting Your Dessert
- Banana Ripeness is Key: Seriously, don’t skimp on this. The browner the bananas, the sweeter and softer they are, leading to a smoother puree and a more naturally sweet dessert. Under-ripe bananas will result in a less flavorful and potentially grainier texture.
- Quality Chocolate Matters: Since chocolate is one of only two main ingredients, its quality shines through. Invest in good chocolate chips, baking bars, or even your favorite chocolate bar for melting. Avoid waxy or compound chocolates, as they may not melt as smoothly or deliver the desired flavor.
- Gentle Melting: Always use a double boiler or microwave carefully in short bursts (30 seconds at a time, stirring between each) to melt chocolate. Overheating can cause chocolate to seize (become clumpy and unworkable). If it seizes, you might try adding a tiny bit of neutral oil or shortening, but prevention is best.
- Thorough Mixing: Ensure the banana puree and melted chocolate are thoroughly combined. Any unmixed streaks will affect the consistency and flavor of the final product. Mix until the mixture is uniform in color and texture.
- Chill Time: Don’t rush the chilling process. The dessert needs ample time in the refrigerator to firm up properly. If it’s too soft, it will be difficult to cut and serve neatly.
- Easy Release: Lining your container with parchment paper with an overhang is a game-changer for easy removal. You can simply lift the entire block of dessert out once it’s firm.
Exciting Variations to Explore
This basic recipe is a fantastic canvas for culinary creativity. Here are some ideas to customize your treat:
- Nutty Swirl: After pouring the mixture into the container, drizzle a tablespoon or two of melted peanut butter, almond butter, or cashew butter on top. Use a skewer or a knife to create beautiful swirls before chilling.
- Tropical Twist: Add a tablespoon of shredded coconut to the mixture before chilling, or sprinkle toasted coconut flakes on top before serving for a delightful texture and flavor contrast.
- Spice it Up: Besides cinnamon, consider adding a pinch of chili powder for a Mexican chocolate kick, a dash of cardamom for an exotic touch, or a touch of pumpkin pie spice for a seasonal twist.
- Extract Enhancements: A teaspoon of vanilla extract or almond extract can deepen the flavor profile. Peppermint extract can turn this into a refreshing mint-chocolate dessert.
- Coffee Infusion: Add a teaspoon of instant espresso powder to the melted chocolate for a mocha-flavored treat that coffee lovers will adore.
- Citrus Zest: A teaspoon of orange or lemon zest mixed in can provide a bright, zesty counterpoint to the richness of the chocolate and banana.
- Crunchy Toppings: Before chilling, sprinkle with chopped nuts (pecans, walnuts, almonds), crushed cookies (like Oreos or graham crackers), or a pinch of sea salt for a sophisticated finish.
- Individual Servings: Instead of a large pan, pour the mixture into small silicone molds or lined muffin tins for perfectly portioned individual desserts.
Frequently Asked Questions About Your No-Bake Chocolate Dessert
Here are answers to some common questions you might have about this easy and delicious recipe:
- Can I use frozen bananas? Yes, you can! If using frozen bananas, make sure they are fully thawed before pureeing. This will prevent excess water from diluting the mixture and ensure a smooth consistency. You might need to pat them dry slightly after thawing.
- How long does this dessert last? Stored in an airtight container in the refrigerator, this dessert will last for 3-5 days. The bananas may start to oxidize slightly over time, but the chocolate will largely protect them.
- Can I freeze this dessert? Absolutely! This dessert freezes wonderfully. Wrap individual pieces tightly in plastic wrap and then place them in an airtight freezer-safe container or bag. It can be stored in the freezer for up to 1 month. Thaw in the refrigerator for a few hours before serving, or enjoy it directly from the freezer for a fudge-like texture.
- Is this dessert vegan? Yes, if you choose a dairy-free or vegan chocolate! Many dark chocolates are naturally vegan, but always check the ingredient label to ensure it doesn’t contain milk solids or other animal-derived products.
- Can I use a different type of fruit? While bananas are ideal due to their natural sweetness and creamy texture when pureed, other fruits might alter the consistency and flavor significantly. Avocados could work for a similar texture, but the flavor profile would be different. Berries or other high-water-content fruits are generally not recommended as they can make the dessert too watery and prevent it from setting properly.
- What if my chocolate seizes (becomes clumpy)? This usually happens if chocolate is overheated or if even a tiny drop of water gets into it while melting. If it seizes, try stirring in a teaspoon of neutral oil (like vegetable or coconut oil) or shortening, one at a time, to see if it smooths out. If not, it might be best to start over.
- How can I make this dessert look fancier for guests? After cutting into squares, dust with cocoa powder, drizzle with a little melted chocolate, sprinkle with sea salt, or top with fresh raspberries or a dollop of whipped cream (dairy or non-dairy).
2-Ingredient No-Bake Chocolate Dessert: Your New Go-To Recipe
In a world brimming with complex recipes, this 2-ingredient no-bake chocolate dessert stands out as a beacon of simplicity and pure deliciousness. It’s a testament to the fact that extraordinary flavors can emerge from the most basic ingredients. Whether you’re looking for a quick weeknight treat, a refreshing summer dessert, or a clever way to use up those ripe bananas, this recipe delivers on all fronts. Easy, fast, and incredibly satisfying, it’s sure to become a beloved staple in your home. Go ahead, gather your chocolate and bananas, and prepare to be amazed by the delightful magic you can create with so little effort. Enjoy every single bite of this rich, smooth, and utterly delightful creation!