
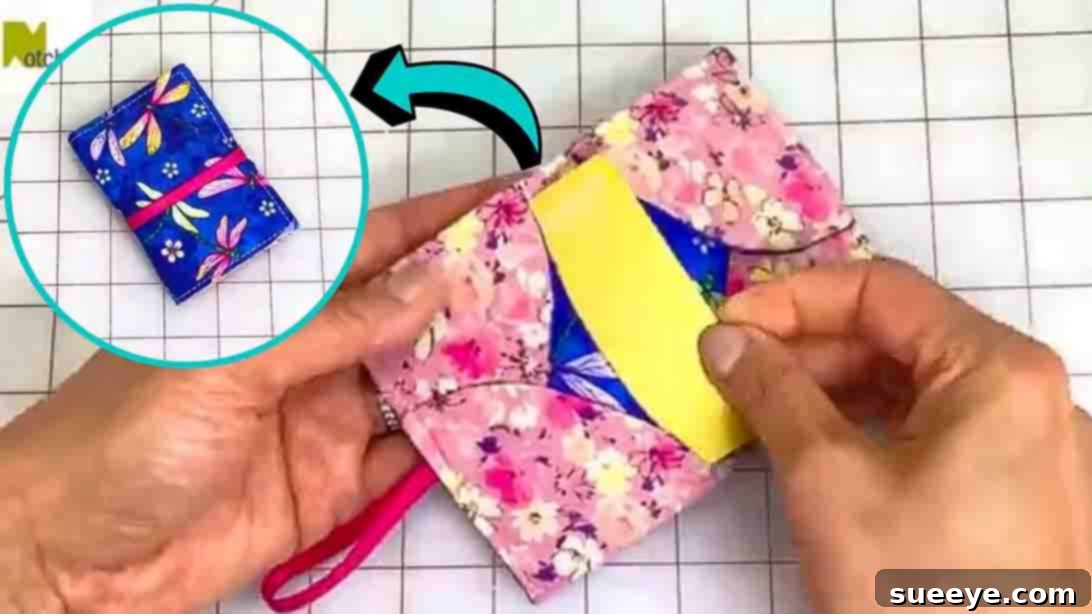
There’s something truly special about a handmade gift. It carries a unique touch, a warmth that store-bought items often lack. But why stop at just the gift itself? Imagine the delight of presenting that thoughtful present in a beautifully crafted, reusable fabric gift bag that you’ve made yourself. Not only does it elevate the gifting experience, but it also champions sustainability by reducing waste from single-use wrapping paper.
If you’ve always admired personalized gifts and the eco-conscious trend of reusable packaging, then this beginner-friendly tutorial for a DIY fabric gift bag is precisely what you need. Brought to you by the creative minds at Notches Sewing, this project is designed for everyone, whether you’re a seasoned sewist or picking up a needle and thread for the very first time. You’ll be amazed at how quickly you can transform two simple pieces of scrap fabric into an elegant and functional gift bag, perfect for holidays, birthdays, or any special occasion.
This tutorial is a fantastic way to utilize those leftover fabric scraps that have been patiently waiting for their moment to shine. It’s an easy, quick, and incredibly rewarding project that yields a practical item you can use again and again. Forget the hassle of tape and scissors; embrace the charm and simplicity of a fabric gift bag. Ready to add a personal, eco-friendly touch to your gift-giving? Let’s gather our materials and embark on this creative journey to craft an adorable and versatile gift bag that your loved ones will surely cherish.
Why Choose a DIY Fabric Gift Bag?
Beyond the simple joy of crafting, creating your own fabric gift bags offers a multitude of benefits:
- Sustainable & Eco-Friendly: In an era where environmental consciousness is paramount, opting for reusable fabric gift bags significantly reduces waste. Traditional wrapping paper often isn’t recyclable due to dyes, laminates, or glitter. Fabric bags, however, can be used countless times, making them a superb choice for a greener lifestyle.
- Personal Touch & Thoughtfulness: A handmade bag instantly adds a layer of care and intention to your gift. The recipient will know you invested time and effort not just into the gift, but also into its presentation, making the entire experience more meaningful.
- Cost-Effective: This project is a brilliant way to use up fabric remnants from other projects. Instead of buying new wrapping paper for every occasion, you can create a collection of beautiful bags for minimal cost, saving money in the long run.
- Versatility & Reusability: Fabric gift bags aren’t just for gifts! They can double as storage for small items, travel bags for toiletries, or even chic organizers. Their durability ensures they’ll last much longer than paper alternatives.
- Creative Expression: From choosing vibrant patterns to subtle textures, the fabric itself becomes part of the gift’s aesthetic. You can match the bag to the recipient’s personality or the occasion, adding another dimension of personalization.
Materials for Your Fabric Gift Bag
One of the best aspects of this DIY fabric gift bag project is its simplicity and minimal material requirements. You likely have most of these items in your crafting stash already, making it an excellent opportunity to put those scrap fabrics to good use. Here’s a detailed list of what you’ll need to create your beautiful gift bag:
- Gift Bag Template: While the tutorial walks you through the sizing, using a template (or creating your own based on your desired bag size) ensures consistent and professional results. For this specific project, the template guides the unique shape.
- Two Pieces of Fabric (9 1/2″ x 11″ each): The beauty of this project lies in its flexibility with fabric choice. Quilting cotton is an excellent option for beginners due to its ease of handling, wide variety of prints, and stable weave. Consider different patterns or colors for the inner and outer layers to add visual interest. Pre-wash and press your fabrics before starting to prevent shrinking and ensure a smooth working surface.
- Light Non-Woven Fusible Interfacing: This is a crucial element that provides structure and body to your fabric bag. The “fusible” aspect means it has a heat-activated adhesive on one side, allowing it to bond easily to your fabric when ironed. Opt for a light-weight interfacing to maintain a soft feel while still adding necessary stability.
- Ruler: A clear quilting ruler is ideal for precise measurements and straight cuts, essential for a polished finish.
- Rotary Cutter: Paired with a self-healing cutting mat, a rotary cutter offers quick, accurate, and clean cuts, especially helpful when cutting fabric pieces to size and trimming seam allowances. If you don’t have one, sharp fabric scissors will also work, but take extra care to cut cleanly.
- Elastic: You’ll need a piece of elastic, approximately 5 1/2″ x 1/4″. This elastic will form the elegant closure of your gift bag, allowing it to cinch beautifully at the top. Choose an elastic that complements your fabric or provides a subtle contrast.
- Basic Sewing Supplies: Don’t forget your sewing machine, matching thread, sharp sewing machine needle, fabric clips or pins to hold your fabric pieces together, an iron and ironing board for pressing seams, and a fabric marker or tailor’s chalk for tracing the template.
Step-by-Step Guide: Crafting Your Fabric Gift Bag
Follow these detailed instructions to create your charming fabric gift bag. Precision in each step will ensure a beautiful and functional end product.
Step 1: Preparing Your Fabric and Initial Stitching
The foundation of a well-made fabric bag begins with careful preparation. This step involves fusing the interfacing, preparing the elastic, and making the initial cuts and stitches that define the bag’s shape.
- Apply Fusible Interfacing: Lay your light non-woven fusible interfacing with the glue side facing upwards on your ironing board. Carefully place one of your 9 1/2″ x 11″ fabric pieces directly on top, ensuring it’s centered and smooth. Cut the interfacing to precisely match the size of your fabric piece. Using a hot iron with steam (refer to your interfacing’s instructions for exact settings), press the fabric and interfacing together. Apply even pressure for about 10-15 seconds in each spot, allowing the adhesive to fully bond. This step gives your bag structure and prevents it from being too floppy.
- Prepare Elastic: Using your ruler and rotary cutter (or scissors), cut a 5 1/2″ length of 1/4″ wide elastic. Set this piece aside; you’ll use it in the final steps.
- Align Fabrics and Trace Template: Take your two main fabric pieces. Place them together with their “right sides” (the side you want to be visible on the finished bag) facing each other. Ensure all edges are aligned perfectly. Now, place your gift bag template on top of the aligned fabrics. Carefully trace the outline of the template onto the top fabric piece using a fabric marker or tailor’s chalk.
- Mark Notches for Opening: Crucially, transfer the markings for the two notches from your template onto the fabric. These notches indicate where the opening of your bag will be, and it’s essential to mark them accurately.
- Secure and Sew: Pin the two fabric pieces together along the traced line, especially around the curves, to prevent shifting while sewing. Starting from the bottom notch, sew along the traced line, following the contour of the template, all the way up to the top notch. Remember to backstitch at both the starting and ending notches to secure your stitches and prevent them from unraveling later. Use a consistent seam allowance, typically 1/4″ to 3/8″, as you sew.
Step 2: Shaping and Pressing Perfection
Once your initial stitching is complete, this step focuses on refining the shape of your bag and preparing the seams for a clean, professional finish. Proper pressing is key here!
- Trim Around the Shape: After sewing, carefully cut around the entire traced and sewn shape. Leave a consistent 1/4″ seam allowance outside of your stitched line. For the curved sections, make small snips into the seam allowance (without cutting through your stitches) to help the fabric lay smoothly when turned right side out. Trim the corners diagonally to reduce bulk.
- Press Open the Opening Seam: Locate the seam you stitched between the two notches (this is where the bag will open). Press this seam open flat with your iron. This creates a neat, crisp edge for the bag’s opening.
- Fold and Press Other Seam: Turn the project over and fold down the other side of the seam that forms the opening. Press it flat as well. This helps create a defined and clean edge for the opening.
- Press Remaining Straight Seams Open: For the rest of the straight seams you’ve sewn, press them open as well. This reduces bulk and allows the bag to lie flatter and look more polished.
- Turn Right Side Out and Shape: Carefully turn your project right side out. Use a point turner, a chopstick, or a dull pencil to gently push out all the corners and curves, ensuring they are as crisp and smooth as possible. Be gentle to avoid poking through your stitches.
- Final Pressing: Once turned out and shaped, give the entire bag a thorough press with your iron. This will set the seams, remove any wrinkles, and give your gift bag a professional, finished appearance.
Step 3: Creating the Closure and Final Assembly
This final step brings your gift bag to life by creating its unique closure and completing the assembly with careful stitching.
- Fold and Press Lining (First Side): With the lining side of the bag facing up, take one end and fold it straight across towards the center, creating a crisp crease. Press this fold firmly with your iron. The exact measurement isn’t as critical as ensuring it’s a straight, even fold.
- Repeat on Other Side: Repeat the folding and pressing action on the other end of the bag, mirroring the first fold. This creates the inner structure of the bag.
- Fold Sides Inward: Now, take the left side of the bag and fold it inward, aligning its edge precisely with both of the previously created folds. Press this new fold firmly. Repeat this process for the right side, folding it inward and pressing.
- Secure with Clips and Repeat: Use fabric clips (or pins) to hold these newly folded sides in place. They should now resemble an “envelope” style opening. Repeat steps 1-4 on the other side of the bag, ensuring symmetry.
- Mark the Center: Carefully find the center point along the top edge of your bag’s opening. Mark this spot with a fabric marker or chalk. This is where your elastic will be anchored.
- Prepare and Place Elastic: Take the 5 1/2″ elastic you cut earlier. Fold it in half lengthwise, ensuring the right sides are together. Now, place one end of this folded elastic at the center mark you just made, positioning it between the top two layers of fabric, about 1/4″ in from the raw edge. The loop of the elastic should be extending outwards from the bag opening.
- Secure Elastic and Clip: Turn the project over and carefully clip the elastic in place, ensuring it’s securely held between the fabric layers. Add more clips around the entire top opening of the bag to hold all layers together, preparing for the final stitch.
- Final Stitching: Using your sewing machine, sew all around the project’s top opening. Start a few inches from where your elastic is, stitch carefully over the elastic to secure it firmly in place (perhaps with a few backstitches over the elastic for extra strength), and continue sewing all the way around the top edge until you meet your starting point. Use a consistent seam allowance, typically 1/4″ to 3/8″, making sure to catch all layers of fabric.
- Enjoy Your Creation: Once sewn, give it one final press. Your adorable, reusable fabric gift bag is now complete! You can proudly place gift cards, small trinkets, jewelry, or any thoughtful present inside and give it to your loved ones, knowing you’ve created something unique and sustainable.
Customization Ideas for Your Fabric Gift Bag
The beauty of a DIY project is the freedom to make it uniquely yours. Here are some ideas to customize your fabric gift bags:
- Fabric Choices: Experiment with different fabric types beyond quilting cotton. Consider linen for a rustic look, velvet for a luxurious feel, or even upcycle old shirts or tablecloths for a truly unique and sustainable option. Choose seasonal prints for holidays or themed fabrics for specific events (e.g., baby prints for a baby shower bag).
- Embellishments: Add ribbons, lace trim, decorative buttons, beads, or small charms to the exterior of the bag. You can sew them on before final assembly.
- Personalized Touches: Use fabric paint or embroidery to add initials, a name, a small design, or a heartfelt message to the bag. This makes the gift bag an even more cherished keepsake.
- Different Closures: While elastic offers a neat cinch, you could explore other closures. Consider adding drawstrings, snap fasteners, or even a simple button and loop for a different aesthetic.
- Appliqué: Cut out fabric shapes and appliqué them onto the bag for a fun and colorful design.
Caring for Your Handmade Fabric Gift Bag
To ensure your beautiful fabric gift bags last for many celebrations to come, proper care is essential. The cleaning method will primarily depend on the type of fabric you used:
- Cotton Fabrics: Most cotton bags can be machine washed in cold water on a gentle cycle. Use a mild detergent. To maintain shape and minimize wrinkles, air dry or tumble dry on low heat. Iron on a cotton setting if needed.
- Delicate Fabrics: If you’ve used more delicate fabrics like silk or velvet, hand washing in cold water with a gentle soap is recommended. Lay flat to dry to prevent stretching or damage.
- Interfacing Considerations: The fusible interfacing typically holds up well to washing, but always check the interfacing manufacturer’s recommendations. Excessive heat in drying might affect the bond over time.
- Spot Cleaning: For minor spills or marks, spot clean with a damp cloth and mild soap.
- Storage: Store your clean and dry fabric bags folded neatly or hung to prevent excessive wrinkling.
Troubleshooting Common Issues
Even for beginners, this project is designed to be straightforward. However, if you encounter any bumps along the way, here are some common issues and their solutions:
- Crooked Seams: This often happens when fabric shifts during sewing. Ensure you’re using plenty of pins or clips to secure the fabric. Guiding the fabric steadily through your machine and watching your seam allowance markings can also help. Practice makes perfect!
- Difficulty Turning Corners: If your corners aren’t coming out sharp, it’s likely due to excess fabric bulk in the seam allowance. Before turning, trim the seam allowance at the corners diagonally as close to the stitching as possible without cutting the stitches. Gently pushing out with a point turner will then be easier.
- Elastic Not Secure: If the elastic feels loose or comes out, you might not have backstitched enough over it or positioned it too close to the raw edge. Ensure it’s tucked securely between the fabric layers (at least 1/4″ in) and reinforced with several backstitches.
- Interfacing Not Adhering: This usually means the iron wasn’t hot enough, or you didn’t apply enough pressure or for long enough. Re-iron the area, applying firm, even pressure and steam if appropriate for your fabric and interfacing.
- Uneven Folds: When folding for the closure, use your ruler to double-check that your folds are straight and even. Pressing firmly after each fold helps to set them in place.
DIY Gift Bag with 2 Pieces of Fabric Only: A Sustainable Craft
Crafting a DIY gift bag from just two pieces of fabric is more than just a sewing project; it’s an embrace of creativity, sustainability, and thoughtful gifting. This beginner-friendly tutorial from Notches Sewing empowers you to create beautiful, reusable packaging that adds a personal touch to every present. Whether you’re making a batch for the upcoming holiday season or simply want a charming way to present a small token of appreciation, these fabric gift bags are a delightful solution.
So, what are you waiting for? Gather your materials, perhaps raid your scrap fabric bin, and give this wonderful project a try. You’ll not only hone your sewing skills but also contribute to a more sustainable future, one beautifully wrapped gift at a time. Share your creations and inspire others to embrace the joy of handmade!