
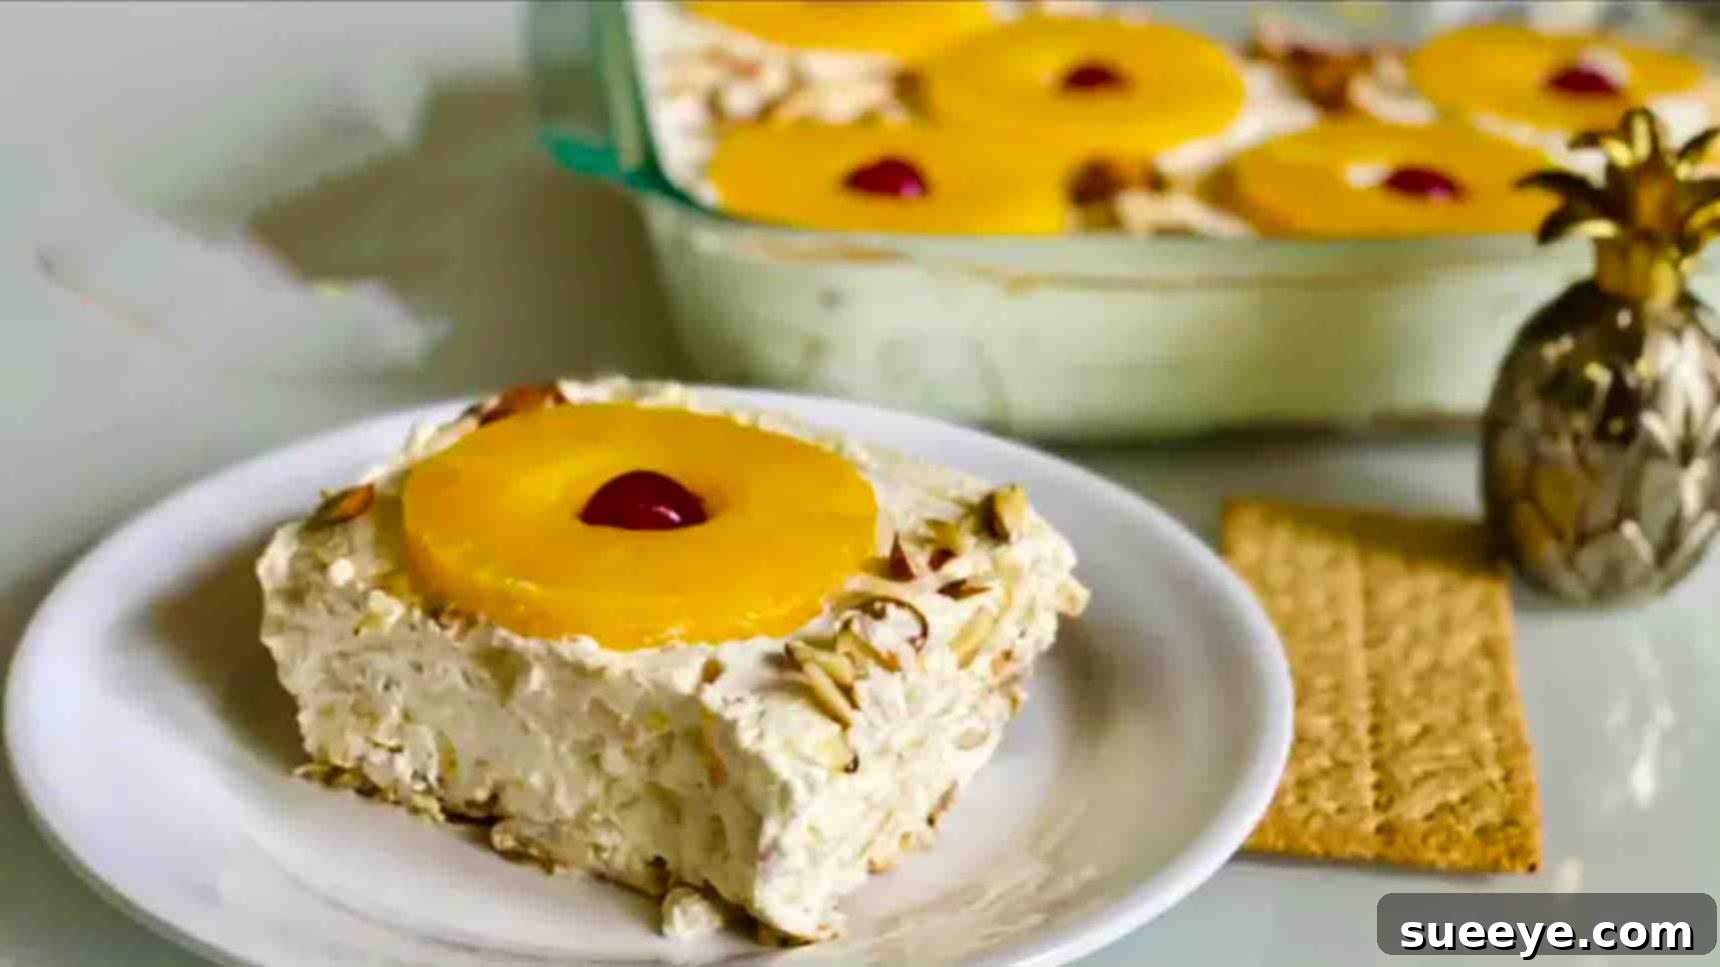
Welcome to a culinary journey that promises a burst of tropical flavor with minimal effort! If you’re searching for an effortlessly delicious dessert that’s perfect for any occasion, from intimate family dinners to grand celebratory gatherings, look no further. This heavenly No-Bake Pineapple Whip Dessert, inspired by the brilliant culinary insights from Amura’s Kitchen on YouTube, is designed to impress without the stress of oven baking. It’s a sweet symphony of creamy textures and tangy pineapple goodness, incredibly simple to prepare, especially in larger batches.
Imagine a dessert that combines the nostalgic crunch of graham crackers with a silky-smooth, vibrant pineapple cream, all topped with delightful garnishes. This recipe delivers just that – a refreshing treat that requires no baking, making it ideal for hot summer days or when your oven is already occupied. It’s a guaranteed crowd-pleaser that won’t disappoint even the most discerning palates. So, get ready to dive into the world of easy, no-fuss dessert making and bring a taste of paradise to your table today!
The Ultimate No-Bake Pineapple Whip Dessert: A Tropical Dream
This recipe is a testament to the idea that some of the most satisfying desserts are also the simplest. By combining readily available ingredients into a harmonious blend, we create a dessert that is not only packed with flavor but also incredibly refreshing. The no-bake aspect means more time enjoying your guests and less time slaving over a hot stove. Follow these easy steps to craft a dessert that will have everyone asking for the recipe!
Gather Your Tropical Treasures: Essential Ingredients
Crafting this delightful no-bake pineapple whip is straightforward, requiring a handful of key ingredients that come together to create its signature creamy, fruity, and crunchy profile. Quality ingredients ensure the best outcome, so choose wisely!
- 14.4 oz Graham Crackers: These form the foundational crust, offering a pleasant crunch and buttery flavor that perfectly complements the creamy pineapple. You can use classic honey graham crackers or experiment with cinnamon or chocolate varieties for a twist.
- 16 oz Cool Whip (Thawed): This provides the airy, light, and creamy texture that defines a “whip” dessert. Ensure it’s fully thawed for easy mixing without losing its volume. For a homemade touch, you can substitute with 4 cups of freshly whipped heavy cream, sweetened to taste.
- 16 oz Sour Cream: Don’t let the name fool you! Sour cream adds a subtle tang that beautifully cuts through the sweetness of the condensed milk and pineapple, balancing the flavors and adding a luxurious richness to the cream base.
- 14 oz Sweetened Condensed Milk: This is the magic ingredient that sweetens the whip and gives it a smooth, luscious consistency without adding extra liquid. It binds all the creamy components together.
- 20 oz Crushed Pineapple (Drained): The star of the show! Make sure to drain the crushed pineapple thoroughly to prevent your dessert from becoming watery. This provides intense pineapple flavor and a fine, juicy texture throughout the whip.
- 20 oz Pineapple Slices (Drained & Chopped): For visual appeal and a different textural experience, chopped pineapple slices are incorporated. Keep some intact slices for elegant garnishing. Like the crushed pineapple, proper draining is crucial.
- Approx. 20 pcs. Chopped Almond Nuts: These add a wonderful crunch and nutty undertone, providing a delightful contrast to the soft creaminess. Feel free to toast them lightly for enhanced flavor.
- Approx. 10 pcs. Candied Cherries (for Garnish): These vibrant red cherries offer a pop of color and a touch of classic dessert elegance. They are purely for visual appeal but add a lovely sweetness.
Essential Kitchen Tools for Success
While this recipe is simple, having the right tools makes the process even smoother:
- Large Mixing Bowl
- Whisk or Electric Mixer
- Rubber Spatula
- 9×13 inch Baking Dish (or similar size for your desired thickness)
- Measuring Cups and Spoons
- Cutting Board and Knife (for chopping pineapple slices and almonds)
- Plastic Wrap or Aluminum Foil
Crafting Your Creamy Pineapple Dream: Step-by-Step Guide
Follow these detailed steps to create a show-stopping no-bake dessert that will be the highlight of any meal. Precision and a little patience will yield perfect results!
Step 1: The Creamy Concoction – Mixing the Base
Begin by preparing the luxurious creamy base that will cradle the pineapple and nuts. In a generously sized mixing bowl, combine the entire 16 oz container of thawed Cool Whip, the 16 oz of sour cream, and the 14 oz can of sweetened condensed milk. Using a whisk or an electric mixer on low speed, gently fold these ingredients together until they are thoroughly combined and the mixture is smooth and uniform. Be careful not to overmix, as this can deflate the Cool Whip and reduce the airy texture of your whip.
Next, it’s time to infuse this creamy base with the star flavor. Add the well-drained 20 oz of crushed pineapple. Remember, squeezing out as much liquid as possible from the crushed pineapple is key to preventing a watery dessert. Then, add most of your chopped 20 oz pineapple slices – reserve a few for garnishing the top later. Finally, stir in the majority of your chopped almond nuts, also saving some for the final presentation. Gently fold all these components together until the pineapple and nuts are evenly distributed throughout the creamy mixture. The result should be a thick, luscious, and wonderfully fragrant filling.
Step 2: Building the Layers – Graham Cracker Foundation and Spreading the Whip
Now, let’s assemble your dessert. Take a 9×13 inch baking dish (or a similarly sized rectangular dish) and arrange a single layer of graham crackers neatly at the bottom. You may need to break some crackers to fit them perfectly and fill any gaps, creating a solid, continuous base. This layer will absorb some moisture from the pineapple whip, softening slightly to create a delightful cake-like texture once chilled.
Once your graham cracker foundation is complete, carefully spoon the entire pineapple mixture over the crackers. Using a rubber spatula or the back of a spoon, spread the mixture evenly across the entire surface of the graham cracker layer. Take your time to ensure the top is as smooth and flat as possible. This uniform distribution ensures every bite is consistent and visually appealing.
Step 3: The Grand Finale – Garnishing and Chilling for Perfection
With the pineapple whip spread smoothly, it’s time for the final aesthetic touches. Artfully arrange the remaining pineapple slices on top of the dessert. You can create a decorative pattern or simply scatter them for a natural look. Next, strategically place the candied cherries to add contrasting color and festive flair. Finally, sprinkle the reserved chopped almonds over the top for an extra textural element and a hint of nutty aroma.
Once garnished, cover the baking dish tightly with a lid or aluminum foil. This step is crucial for two reasons: it prevents the dessert from absorbing any unwanted odors from the refrigerator and helps maintain its moisture. Transfer the covered dish to the refrigerator and allow it to chill overnight, or for a minimum of 6-8 hours. This prolonged chilling time is essential. It allows the flavors to meld beautifully, the graham crackers to soften into a cake-like base, and the entire dessert to set firmly, making it easier to slice and serve. The longer it chills, the better the texture and flavor development will be!
Pro Tips for Pineapple Perfection
Achieving a truly outstanding no-bake pineapple whip involves a few expert tricks:
- Drain Pineapple Thoroughly: This cannot be stressed enough. Excess liquid from the pineapple will make your dessert watery and prevent it from setting properly. Press out as much juice as possible, perhaps even using a cheesecloth.
- Chill Your Bowl and Whisk: If you’re using homemade whipped cream instead of Cool Whip, chilling your mixing bowl and whisk attachment for 10-15 minutes before whipping will help the cream achieve maximum volume and stiffness.
- Gentle Mixing: When combining the Cool Whip, sour cream, and condensed milk, mix gently until just combined. Overmixing can cause the Cool Whip to lose its airy structure.
- Even Graham Cracker Layer: Take the time to create a uniform layer of graham crackers. This ensures a consistent base for every slice.
- Patience with Chilling: Resist the urge to serve too early. The overnight chill is vital for the flavors to deepen and for the dessert to achieve its perfect, sliceable consistency.
Delicious Variations to Try
While the classic pineapple whip is divine, feel free to get creative with these delicious variations:
- Tropical Medley: Incorporate other well-drained tropical fruits like mango chunks, mandarin oranges, or shredded coconut into the mix for an even more exotic flavor profile.
- Different Crusts: Instead of graham crackers, try vanilla wafers, shortbread cookies, or even a crushed pretzel crust for a sweet and salty twist.
- Nutty Alternatives: Swap almonds for chopped pecans, walnuts, or macadamia nuts for a different nutty flavor and crunch.
- Citrus Burst: Add a tablespoon of fresh lime or lemon zest to the creamy mixture for an extra bright, zesty kick that complements the pineapple beautifully.
- Spiced Delight: A pinch of ground ginger or cinnamon can add warmth and depth to the tropical flavors.
- Cream Cheese Twist: For an even richer, tangier cream base, replace half of the sour cream with softened cream cheese. Whip the cream cheese until smooth before adding other ingredients.
Serving and Storage Suggestions
Proper serving and storage will ensure your pineapple whip remains fresh and delightful:
- Serving: Once thoroughly chilled, simply cut the dessert into squares or rectangles and serve directly from the dish. A sharp knife, wiped clean between cuts, will help you achieve neat slices.
- Pairings: This dessert is wonderful on its own, but it also pairs beautifully with a cup of coffee, a light herbal tea, or even a glass of sparkling wine for a sophisticated touch.
- Storage: Keep any leftover dessert covered tightly with plastic wrap or in an airtight container in the refrigerator. It will stay fresh and delicious for 3-4 days. The graham cracker crust may become softer over time, but the flavors will remain vibrant.
- Freezing: While technically possible, freezing is not recommended as it can alter the texture of the Cool Whip and pineapple, making it watery upon thawing. It’s best enjoyed fresh from the refrigerator.
Why Choose a No-Bake Dessert? The Advantages Are Clear!
No-bake desserts, like this pineapple whip, offer a host of benefits that make them incredibly popular, especially for busy individuals and during warmer months:
- Effortless Preparation: No need to preheat the oven, monitor baking times, or worry about tricky temperatures. The simplicity saves time and reduces stress.
- Perfect for Warm Weather: Keeping your kitchen cool is a major plus when the temperatures rise. No-bake desserts allow you to enjoy a delicious treat without adding extra heat to your home.
- Beginner-Friendly: With no complex baking techniques, these recipes are often perfect for novice cooks or those who are less confident in their baking skills.
- Make Ahead: Most no-bake desserts require chilling, which means they are ideal for preparing in advance, freeing up your time on the day of your event.
- Versatility: The components of no-bake desserts are often easy to customize, allowing for endless variations with different fruits, creams, and crusts.
Frequently Asked Questions (FAQ)
- Q: Can I use fresh pineapple instead of canned?
- A: While canned pineapple is convenient and typically used for its consistent sweetness and texture, you can use fresh pineapple. However, you must cook and cool fresh pineapple first to neutralize an enzyme (bromelain) that can prevent the dairy components from setting. For ease and reliability, canned, well-drained pineapple is usually preferred for no-bake desserts involving dairy.
- Q: How can I make this dessert healthier?
- A: You can opt for light Cool Whip, low-fat sour cream, or even substitute some of the sweetened condensed milk with a sugar-free alternative. You could also use whole-wheat graham crackers. While these changes can reduce calories or sugar, they may slightly alter the texture and sweetness profile.
- Q: My dessert didn’t set. What went wrong?
- A: The most common reasons for a dessert not setting are insufficient chilling time or too much liquid. Ensure your pineapple is thoroughly drained, and always allow for the full overnight chilling period.
- Q: Can I prepare this in individual servings?
- A: Absolutely! Layer the ingredients in small dessert cups or mason jars for charming individual portions. Adjust the quantities accordingly, and ensure they still get adequate chilling time.
This No-Bake Pineapple Whip Dessert is more than just a recipe; it’s an invitation to enjoy simplicity, celebrate tropical flavors, and create lasting memories around the dinner table. With its ease of preparation and utterly delicious taste, it’s bound to become a staple in your dessert repertoire. So, gather your ingredients, follow these simple steps, and prepare to delight your taste buds with this refreshing, creamy, and wonderfully fruity creation!
For a visual guide and more tips straight from the source, be sure to watch the full recipe video from Amura’s Kitchen here.