
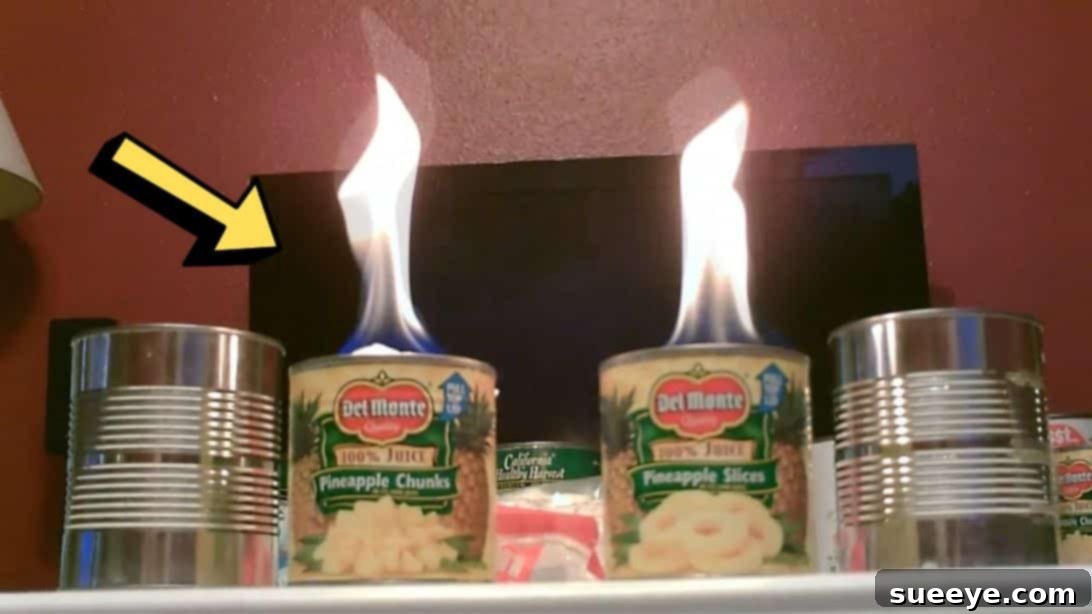
In an unpredictable world, preparedness is not just a virtue—it’s a necessity. From sudden power outages to unexpected cold snaps or adventurous camping trips, having a reliable source of heat and a means to cook can make all the difference. While many commercial solutions exist, they often come with a hefty price tag or rely on specific fuel types that might not always be accessible. This is where the ingenuity of DIY projects shines. Imagine creating a versatile, dual-purpose emergency heater and stove right from the comfort of your home, using mostly recycled materials you might already have on hand.
This comprehensive guide will walk you through building an incredibly efficient and robust alcohol stove that serves both as a heater to keep you warm and a portable cooktop for your culinary needs. What makes this project even more remarkable is its simplicity, cost-effectiveness, and sustainability. You won’t need specialized tools or expensive components; just a few basic items and a desire to be self-sufficient. This innovative design, inspired by the practical wisdom of desertsun02 on YouTube, offers an invaluable solution for emergencies, outdoor adventures, or simply honing your survival skills.
Why a DIY Emergency Heater & Stove is Essential
The need for a dependable heat source and cooking method becomes critical during various scenarios. Power outages can render your electric stove and heating systems useless, leaving you vulnerable to cold and hunger. Natural disasters like storms or floods can disrupt essential services for extended periods. Even outside of emergencies, this DIY stove is perfect for camping, backpacking, or simply enjoying the outdoors where a compact, lightweight, and efficient cooking solution is paramount.
Commercial camping stoves often rely on propane or butane canisters, which can be costly and difficult to resupply in remote areas or during crises. Our DIY alcohol stove, however, uses readily available 70% isopropyl alcohol, which is common in most households and pharmacies. Its simple construction means fewer parts to break and easy repairs, making it a reliable choice when professional help or specialized equipment is out of reach. Embracing this DIY project means taking a proactive step towards greater independence and resilience.
Understanding the Design Principles of Your Tin Can Stove
At its core, this dual-purpose device operates on the principles of an alcohol-fueled wick stove. The smaller can acts as a fuel reservoir, holding the isopropyl alcohol, while the cotton balls serve as a wick, drawing the alcohol up for a controlled and steady burn. The larger can encases this system, and the surrounding dirt acts as both insulation and a structural stabilizer, helping to concentrate the heat upwards and outwards efficiently. This design creates a stable platform for cooking utensils while also radiating warmth, making it incredibly versatile.
Alcohol stoves are known for their clean burn and relatively quiet operation compared to gas stoves. They produce a steady flame that is effective for boiling water, simmering food, and providing a localized heat source. The brilliance of this specific design lies in its simplicity and the ability to achieve significant heat output from such humble materials, transforming everyday items into a critical survival tool.
Materials: Gathering Your Recycled Components
One of the most appealing aspects of this project is its reliance on commonly found and recycled items. Before you begin, gather the following:
- 1 Large Metal Can: Think along the lines of a coffee can, a large vegetable can, or even a gallon paint can (cleaned thoroughly). The larger the can, the more fuel it can accommodate, potentially offering a longer burn time and a wider base for stability. Ensure it’s made of metal and has no plastic linings that could melt.
- 1 Small Metal Can: A tuna can, a small fruit can, or a tomato paste can will work perfectly. This can needs to fit comfortably inside the larger can, leaving a significant gap around its perimeter for the dirt and allowing for airflow.
- Funnel: Any standard kitchen funnel will do. It’s essential for neatly adding the dirt between the two cans without making a mess.
- Dirt/Sand: Plain garden dirt, sand, or even fine gravel can be used. Its primary roles are insulation, stability, and creating a compact structure around the fuel reservoir. Ensure it’s dry to prevent moisture from affecting performance.
- Cotton Balls: These are crucial for wicking the alcohol. A handful of standard cotton balls will suffice. Alternatively, clean cotton fabric scraps (like from an old T-shirt) can be torn into strips and packed into the small can to act as a wick.
- 70% Isopropyl Alcohol: This is your primary fuel source. Commonly found in pharmacies, it burns cleanly and effectively. While other alcohols like denatured alcohol can also work, isopropyl is generally safer and more accessible. Absolutely avoid gasoline, kerosene, or other highly volatile petroleum-based fuels, as they are extremely dangerous for this type of stove and can lead to explosions or uncontrolled fires.
Directions: Step-by-Step Guide to Building Your DIY Stove
Constructing your dual-purpose heater and stove is straightforward. Follow these steps carefully to ensure a safe and effective build.
Step 1: Assembling the Core Structure and Fuel System
Begin by ensuring both your large and small cans are clean and dry. Place the smaller can centrally inside the large can. It’s important to have a noticeable gap, perhaps an inch or more, all around the smaller can within the larger one. This gap is critical for filling with dirt and allowing proper heat transfer and airflow. Next, insert your funnel into this gap, positioning it so that you can easily pour material into the space between the two cans. Carefully fill the large can all around the small can with your chosen dirt or sand. Pack it down gently but firmly to create a stable base and efficient insulation. Continue filling until the dirt is almost at the rim of the large can, leaving about half an inch to an inch of space from the top for safety and flame management. This packed dirt will stabilize the inner can and help radiate heat.
Now, direct your attention to the smaller, inner can. Insert a generous number of cotton balls into this can, packing them lightly but ensuring they fill the space without being overly compressed. These cotton balls will act as the wick for your alcohol fuel. Once the cotton balls are in place, carefully pour 70% isopropyl alcohol into the smaller can, saturating the cotton balls completely. You want the cotton balls to be fully soaked, with a small pool of alcohol visible at the bottom, but avoid overfilling to the point where alcohol could easily spill out. With the fuel ready, carefully light the soaked cotton balls using a long-stem lighter or an extended match for safety. The flame will initially be small, but as the alcohol heats up and wicks effectively, it will grow into a steady, clean-burning flame.
Step 2: Setting Up for Cooking and Extinguishing
Once your tin can stove is lit and burning steadily, you can easily transform it into a functional cooking surface. To do this, you’ll need to create a stable platform for your cooking pot or pan. Take two additional large cans (similar in size to the outer can of your stove, or slightly larger) and place one upside down on each side of your burning stove. These cans will serve as sturdy risers. Ensure they are positioned to create a level and secure surface for your cookware, elevating it above the flame while allowing adequate airflow for efficient combustion. Carefully place your pan or pot on top of these two inverted cans, ensuring it is stable and balanced. The heat from the alcohol flame will now be directed efficiently towards the bottom of your cookware, allowing you to start cooking.
This setup is surprisingly effective for various cooking tasks. For instance, if you want to cook eggs, you’ll find that they will typically be ready in about 2 minutes, depending on your desired doneness and the pan’s heat. You can boil water for coffee or rehydrating freeze-dried meals, warm up canned goods, or fry small items. Monitor your cooking closely, as the heat output is consistent but not easily adjustable like a conventional stove. Once your cooking is complete, or when you simply wish to extinguish the flame, the simplest method is to gently blow air into the fire. For a more controlled and fuel-efficient method, you can also carefully place a non-flammable lid (like a metal saucer or another empty can) over the smaller fuel can to smother the flame, starving it of oxygen. Always ensure the flame is completely out before moving the stove or leaving it unattended.
Safety Precautions and Best Practices
While this DIY stove is simple and effective, safety must always be your top priority. Alcohol is a flammable fuel, and open flames require careful handling:
- Ventilation is Key: Always use this stove in a well-ventilated area. Never use it indoors without proper ventilation, as burning alcohol can produce carbon monoxide, an odorless and colorless gas that can be deadly.
- Stable Surface: Place your stove on a flat, non-flammable, and stable surface. Concrete, dirt, or rock are ideal. Avoid wooden tables, plastic surfaces, or any uneven ground where the stove could tip over.
- Keep Clear of Combustibles: Ensure there are no flammable materials like paper, cloth, dry leaves, or tents nearby when the stove is in use. Maintain a safe perimeter around the burning stove.
- Never Leave Unattended: An open flame, especially in an emergency context, should never be left unsupervised. Always have an adult present while the stove is burning.
- Fuel Storage: Store isopropyl alcohol in its original container, tightly sealed, and away from heat, open flames, and out of reach of children and pets.
- Refueling: Never attempt to refuel the stove while it is burning or still hot. Allow it to cool completely before adding more alcohol. Refueling a hot stove can lead to dangerous flare-ups.
- Proper Extinguishing: As mentioned, blowing out the flame is an option, but smothering it with a non-flammable lid is safer and helps conserve fuel. Ensure the flame is completely extinguished before packing away or storing.
- Handling Hot Components: The cans will become extremely hot during operation. Use heat-resistant gloves or tongs if you need to move or handle the stove after it has been burning.
- Children and Pets: Keep young children and pets at a safe distance from the operating stove.
Tips for Optimal Performance and Usage
- Fuel Efficiency: To maximize burn time, ensure the cotton balls are well-packed but not overly compressed, allowing for good wicking. Avoid overfilling the fuel reservoir, as this can lead to spills and wasted fuel.
- Heat Regulation: While this simple design doesn’t offer precise heat control, you can somewhat regulate it by partially covering the flame with a metal lid (leaving enough space for oxygen) or adjusting the distance of your pot from the flame using taller or shorter support cans.
- Cookware Choice: Lightweight camping pots and pans work best. Avoid heavy cast iron, which takes longer to heat up. Flat-bottomed cookware will ensure even heat distribution.
- Wind Protection: In windy conditions, the flame can be easily affected, reducing efficiency. Consider creating a simple windbreak around the stove using rocks or a metal sheet, ensuring it doesn’t impede ventilation.
- Maintenance: After each use, ensure the stove is cool, clean out any debris from the dirt, and replenish the alcohol if needed. Store it in a dry place.
- Experimentation: Don’t be afraid to experiment with different can sizes or wicking materials (e.g., denim strips) to find what works best for your specific needs. Always prioritize safety during any experimentation.
Environmental Impact & Sustainability
This DIY project is a testament to sustainable living and resourcefulness. By repurposing everyday tin cans, you’re not only creating a valuable tool but also reducing waste. The use of readily available alcohol as fuel, which burns relatively cleanly compared to fossil fuels, further enhances its eco-friendly profile. This approach encourages a mindset of making the most of what you have and reducing reliance on manufactured goods, contributing to a more sustainable lifestyle.
Conclusion: Your Ready-to-Use Emergency Solution
With these simple steps, you’ve transformed a few recycled cans and household supplies into a powerful, dual-purpose emergency heater and stove. This DIY project provides not just a practical tool for survival, camping, or unexpected outages, but also a profound sense of accomplishment and preparedness. The ability to generate warmth and cook a hot meal when conventional methods are unavailable is truly empowering. Embrace this ingenuity, and you’ll always be a step ahead in facing life’s uncertainties.
We extend our sincere thanks to desertsun02 via YouTube for sharing such an invaluable and inspiring project. If you enjoyed building this practical stove and heater, we highly recommend visiting his channel and subscribing for more innovative DIY solutions and survival tips!