
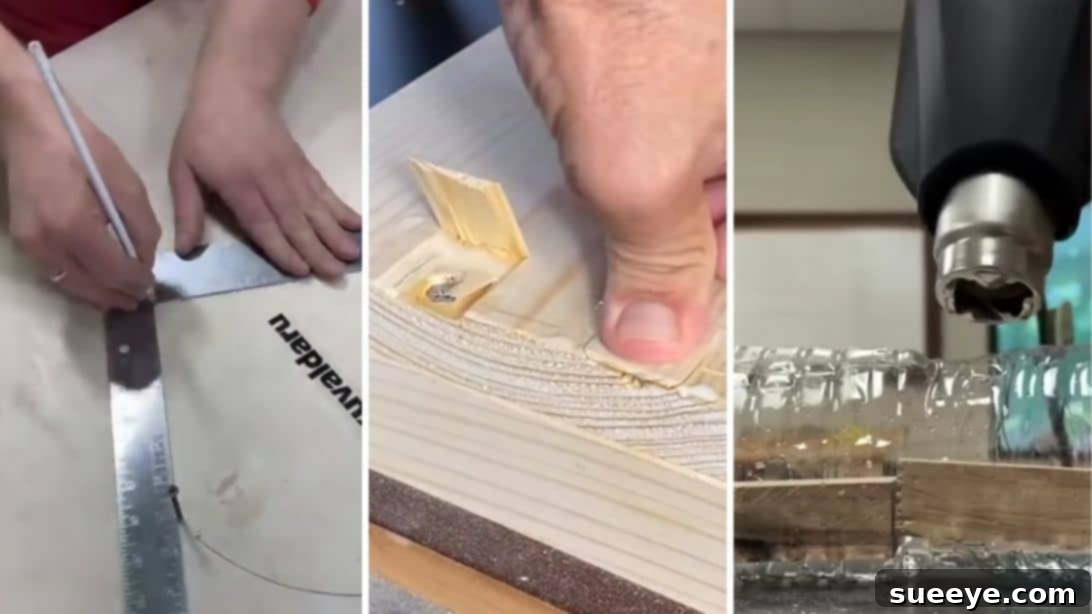
Unlocking Woodworking Mastery: Genius Tips & Hacks for Every Craftsman
Whether woodworking is a cherished hobby, a passion project, or a thriving source of income, continuously refining your skills and discovering smarter techniques is key to achieving exceptional results. The world of woodworking is rich with innovative solutions, and sometimes, the simplest tricks can revolutionize your craft. We’ve compiled a list of ingenious woodworking tips and hacks that promise to transform your workflow, making your projects smoother, more precise, and ultimately, more satisfying. After integrating even just one of these clever methods into your routine, you’ll likely wonder how you ever managed without them. These practical solutions are inspired by the creative insights shared by Quantum Tech HD on YouTube, a fantastic resource for DIY enthusiasts looking to elevate their game.
Essential Materials for Your Woodworking Toolkit
Many of these innovative woodworking hacks leverage common materials you likely already have or can easily acquire. Having these items on hand will equip you to tackle various challenges, from minor repairs to intricate joinery, with confidence and efficiency. Here’s a quick list of what you might need:
- Wood (for projects and practice)
- Wood glue (a staple for strong bonds and creative repairs)
- Sanding machine (for flawless finishes)
- Powdered wood or sawdust (your secret weapon for invisible repairs)
- Chisel (for precise cuts and hidden joinery)
- Plastic bottle (an unexpected hero for secure, lightweight connections)
- Heat gun (for versatile applications, including plastic bonding)
- L square ruler (reimagined for perfect curves)
- Pen (for marking and drafting)
Mastering Your Craft: Revolutionary Woodworking Directions & Hacks
Hack #1: The Perfect Fit – Solving Mismatched Wood with Clever Wedges
Encountering a slightly undersized tenon or a gap in a joint can be a frustrating setback in any woodworking project. This brilliant hack offers an elegant and robust solution to achieve a perfect, snug fit, even when your pieces aren’t precisely matched. Instead of recutting or discarding wood, you can subtly expand the end of a wooden component, ensuring a tight and durable connection.
How It Works: Begin by carefully identifying the edge of your wooden piece that needs slight expansion. Using a fine-toothed saw, cut two shallow, parallel lines into the end of the wood. These cuts should be made precisely and consistently to create narrow channels. The distance between these lines will determine the width of the thin fragments you’ll insert. Next, prepare two thin wooden fragments – these can be slivers of scrap wood or purpose-cut wedges – that fit snugly into the created gaps. Gently insert these thin fragments into the saw kerfs. Once positioned, carefully hammer them down tightly. As the fragments are driven in, they exert outward pressure, subtly widening the end of your original wood piece. This expansion effectively eliminates the mismatch, locking the component securely into its intended place. For added strength and longevity, a small amount of wood glue can be applied to the fragments before hammering them in, ensuring a permanent and almost invisible repair or adjustment. This technique is invaluable for achieving professional-grade joinery without the need for extensive rework.
Hack #2: The L-Square Compass – Drawing Perfect Circles with Ease
Drawing large, accurate circles in woodworking often requires specialized tools like a beam compass, which might not always be available or suitable for every size. This ingenious hack transforms a standard L-square ruler, a common tool in every workshop, into an incredibly efficient and versatile compass. It allows you to scribe perfect circles of various diameters with precision, making it ideal for tabletops, decorative inlays, or any project requiring radial symmetry.
How It Works: To begin, select two small nails or pins. The distance between these two nails will directly correspond to the radius of your desired circle. For instance, if you want a 10-inch radius, place the nails 10 inches apart. Carefully insert these two nails into your workpiece at the desired center point, ensuring they are firm but not obstructing the L-square’s movement. One nail acts as the fixed pivot point, and the other as a guide. Position your L-square ruler such that one arm rests against the fixed pivot nail, and the other arm aligns with the guide nail. Then, place your pen firmly in the inner corner of the L-square, where the two arms meet at a right angle. With a steady hand, slowly and smoothly slide the ruler around the fixed pivot point, using the guide nail to maintain the consistent radius. As you rotate the ruler, the pen, held firmly in the corner, will trace a perfectly shaped circle on your wood surface. This method provides excellent control and accuracy, making it an indispensable technique for any woodworker needing to draw precise arcs and circles without specialized equipment.
Hack #3: The Invisible Repair – Erasing Cracks and Imperfections with Sawdust and Glue
Cracks, small gaps, or minor imperfections are an inevitable part of woodworking, whether from natural wood movement or the occasional miscalculation. Rather than letting these blemishes compromise the aesthetics of your project, this brilliant hack offers an incredibly effective way to make them vanish, leaving an undetectable repair that blends seamlessly with the surrounding wood. This technique relies on creating a custom wood filler that perfectly matches your material.
How It Works: The secret lies in combining wood glue with powdered wood or fine sawdust from the same type of wood you are working with. This ensures the filler will have a similar color and grain characteristic. Start by applying a generous amount of wood glue directly to the area where you want to hide the cracks, joints, or defects. Ensure the glue penetrates deep into the void. While the glue is still wet, liberally sprinkle or press a generous amount of powdered wood or sawdust onto the glued area. Once the sawdust covers the glue, use your finger, a small block of wood, or a putty knife to vigorously rub the sawdust into the glue. This action forces the sawdust into every crevice, mixing it thoroughly with the adhesive to form a strong, custom-colored filler. Allow the mixture to dry completely, following the glue manufacturer’s recommendations. Once dry, the repaired area will be hard and ready for finishing. Use a sanding machine, starting with a coarser grit and progressing to finer grits, to smoothen out the filled area. Sand until it is perfectly flush with the surrounding wood, revealing an almost invisible repair that accepts stains and finishes just like the original material, ensuring a flawless and professional outcome.
Hack #4: The Concealed Fastener – Joining Wood Without a Trace
For projects where exposed screw or nail heads would detract from the aesthetic, or for applications where a strong, hidden mechanical bond is desired, this sophisticated hack provides an elegant solution. It allows you to secure wood pieces together using fasteners while maintaining a pristine, unblemished surface. This method is particularly useful for fine furniture making, decorative panels, or any high-visibility joinery.
How It Works: The key to this hack is creating a “trapdoor” for your fastener. Begin by carefully chiseling out a thin, rectangular veneer from the upper layer of the wood surface where you intend to place your fastener. The chisel cut should be precise and shallow, creating a small, removable lid of wood. Lift this chiseled piece away. Now, insert your nail or screw into the exposed wood beneath the removed veneer, securing the joint firmly. Once the fastener is in place, apply a small amount of wood glue to the underside of the chiseled-out veneer piece and carefully reattach it into its original position, ensuring it aligns perfectly with the grain. To ensure a tight and level bond, place some weights or clamps on top of the reattached wood veneer. This pressure will help the glue set evenly and prevent any bulging. Allow ample time for the glue to dry completely, following the manufacturer’s guidelines. Once dry, the veneer will be firmly reattached, effectively hiding the fastener. Finally, use a sanding machine to gently smoothen out the area, making the repaired section completely flush with the surrounding surface. With careful execution, the result is an impeccable, unmarred finish where the fastener remains entirely concealed, showcasing truly expert craftsmanship.
Hack #5: Innovative Plastic Bottle Joinery – Strong & Lightweight Connections
When working with light wood pieces, especially for models, prototypes, or decorative items where weight and cost are considerations, traditional joinery might be overkill or impractical. This innovative hack presents an incredibly sturdy, lightweight, and cost-effective method for joining two pieces of light wood using an unexpected material: a plastic bottle. This technique leverages the thermoplastic properties of common plastics to create custom-fit connectors.
How It Works: Start by selecting a clean plastic bottle, preferably one made of PET (like water bottles or soda bottles), as these are easily thermoformed. Carefully cut out a section from the bottle’s body to create a rectangular or strip-like piece of plastic. The size of this plastic piece should be appropriate for the joint you want to create. Position the two light wood pieces you intend to join, ensuring they are aligned correctly. Then, place the cut-out plastic strip around the joint, effectively creating a sleeve that encompasses both wood pieces. The wood pieces should be inserted into each side of the plastic sleeve. With the wood pieces held firmly within the plastic, take a heat gun and apply heat evenly to the plastic. As the plastic heats, it will begin to soften and shrink, conforming tightly to the shape of the wood. The goal is to melt and shrink the plastic just enough so that it encapsulates and attaches securely to the wood, forming a strong, custom-molded bond. Be careful not to overheat the plastic or scorch the wood. Once the plastic has cooled and solidified, you’ll find that the two wood pieces are firmly attached. This method creates a surprisingly robust connection that is both lightweight and incredibly inexpensive, offering a unique solution for various lightweight woodworking applications.
*All image credit for the inspiring visuals in this article belongs to Quantum Tech HD via YouTube. We highly recommend following and subscribing to their channel for more innovative woodworking and DIY content!
Elevate Your Woodworking: 5 Genius Tips & Hacks for Every Project
These five genius woodworking tips and hacks represent just a glimpse of the endless innovation possible in the world of crafting with wood. From ingenious methods for achieving seamless joints and repairing imperfections to clever ways of utilizing everyday items for precision tasks, these techniques are designed to save you time, reduce waste, and enhance the quality of your finished projects. Whether you are a seasoned woodworker looking for new tricks or a beginner eager to master essential skills, incorporating these smart solutions will undoubtedly improve your efficiency and satisfaction. Experiment with these ideas, adapt them to your specific needs, and watch as your woodworking prowess reaches new heights. Happy crafting!