
Transform Your Tiles: A Comprehensive Guide to Painting Kitchen and Bathroom Tiles with Chalk Paint
Are you looking to give your kitchen or bathroom a fresh, modern update without the hassle and expense of a full renovation? Old, outdated, or discolored tiles can drastically diminish the appeal of any space. However, replacing them often involves significant time, mess, and financial investment. What if there was a simpler, more budget-friendly solution to breathe new life into your tiled areas?
Enter the world of tile painting! This ingenious DIY method allows you to completely transform the look of your tiles, giving them a vibrant new finish that can complement any decor style. When I first discovered this incredible tile painting video tutorial by Do It On A Dime on YouTube, my mind immediately went to a friend who had just moved into a new home. Her kitchen featured an outdated eighties tile design that desperately needed a modern touch. I immediately shared the video, and she was thrilled by the potential for a quick, affordable transformation. She wasted no time heading to the store to gather her supplies, and together, we embarked on a tile painting adventure that yielded phenomenal results. This method is surprisingly quick, incredibly easy, and involves just a few key steps to achieve a stunning update.
For our project, we opted for Annie Sloan Chalk Paint, a high-quality, pre-made chalk paint renowned for its excellent adhesion and beautiful matte finish. However, if you’re looking for an even more economical option, you can easily create your own chalk paint by adding Plaster of Paris to ordinary flat wall paint. This DIY chalk paint recipe is highly effective and something I’ve personally used many times with great success.
Why Choose Chalk Paint for Your Tile Transformation?
Chalk paint has become a favorite among DIY enthusiasts for good reason. Its unique properties make it an ideal choice for refreshing outdated tiles:
- Exceptional Adhesion: Chalk paint is formulated to adhere well to many surfaces, including the notoriously slick finish of ceramic tiles, often requiring minimal prep work.
- Minimal Preparation: While some sanding and priming are essential for tile painting durability, chalk paint generally requires less rigorous preparation compared to other paint types.
- Beautiful Matte Finish: It dries to a lovely, velvety matte finish that can instantly modernize a space, providing a sophisticated look.
- User-Friendly: Chalk paint is incredibly easy to work with. It applies smoothly, dries relatively quickly, and is forgiving, making it perfect for DIY beginners.
- Versatile Color Options: Whether you choose a classic pre-made brand like Annie Sloan or mix your own, the color possibilities are endless, allowing you to perfectly match your home’s aesthetic.
- Cost-Effective: Painting tiles is significantly cheaper than replacing them, offering a high-impact transformation on a modest budget.
Planning Your Tile Painting Project
Before you dive in, a little planning goes a long way to ensure a smooth and successful tile painting project:
- Assess Your Tiles: Examine the condition of your existing tiles. Are there any cracks or loose areas? Address these repairs before painting. Consider the type of tile; chalk paint works best on ceramic or porcelain.
- Select Your Colors Wisely: Choose a color that complements your existing decor. Consider testing a small, inconspicuous area or using paint samples to ensure you love the shade in your space’s lighting. Lighter colors can make a room feel larger and brighter.
- Budgeting for Success: Factor in the cost of paint, primer, sealer, and all necessary tools. While painting is budget-friendly, investing in quality materials will ensure a more durable and professional finish.
- Time Commitment: Allow ample time for cleaning, sanding, multiple paint coats, and crucial drying and curing times. Rushing the process can compromise the final result. A typical project might take a full weekend, with curing lasting several days to weeks.
- Ventilation is Key: Ensure the area is well-ventilated, especially when working with primers and sealers, which can have strong fumes. Open windows, use fans, and wear a mask.
Essential Materials For Tile Painting:
Gathering all your supplies beforehand will make the process much smoother. Here’s a comprehensive list of what you’ll need for a durable and beautiful tile transformation:
- Chalk Paint:
- Annie Sloan Chalk Paint (or your preferred brand)
- Alternatively, ingredients for DIY chalk paint: flat latex wall paint and Plaster of Paris (refer to this recipe)
- Primer/Undercoat:
- High-quality epoxy paint undercoat – essential for adhesion and durability, especially in wet areas.
- Sanding Tools:
- An electric sander (orbital sander is great for large areas)
- Medium-grit sandpaper (around 120-180 grit) for initial sanding
- Fine-grit sandpaper (220 grit) for light sanding between coats (optional, but recommended for smoothness)
- Sanding sponge or block for corners and edges
- Application Tools:
- A paint roller with a short-nap cover (e.g., 1/4 inch or foam roller) for a smooth finish
- A paintbrush (angled sash brush) for cutting in edges, grout lines, and detailed areas
- Paint trays and liners
- Cleaning Supplies:
- TSP (Trisodium Phosphate) cleaner or a strong degreaser/sugar soap
- Sponges or scrubbing brushes
- Clean rags or microfiber cloths
- Bucket for cleaning solutions
- Masking and Protection:
- Painter’s tape (high-quality, like Frog Tape, for crisp lines)
- Drop cloths or plastic sheeting to protect floors and adjacent surfaces
- Safety Gear:
- Protective gloves
- Safety glasses
- Respirator mask (especially when sanding and using solvent-based primers/sealers)
- Topcoat/Sealer:
- Durable water-based polyurethane (satin or matte finish recommended) or a clear epoxy sealer – absolutely crucial for protecting your painted tiles, especially in high-moisture or high-traffic areas.
Step-by-Step Directions for Painting Your Tiles:
This tile painting video tutorial by Do It On A Dime on YouTube provides an excellent visual guide, and here we’ll break down the process into detailed steps to ensure a flawless finish.
Step 1: Thorough Cleaning – The Foundation of Success
The most critical step for any painting project, especially on tiles, is proper cleaning. Any grease, grime, soap scum, or residue will prevent the primer and paint from adhering correctly, leading to peeling. Start by sweeping or vacuuming the tiled area to remove loose dirt. Then, use a heavy-duty cleaner like TSP (Trisodium Phosphate) or a strong degreaser. Mix it according to the manufacturer’s instructions and scrub the entire tile surface and grout lines meticulously. Rinse the area multiple times with clean water until no residue remains. Allow the tiles to dry completely – this can take several hours, so don’t rush it.
Step 2: Prepare and Protect Your Space
Before sanding or painting, protect surrounding areas. Use high-quality painter’s tape to mask off baseboards, cabinet edges, walls, and any other surfaces you don’t want painted. Lay down drop cloths or plastic sheeting to cover floors, furniture, and countertops. Ensure the room is well-ventilated by opening windows and using fans. Safety first: put on your gloves, safety glasses, and a respirator mask.
Step 3: Sanding for Optimal Adhesion
Even with chalk paint’s good adhesion, roughing up the glossy surface of ceramic tiles is essential for the primer and paint to truly grip. Attach medium-grit sandpaper (120-180 grit) to your electric sander. Sand the entire tiled area, applying even pressure. Pay attention to corners and edges, using a sanding sponge or block where the electric sander can’t reach. The goal isn’t to remove the tile’s finish entirely, but to create a dull, slightly textured surface. After sanding, thoroughly vacuum all sanding dust, then wipe down the tiles with a damp cloth, followed by a dry one, to ensure a dust-free surface.
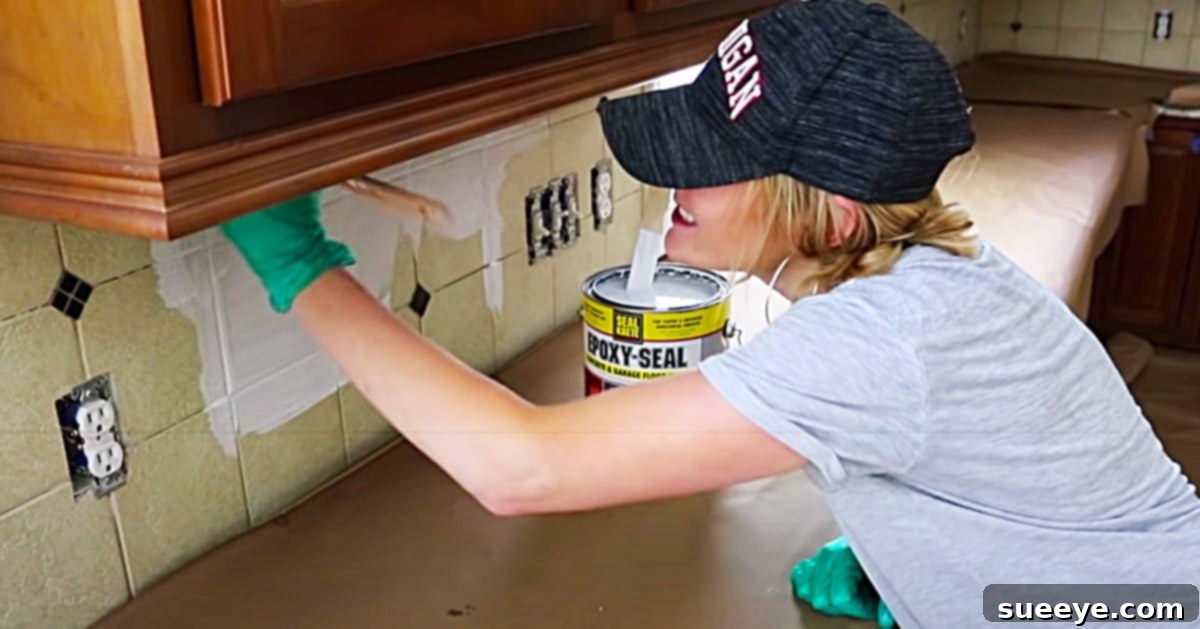
Step 4: Apply the Epoxy Undercoat – Your Durability Partner
This is a crucial step often overlooked but vital for the longevity of your painted tiles, especially in high-moisture areas like kitchens and bathrooms. An epoxy undercoat provides a super-strong bond that chalk paint can adhere to, preventing chipping and peeling down the line. Mix the epoxy primer according to the manufacturer’s instructions. Use a paintbrush to cut in around the edges and grout lines, then use a roller for the main tile surfaces. Apply thin, even coats to avoid drips and uneven texture. Allow the primer to dry completely as per the manufacturer’s recommended drying time, which can be several hours or overnight.
Step 5: Apply Your Chosen Chalk Paint
Now for the exciting part – adding color! Stir your chalk paint thoroughly. Using a paintbrush, carefully paint the grout lines and edges first. Then, switch to a short-nap roller for the main tile surfaces. Apply the paint in thin, even coats. Avoid applying it too thick, as this can lead to bubbling or uneven drying. Allow each coat to dry completely before applying the next. Chalk paint typically dries quickly, but always check the manufacturer’s guidelines. You’ll likely need two to three coats to achieve full, opaque coverage, depending on your chosen color and the original tile color. For an extra smooth finish, you can very lightly sand with 220-grit sandpaper between coats, wiping away any dust.
The results after this stage are already so phenomenal! The transformation is truly striking, and the fresh, bright, and cheerful appearance of the newly painted tiles is incredibly satisfying.
Step 6: The Sealing Process – Ensuring Long-Lasting Durability
This step is non-negotiable, especially for tiles in wet or high-traffic areas like kitchens and bathrooms. Chalk paint alone is not durable or waterproof enough to withstand daily wear and tear. A robust topcoat is essential for protecting your beautiful new finish. You have a couple of options:
- Water-Based Polyurethane: Apply 2-3 thin, even coats of a good quality water-based polyurethane (matte or satin finish to maintain the chalk paint look). Apply with a clean roller or brush, allowing each coat to dry fully according to the manufacturer’s instructions.
- Clear Epoxy Sealer: For ultimate durability and water resistance, especially in shower areas or highly used floors, consider a clear epoxy sealer. This will create a rock-hard, protective layer. Follow the product instructions meticulously as epoxy can be more sensitive to mixing and application.
Crucially, allow the sealer to **fully cure** before subjecting the tiles to heavy use. “Dry to touch” is not “cured.” Curing can take anywhere from a few days to several weeks, depending on the product and environmental conditions. Refer to the manufacturer’s guidelines and avoid placing heavy objects, scrubbing, or drenching the area during this time.
Tips for Success and Troubleshooting
- Smooth Finish: Achieve a professional-looking smooth finish by using a high-quality short-nap roller. Apply paint in thin, even coats, and consider a light sanding with fine-grit sandpaper (220 grit) between paint coats for an ultra-smooth surface.
- Grout Lines: Decide whether you want to paint the grout lines the same color as the tiles or keep them contrasting. Painting them the same color creates a seamless, modern look. If leaving them natural, tape them off meticulously.
- Durability Boost: Never skip the epoxy primer and the final topcoat. These two steps are paramount to the longevity and performance of your painted tiles, especially in moisture-prone areas.
- Proper Curing Time: Patience is a virtue! Allowing adequate drying and curing time for all layers (primer, paint, sealer) is the single most important factor for a durable finish.
- Gentle Maintenance: Once cured, clean your painted tiles with gentle, non-abrasive cleaners and soft cloths. Avoid harsh chemicals, abrasive sponges, or steam cleaners, which can damage the finish over time.
- Common Mistakes to Avoid: Rushing the prep work (cleaning and sanding), skipping the primer or sealer, applying paint in thick coats, and not allowing sufficient drying/curing time are the most common pitfalls.
Beyond the Kitchen and Bathroom
The versatility of chalk paint on tiles isn’t limited to just kitchens and bathrooms. Consider using this method to rejuvenate:
- Laundry Room Floors: A fresh coat of paint can brighten up a utilitarian space.
- Entryway Tiles: Create a welcoming first impression with a stylish tiled floor.
- Fireplace Surrounds: Update an old, dated fireplace hearth with a new color.
- Outdoor Patios (covered): With the right outdoor-specific sealer, you could even transform a covered patio or porch.
Conclusion: Your Tiles Await Their Transformation
Repainting your kitchen or bathroom tiles with chalk paint is a truly empowering and rewarding DIY project. It offers a cost-effective, time-efficient, and dramatically effective way to update your home’s aesthetics without the need for extensive demolition or high expenses. From the initial inspiration of the Do It On A Dime video to the stunning final results, this method proves that a little paint and effort can go a long way in achieving a fresh, modern look.
By following these detailed steps – from meticulous cleaning and proper priming to the careful application of chalk paint and a durable topcoat – you can achieve a professional-looking finish that will stand the test of time. Say goodbye to drab, dated tiles and hello to a vibrant, revitalized space that reflects your personal style. Grab your materials, embrace the DIY spirit, and prepare to be amazed by the transformative power of painted tiles!