
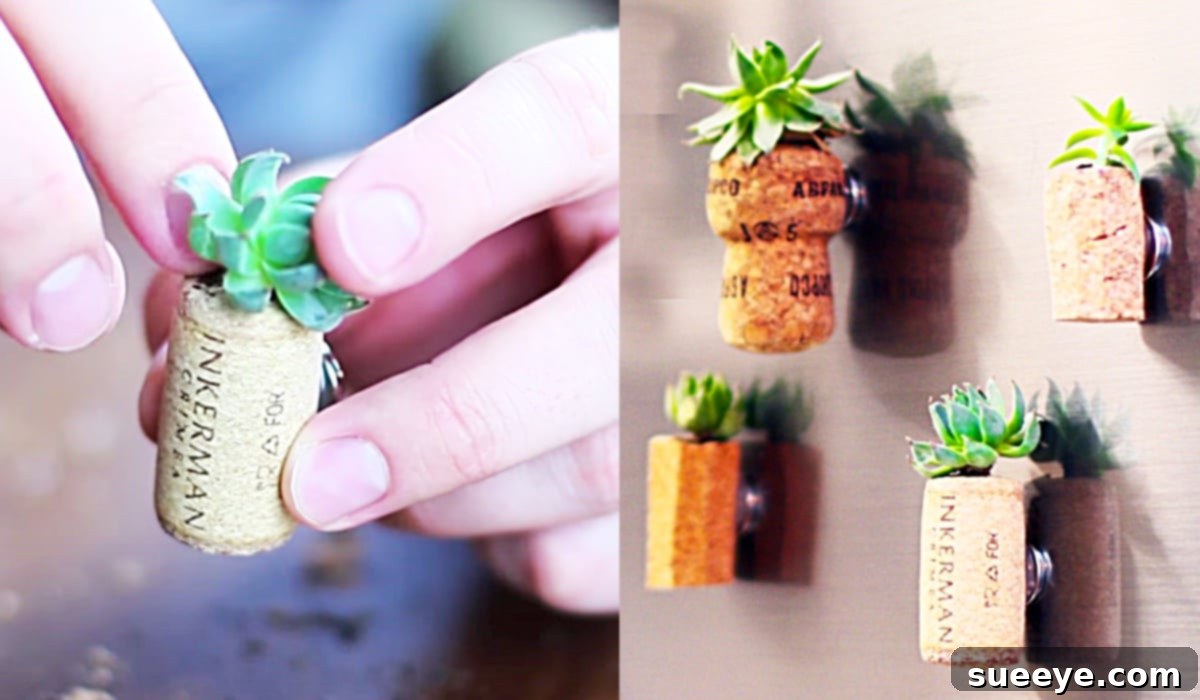
DIY Wine Cork Succulent Fridge Magnets: A Step-by-Step Guide to Adorable & Eco-Friendly Decor
Transform your kitchen or workspace into a greener, more vibrant area with charming DIY wine cork succulent fridge magnets. This incredibly easy and rewarding craft project offers a fantastic way to repurpose discarded wine corks, turning them into miniature planters for tiny succulents. Not only are these magnets a delightful addition to any magnetic surface, but they also serve as a testament to sustainable living and the beauty of handmade decor. Inspired by an ingenious video tutorial by Eureka on YouTube, this project promises an enjoyable crafting experience that yields beautiful, seemingly expensive results without breaking the bank. Imagine creating a personalized collection of these mini botanical wonders, bringing a touch of nature indoors with minimal effort and cost. The process is remarkably straightforward, requiring only a few basic materials, most of which you might already have on hand or can acquire affordably from a local craft store like Michael’s, especially with sales and coupons.
Why Craft Wine Cork Succulent Magnets? The Benefits of This Charming DIY
Beyond their undeniable cuteness, creating wine cork succulent magnets offers a myriad of benefits, making them a popular choice among DIY enthusiasts and plant lovers alike:
- Eco-Friendly Repurposing: This project is a fantastic example of upcycling. Instead of throwing away wine corks, you’re giving them a new life as charming planters, contributing to waste reduction and sustainable crafting.
- Affordable Home Decor: Compared to buying decorative magnets or small planters, crafting these succulent magnets is incredibly cost-effective. The main components—wine corks and mini succulents—are readily available and inexpensive, especially if you save your corks or utilize craft store sales.
- Personalized & Unique Gifts: Handmade gifts always carry a special touch. These magnets make thoughtful presents for friends, family, or teachers, perfect for housewarmings, birthdays, or just because. You can customize them to suit any recipient’s style.
- Easy & Beginner-Friendly: Even if you’re new to DIY or gardening, this project is remarkably simple. The steps are intuitive, and the tools required are minimal, ensuring a high success rate for crafters of all skill levels.
- Versatile Decoration: While perfect for fridges, these magnets can adorn any magnetic surface, including office whiteboards, school lockers, magnetic memo boards, or even a metal filing cabinet, instantly adding a touch of natural beauty.
- Low-Maintenance Greenery: Succulents are renowned for their resilience and minimal water requirements, making them ideal for busy individuals or those without a green thumb. These tiny cork planters are no exception, offering long-lasting beauty with little effort.
- Therapeutic Crafting Experience: Engaging in a hands-on project like this can be incredibly relaxing and satisfying. The process of creating something beautiful from scratch provides a wonderful sense of accomplishment and a mindful escape from daily stresses.
Essential Materials for Your Wine Cork Succulent Fridge Magnets
Gathering your supplies is the first exciting step in bringing these adorable magnets to life. The beauty of this project lies in its simplicity and the accessibility of its materials. Here’s a detailed look at what you’ll need:
- Wine Corks: The star of our show! You can either save your own recycled wine corks over time – a fun excuse to enjoy a few bottles! – or purchase a bag of new corks from a craft store. Both natural cork and synthetic corks can work, though natural cork tends to be easier to hollow out and has a more rustic appeal.
- Small Magnets: Choose flat-backed magnets that are strong enough to hold the cork and a tiny amount of soil and succulent. Ceramic disc magnets or strong neodymium magnets are excellent choices, often available in packs at craft stores or hardware shops. Ensure they are robust enough to prevent your finished magnet from sliding down your fridge.
- Mini Succulents: The smaller, the better for these cork planters. Look for succulent varieties that remain compact, such as sedums, sempervivums, tiny echeverias, or even small cuttings from larger plants. Michael’s and other garden centers often carry a selection of “mini succulents” specifically for small-scale projects. Their drought tolerance makes them perfect for this unique planting method.
- Potting Soil (for Succulents): Regular potting soil can retain too much moisture, which is detrimental to succulents. Opt for a fast-draining succulent and cactus potting mix to ensure your mini plants thrive. You’ll only need a small amount, so a small bag will last for many projects.
- An Exacto Knife or Craft Knife: This will be your primary tool for carefully hollowing out the wine corks. Ensure your blade is sharp for clean cuts and always exercise extreme caution when using it. A small carving tool set can also be useful for this step.
- A Drill Bit (small size) or Screwdriver: While an Exacto knife can hollow out the cork, a small drill bit (e.g., 1/4 inch or smaller) can make starting the hole much easier and create a cleaner initial cavity. Alternatively, a small flathead screwdriver can be used to carefully scrape and widen the hole, especially if you don’t have a drill.
- A Hot Glue Gun: Essential for securely attaching the magnet to the cork. A low-temperature glue gun is often sufficient and reduces the risk of burns.
- Glue Sticks: Ensure you have an ample supply of glue sticks for your hot glue gun.
- Optional: Small Tweezers or Chopstick: These tools can be incredibly helpful for gently placing and positioning the tiny succulents and distributing the soil without damaging the plant.
- Optional: Small Decorative Pebbles or Sand: A tiny layer of decorative pebbles or fine sand on top of the soil can add a polished finish and help retain some moisture while looking aesthetically pleasing.
Step-by-Step Directions: Crafting Your Own Succulent Masterpieces
Now that you have all your materials ready, let’s dive into the fun part of assembling your DIY wine cork succulent fridge magnets. Follow these easy steps to create your charming botanical decor:
Step 1: Preparing Your Wine Corks – Creating the Cavity
The first crucial step involves hollowing out a small portion of your wine cork to create a mini planter.
- Mark the Center: Carefully identify the wider end of the cork if there’s any slight taper, and choose that as the top. Using a pen or marker, lightly mark the center of one end of your wine cork.
- Initiate the Hole: If you’re using a drill, select a small drill bit (e.g., 1/4 inch) and carefully drill a shallow pilot hole in the center of your mark. This provides a clean starting point. If using an Exacto knife, gently score a small circle in the center.
- Hollow Out the Cork: This is where patience and precision come in. With your Exacto knife, slowly and carefully carve out a cavity in the cork. Aim for a depth of about 1/2 to 3/4 of an inch, leaving enough cork material around the sides and bottom to maintain structural integrity. Use a gentle scraping motion to remove small pieces of cork. If you’re using a screwdriver, you can carefully twist and scrape to widen the hole.
- Refine the Cavity: Ensure the cavity is wide enough to accommodate the roots of your mini succulent. Smooth out the edges as much as possible, but remember, perfection isn’t necessary; the natural texture of the cork adds to its charm. Always cut away from your body and keep your fingers clear of the blade.
Step 2: Attaching the Magnet for Secure Display
Once your cork planter is ready, it’s time to add the magnetic element that will allow it to adhere to your fridge or other metal surfaces.
- Identify the Base: Turn your hollowed cork upside down. The flat, un-carved end will be where your magnet goes.
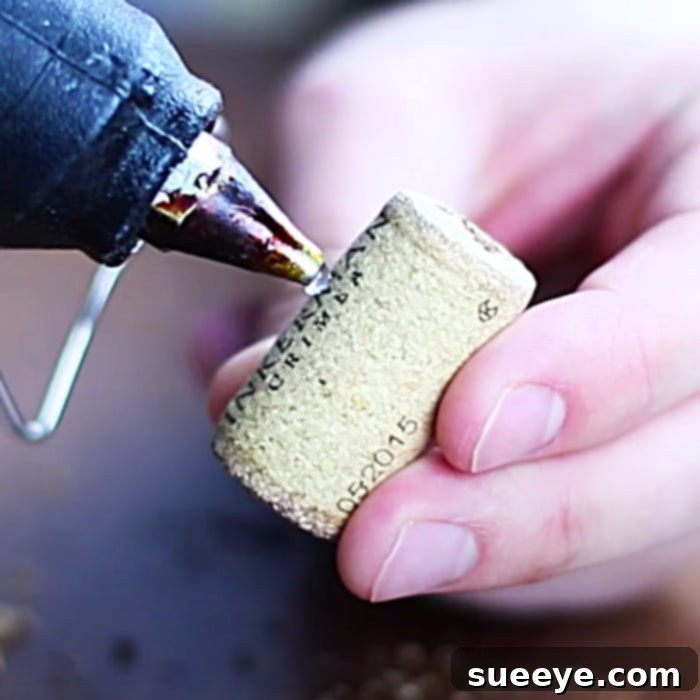
- Apply Hot Glue: Heat up your hot glue gun. Apply a generous dab of hot glue to the center of the un-carved end of the cork.
- Attach the Magnet: Quickly and firmly press one of your small magnets onto the hot glue. Hold it in place for a few seconds to ensure a strong bond as the glue cools and sets. Make sure the magnet is flush with the cork for optimal contact with your magnetic surface. Allow the glue to fully cure before moving to the next step, typically a minute or two.
Step 3: Planting Your Miniature Succulent Garden
This is where your wine cork transforms into a living piece of art!
- Add Potting Soil: Carefully spoon or sprinkle a small amount of succulent potting mix into the hollowed-out cork cavity. Fill it about halfway.
- Prepare the Succulent: Gently remove your mini succulent from its nursery pot. Carefully loosen any tightly packed roots. If you’re using a cutting, ensure it has callused over (dried at the cut end) before planting.
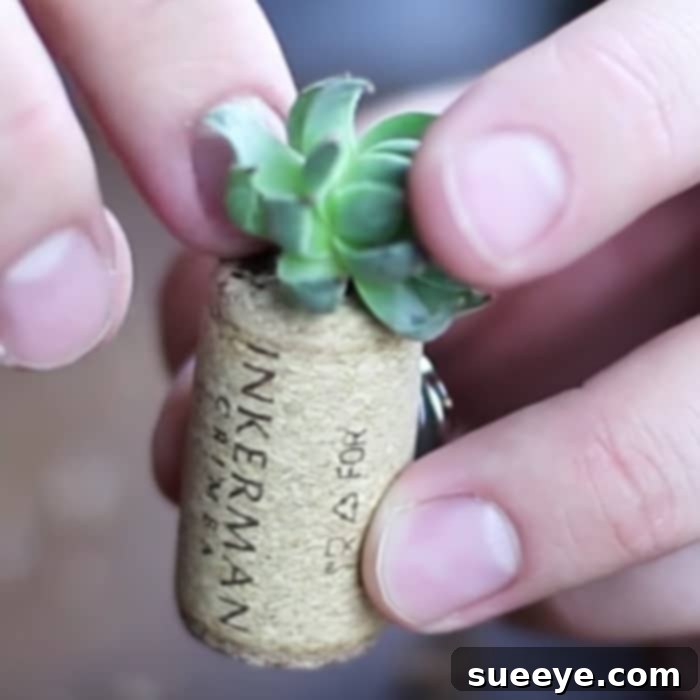
- Position the Succulent: Using tweezers or your fingers, gently place the succulent into the cork cavity. Center it and ensure the roots are nestled comfortably on the soil.
- Add More Soil: Carefully add more potting soil around the base of the succulent, filling the cavity to just below the rim. Gently pat the soil down to secure the plant, but avoid compacting it too much. You can use a small stick or the back of a spoon for this.
- Optional: Decorative Topping: For an extra touch of charm, you can add a tiny layer of decorative pebbles, sand, or fine gravel on top of the soil. This not only looks appealing but can also help to prevent the soil from washing out.
Caring for Your Wine Cork Succulent Magnets: Keeping Them Thriving
While succulents are famously low-maintenance, a little care goes a long way in ensuring your cork magnets remain vibrant and healthy for months, or even years. The key is understanding their specific needs, especially when confined to such a small planter.
- Watering Wisely: This is the most critical aspect of succulent care. Because corks are small and don’t have drainage holes, overwatering is the biggest threat. Water sparingly. A good rule of thumb is to water every 2-4 weeks, or when the soil is completely dry. Use a dropper or a small syringe to deliver a few drops of water directly to the soil. Avoid getting water on the succulent leaves if possible. If you notice the cork feeling very light, it’s likely time for a few drops of water.
- Light Requirements: Succulents love bright, indirect light. Place your magnets on a part of your fridge or magnetic surface that receives ample natural light throughout the day. Avoid direct, intense sunlight for prolonged periods, as this can scorch the delicate leaves of some succulents. If natural light is scarce, consider supplementing with a small grow light for a few hours a day.
- Air Circulation: Good air circulation is important for preventing fungal issues. Ensure your magnets aren’t tucked away in a humid, stagnant corner.
- Monitoring for Growth: As your succulents grow, they might eventually outgrow their cork home. This is a sign of a happy plant! When this happens, you can gently remove the succulent and repot it into a slightly larger traditional planter, then plant a new mini succulent in your cork magnet.
- Occasional Refresh: Every few months, you might want to check the soil. If it seems compacted or depleted, carefully remove the succulent, refresh the soil, and replant.
Creative Variations and Display Ideas for Your Cork Succulents
Once you’ve mastered the basic technique, there are endless ways to personalize and display your wine cork succulent magnets. Let your creativity bloom!
- Paint or Decorate the Corks: Before planting, you can paint the corks with acrylic paints, spray paint them in metallic hues, or even wrap them with decorative twine or ribbon for an added touch of flair.
- Mix and Match Succulent Varieties: Experiment with different types of mini succulents. The variety in shapes, textures, and subtle colors can create a stunning collection when grouped together.
- Add Decorative Toppings: Besides small pebbles, consider using colored sand, fine glitter, or even a tiny piece of preserved moss around the succulent for an enchanted garden look.
- Create a “Living Wall” on Your Fridge: Arrange multiple succulent magnets in a pattern or cluster them together to create a miniature vertical garden display on your refrigerator. This can be a real conversation starter!
- Gift Packaging: When giving them as gifts, present them in small decorative boxes with a care card. They make excellent party favors, wedding favors, or thoughtful additions to gift baskets.
- Seasonal Themes: Decorate the corks with tiny seasonal embellishments. For example, a small red bow for holidays or a tiny faux flower for spring.
- Beyond the Kitchen: Think about other places for these magnets. They can brighten up a dull office cubicle, add character to a locker, or serve as charming plant markers on a magnetic gardening board.
Safety Tips and Best Practices
While this is a relatively safe craft, a few precautions will ensure a smooth and enjoyable experience:
- Knife Safety: Always cut away from your body when using the Exacto knife. Keep fingers clear of the blade’s path. A cutting mat can protect your work surface. If you’re uncomfortable with a knife, consider using a small rotary tool or asking for assistance.
- Hot Glue Gun Safety: Be mindful of the hot tip and dispensed glue to avoid burns. Keep it on a heat-resistant surface.
- Succulent Handling: Some succulents have delicate leaves that can break easily, while others might have spines or sap that could irritate skin. Handle them gently, and if you have sensitive skin, consider wearing gloves.
- Magnet Strength: Ensure your magnets are strong enough to hold the cork and its contents, but not so strong that they might scratch delicate surfaces when removed or applied roughly.
Conclusion: Your Green Masterpiece Awaits
Crafting DIY wine cork succulent fridge magnets is an incredibly satisfying project that combines sustainability, creativity, and a love for nature. It’s a testament to how easily discarded items can be transformed into beautiful, functional, and cherished decor. Whether you’re looking to add a personal touch to your home, create unique gifts, or simply enjoy a relaxing crafting session, these miniature living magnets are sure to delight. The journey from a simple wine cork to a vibrant, living magnet is not just about making an object; it’s about embracing eco-conscious crafting, fostering a connection with nature, and enjoying the immense satisfaction of creating something truly special with your own hands. So gather your materials, follow these steps, and prepare to infuse your living space with these adorable, green masterpieces. We encourage you to try this fun and rewarding DIY – your fridge (and your succulents) will thank you!