
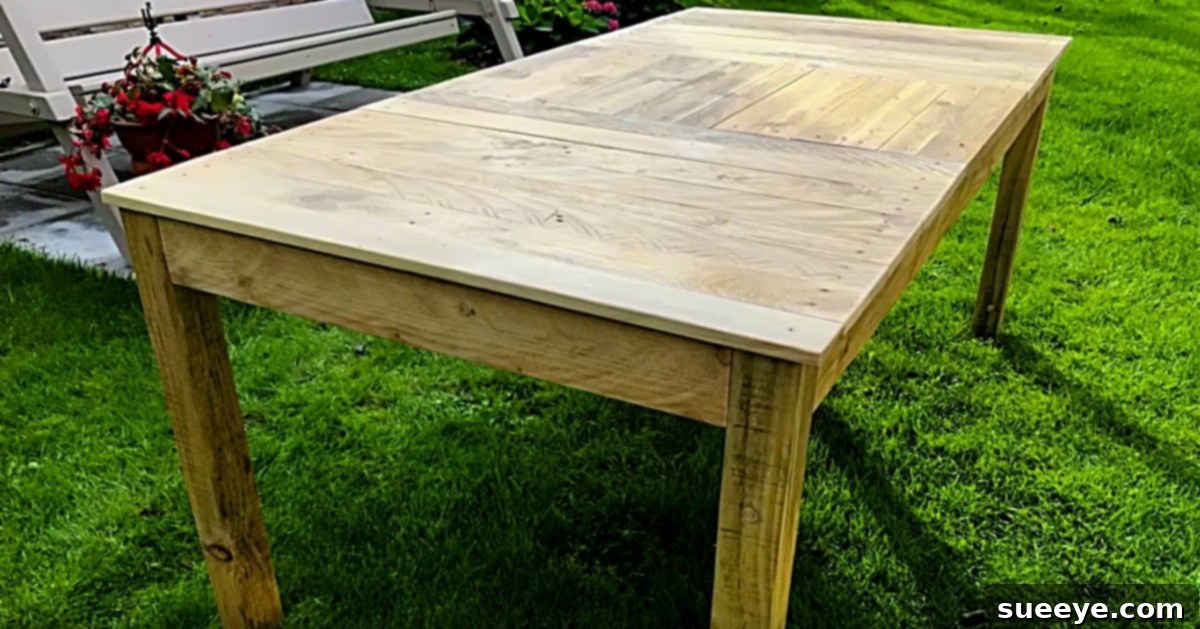
How To Make A Farmhouse Table Out Of Pallets
Discover the rewarding journey of transforming discarded wooden pallets into a beautiful and functional piece of furniture – a DIY Farmhouse Pallet Table. This project is not only incredibly cost-effective but also an excellent way to embrace sustainability by upcycling materials that would otherwise end up in landfills. Imagine creating a robust, rustic table perfect for your garden, patio, or even as a charming indoor accent, all while learning valuable woodworking skills.
The inspiration for this project often sparks from seeing the incredible potential in everyday objects. I recently witnessed a friend construct an entire backyard office using pallets, which immediately brought to mind the versatility of this humble material. When I stumbled upon a brilliant DIY Pallet Table tutorial, I knew instantly that this was a project he’d love, especially since he was keen to start a garden this year and wanted a fun, hands-on way to teach his nieces and nephews about gardening and sustainable living. The idea of building a dedicated space for potting plants, preparing seedlings, or simply enjoying outdoor meals with family became a shared goal.
My friend, always eager for a new challenge, quickly agreed. With a generous stash of pallets already on hand from his previous ventures, we just needed to gather a few more supplies. My role was simple: ensure a steady supply of refreshments and pick up some craft stain to give our creation that perfect finish. Arriving at his place, I was greeted by an impressive array of tools neatly laid out, ready for action. Among them were a power drill, a jigsaw, a pry bar, a hammer, various wood drill bits, a measuring tape, a chalk line, sandpaper in different grits, safety glasses, and wood stain. The beauty of working with pallets is their accessibility; they are frequently available for free. You can often find them by simply asking at your local hardware store, grocery store, or even construction sites – many businesses are happy to accommodate requests to take spare pallets off their hands, saving them disposal costs.
This project is more than just building a table; it’s about creating memories, fostering creativity, and contributing positively to the environment. It offers a tangible way to teach younger generations about the value of repurposing and the satisfaction of crafting something useful with their own hands. Let’s dive into the details of how you can build your very own farmhouse-style table out of pallets, bringing rustic charm and functionality to your outdoor or indoor space.
Why Choose Pallets for Your DIY Project?
Choosing pallets for your DIY furniture projects offers a multitude of benefits, making them a favorite among crafters and budget-conscious builders. Firstly, the cost-effectiveness is unbeatable – pallets are often free, significantly reducing your material expenses. This allows you to allocate your budget towards quality tools or finishing touches like stains and varnishes. Secondly, upcycling pallets is an environmentally friendly choice. By giving these wooden structures a second life, you divert them from landfills, reducing waste and decreasing the demand for new timber production. Each pallet repurposed contributes to a more sustainable lifestyle.
Beyond the practical advantages, pallets lend a unique aesthetic to any project. Their rough-hewn texture and often weathered appearance naturally evoke a rustic, farmhouse, or industrial chic style that is highly sought after in modern home decor. This inherent character means less work is required to achieve an aged look; the wood already tells a story. However, it’s crucial to select your pallets carefully. Look for pallets marked with an “HT” stamp, which indicates they have been heat-treated to prevent pests, making them safe for indoor and outdoor use. Avoid pallets marked “MB” (methyl bromide), as these have been chemically treated and are not suitable for furniture or anything that will be in contact with food or skin. Always inspect pallets for excessive damage, spills, or strong odors before bringing them home.
Materials & Tools You’ll Need:
Before you embark on constructing your beautiful farmhouse pallet table, it’s essential to gather all the necessary materials and tools. Having everything at hand ensures a smooth and efficient building process, minimizing interruptions. Here’s a comprehensive list, combining the specific items mentioned earlier with additional essentials for a robust and professional finish:
Materials:
- Pallet Boards: Several pallets (typically 3-5 depending on your desired table size and the condition of the pallets)
- Structural Lumber: 2x4s and 4x4s for the table frame and legs (the exact quantity will depend on your table dimensions)
- Fasteners: Wood screws (various lengths, 2-3 inches recommended for structural parts), Nails (for attaching thinner pallet boards if desired)
- Adhesive: Strong wood glue for reinforced joints
- Joint Reinforcement (Optional): Doweling and dowel pins for added strength and concealed joints
- Finishing Products: Wood stain or paint (in your preferred color), Varnish or exterior-grade sealant (for weather protection)
Tools:
- Measuring & Marking: Measuring Tape, Pencil, Chalk Line (for straight cuts)
- Cutting: Jigsaw (for precise cuts), Circular Saw or Miter Saw (optional, for faster and straighter cuts on structural lumber)
- Disassembly: Pry Bar (essential for carefully dismantling pallets), Hammer (for nails and assembly)
- Drilling: Power Drill, Wood Drill Bits (various sizes, including a countersink bit)
- Sanding: Sandpaper (rough, medium, and fine grits – 60, 120, 220), Orbital Sander (recommended for efficiency)
- Safety Gear: Safety Glasses (non-negotiable!), Work Gloves, Dust Mask
- Assembly Aids: Wood Clamps (for holding pieces while glue dries), Level (to ensure a flat, stable table)
- Application: Paint Brushes or rags for applying stain/varnish
Directions: Crafting Your DIY Pallet Farmhouse Table
Building your own pallet table is a project that rewards patience and attention to detail. Follow these expanded steps to construct a durable and attractive piece of furniture that will serve you for years.
Step 1: Gather and Prepare Your Pallet Boards
Begin by carefully disassembling your chosen pallets. This step requires patience and the right tools to minimize damage to the wood. Use a pry bar and a hammer to gently separate the top and bottom deck boards from the stringers (the thicker support beams). Work slowly, prying up one board at a time, moving along its length to avoid splitting the wood. Once separated, use your hammer to remove any remaining nails, either by pulling them out from the back or hammering them through. Sort your boards, setting aside any damaged or excessively warped pieces. Clean the usable boards by brushing off dirt and debris. This initial preparation is crucial for the structural integrity and aesthetic appeal of your finished table.
Step 2: Design and Plan Your Table Dimensions
Before making any cuts, visualize your table. Determine the ideal height, length, and width that will best suit its intended purpose, whether it’s a potting bench, an outdoor dining table, or a children’s activity station. Sketch out a simple design, noting the dimensions for the legs, aprons (the horizontal supports connecting the legs), and the tabletop. This planning phase ensures you cut the right number of pieces to the correct sizes and helps you utilize your pallet wood efficiently.
Step 3: Build a Sturdy Table Frame out of 2x4s and 4x4s
The foundation of your table is its frame, and using new 2x4s and 4x4s ensures stability and durability. Cut four 4x4s to your desired leg height. Next, cut four 2x4s for the side aprons (two for the longer sides and two for the shorter sides, accounting for the width of the 4×4 legs). Assemble the frame by attaching the 2×4 aprons to the 4×4 legs using wood glue and long wood screws. Predrill pilot holes to prevent splitting, and use a countersink bit so the screw heads sit flush or below the surface. Ensure all corners are square using a carpenter’s square and clamps. A level is indispensable here to make sure your frame is perfectly flat and stable. This robust frame will support the weight of the pallet top and anything placed upon it.
Step 4: Craft the Wooden Tabletop with a Horizontal and Vertical Design
Now, it’s time to create the distinctive tabletop. From your prepared pallet boards, select pieces that are relatively straight and in good condition. You can achieve a classic farmhouse aesthetic by arranging boards in a combination of horizontal and vertical patterns, or simply lay them all in one direction for a clean, continuous look. Cut your pallet boards to length, ensuring they extend slightly beyond the frame if you desire an overhang. Lay them out on top of the assembled frame to plan your arrangement. Once satisfied with the layout, secure each board to the 2×4 apron frame using wood glue and screws. For a cleaner look, you can drill from underneath the frame into the pallet boards. If screwing from the top, countersink the screws to hide the heads. Maintain consistent spacing between boards if you want a gap, or butt them tightly together for a solid surface. This step truly brings the character of the pallet wood to life.
Step 5: Sand and Smooth for a Professional Finish
Sanding is a critical step that transforms rough pallet wood into a smooth, splinter-free surface. Start with a coarse-grit sandpaper (around 60-80 grit) to remove any major imperfections, deep scratches, and to level the surface of the pallet boards. Work your way up to medium-grit (120-150 grit) to refine the surface and then finish with a fine-grit sandpaper (200-220 grit) for a silky-smooth touch. Pay special attention to the edges and corners to prevent splinters. An orbital sander will make this process much faster and more effective, but hand-sanding is perfectly viable with enough effort. Remember to wear a dust mask during this process to protect your lungs from fine wood dust.
Step 6: Protect and Beautify Your Table with Stain and Varnish
With the sanding complete, your table is ready for its protective and decorative finish. First, apply your chosen wood stain or paint. If staining, apply it evenly with a brush or rag, wiping off excess to achieve your desired depth of color. For a painted finish, apply multiple thin coats for smooth, even coverage. Once the stain or paint is completely dry, apply several coats of varnish or an exterior-grade sealant. This step is especially crucial if your table will be used outdoors, as it provides a durable barrier against moisture, UV rays, and general wear and tear. Sand lightly with fine-grit sandpaper between coats of varnish for an extra smooth and professional finish. This final layer will make your table resistant to adverse weather elements and easy to clean.
Beyond the Garden: Versatile Uses for Your Pallet Table
This sturdy and charming pallet table is far more versatile than just a garden accessory. While my friend primarily uses his on his patio overlooking the garden, where it serves as a practical potting station and a lovely spot for entertaining guests, its potential extends much further. Imagine it as a rustic outdoor dining table for summer barbecues, a robust workbench for DIY projects in the garage, or even a unique coffee table in a living room with an industrial or farmhouse aesthetic. For those with children, it can become an ideal outdoor activity table, perfect for crafts, drawing, or even a mini-mud kitchen. Its inherent durability makes it suitable for various functions, bringing character and utility wherever it’s placed.
Conclusion: A Project That Gives Back
Embarking on the journey of building a DIY pallet farmhouse table is a highly satisfying endeavor. Not only do you get to hone your woodworking skills and create a truly unique piece of furniture that reflects your personal style, but you also contribute to environmental sustainability by giving discarded materials a new lease on life. The finished product, whether gracing your garden, patio, or indoors, will be a testament to your creativity and effort. It’s a project that brings people together, as seen with my friend and his family, and provides a durable, beautiful, and functional addition to any space. So, gather your pallets, embrace the challenge, and enjoy the profound satisfaction of crafting something beautiful from scratch.