
Unlock Your Creativity: Easy DIY Upcycled Button Bracelet Tutorial
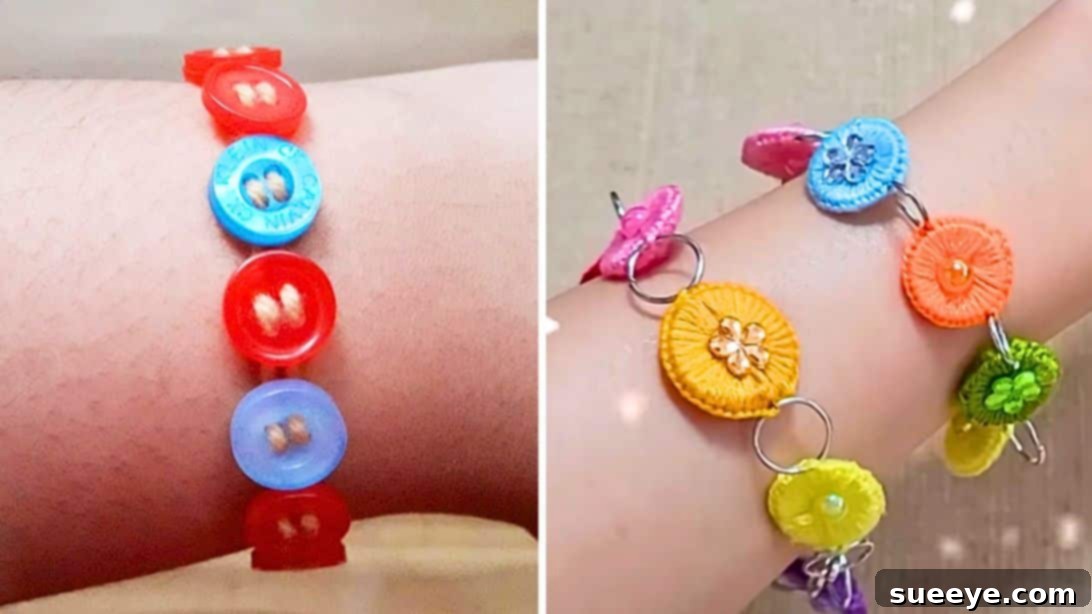
Do you have a treasure trove of buttons, perhaps inherited from a grandparent, saved from old garments, or simply collected over time? Instead of letting them gather dust, transform those overlooked buttons into charming, wearable art! This beginner-friendly project, inspired by fantastic crafters like Rose Crochet & Craft on YouTube, offers a simple yet satisfying way to upcycle. In just a few minutes, you can create a beautiful button bracelet that reflects your personal style. Not only is this a delightful craft to make for yourself, but these unique bracelets also make thoughtful, handmade gifts for friends and family, or even a fantastic item to sell at craft fairs. If you’re looking to explore more intricate designs or button craft ideas, you might also find inspiration from other tutorials, such as those by Merry Craft on YouTube, which offer equally adorable and easy-to-follow projects. Dive into the world of button crafting and discover the joy of creating something truly special!
Why Upcycle Buttons? The Charm of Sustainable Crafting
Buttons are often discarded along with old clothes, yet they possess an incredible amount of character and history. Each button tells a story, and repurposing them into a DIY bracelet is not only an eco-conscious choice but also a wonderful way to honor their past. Upcycling reduces waste and encourages a more sustainable approach to fashion and decor. Furthermore, working with buttons opens up a world of creative possibilities. They come in countless shapes, sizes, colors, and materials – from vintage mother-of-pearl to modern plastics, metal, and wood. This variety allows for endless customization, ensuring that no two button bracelets will ever be exactly alike. Embrace the charm of upcycled materials and let your imagination lead the way to unique, handcrafted jewelry.
Materials You’ll Need:
- An assortment of buttons (at least 13, but the exact number depends on your wrist size and button dimensions)
- Durable yarn or strong string (waxed linen thread or embroidery floss also works well)
- Two needles with eyes large enough to accommodate your chosen yarn
- Sharp scissors
- A ruler or tape measure
Step-by-Step Directions for Your Button Bracelet:
Creating your own button bracelet is a straightforward process that yields impressive results. Follow these detailed steps to craft a beautiful piece of handmade jewelry:
Step 1: Prepare Your Yarn and First Button
Begin by cutting a generous length of yarn, approximately 24 to 30 inches (60 to 75 cm) long. This length provides ample room for knotting and maneuvering, ensuring you won’t run short during the process. Once cut, fold the yarn precisely in half, aligning both ends. Insert your index finger into the loop created by the fold. Now, tie a secure knot around your finger, forming a small, stable loop. It’s crucial to leave a small allowance to this loop; aim for a loop that’s just large enough to comfortably fit over one of your chosen buttons later, as this will serve as your bracelet’s clasp. After creating the knot and loop, thread each of the yarn’s free ends through a separate needle. You’ll be working with two needles simultaneously, which helps secure the buttons firmly. Gather your buttons; for an average adult wrist, you’ll typically need around 13 buttons, but this can vary based on the size of your buttons and your wrist circumference. Pick your first button. Hold it steady, then insert one of your threaded needles into the left-hand hole of the button, pushing it through until it emerges from the right-hand hole. Take the other threaded needle and repeat this action for the lower two holes of the same button, ensuring the yarn runs parallel and taut through both sets of holes. This initial threading creates a strong foundation for your bracelet.
Step 2: Adding More Buttons and Customizing Length
With your first button securely attached, carefully slide it down the yarn toward the initial loop or knotted end. Make sure it sits snugly against the knot without pulling too tightly on the loop itself. Now, continue to add more buttons one at a time, replicating the threading process from Step 1. For each subsequent button, thread one needle through the left upper hole and out the right upper hole, then the other needle through the left lower hole and out the right lower hole. After threading each button, gently push it down the yarn until it rests closely against the previous button. The goal is to create a continuous line of buttons with minimal gaps, giving your bracelet a cohesive look. As you add buttons, periodically wrap the growing chain around your wrist to check the length. The bracelet should be long enough to comfortably encircle your wrist, with a slight overlap for the clasp. Once you’ve reached the desired length, and the button count is sufficient for your wrist, carefully remove both needles from the yarn ends.
Step 3: Securing the Bracelet and Final Touches
Once you’ve added all your buttons and confirmed the perfect length, it’s time to finish your bracelet. Take the two excess tails of the yarn that you just removed the needles from. Bring them together and tie a very secure knot, pulling tightly to ensure the buttons remain firmly in place. You might want to tie a double knot for extra security. Now, grab one more button – this will be your clasp button. Insert both yarn tails through two holes of this final button (similar to how you threaded the main buttons, but with both tails together). Slide this button down until it sits snugly against your final bracelet button. Tie another tight knot directly after this clasp button to hold it in place. This knot should be firm enough to prevent the clasp button from sliding. Finally, trim off any excess yarn tails, leaving only a small, neat fringe. Your beautiful, upcycled button bracelet is now complete! To wear it, simply wrap it around your wrist and insert the initial loop (from Step 1) over your final clasp button. Enjoy your unique, handmade accessory!
Tips for Success and Personalization
- Button Selection: Don’t be afraid to mix and match! Using buttons of different sizes, colors, and textures can create a more dynamic and visually interesting bracelet. Consider a gradient of colors or a random assortment for a playful look.
- Yarn Choice: The type of yarn or string you use will affect the bracelet’s feel and durability. Thicker yarns create a chunkier look, while thinner threads allow for a more delicate design. Ensure your yarn is strong enough to hold the weight of the buttons without fraying easily.
- Needle Size: Always choose needles with eyes large enough for your yarn but small enough to pass through the buttonholes without difficulty. A blunt tapestry needle can be helpful for thicker yarns and larger buttonholes.
- Secure Knots: The integrity of your bracelet relies on strong knots. Always pull your knots tightly and consider adding a tiny dab of fabric glue to the final knots for extra security, especially if you plan to wear the bracelet often.
- Measuring for Fit: When checking the length, aim for a fit that is comfortable but not too loose. Remember that the clasp mechanism will add a little extra length, so factor that in. A good rule of thumb is to have the button chain just meet around your wrist, leaving room for the clasp.
- Beyond Bracelets: This technique isn’t limited to bracelets! You can adapt it to create unique button necklaces, headbands, keychains, or even decorative button garlands.
Explore More Button Craft Ideas
Once you’ve mastered the button bracelet, you’ll likely find yourself inspired to explore the vast world of button crafts. Buttons are incredibly versatile and can be used in a myriad of creative projects. Consider making button earrings, embellishing clothing or bags with unique button patterns, or creating intricate button art for your home decor. From festive holiday ornaments to charming hair accessories, the possibilities are truly endless. For those looking to dive deeper into unique crafting techniques and discover more adorable projects, channels like Merry Craft on YouTube offer a wealth of inspiration. Their video tutorials often provide fresh ideas and detailed guidance for various button-based creations, helping you expand your crafting repertoire and turn everyday objects into extraordinary pieces.
The Joy of Handmade: Gifts, Sales, and Personal Satisfaction
There’s an undeniable joy in creating something with your own hands. This DIY button bracelet project offers immense personal satisfaction, allowing you to transform simple materials into a beautiful and functional item. Beyond the personal reward, these handmade bracelets make exceptional gifts. A handcrafted gift carries a unique sentiment, showing thought and effort that store-bought items simply cannot replicate. For the entrepreneurial spirit, these bracelets are also fantastic items to make and sell. Their relatively low material cost, ease of production, and endless customization options make them ideal for craft markets, online shops, or gifting boutiques. By offering unique, upcycled jewelry, you contribute to a sustainable craft economy and share your creativity with the world.
Ready to Create?
So, gather your collection of buttons, pick out your favorite yarn, and get ready to embark on a fun and rewarding crafting journey. Whether you’re making a bracelet for yourself, as a thoughtful present, or to sell, this easy DIY project is sure to bring a smile to your face. Let your imagination guide you, experiment with different colors and textures, and enjoy the process of bringing new life to old buttons. Happy crafting!
Special thanks to Rose Crochet & Craft and Merry Craft via YouTube for inspiring this craft and for the wonderful images used here. If you enjoyed this project, be sure to visit their channels for more amazing craft tutorials and creative ideas! Don’t forget to subscribe to their channels for continuous inspiration.