
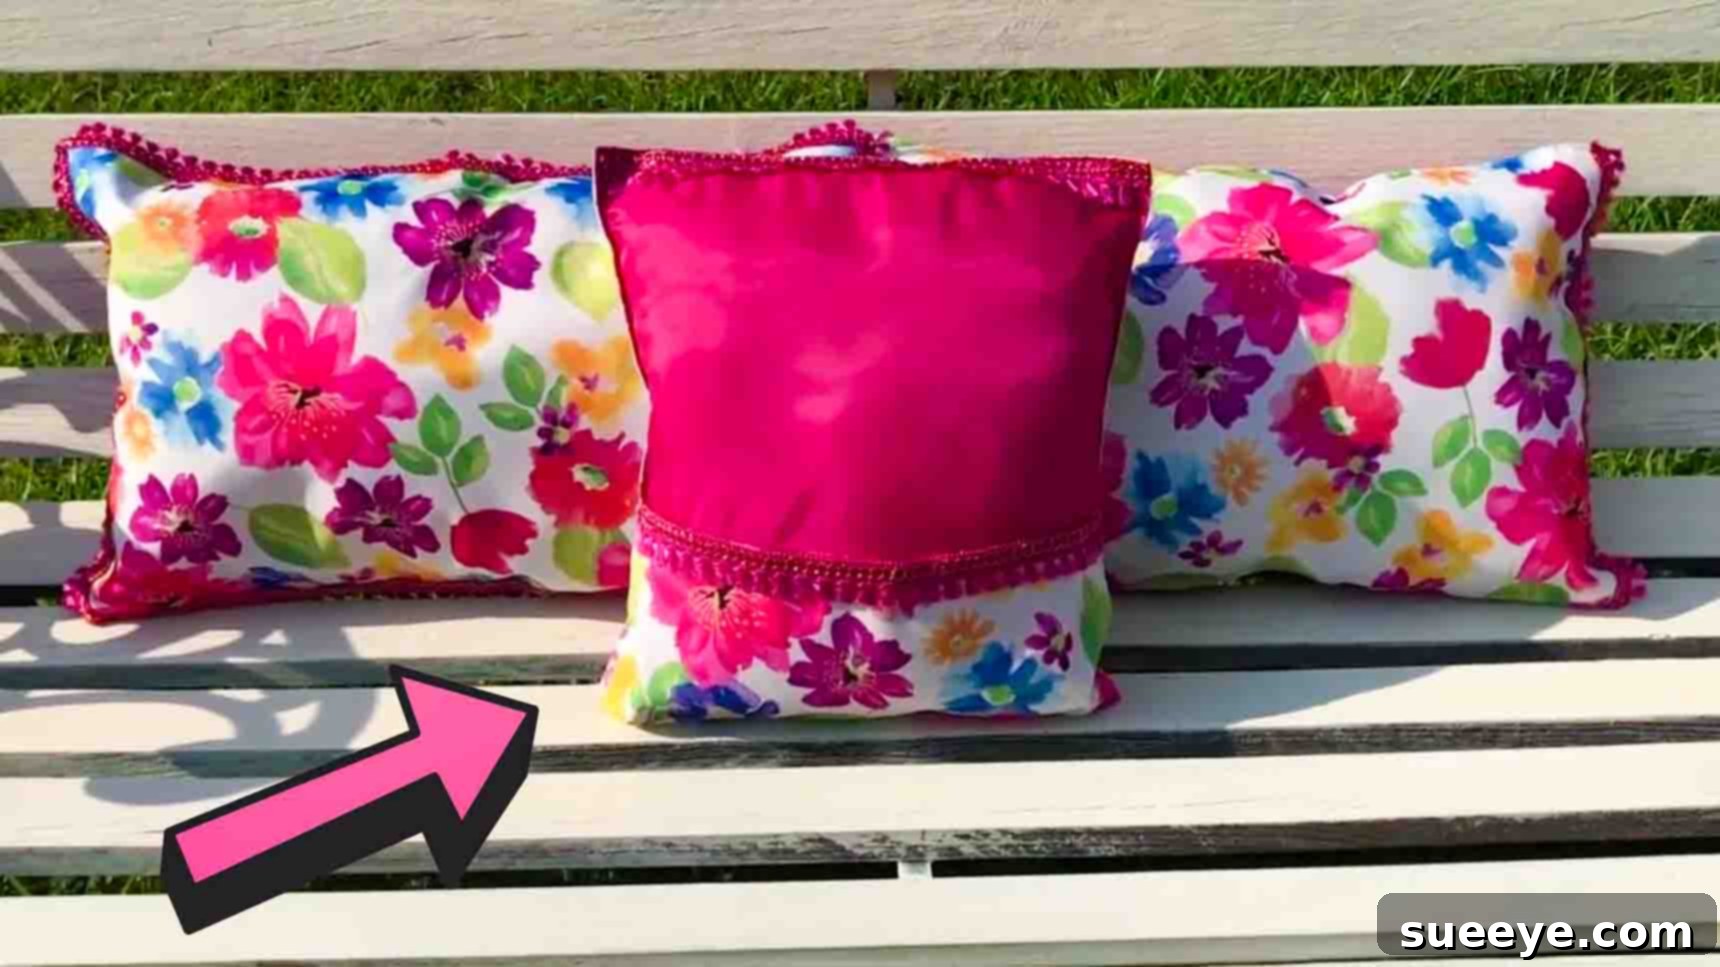
DIY Floral Pillows: Transform Dollar Tree Placemats into Chic Home Decor
Are you searching for an affordable and simple way to refresh your living space? Look no further! This fantastic DIY project allows you to craft stylish, floral-themed throw pillows using an unexpected, budget-friendly material: Dollar Tree placemats. Inspired by a clever tutorial from Ashleigh Lauren SHORTS on YouTube, I decided to give this creative hack a try. The result? Absolutely charming pillows that instantly added a touch of elegance and comfort to my couch, all without breaking the bank. If you love discovering smart ways to enhance your home decor on a dime, this tutorial is perfect for you!
Why DIY Your Own Throw Pillows? The Benefits of Placemat Pillows
Decorating your home doesn’t have to be expensive, especially when you embrace the world of DIY. Crafting your own throw pillows from placemats offers a multitude of advantages:
- Unbeatable Affordability: Dollar Tree placemats are typically just $1 each, making the cost per pillow incredibly low compared to retail options.
- Easy and Accessible: This project requires minimal crafting experience and basic tools, making it ideal for beginners or anyone looking for a quick and satisfying DIY.
- Customization at Your Fingertips: With a vast array of placemat designs available, you can easily find patterns and colors that perfectly match your existing home decor or seasonal themes. Add different trims, embellishments, or even mix and match patterns to create a unique collection.
- Sustainable Upcycling: Give new life to readily available items, transforming them into functional and beautiful pieces for your home. It’s a creative way to reduce waste and practice eco-conscious decorating.
- Instant Gratification: These pillows come together quickly, allowing you to enjoy your newly decorated space almost immediately. The satisfaction of creating something beautiful with your own hands is truly priceless.
Whether you’re sprucing up your living room, adding comfort to a reading nook, or staging a guest bedroom, these DIY floral placemat pillows are a game-changer for any budget-conscious decorator.
Gather Your Materials: What You’ll Need
One of the best aspects of this DIY project is how few and inexpensive the materials are. You likely have many of these items around your house already!
- Four Dollar Tree Placemats: Choose floral patterns that complement your decor. The key here is to find placemats with a stitched edge that can be easily opened.
- Trim of Choice: This is where you can truly personalize your pillows. Options include pom-pom trim, fringe, braided trim, ribbon, or even a simple cord. Select a trim that matches or contrasts beautifully with your placemats.
- Poly-Fil or Pillow Foam: This will be the stuffing for your pillows. Poly-Fil (polyester fiberfill) offers a soft, cloud-like feel, while pillow foam inserts provide a firmer, more structured look. Consider buying a large bag of Poly-Fil for multiple pillows, or repurpose old pillow inserts.
- Box Cutter or Seam Ripper: A sharp box cutter works well for carefully opening seams, but a seam ripper is specifically designed for this task and can offer more precision and safety.
- Scissors: Essential for cutting your trim and any loose threads.
- Glue Gun and Glue Sticks: A hot glue gun is your best friend for attaching the decorative trim quickly and securely. Make sure you have plenty of glue sticks on hand.
- Basic Sewing Kit: This includes a needle and thread. You’ll need it for closing the opening after stuffing. Don’t worry, even a basic stitch will do!
With these simple items, you’re ready to embark on your pillow-making journey!
Step-by-Step Instructions: Crafting Your Floral Pillows
Follow these easy directions to transform your Dollar Tree placemats into beautiful, custom throw pillows. Take your time with each step for the best results!
Step 1: Preparing and Stuffing Your Placemat
This initial step involves carefully opening a seam on your placemat and then filling it to achieve that perfect fluffy texture.
- Identify the Seam: Lay your placemat flat. Most placemats have a sewn edge all around. You’ll need to carefully locate one of these stitched edges that can be opened without damaging the main fabric. Choose a side that will be less visible or easier to work with.
- Carefully Open the Stitching: Using either a box cutter or a seam ripper (a seam ripper is often safer and more precise for this task), gently begin to take apart the stitching along one short side of the placemat. Work slowly and carefully to avoid cutting the fabric itself. You only need to open enough of the seam to create a sizable opening for stuffing – typically about 5-7 inches, depending on the size of your placemat.
- Stuff with Poly-Fil or Foam: Once you have a sufficient opening, begin stuffing your placemat with your chosen filling.
- For Poly-Fil: Start by gently pulling apart chunks of the fiberfill to prevent lumps. Insert small amounts at a time, pushing it into the corners first to ensure they are well-filled. Gradually add more, working your way towards the center.
- For Pillow Foam: If using a foam insert, carefully slide it into the placemat. You might need to gently fold or compress it slightly to get it through the opening.
- Fluff and Distribute Evenly: Once you have a good amount of stuffing inside, put your hands into the placemat and move the stuffing around. Gently massage and pat the pillow to evenly distribute the Poly-Fil, making sure there are no hard lumps or empty spots. Your goal is a nicely plump and fluffy pillow. Don’t overstuff it to the point where it’s rock-hard, but ensure it’s firm enough to hold its shape.
- Close the Opening: With your basic sewing kit, carefully close the hole you made. A simple whip stitch or ladder stitch works perfectly here. The ladder stitch is particularly great as it creates an almost invisible seam. If you’re new to sewing, there are many quick tutorials online for these basic stitches. The key is to make small, neat stitches that secure the opening tightly. This doesn’t need to be professional-level sewing, just strong enough to hold the stuffing in.
Step 2: Adding the Decorative Trim
This step is where your pillow truly comes to life with a personalized touch!
- Prepare Your Trim: Unroll your chosen trim and lay it out. Measure the perimeter of one of your pillows to estimate how much trim you’ll need, then add a few extra inches for overlap.
- Heat Your Glue Gun: Plug in your hot glue gun and allow it to heat up completely. Always exercise caution when working with hot glue.
- Apply the Trim: Starting at an inconspicuous spot (like the center of one side, or near a corner), apply a thin line of hot glue along the edge of your pillow. Press your trim onto the glue firmly. Work in small sections, applying glue and pressing down the trim as you go. This method helps prevent the glue from drying before you can attach the trim and allows for adjustments.
- Navigating Corners: When you reach a corner, you have a couple of options:
- Mitered Corner: For a neat, tailored look, fold the trim at a 45-degree angle to create a mitered corner, then continue gluing.
- Overlap/Gather: Simply curve the trim around the corner, slightly gathering it if needed, or allow it to create a soft loop.
- Finishing the Loop: Continue gluing the trim all the way around the pillow until you meet your starting point. Overlap the trim ends slightly (about half an inch) and glue them down securely to create a seamless finish. Trim any excess.
- Inspect and Refine: Once the glue has cooled, inspect your pillow for any loose spots or visible glue strings. Gently pull off any glue strings for a clean finish.
Repeat these steps for each placemat you wish to transform into a pillow. You’ll be amazed at how quickly you can create a cohesive and stylish set of new throw pillows!
Customization and Creative Ideas for Your Placemat Pillows
While the basic tutorial provides a fantastic foundation, don’t stop there! These DIY placemat pillows are incredibly versatile and can be customized in countless ways to reflect your personal style:
- Mix and Match Patterns: Instead of using four identical placemats, try combining two different floral patterns that complement each other. Or, pair a floral placemat with a solid-colored one for contrast.
- Vary Your Trims: Experiment with different types and colors of trim. A bright pom-pom trim can add a playful touch, while a more subtle braided trim offers elegance. You could even layer two different trims for a unique look.
- Add Embellishments: Before or after adding the trim, consider sewing on buttons, fabric appliques, iron-on patches, or even some simple hand embroidery to further personalize your pillows.
- Seasonal Themes: Keep an eye out for seasonal placemats at Dollar Tree. You could create pumpkin-themed pillows for fall, festive holiday pillows, or bright, pastel-colored ones for spring.
- Different Shapes: While most placemats are rectangular or oval, if you find round placemats, you can easily create round throw pillows using the same technique!
- No-Sew Alternative for Closing: If you truly want to avoid sewing, a strong fabric glue can be used to seal the opening after stuffing. However, for maximum durability and longevity, especially with frequent use, sewing is generally recommended.
The beauty of DIY is that there are no strict rules. Let your creativity guide you and design pillows that truly make your home feel special.
Care and Maintenance for Your DIY Placemat Pillows
To ensure your beautiful new pillows last, proper care is essential. Since these are made from placemats and involve hot glue, machine washing might not always be the best option. Always check the care instructions on your original placemats if available.
- Spot Cleaning: For most small spills or dirt, spot cleaning with a damp cloth and mild detergent is recommended. Gently dab the stained area and then blot dry.
- Hand Washing (Caution): If a deeper clean is needed, some placemats might tolerate gentle hand washing in cool water with a mild soap. Avoid excessive scrubbing, especially on areas with hot glue, as it might weaken the adhesive. Rinse thoroughly and allow to air dry completely.
- Avoid Machine Washing: Machine washing and drying can potentially damage the trim, loosen the hot glue, or cause the placemat fabric to fray or lose shape. It’s generally best to avoid it.
- Regular Dusting: Keep your pillows looking fresh by regularly dusting them with a soft brush or using a lint roller to remove pet hair and dust.