
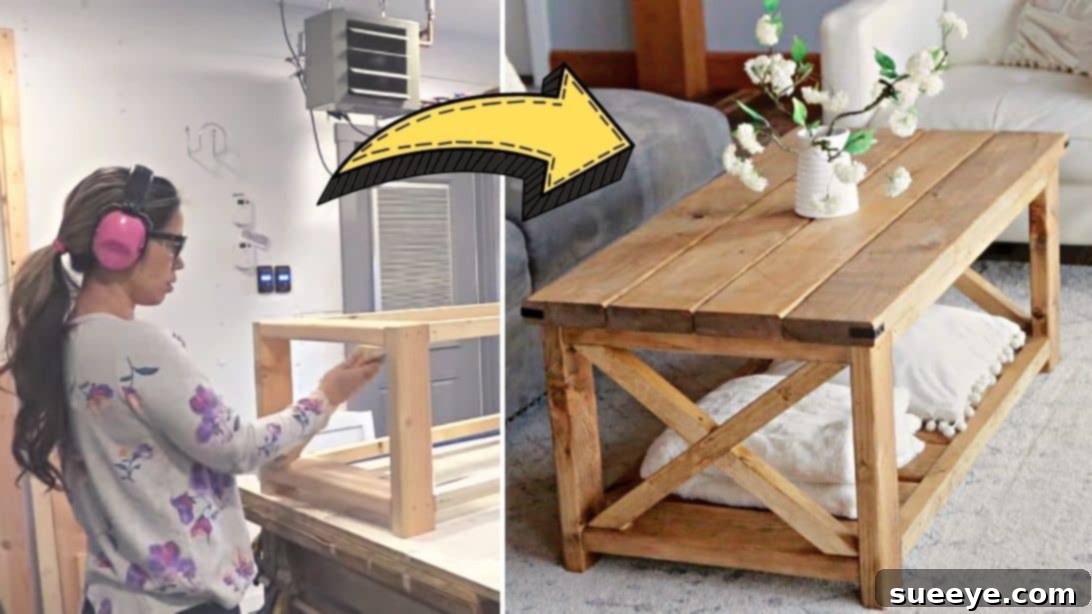
Are you searching for a rewarding weekend project that combines rustic charm with practical functionality? Look no further than this fantastic woodworking guide! In just a couple of days, and with an estimated budget of around $40, you can construct your very own stylish farmhouse coffee table. This DIY endeavor is perfect for beginners and seasoned woodworkers alike, offering a chance to create a beautiful, custom piece of furniture for your home. We’ll walk you through each step, making the process straightforward and enjoyable. For a visual demonstration and additional insights, we highly recommend watching Ana White’s comprehensive video tutorial on YouTube, which complements these detailed instructions perfectly.
Build Your Own Farmhouse Coffee Table: A Beginner-Friendly DIY Project Under $40
The farmhouse aesthetic continues to be a beloved interior design trend, known for its warmth, simplicity, and inviting appeal. A centerpiece of any living space, a coffee table can truly define the room’s character. Instead of spending hundreds on a store-bought item, imagine the satisfaction of crafting a sturdy, personalized farmhouse coffee table with your own hands. This project not only saves you money but also allows you to hone your woodworking skills and create a unique piece tailored to your taste. Our guide, inspired by Ana White’s acclaimed design, makes this dream achievable for under $40, proving that quality furniture doesn’t have to break the bank.
Why Choose This DIY Farmhouse Coffee Table Project?
- Budget-Friendly: With an estimated cost of just $40, this project is incredibly economical, especially when compared to retail prices for similar tables.
- Beginner-Friendly: The design is straightforward, primarily using common lumber and basic tools, making it accessible for those new to woodworking.
- Customizable: While we provide a classic farmhouse design, you have the freedom to choose your preferred stain or paint, allowing for personalization to match your home decor.
- Durable Construction: Using robust dimensional lumber and strong joinery techniques ensures a long-lasting, functional piece of furniture.
- Sense of Accomplishment: There’s immense pride in creating something beautiful and useful with your own hands.
Essential Tools You’ll Need
Before diving into the build, ensure you have the following tools ready. Having everything organized will make your woodworking experience much smoother and more efficient.
- Power Drill: Essential for driving screws and pre-drilling holes. A cordless drill offers greater flexibility.
- Miter Saw or Circular Saw: For accurately cutting your lumber to the specified lengths and angles. A miter saw provides more precision for angle cuts.
- Tape Measure: For precise measurements of all wood pieces. “Measure twice, cut once!” is the golden rule here.
- Pencil: For marking cut lines and screw placement.
- Safety Glasses: Always protect your eyes when working with power tools.
- Hearing Protection: Recommended when operating noisy power tools.
- Sanding Tool: An orbital sander is ideal for smooth finishes, but sandpaper blocks can work for smaller areas.
- Clamps: Various sizes of wood clamps are incredibly helpful for holding pieces together while glue dries or while fastening with screws.
- Wood Glue Applicator/Brushes: For even distribution of wood glue.
- Square: A speed square or combination square is crucial for ensuring cuts and assemblies are perfectly square.
Materials List for Your Farmhouse Coffee Table
Gathering all your materials beforehand ensures a seamless building process. The dimensions provided are standard lumber sizes readily available at most hardware stores.
- 4 pieces of 2×6 wood, 8 feet (stud length): These will form the sturdy tabletop boards and parts of the base/shelf frame. Look for straight, knot-free pieces for the best results.
- 1 piece of 2×4 wood, 8 feet (stud length): Primarily used for the table legs, providing robust support.
- 3 pieces of 2×2 furring strips, 8 feet long: These lighter strips are used for the aprons, shelf sides, and the distinctive “X” cross-braces.
- 2½ inches long self-tapping screws (e.g., Kreg pocket hole screws, or similar wood screws): These are critical for strong, secure joinery. Ensure they are suitable for outdoor use if planning an outdoor table, or simply interior use for a coffee table. You’ll need a generous supply.
- High-quality Wood Glue: A strong adhesive is vital for reinforcing all screw joints, ensuring the table’s longevity and stability. Waterproof wood glue is a good choice.
- Corner braces (optional): While not strictly necessary for structural integrity if glue and screws are used correctly, these can add extra reinforcement, especially for beginners.
- Wood Filler (optional): For filling any screw holes or imperfections if you plan on a smooth, painted finish.
- Sandpaper (various grits from 80-220): For preparing the wood surface for finishing.
- Primer, Paint, or Wood Stain, and Sealer: Choose your desired finish to protect and beautify your table.
- Official Plans:Click this link to be redirected to Ana White’s detailed woodworking plans, which offer additional diagrams and cutting lists.
Step-by-Step Directions to Build Your Coffee Table
Step 1: Preparing and Assembling the Base Structure
Precision in cutting is paramount for a professional-looking finish. Take your time with each cut and measurement.
-
Making the Cuts:
- Cut 4 pieces of 2×6 lumber to 46 inches each. These will become your beautiful tabletop boards.
- Cut 4 pieces of 2×4 lumber to 16½ inches each. These robust pieces will serve as the legs of your coffee table.
- Cut 10 pieces of 2×6 lumber to 18 inches each. These will form the ends of your coffee table frame and the slats for the bottom shelf.
- Cut 4 pieces of 2×2 furring strips to 37 inches each. These are your “aprons” or long shelf sides, connecting the leg assemblies.
- Cut 4 pieces of 2×2 furring strips to 19½ inches each. These are the pieces that will form the decorative “X” bracing on each end. Crucially, each end of these pieces should be cut at a 52° angle off square, ensuring the ends remain parallel to each other. This specific angle is designed to fit snugly against the frame posts.
- Constructing the Leg Assemblies: Take two of your 18-inch 2×6 pieces and two of your 16½-inch 2×4 leg pieces. Apply a generous amount of wood glue to the ends of the 18-inch 2x6s where they will meet the 2×4 legs. Position the 2x6s to create a rectangular frame with the 2x4s as the vertical posts. Secure each joint with two 2½-inch self-tapping screws, driving them through the 2x6s into the ends of the 2×4 legs. Ensure all joints are square before the glue sets. Repeat this process to build a second identical leg assembly. You now have two strong, independent leg structures.
- Connecting the Leg Assemblies: Place your two completed leg assemblies on a flat, level surface, ensuring they are oriented correctly (e.g., with the 2x4s acting as legs). Use your four 37-inch 2×2 furring strips (the long aprons) to connect these two leg assemblies. Apply wood glue to the ends of the 2x2s and attach them to the inside faces of the 2×4 legs, or the appropriate places on the 2×6 end pieces, using two screws per joint. This creates the main rectangular frame of your coffee table, establishing its overall length and width. Double-check for squareness and levelness at this stage.
- Installing the “X” Bracing (Decorative Ends): Now for the distinctive farmhouse “X” detail. Take one of your 19½-inch 2×2 pieces (with the 52° angled ends). Position it diagonally across one end of your coffee table frame, ensuring its angled ends sit flush against the uprights or horizontal members. Once you’re satisfied with the fit and angle, apply wood glue to the contact points and secure it with screws from the top and bottom (into the horizontal 2×6) and from the sides (into the 2×4 leg or 2×6 end piece). Take a second 19½-inch 2×2 piece. Place it alongside the first “X” piece, crossing over it, to mark where the two pieces intersect. Carefully draw a line on the second piece at this intersection point. Remove the second piece and make a shallow cut (a half-lap joint or simple notch) along the marked lines, allowing the two “X” pieces to interlock or lay flush where they cross. Once cut, apply glue to all contact surfaces, position the second “X” piece into place, and secure it with screws, ensuring a tight fit. Repeat this entire “X” bracing process for the opposite end of the coffee table.
- Adding the Center Shelf Support: Locate one of your 18-inch 2×6 pieces. This will serve as the central support for your bottom shelf. Position it horizontally in the exact center of the table’s main frame, spanning between the two long 37-inch 2×2 aprons. Apply wood glue to the ends and secure it to the aprons using two screws per joint. This piece will provide crucial support for the shelf slats to follow.
Step 2: Attaching the Tabletop, Constructing the Shelf, and Finishing
With the base frame complete, it’s time to add the tabletop and the functional bottom shelf.
- Assembling the Tabletop: Lay your four 46-inch 2×6 tabletop boards on a flat, level surface, side by side. Ensure they are tightly aligned and that the best-looking sides are facing upwards. At this point, you might consider using Kreg pocket hole screws to join the tabletop boards underneath for added strength, though simply securing them to the base works for this design.
- Attaching the Base to the Tabletop: Carefully apply a generous amount of wood glue to the entire top perimeter of your coffee table frame (the surfaces that will contact the tabletop boards). Now, with the tabletop boards still laid out on the flat surface, carefully invert your assembled table frame and center it precisely onto the underside of the tabletop boards. Ensure there’s an even overhang on all sides. Use clamps to hold the frame and tabletop together while the glue sets. Then, drive ample 2½-inch self-tapping screws from the underside of the tabletop boards into the frame. Distribute these screws strategically to provide strong attachment, approximately every 6-8 inches along the perimeter.
- Building the Bottom Shelf: Take one of your 18-inch 2×6 slats. Position it in the absolute center of the table’s bottom shelf area, resting on the 37-inch 2×2 aprons and the central 18-inch 2×6 support. Apply wood glue to the contact points and secure it with two screws per joint. Next, take the remaining 18-inch 2×6 slats. Attach them inside the frame, parallel to the center slat, ensuring you leave a consistent gap of about 1 inch (or slightly less, depending on your preference) between each slat. This spacing gives the shelf a classic slatted farmhouse look. Secure each slat with wood glue and two screws per joint.
-
The All-Important Finishing Process:
- Sanding: This step is crucial for a smooth, professional finish. Start with a coarser grit sandpaper (e.g., 80 or 100-grit) to remove any rough spots, splinters, or major imperfections. Work your way up through progressively finer grits (e.g., 120, then 150, and finally 220-grit) until the entire surface feels silky smooth to the touch. Pay extra attention to the tabletop and any edges that will be frequently touched.
- Cleaning: After sanding, thoroughly clean the entire coffee table to remove all sawdust residue. A shop vacuum followed by a tack cloth works best to ensure no fine dust remains, as it can interfere with the absorption of stain or paint adhesion.
- Priming (if painting): If you plan to paint your table, apply a good quality wood primer. This helps seal the wood, prevents the paint from soaking in unevenly, and ensures better adhesion and a more durable finish. Allow the primer to dry completely according to the manufacturer’s instructions.
- Painting or Staining:
- For Paint: Apply your chosen paint in thin, even coats. Allow each coat to dry thoroughly before applying the next. Lightly sand between coats with a fine-grit sandpaper (e.g., 220-grit) for an extra smooth finish.
- For Stain: Apply your wood stain according to the product instructions, usually by wiping it on and then wiping off the excess after a few minutes. Experiment with scrap wood first to achieve your desired color depth. Allow the stain to dry completely.
- Sealing/Topcoat: This is a vital step for protecting your coffee table from spills, scratches, and everyday wear. Apply at least two to three coats of a protective topcoat, such as polyurethane, polycrylic (water-based and less yellowing), or a furniture wax. Follow the manufacturer’s instructions for application and drying times, including light sanding between coats if recommended.
Tips for Success and Customization
- Work Safely: Always wear safety glasses and use appropriate safety precautions when operating power tools. Keep your workspace clean and organized.
- Measure Accurately: Precision in measuring and cutting is key to a successful build. Double-check all measurements before making cuts.
- Test Fit: Before applying glue and driving screws, dry-fit your pieces to ensure they align correctly.
- Use Clamps: Clamps are your best friends in woodworking. They hold pieces securely while glue dries and while you drive screws, ensuring tight, strong joints.
- Pre-drill Holes: To prevent wood from splitting, especially near ends or edges, always pre-drill pilot holes for your screws.
- Personalize Your Finish: Beyond basic paint or stain, consider distressing the wood for an aged look, or using a two-tone finish (e.g., painted base with a stained top).
- Consider Different Sizes: This design can be adapted for a side table or console table by adjusting the dimensions of your cuts.
Caring for Your New Wooden Coffee Table
Once your beautiful farmhouse coffee table is complete and fully cured, a little care will ensure it lasts for years. Wipe up spills immediately to prevent water damage. Use coasters for drinks to protect the tabletop. Periodically clean with a damp cloth and a mild wood cleaner. If you applied a wax finish, reapply wax every few months to maintain its luster and protection. For polyurethane finishes, a simple polish can help keep it looking new.
Congratulations! You’ve successfully built a stunning, durable farmhouse coffee table that will be a conversation starter in your home. This project is a testament to what you can achieve with a few basic tools, some affordable lumber, and a weekend’s worth of effort. Enjoy your new, handcrafted piece of furniture!
*All image credit belongs to Ana White via YouTube. Follow and subscribe to her channel for more inspiring and detailed woodworking tutorials!