
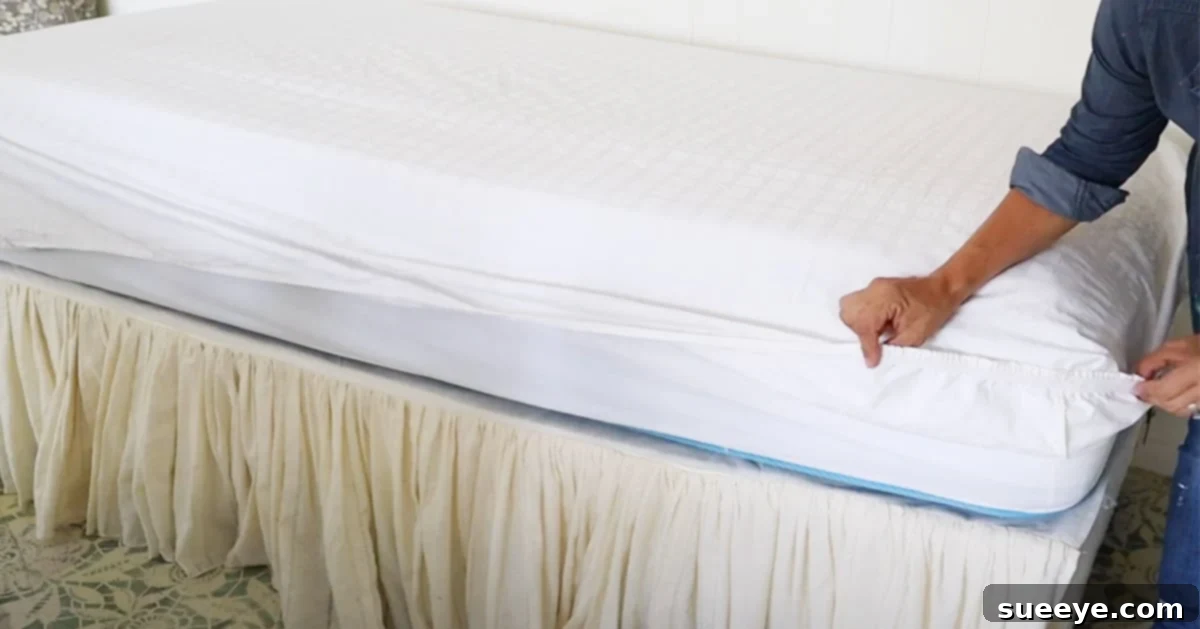
Transforming a standard flat sheet into a perfectly fitting fitted sheet for your mattress is a rewarding and highly practical DIY project. This clever bedding hack not only saves you money but also allows you to customize your bedding to your exact preferences. Whether you have an unused flat sheet lying around, found a beautiful fabric that isn’t available as a fitted sheet, or simply need an extra sheet in a pinch, this guide will walk you through the process. Mimzy & Company on YouTube offers excellent step-by-step visual instructions, which this article elaborates upon to provide a comprehensive written guide.
The beauty of this project lies in its simplicity and the immediate benefits it offers. Fitted sheets, especially those with deep pockets or made from specific materials, can often be surprisingly expensive. By repurposing a flat sheet, you tap into a budget-friendly alternative that’s also environmentally conscious, reducing waste by giving new life to existing textiles. Say goodbye to ill-fitting sheets that constantly pop off the corners and hello to a snug, secure fit every time.
Why Make Your Own Fitted Sheet?
Beyond the satisfaction of a DIY accomplishment, there are several compelling reasons to consider crafting your own fitted sheets:
- Significant Cost Savings: New fitted sheets, particularly for larger beds like king or queen sizes, or those made from high-quality materials, can be quite costly. Using a flat sheet you already own or purchasing an affordable flat sheet can drastically reduce this expense.
- Perfect Fit, Every Time: Mattresses come in various depths, and finding a fitted sheet that accommodates extra-deep mattresses or mattress toppers can be a challenge. Making your own allows you to tailor the sheet to the exact dimensions of your mattress, ensuring a secure and wrinkle-free fit.
- Customization and Style: Sometimes, you fall in love with a flat sheet’s color, pattern, or fabric, only to find that a matching fitted sheet isn’t available or doesn’t meet your needs. This DIY method means you never have to compromise on style.
- Sustainability and Repurposing: Giving an unused or forgotten flat sheet a new purpose is a fantastic way to practice sustainability. It reduces textile waste and promotes a more resourceful approach to home furnishings.
- Emergency Solution: Need an extra fitted sheet quickly for guests, or has your current one met an unfortunate fate (like an irreversible stain)? This hack provides a rapid and effective solution without an emergency trip to the store.
Choosing the Right Flat Sheet for Your Project
The success of your DIY fitted sheet largely depends on selecting the appropriate flat sheet. The general rule of thumb is to use a flat sheet one size larger than your mattress. For example, if you have a twin-size bed, opt for a queen-size flat sheet. If your bed is queen-size, a king-size flat sheet will provide the necessary extra fabric. This additional material is crucial for creating generous corner pockets and ensuring enough fabric to tuck under the mattress for a secure fit.
Consider the fabric’s material and condition. Cotton, flannel, linen, or sateen are all excellent choices, each offering different levels of comfort and warmth. Ensure the flat sheet is clean and in good condition, free from rips or excessive wear. For those who, like many, appreciate the crispness of white sheets but struggle with maintenance, remember that darker colors or patterns can be more forgiving with daily use and washing. However, with proper care, white sheets can maintain their pristine appearance for a long time.
Supplies and Tools You’ll Need:
Before you begin, gather all your materials and tools. Having everything at hand will make the process smoother and more enjoyable:
- Flat Sheet: King or Queen size (depending on your bed’s size, as discussed above).
- Fabric Pins: Essential for holding fabric in place and marking your cuts and seams accurately.
- Sharp Scissors: A good pair of fabric shears will ensure clean, precise cuts, which are crucial for a professional finish and to prevent fraying.
- Elastic: Approximately 3/4-inch wide. While the original guide mentioned 12 inches, for a secure fit, you might need more, especially if you plan to add elastic beyond just the corners. For corner-only elastic, 12-15 inches per corner (total of 48-60 inches) is more practical. For a full perimeter elastic, you’ll need enough to go around the entire bottom edge of your mattress, typically 140-180 inches depending on bed size, plus a few extra inches for overlap.
- Sewing Machine (or Needle and Thread): A sewing machine is highly recommended for durability and speed, but this project can also be completed by hand with patience and strong stitches.
- Measuring Tape or Ruler: For precise measurements of your mattress and for marking cutting and sewing lines.
- Iron and Ironing Board: To press seams and ensure smooth, crisp fabric, which makes sewing much easier.
Step-by-Step Directions for Your DIY Fitted Sheet:
This process is broken down into easily manageable steps. Remember, precision at each stage contributes to a perfectly fitting sheet.
1. Prepare Your Workspace and Lay Out the Sheet
First, clear your mattress completely. Lay the flat sheet directly on your mattress, ensuring it is spread out smoothly without any wrinkles or bunching. Center the sheet as best as possible. The goal here is to determine the exact amount of excess fabric you have. Make sure one side of the flat sheet is perfectly lined up with the bottom edge of your mattress. This alignment is key because it means you’ll only need to cut two sides of the sheet (the top and one side), as the other two sides will already have their finished hems properly aligned with the mattress.
2. Mark and Cut the Excess Fabric
Once your sheet is perfectly aligned on the mattress, identify the two sides you need to trim. These are typically the head and one side of the bed. Using your sharp scissors, carefully cut along the edge of the mattress, removing the excess fabric. Take your time to make these cuts as straight as possible. This initial cut reduces bulk and prepares the sheet for creating the corner pockets.

3. Create the Corner Pockets
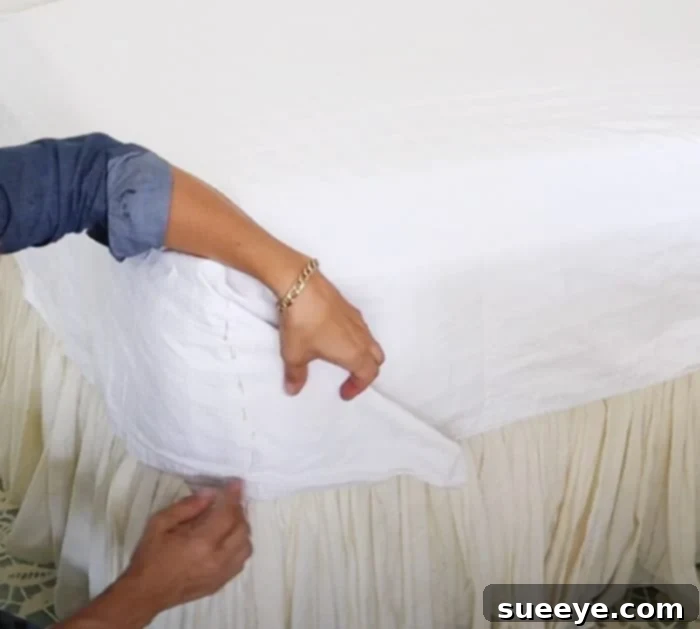
This is where your fitted sheet truly takes shape. Carefully grab the fabric at one corner of the mattress. Pinch the excess fabric to form a triangular shape, much like you would when neatly wrapping a present. The goal is to create a corner seam that will perfectly hug your mattress. While the sheet is still on the mattress, use your fabric pins to mark a straight line from the top edge of the mattress down to the bottom, right along the corner. Keep the pinned line snug but not overly tight, allowing a little ease for sewing and a comfortable fit. Crucially, ensure the “wrong side” (the side that will face the mattress when finished) of the fabric is facing outwards as you pin. This way, when you sew, your seams will be hidden inside the sheet, creating a clean finish. Repeat this pinning process for all four corners of the sheet.
4. Sew the Corners
Once all four corners are pinned, carefully remove the sheet from the mattress. Take it to your sewing machine. Using a straight stitch, sew directly along each pinned line. After sewing, trim any excess fabric, leaving about a 1/2-inch seam allowance. To prevent fraying and ensure longevity, finish these raw edges. You can do this with a zig-zag stitch on your sewing machine, or if you have a serger, use that for a professional finish. Press your seams open or to one side with an iron for a neater look.
5. Adding the Elastic
This step is vital for a sheet that stays put. You have two main options:
Option A: Corner Elastic (simpler, as suggested by original elastic quantity)
For this method, you will attach elastic to the inside of each corner. Cut four pieces of 3/4-inch wide elastic, each about 12-15 inches long. Turn the sheet inside out. At each corner seam, fold the raw edge of the opening (if you didn’t have existing hems on all sides) in twice to create a narrow casing, or simply fold the hemmed edge. Pin the elastic to the fabric at one end of the corner, stretching it as you sew it along the edge for about 12-15 inches. This gathering effect will make the corner snug. Securely stitch both ends of the elastic. Repeat for all four corners.
Option B: Full Perimeter Elastic (for a more traditional fitted sheet)
For a more secure fit, you might want to add elastic around the entire perimeter of the sheet. For this, you will need a much longer piece of elastic (as mentioned, typically 140-180 inches).
First, create a casing around the entire edge of your sheet. If your sheet already has a hem, you might be able to feed elastic through it. If not, fold the raw edge of the fabric up by about 1/2 inch, press, then fold it up again by about 1 inch to create a channel. Stitch this channel down, leaving a 2-3 inch opening. Attach a safety pin to one end of your elastic and thread it through the casing until it comes out the other side. Overlap the elastic ends by about 1 inch and sew them securely together. Stitch the opening in the casing closed.
For detailed visual instructions on these steps, especially the pinning and elastic application, watching Mimzy & Company’s YouTube tutorial is highly recommended. Their clear demonstrations can help clarify any ambiguities in the written instructions.
Finishing Touches and Care
Once you’ve sewn all the corners and added your elastic, turn your new fitted sheet right side out. Place it on your mattress to test the fit. Make any minor adjustments if necessary. Trim any loose threads. Your DIY fitted sheet is now ready for use! For its first wash, it’s often a good idea to wash it separately, especially if you’ve used new fabric, to ensure any excess dye is removed and to allow the fabric to settle. For white sheets, to maintain their pristine color, wash in cold water with a gentle, non-chlorine bleach detergent, and consider line-drying in the sun for natural brightening. Avoid harsh chemicals that can break down fibers over time.
Troubleshooting and Pro Tips:
- My Sheet Doesn’t Fit Perfectly: If the sheet is too loose, you can go back and sew your corner seams a little deeper, or add more elastic/stretch the elastic tighter when sewing. If it’s too tight, you might need to unpick and re-sew with less depth, but this is less common if you used an oversized flat sheet.
- Elastic Doesn’t Hold: Ensure you’re stretching the elastic enough when sewing. For corner elastic, make sure it’s securely stitched at both ends. For perimeter elastic, ensure the casing is snug and the elastic itself is of good quality.
- Preventing Fraying: Always finish your raw edges with a zig-zag stitch, serging, or by turning and stitching twice. This adds durability and prevents unraveling.
- Consider Fabric Direction: If your flat sheet has a distinct pattern or stripe, pay attention to the direction of the print when cutting and pinning to ensure it looks consistent once on the bed.
- Ironing is Your Friend: Don’t skip ironing! Pressing fabric before cutting and sewing helps achieve straighter lines and neater seams, leading to a much more professional-looking finished product.
Conclusion
Overall, this DIY fitted sheet hack is an incredibly handy skill for anyone looking to optimize their home and save money. It’s a testament to the power of repurposing and the satisfaction of creating something functional with your own hands. Whether you’re an avid crafter or a sewing novice, the steps are straightforward and the benefits are immediate.
No more struggling with flat sheets that refuse to stay tucked or spending a fortune on specialty fitted sheets. By following these instructions and leveraging an unused flat sheet, you can easily create custom bedding that fits your mattress perfectly, adds a personal touch to your bedroom decor, and extends the life of your linens. So, gather your supplies, find that forgotten flat sheet, and embark on a rewarding journey to craft your very own, perfectly fitted bed sheets!