DIY Decor
16 Clever Tips and Tricks for Hanging Photos and Frames
Tips and tricks for hanging photos and frames: 16 methods, from the paint stirrer trick and picture ledges to frames hung on knobs and a yarn hoop.
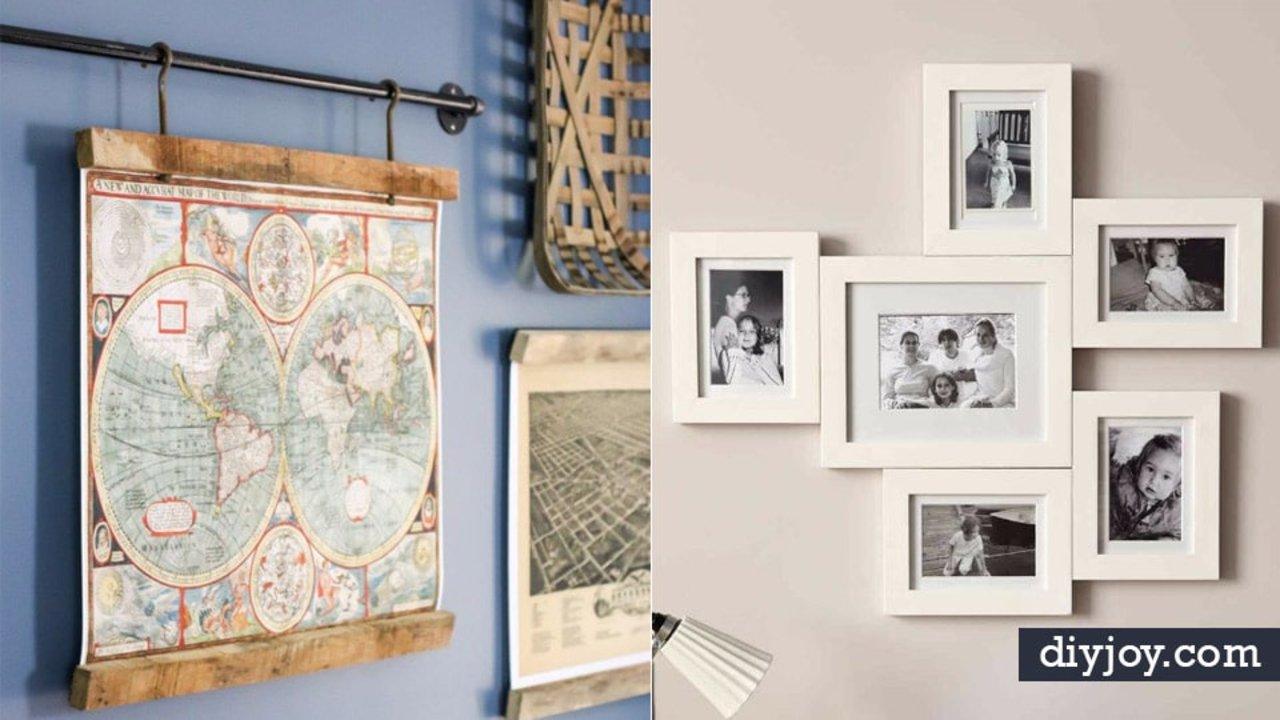
Gallery walls look effortless in photographs and go wrong on a Saturday afternoon, usually somewhere around the fourth nail hole. These 16 are the full method list rather than a quick set of hacks: the tricks that get frames straight and level the first time, and the displays that mean you never put a nail in the wall at all. There is a paint stirrer with a screw pushed through it that marks the exact nail position, blue tape stretched across the back of a frame and transferred to the plaster, picture ledges that let you restyle a whole wall in thirty seconds, rope looped over decorative knobs, an old bunk bed ladder, a yarn wrapped hoop and a shutter covered in clothespins. Every outside project links back to the maker who worked it out, and there is one Sueeye tutorial in here too.
DIY Ideas For Hanging Photos and Frames
1. Hang Picture Frames From A Rail
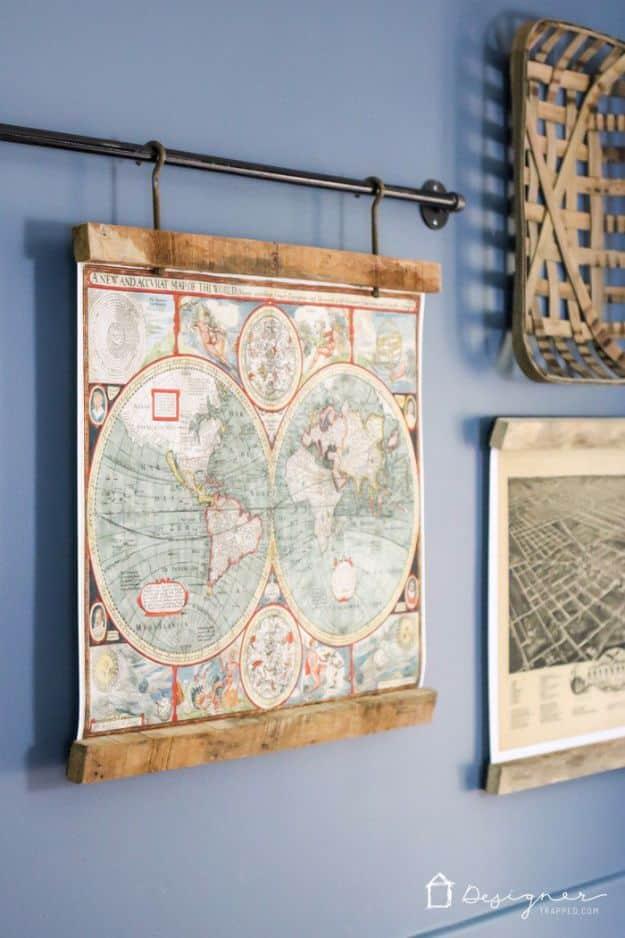
A row of framed maps hung from a ten foot iron pipe fixed to the wall on floor flanges, with a curtain rod bracket supporting the middle because the frames are heavy. The frames themselves are reclaimed pallet wood, and there are two ways to make them. The simple version stacks wood around the print, glues it with rapid fuse wood adhesive and clamps it for half an hour. The adjustable version uses hinged backer strips and anti skid pads so the map can be swapped later without rebuilding the frame, with screw hooks drilled into the top edge to hang from.
Get the full tutorial at Designer Trapped in a Lawyer's Body.
2. Unique DIY Picture Frame
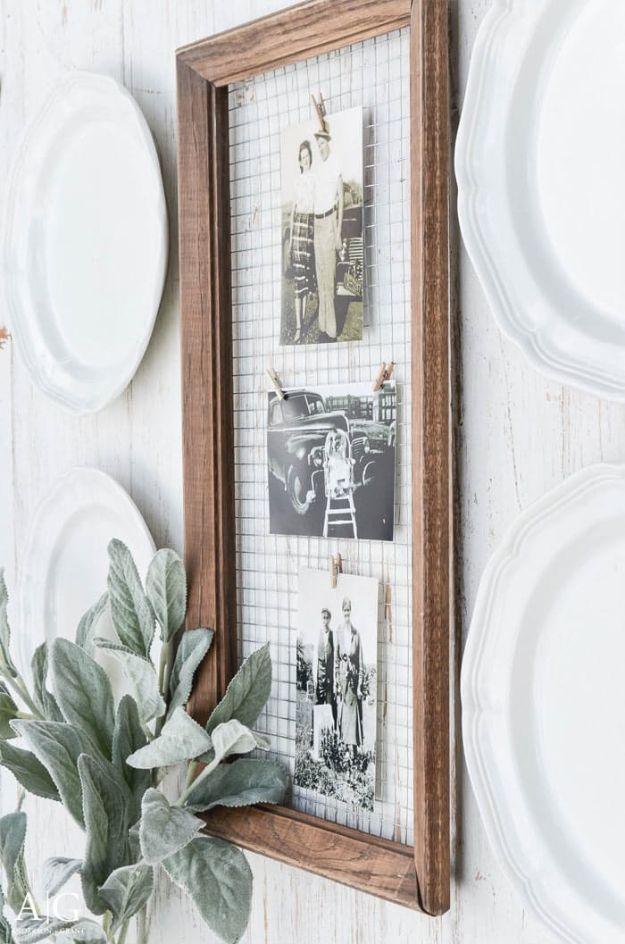
A long narrow thrift store frame with the glass removed and hardware cloth stapled across the back, so photographs clip on with miniature clothespins and come off again whenever you want. Sand the frame lightly first to bring the color underneath through the old paint. Measure the opening, cut the mesh with wire cutters, wear gloves doing it because cut hardware cloth is vicious, and fix it with an electric staple gun. Three photographs sit side by side down the length of it. It works as a message board as much as a photo frame, which is the real advantage of clips over glass.
Get the full tutorial at Anderson + Grant.
3. Mineral Photo Display
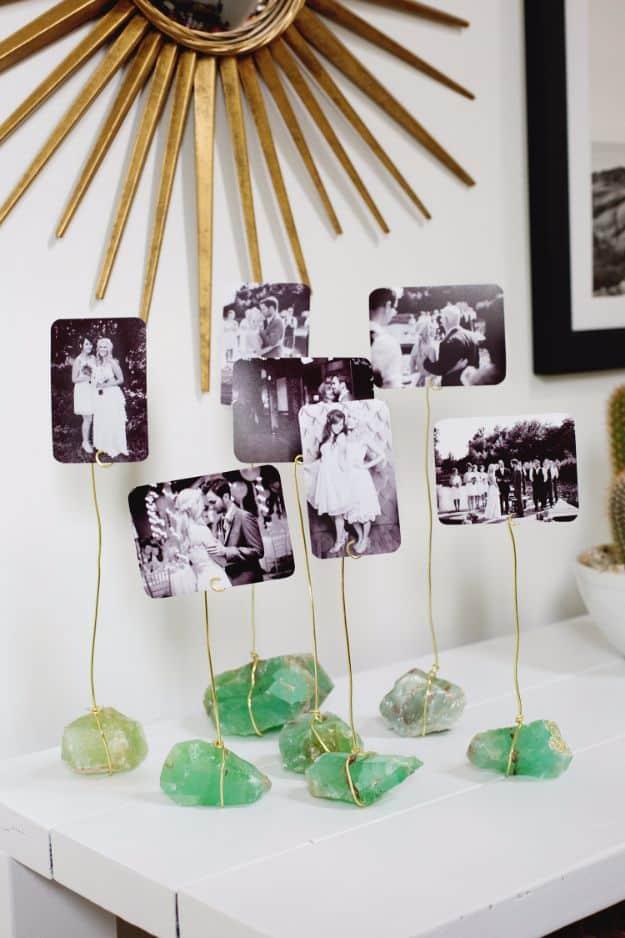
Raw green calcite, bought online, with a length of wire wrapped round each stone and looped at the top to grip a photograph. Use an odd number, because odd numbers layer in front of each other and even numbers line up in a row. Needle nose pliers matter more than they sound: they let you bend the cut end of the wire back in on itself so nothing sharp is left sticking out. Plan the arrangement with blank 3 by 4 inch cards before you cut a single photo, then print the whole set in black and white so the cluster reads as one piece.
Get the full tutorial at A Beautiful Mess.
4. Rustic Wire Photo Hanging
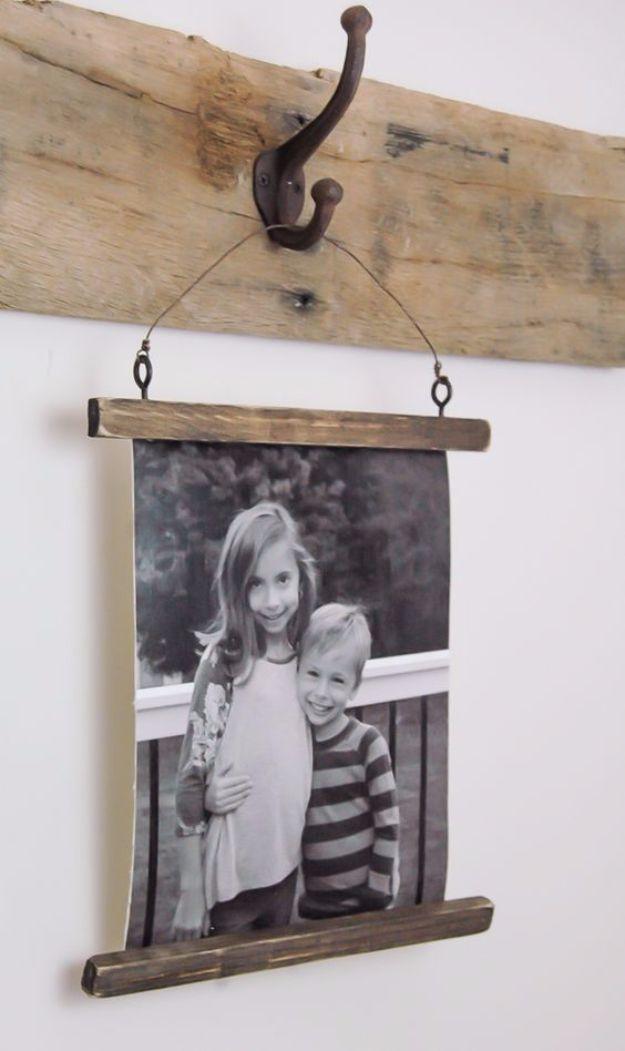
Photographs mod podged onto canvas upholstery fabric, so the print takes the weave of the cloth and stops looking like a print. Brush Mod Podge onto the back of an 8 by 10, press it down onto the canvas, seal over the top with another layer, then press more fabric into the wet surface for texture. Once dry, trim the canvas back to roughly a half inch border. Half inch by quarter inch wood trim gets espresso stain, distressing and a pilot hole for an eye screw at each end, glues to the top and bottom edges, and rustic craft wire hangs the whole thing.
Get the full tutorial at Little House of Four.
5. DIY Knock-Off Anthropologie Hanging Frame
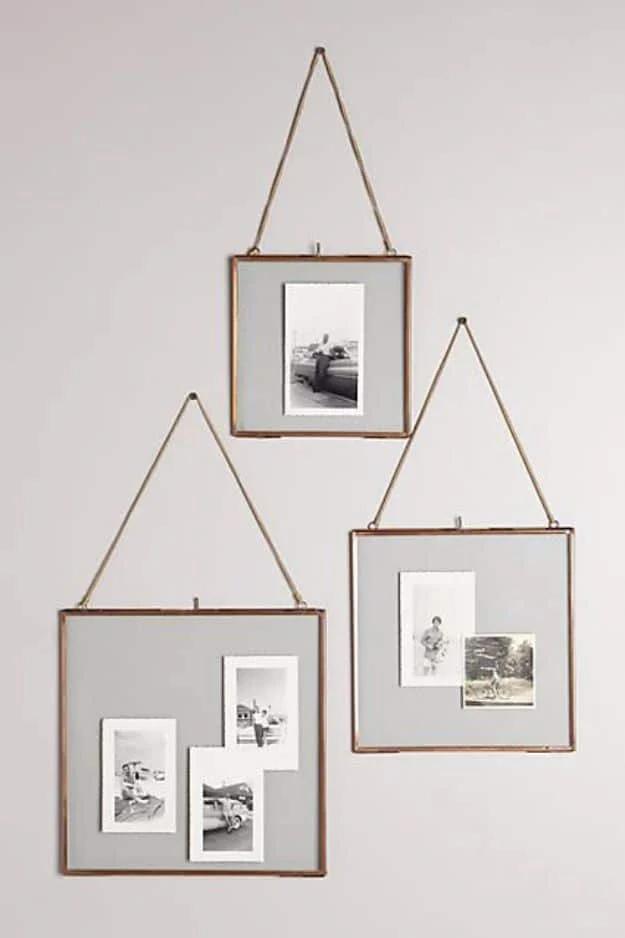
A plastic float frame from a discount store, primed for plastic and sprayed with Krylon Short Cuts in gold leaf, with small metal washers super glued to the top piece before painting so the finished frame has visible hardware detail. The hanging strand is a gold necklace picked up at a garage sale for under a dollar, cut to length with jewelry snippers, clasp removed, threaded through the back of the frame and knotted at the front with a dab of super glue on the knot. The chain is decorative; the frame’s own built in hardware still takes the weight. A couple of hours start to finish.
Get the full tutorial at Curbly.
6. Yarn And Hoop Photo Display
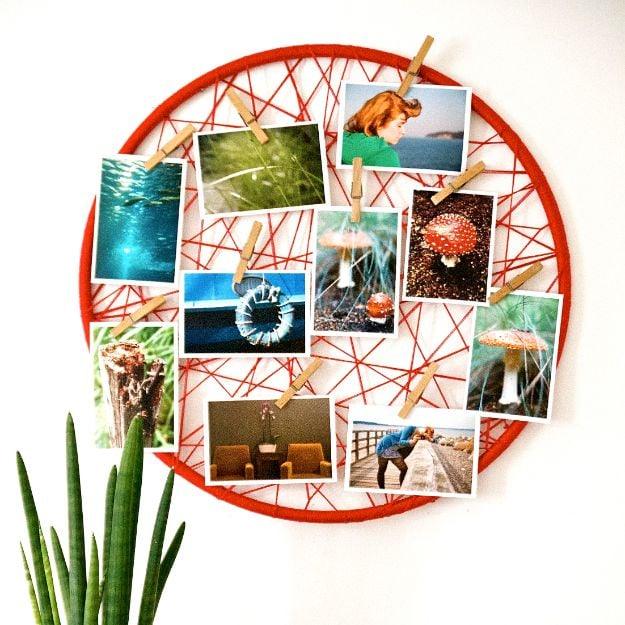
A plastic hoop, found on a walk, wrapped and criss crossed with red yarn until it becomes a web you can peg photographs onto. Run double sided tape around the outside of the hoop first, because that is what stops the yarn sliding as you wind. Then wrap and cross the yarn back and forth through the middle, leaving whatever gaps you like; tighter for small prints, looser for bigger ones. Peg the photos on with small clothespins and move them around until the arrangement sits right. One bold yarn color against a white wall is what makes it read as intentional.
Get the full tutorial at Pinkepank.
7. DIY Tabletop Leaning Shelf Photo Display
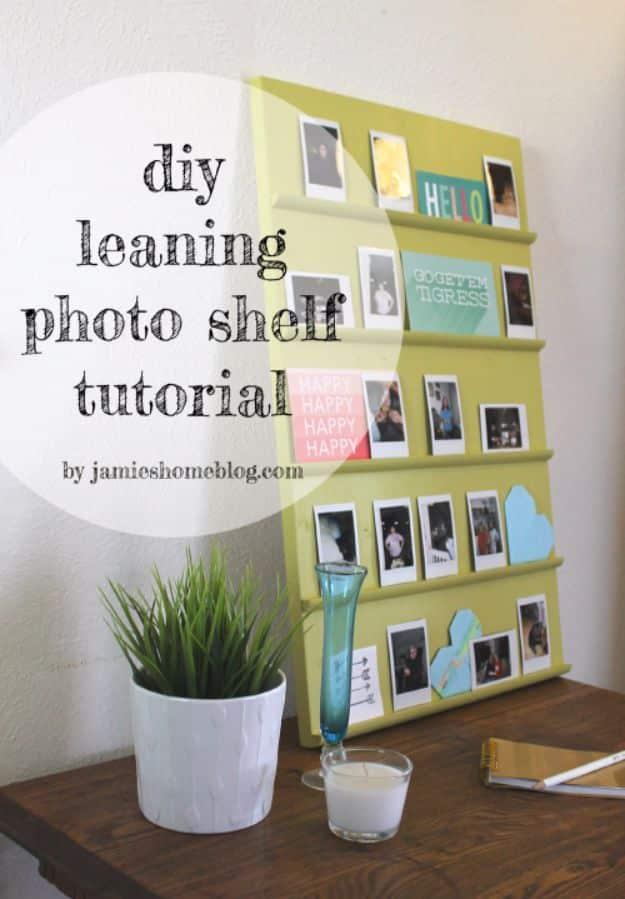
A leaning shelf for a tabletop, made from a 16 inch wide by 25 inch tall by three quarter inch deep pine craft panel with quarter round ledges glued across it every five inches, leaving four and a half inches of display space between rows. Sand the board properly first, round the edges, and angle the bottom back edge so it leans against the wall without sliding. Mark the ledge positions with a yard stick, cut the quarter round from an eight foot length with a hand saw, glue and clamp. Caulk the seams if the board bows. Two coats of paint, no sealer needed.
Get the full tutorial at Jamie's Home Blog.
8. Paint Stirrer Trick
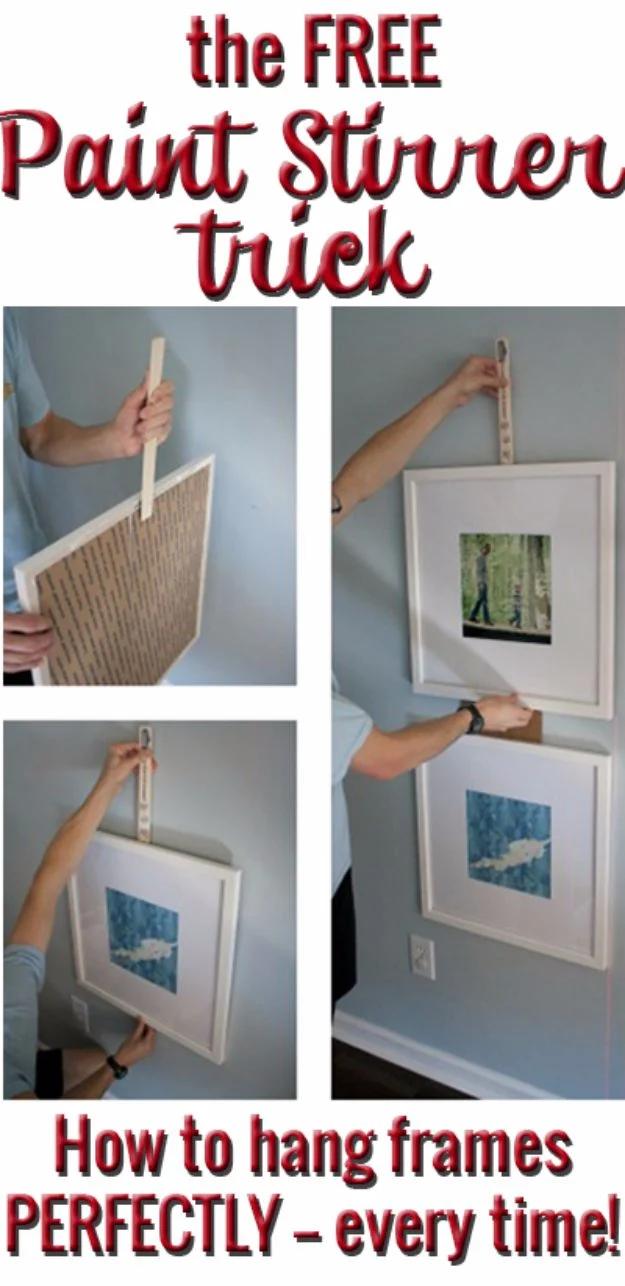
This is the best trick on the list and it costs nothing. Push a screw through a free paint stirrer so the point sticks out the other side. Hold the frame against the wall where you want it, hook the stirrer into the frame’s hanging hardware, then take the frame away while holding the stirrer still and press the screw point into the wall. That dent is exactly where the nail goes. Hammer, hang, level. The bonus tip is just as good: the little cardboard corner protectors that come in frame packaging make perfect spacers between frames, so nothing needs measuring.
Get the full tutorial at View Along the Way.
9. Pottery Barn Inspired Hanging Pictures
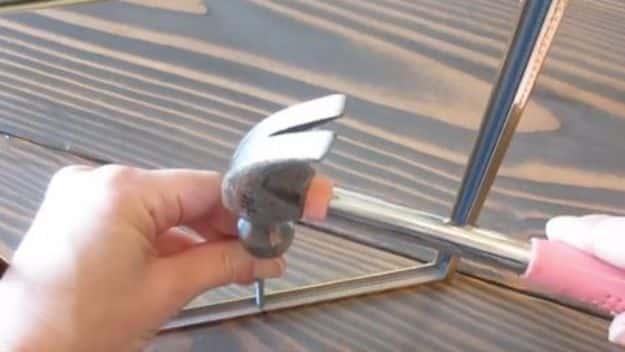
Cheap dollar store frames turned into a Pottery Barn style hanging arrangement, which is the sort of swap that costs a few dollars and looks like a catalog page. The frames do not need to match each other, because hanging them on a shared line or a shared rail is what pulls a mismatched set together. One version skips photographs entirely and puts a piece of good looking fabric behind the glass instead, so the arrangement works as pattern on a wall rather than as a picture display. It is the cheapest gallery wall on this list by a wide margin.
Get the full tutorial at Sueeye.
10. Perfectly Straight Frames And Decor
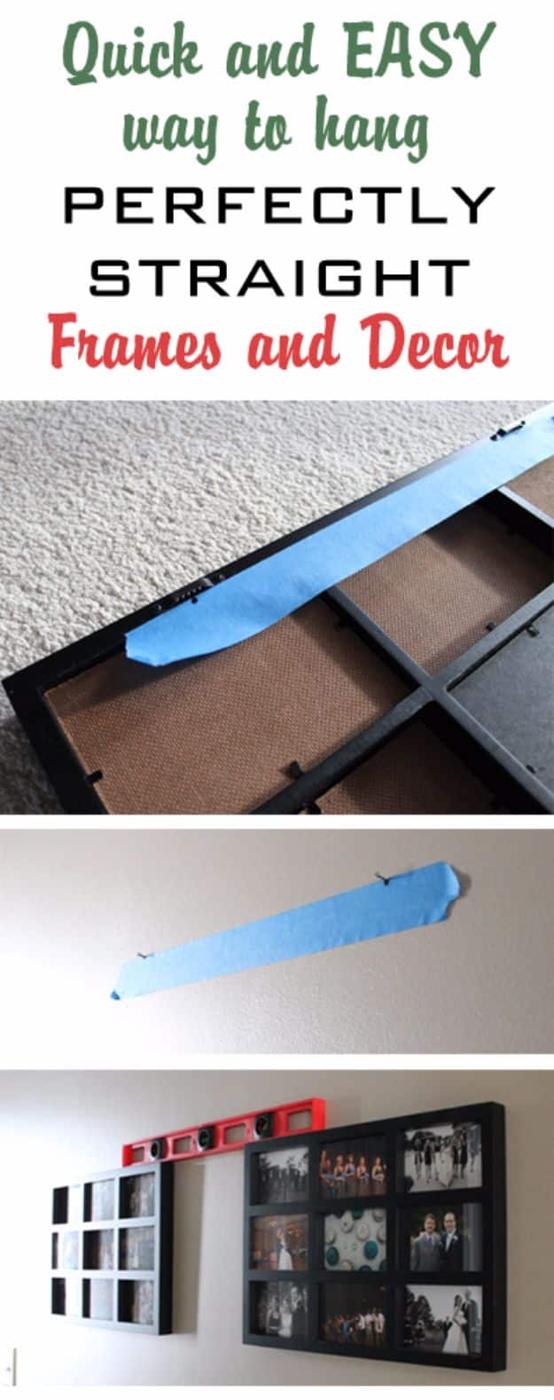
The blue tape method, which is the other great no measuring trick on this list. Stretch a strip of painter’s tape across the back of the frame so it runs over both hanging hooks, and mark the hook positions on the tape. Peel the tape off the frame, stick it on the wall where you want the frame, level it, and the marks show exactly where both nails go. Hammer through the marks, pull the tape off, hang. It works for anything with two fixing points, which is the case that defeats every other method, and it costs one strip of tape.
Get the full tutorial at Thriving Home.
11. Hanging Frames From Knobs
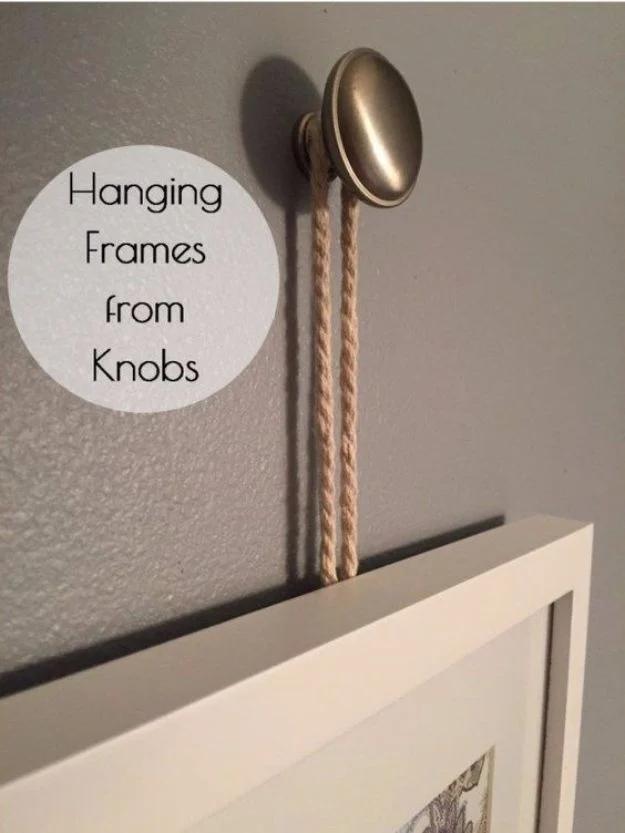
Frames hung from decorative drawer knobs on loops of cord rope instead of on nails, which turns the hardware into part of the display. Fourteen inches of rope per frame is the starting point, threaded through the frame’s existing hanger and knotted into a large loop. Dip each knot in school glue so the cut ends never fray, let it dry, then slide the knot down to the bottom edge of the frame where it is hidden. Each knob screws onto a hanger bolt, and the hanger bolt goes into the wall, with a tap of a hammer to start the screw.
Get the full tutorial at Lemons, Lavender & Laundry.
12. Instagram Photo Wall Display
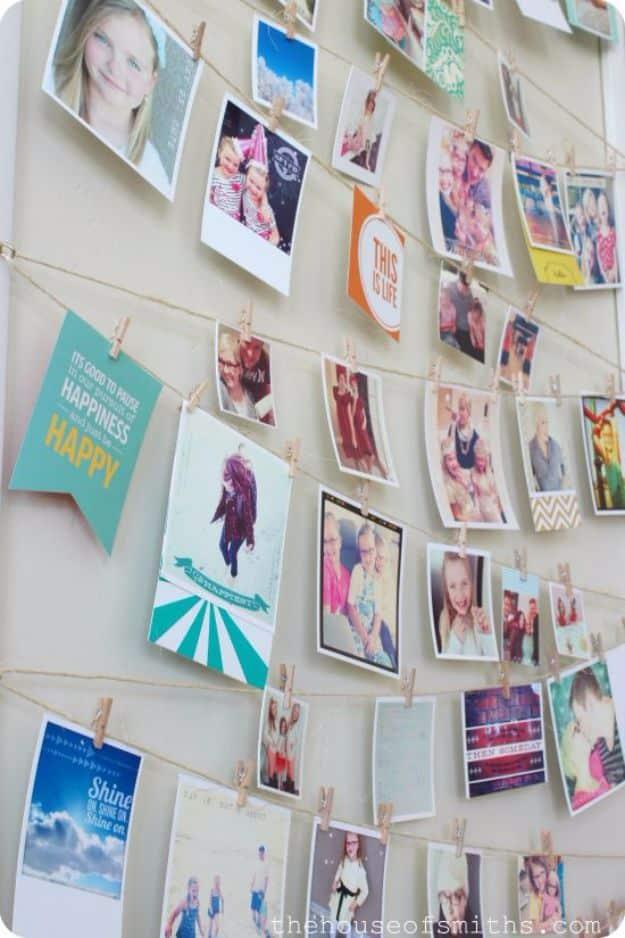
Two lengths of PVC composite molding fixed to either side of a wall with Command strips, each fitted with eye screws at even intervals, and twine threaded back and forth between them so a whole wall becomes a clothesline. Photos, holiday cards and patterned scrapbook papers peg on anywhere along the lines. Tape the ends of the twine before threading so they do not fray. Command strips mean the entire installation comes off a rented wall without a mark. Because it is a grid of lines rather than fixed points, the display expands into whatever space it is given and never looks half finished.
Get the full tutorial at The House of Smiths.
13. Ladder Gallery
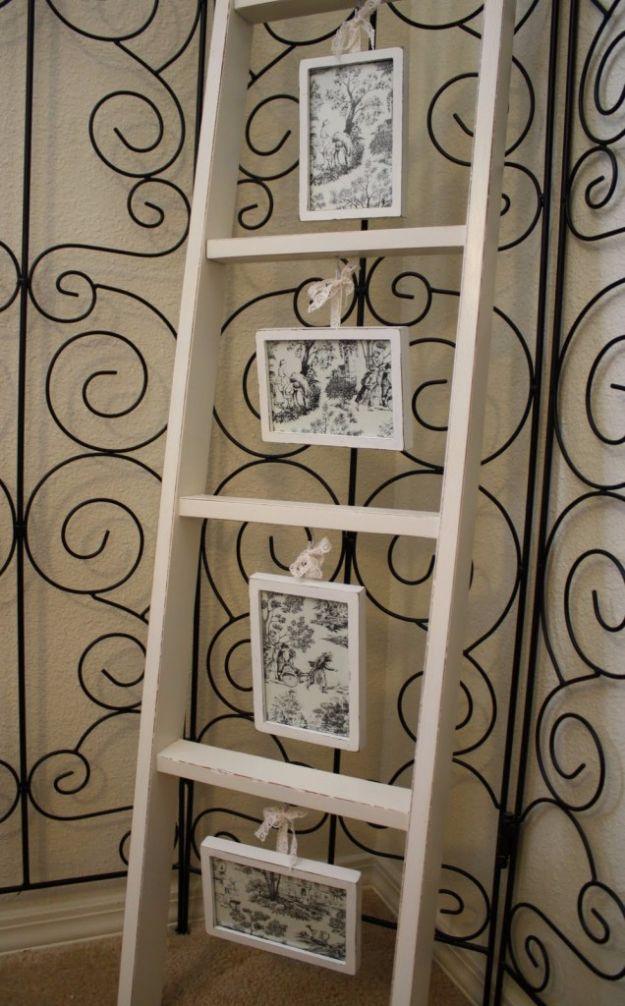
A bunk bed ladder from a ReStore, painted Heirloom White and sanded back at the edges, with white hooks fitted between the rungs and dollar store frames hanging from them on off white lace ribbon. The frames were stained dark walnut first and then painted the same Heirloom White over the top, so the distressing brings dark wood through pale paint rather than bare timber. Because the frames hang on ribbon from hooks, the whole display rearranges in a minute. The ladder can lean in a corner, go flat against a wall, or lie sideways with the hooks repositioned.
Get the full tutorial at A Diamond in the Stuff.
14. Wooden Animal Photo Holder DIY
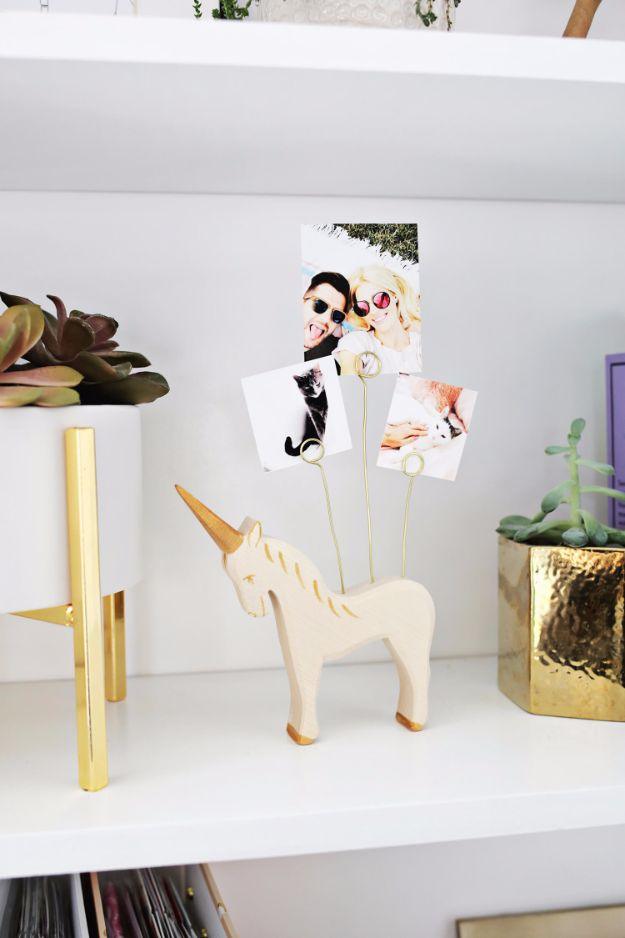
A small wooden animal drilled to take lengths of brass wire, each curled at the top into a spiral that grips a photograph. Go thicker than you would think on the wire: the maker calls for gauge 10 or 14, and anything much thinner bends under a print. Drill each hole about half an inch deep with a bit the same size as the wire, then run super glue down inside it with a thin nozzle so the joint never shows. Cut the wires to different lengths, because the height difference is what stops something this small disappearing on a shelf.
Get the full tutorial at A Beautiful Mess.
15. Photo Ledges
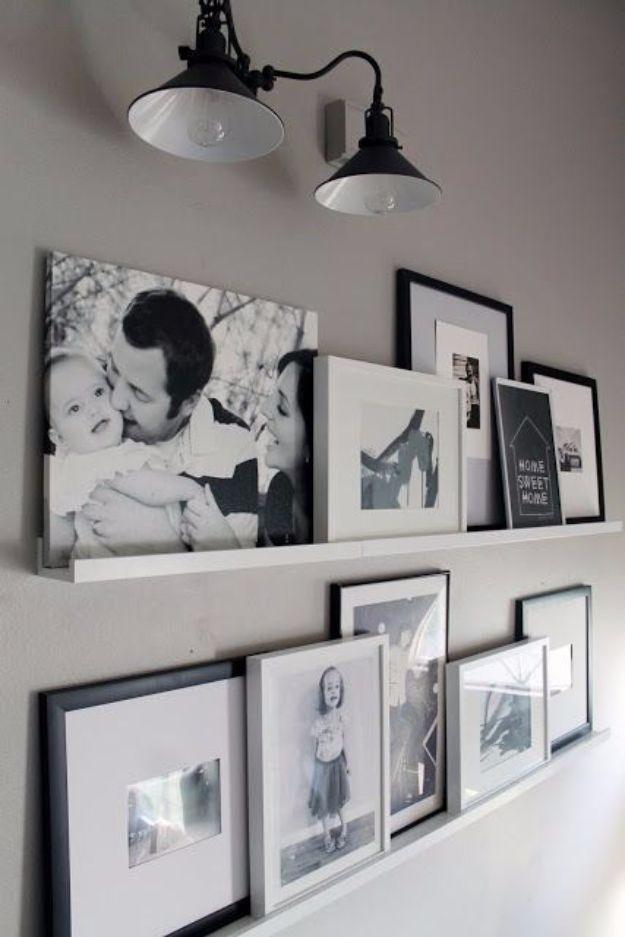
Two runs of shop bought picture ledges, in two different lengths so the pair fills the wall exactly, screwed into anchors along a stairway. The makers are honest that nothing was built here, and point at a free plan if you would rather make the ledges yourself. What is worth copying is the fix that came after a frame toppled off and broke on the stairs below: a blob of sticky tack behind every frame, and another where the bottom of the frame meets the ledge to force it to lean back. Balanced but not symmetrical is the arrangement rule.
Get the full tutorial at Chris Loves Julia.
16. DIY Shutter Repurpose
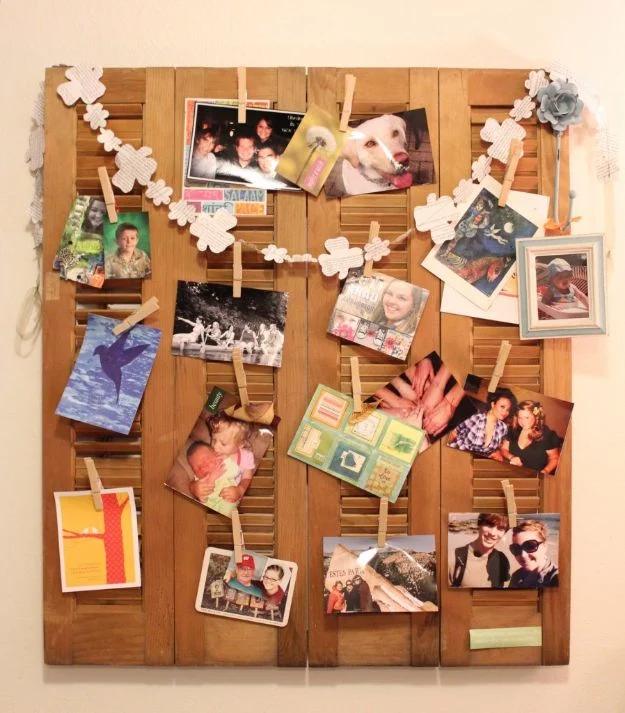
An old louvered shutter hung flat on the wall and covered in clothespins, so photographs, postcards, greetings cards and anything else worth keeping clip into the slats. The louvers do all the work, because every angled slat is already a place for a peg to grip, which means no wires, no hooks and no hardware at all beyond whatever hangs the shutter. Cards go up when they arrive and come down when the season changes. It lives happily in a kitchen, which is the room where this sort of thing actually gets used and where nobody wants a formal gallery wall.
Get the full tutorial at Apartment 205B.