
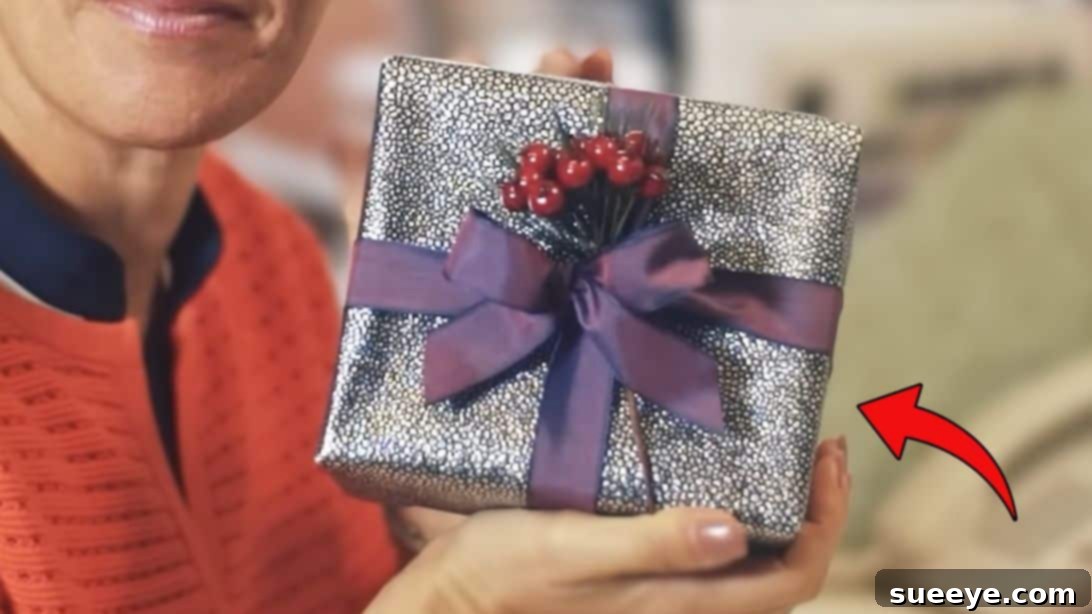
Mastering the Art of Gift Wrapping: How to Tie the Perfect Ribbon Bow
Elevate your gift-giving experience this year by mastering the elegant art of tying a ribbon bow. While it might seem like a simple finishing touch, a beautifully tied bow transforms any present into a truly memorable gesture. It’s more than just decoration; it’s a silent testament to the care and thought you put into your gift. Many find achieving that flawless, symmetrical bow a bit challenging, often requiring a few attempts. But with the right technique and a little practice, you can consistently create stunning bows that impress and delight.
We’ll guide you through a proven method, inspired by the expertise of renowned ribbon specialist Jane Means, to tie a classic ribbon around a box. This step-by-step tutorial is designed to make the process straightforward and enjoyable, ensuring your gifts look polished and professional every time. Say goodbye to lopsided loops and tangled ends, and hello to perfectly presented presents!
Why a Beautiful Bow Elevates Your Gift
In a world where presentation often speaks volumes, a well-chosen and perfectly tied ribbon bow can significantly enhance the perceived value and thoughtfulness of your gift. It’s not merely an accessory; it’s an integral part of the gifting experience. Here’s why investing a little extra time in your bow matters:
- First Impressions Count: The moment a recipient sees a beautifully wrapped gift, their anticipation builds. A neat, elegant bow sets a tone of care and attention to detail before the gift is even opened.
- Reflects Thoughtfulness: A hastily tied bow can suggest a last-minute effort, while a carefully crafted one communicates that you truly put thought into every aspect of the present, from the item itself to its presentation.
- Adds a Touch of Luxury: Ribbons, especially those of high quality, can instantly elevate a simple package into something luxurious and special. They add texture, color, and a sense of occasion.
- Creates Excitement: The act of untying a bow, especially a complex or elaborate one, adds to the ritual of gift-opening, making the moment more engaging and exciting.
- Personalization: Ribbons allow for personalization. You can choose colors, textures, and styles that reflect the recipient’s personality, the occasion, or the theme of the gift.
Transforming your gift-wrapping from functional to fabulous is easier than you think. With this guide, you’ll be tying exquisite bows that make every gift feel extraordinary.
Choosing the Perfect Ribbon for Your Gift
The type of ribbon you choose can significantly impact the final look and feel of your gift. With an array of options available, selecting the right one can seem daunting, but considering a few key factors will make the decision easier.
Types of Ribbons and Their Uses:
- Satin Ribbon: Known for its smooth, glossy finish on one or both sides, satin ribbon exudes elegance and luxury. It drapes beautifully and is perfect for formal gifts or when you want a sophisticated look. Available in a vast spectrum of colors.
- Grosgrain Ribbon: Identified by its ribbed texture, grosgrain is sturdy and holds its shape well, making it excellent for structured bows. It offers a more casual yet chic look than satin and is less prone to slipping.
- Organza Ribbon: Translucent and lightweight, organza ribbon adds a delicate and ethereal touch. It’s ideal for layering with other ribbons or for creating soft, voluminous bows that have a subtle shimmer.
- Wired Ribbon: Featuring a thin wire along its edges, wired ribbon is a dream for bow-making because it allows you to shape and mold the loops precisely. This is perfect for creating intricate, voluminous, and long-lasting bows.
- Velvet Ribbon: Rich and luxurious, velvet ribbon is wonderful for holiday gifts, winter occasions, or anytime you want to add warmth and opulence. Its plush texture makes a strong visual statement.
- Natural & Rustic Ribbons (Jute, Raffia, Twine): For a more organic, eco-friendly, or rustic aesthetic, ribbons made from natural fibers are excellent. They are perfect for handmade gifts, garden-themed presents, or gifts with a country charm.
Key Considerations When Choosing:
- Occasion: A wedding gift might call for satin or organza, while a birthday gift for a child could feature bright grosgrain. Holiday gifts often benefit from velvet or patterned ribbons.
- Gift Size and Shape: For larger gifts, a wider ribbon makes more of a statement. For smaller, delicate items, a narrower ribbon is more appropriate. Consider if the ribbon will complement or overwhelm the gift.
- Color and Pattern: Coordinate the ribbon color with your wrapping paper. A monochromatic scheme can be elegant, while contrasting colors can add a pop of excitement. Patterned ribbons can introduce an extra layer of visual interest.
- Recipient’s Style: Think about the person receiving the gift. Do they prefer classic elegance, modern minimalism, playful whimsy, or rustic charm?
By thoughtfully choosing your ribbon, you set the stage for a truly exquisite presentation.
Essential Tools for Perfect Ribbon Tying
Before you begin, gathering the right tools will make the ribbon-tying process smoother and more enjoyable. You don’t need much, but having these essentials on hand will significantly improve your results:
- Sharp Scissors: This is perhaps the most crucial tool. Dull scissors will fray your ribbon edges, leading to a messy, unprofessional look. A pair of dedicated craft scissors kept sharp will ensure clean, crisp cuts every time.
- Your Chosen Ribbon: Based on the gift, occasion, and recipient, select your ribbon type, width, and color. Always have a little extra; it’s better to have too much than too little.
- The Gift Box (Wrapped): Ensure your gift is already neatly wrapped. A smooth, taut surface makes it much easier to tie a ribbon securely without it slipping or wrinkling the paper.
- Optional: Double-Sided Tape or Glue Dots: For extra security, especially with slippery ribbons, a small piece of double-sided tape can help anchor the ribbon in place before you tie the bow. This is particularly useful for beginners or when working with difficult materials.
Having these simple items ready will set you up for success in creating beautiful bows.
Pre-Tying Tips for a Flawless Finish
Achieving a perfect bow starts even before you make the first knot. These preliminary tips will help you avoid common pitfalls and ensure your ribbon looks pristine from start to finish.
- Ensure a Cleanly Wrapped Box: The foundation of any great bow is a perfectly wrapped gift. Make sure your wrapping paper is smooth, corners are crisp, and any tape is discreetly placed. A bumpy or loose wrapper will make it harder to tie a taut ribbon.
- Practice Makes Perfect: If you’re new to bow tying or trying a new technique, consider practicing with a scrap piece of ribbon. This allows you to get a feel for the material and the steps without wasting your good ribbon or frustrating yourself with the actual gift.
- Avoid Twists: As you wrap the ribbon around the box, constantly check that it lies flat and hasn’t twisted. Twisted ribbons look messy and unprofessional. Gently smooth and untwist as you go.
- Estimate Ribbon Length Generously: A common mistake is not cutting enough ribbon. A good rule of thumb for a standard bow is to measure the circumference of your box twice, then add about 18-24 inches (45-60 cm) for the loops and tails of your bow. When in doubt, err on the side of too much. You can always trim excess, but you can’t add more!
- Consider Your Bow’s Placement: Decide where on the box you want your bow to be centered. Most commonly, it’s placed on the top center, but you might choose an offset placement for a unique look.
Taking these small preparatory steps will significantly contribute to the overall beauty and success of your ribbon work.
Step-by-Step Guide: How to Tie a Ribbon Around a Box
Now, let’s dive into the practical steps to create that stunning ribbon bow. Follow these instructions carefully, and remember that patience and precision are your best allies.
Step 1: Position and Initial Wrap
Begin by laying your wrapped gift box on a flat surface. Take one end of your chosen ribbon and position it on the top surface of the box, letting a small tail (approximately 4-6 inches or 10-15 cm) hang slightly over the side. Hold this short end firmly in place with your thumb or a small piece of double-sided tape if the ribbon is slippery. Now, take the longer “working” end of the ribbon and wrap it smoothly and tightly around the entire length of the box, bringing it back to the top surface, directly opposite where you started.
Step 2: Cross Over and Secure the First Loop
Once the working ribbon is back on top, cross it over the short end you initially held down. Ensure this crossing point is exactly where you intend your bow to be centered. While holding the intersection point firmly with one hand, take the working ribbon and wrap it around the width of the box, perpendicular to your first wrap. Bring it back to the center of the top of the box. You should now have the ribbon forming a cross on the top of your box, securing the initial short tail. It’s crucial that the ribbon lies flat and is snug against the box at all times, without crushing the box itself.
Step 3: Measure and Cut for the Bow
Now that the ribbon is wrapped around the box and secured in a cross, you have two ends meeting at the center top. Take the short tail you started with and hold it alongside the working ribbon. Estimate the length needed for your bow loops and tails. A good way to measure is to imagine the size of the bow you want. Cut the working ribbon so that both ends are roughly the same length. They should be long enough to create two generous loops and two tails for your bow. Err on the side of cutting it a little longer, as you can always trim it later.
Step 4: Tuck for a Secure Base
With both ribbon ends now approximately equal in length, it’s time to create the secure foundation for your bow. Take one of the ribbon ends (it doesn’t matter which one) and carefully tuck it underneath the crossed section of ribbon on the top of the box. Gently pull it through, so it emerges on the opposite side. This action creates a secure knot that holds the ribbon firmly in place around the box. Ensure the ribbon remains flat and untwisted as you pull it through. This step prevents the ribbon from sliding off once the bow is tied.
Step 5: Crafting the Perfect Bow
This is where the magic happens! To create a classic bow, envision the letter ‘X’ as your guide. First, take one end of the ribbon and form a loop (often called a “bunny ear”). Hold this loop securely. Then, take the other end of the ribbon and wrap it around the base of the first loop, going from the front to the back, and then insert it into the center opening of the “X” you’ve formed. This action creates the second loop. Before you pull anything tight, pause and ensure both loops are roughly equal in size and the tails hang symmetrically. Adjust the loops and tails as needed until they look balanced. Once satisfied, gently but firmly pull both loops to tighten the knot at the center. Tug at the loops and tails to fluff out the bow, giving it volume and shape. Finally, trim the ends of your ribbon. You can cut them at an angle for a classic look, or create a V-shape (fishtail cut) by folding the ribbon lengthwise and cutting upwards from the fold to the edge.
Advanced Tips and Troubleshooting for Bow Tying
Once you’ve mastered the basic bow, you can refine your technique and tackle common challenges to achieve truly professional results.
Pro Tips for Perfection:
- Use Wired Ribbon for Structure: If you struggle with bows holding their shape, wired ribbon is a game-changer. The wire allows you to sculpt each loop and tail precisely, ensuring your bow looks full and vibrant.
- Layering Ribbons: For an extra luxurious look, consider using two different ribbons. Wrap a wider, solid-colored ribbon first, then layer a narrower, perhaps patterned or contrasting ribbon over the top, tying both into a single bow or separate bows for a layered effect.
- Add Embellishments: Once your bow is tied, consider adding small embellishments. A sprig of greenery, a tiny ornament, a personalized tag, or a small floral element can be tucked into the center of the bow for added charm.
- Practice the “Bunny Ears” Method: For some, the traditional “bunny ears” method of tying a shoe-lace bow is easier. Form two loops (the bunny ears) with your ribbon ends, cross one over the other, tuck it through the hole, and pull tight. Adjust until perfect.
Troubleshooting Common Bow Tying Problems:
- Lopsided Bows: This often happens when one loop is pulled tighter than the other, or the initial knot isn’t centered. Before tightening, meticulously adjust both loops and tails until they are symmetrical.
- Ribbon Slipping: If your ribbon won’t stay put, especially on glossy wrapping paper, use a tiny piece of double-sided tape at the crossing points on the back or bottom of the box before you tie the bow. Wired ribbon also helps grip.
- Not Enough Ribbon: Always measure generously! If you find yourself short, you can try making smaller loops, or consider tying a simple knot and then attaching a pre-made bow separately with hot glue or a thin wire.
- Twisted Ribbons: The key here is vigilance. As you wrap and tie, continuously smooth out the ribbon. If it twists, gently untwist it before pulling tight. Satin ribbons are particularly prone to twisting.
- Flat, Lifeless Bows: This is where fluffing comes in. Once the bow is tied, gently pull each loop from the center outwards, separating them and giving them air. Wired ribbon excels at maintaining this volume.
Frequently Asked Questions About Tying Ribbon Bows
Here are answers to some common questions that arise when tying ribbon bows:
Q: How do I know how much ribbon to cut?
A: A good general rule is to measure the total circumference of your box twice (lengthwise and widthwise), then add about 18-24 inches (45-60 cm) for the loops and tails of your bow. For larger bows or if you’re unsure, add a little extra. It’s always better to have too much than too little.
Q: My bow looks flat. How can I make it look fuller?
A: The key is to “fluff” your bow once it’s tied. Gently pull and separate each loop from the center outwards. If you’re using wired ribbon, you can physically shape and mold the loops and tails to give them more volume and definition.
Q: What’s the best ribbon for beginners?
A: Wired ribbon is highly recommended for beginners because its built-in wire allows you to easily shape and hold the loops, making adjustments much simpler. Grosgrain ribbon is also good as it has a bit more body than satin and is less prone to slipping.
Q: Can I use multiple ribbons for one bow?
A: Absolutely! Layering ribbons adds depth and texture. You can either wrap two different ribbons around the box simultaneously and tie them together, or tie a simpler bow with one ribbon and then use a second, narrower ribbon to create a smaller bow on top, securing it with a thin wire or a dab of hot glue.
Q: How do I prevent the ribbon from slipping off the box?
A: Ensure the ribbon is wrapped tightly around the box from the start. For extra security, especially with very smooth ribbons or glossy wrapping paper, you can use small pieces of double-sided tape to anchor the ribbon at the crossing points on the underside of the box before tying your bow.
Conclusion: The Joy of a Perfectly Wrapped Gift
Tying the perfect ribbon bow around a gift box is an art form that, once mastered, adds immeasurable value to your presents and brings immense satisfaction. It’s a small detail that speaks volumes about your care and attention. By following the steps outlined in this guide, from selecting the right ribbon to the final flourishing cut of the tails, you’ll be well-equipped to create stunning presentations every time.
Remember, practice makes perfect. Don’t be discouraged if your first few attempts aren’t flawless. Each bow you tie refines your skill, and soon, you’ll be creating elegant, professional-looking gifts with ease. So, gather your ribbons and scissors, and get ready to spread joy with beautifully presented gifts that truly stand out.
RELATED: DIY Bow Scrunchie
RELATED: How to Wrap Gifts With No Tape