
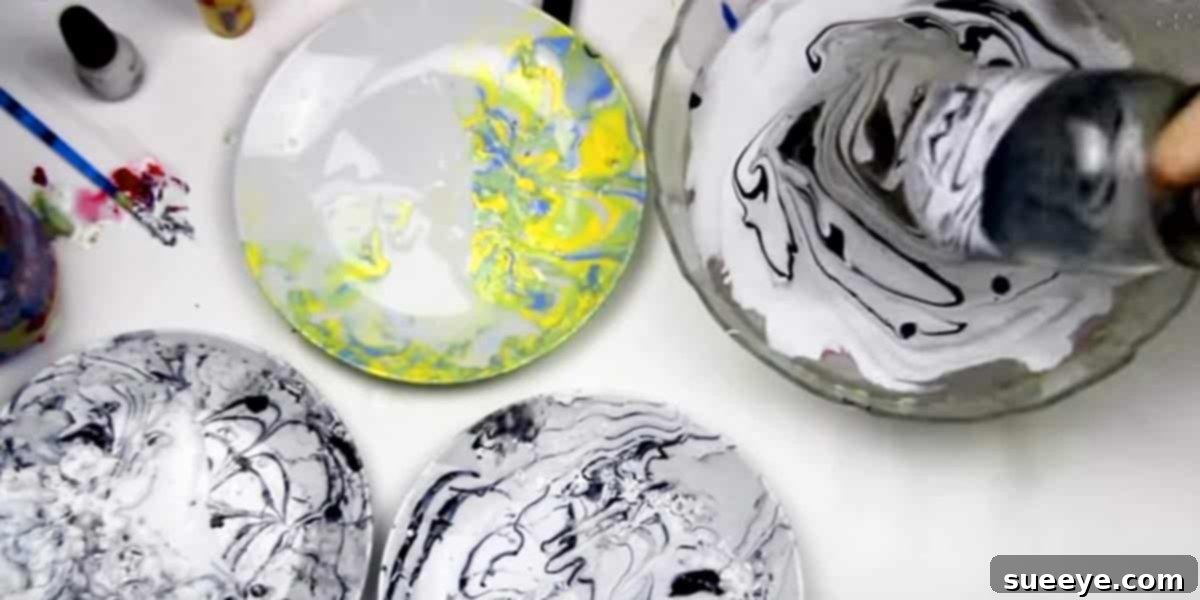
Transforming ordinary glass into something truly extraordinary has never been easier or more fun! Imagine taking a plain mason jar, a simple glass vase, or even a discarded bottle, and in just a few minutes, turning it into a vibrant piece of art. This engaging DIY project offers a fantastic way to achieve stunning, professional-looking results with minimal effort and cost. Whether you’re looking to add a personal touch to your home decor, create unique gifts for loved ones, or find a creative activity for a rainy afternoon, nail polish marbling is your perfect solution.
Gone are the days of complex crafts requiring specialized tools and skills. This simple yet incredibly effective technique allows anyone to unleash their inner artist, producing beautiful marbled patterns that are utterly unique. It’s ideal for quickly dressing up a table before a spontaneous gathering, crafting charming holiday decorations without breaking the bank, or even engaging bored kids with a captivating, hands-on activity. Get ready to discover one of the quickest, most satisfying, and visually rewarding DIY projects you’ll ever undertake!
The Magic of Nail Polish Marbling: Why You’ll Love This DIY Project
This innovative DIY technique is a true game-changer for anyone seeking an accessible and rewarding creative outlet. It’s particularly wonderful for those days when you’re cooped up indoors due to cold weather or a relentless downpour, offering a vibrant escape into the world of color and design. The sheer simplicity of the process, combined with the incredibly impressive final appearance, often surprises first-timers. You’ll be amazed at how easily you can achieve such sophisticated results!
One of the greatest advantages of nail polish marbling is its incredible versatility. While mason jars are a popular choice due to their availability and charm, this technique isn’t limited to just jars. Imagine the stunning effect on a plain ceramic plate, a clear glass vase, or even small glass candle holders. The possibilities are endless, allowing you to personalize almost any smooth, non-porous surface. This adaptability makes it perfect for creating thoughtful, handmade gifts for friends and family, adding a personal touch that store-bought items simply can’t match.
Beyond its aesthetic appeal, this project is also wonderfully inclusive. It’s simple enough for older children and teenagers to undertake on their own, fostering independence and creativity, perhaps with just a little supervision for the messier parts. For adults, it’s a relaxing and therapeutic activity, offering a chance to unwind and express artistic flair without the pressure of perfection – every marble design is naturally unique and beautiful. It’s a budget-friendly way to upcycle old glass items, breathe new life into forgotten decor, and explore a spectrum of color combinations.
The applications for your marbled creations are vast and varied. They make exquisite table centerpieces for weddings or special events, adding an elegant, customized touch. Use them as decorative vases for fresh flowers around your home, instantly elevating any room. They are also incredibly practical for organizing, serving as stylish holders for makeup or makeup brushes on a vanity, or keeping pens and pencils neatly arranged on your desk. This project truly embodies the spirit of creative transformation, making beautiful, functional art accessible to everyone.
Essential Supplies for Your Marbling Adventure
Before you dive into the exciting world of nail polish marbling, gathering your materials is key. The beauty of this project lies in its affordability and accessibility, often utilizing items you might already have around the house or can easily acquire from a dollar store. Here’s a comprehensive list of what you’ll need to get started:
- Glass Objects: Mason jars are a fantastic starting point due to their classic appeal and various sizes. However, don’t limit yourself! Consider upcycling old glass vases, candle holders, wine bottles, drinking glasses, or even ceramic plates. Ensure your chosen items are clean and dry for the best results.
- Nail Polish: This is the star of our show! You’ll need a selection of nail polishes in various colors. Dollar stores, like Dollar General, often have huge racks of brightly colored polishes for as little as 99 cents, making this an incredibly budget-friendly craft. Experiment with contrasting colors for dramatic effects or complementary shades for a softer, blended look. Old nail polish that might be too thick for nails often works perfectly for marbling.
- Disposable Container: You’ll need a container that is deep enough to fully submerge your glass object and wide enough to allow the nail polish to spread freely on the water’s surface. Old plastic food containers, yogurt tubs, or even aluminum foil pans work wonderfully. Be prepared to discard this container after use, as it will get covered in polish.
- Warm Water: Fill your disposable container with lukewarm water. The temperature is important; water that is too cold can cause the nail polish to sink, while water that is too hot can make it dry too quickly on the surface. Aim for a comfortable, slightly warm temperature.
- Stirring Stick/Toothpick: A simple wooden skewer, toothpick, or even a craft stick will be essential for gently swirling the nail polish on the water’s surface to create your unique marbled patterns.
- Gloves (Optional, but Recommended): To keep your hands clean and free from nail polish stains, a pair of disposable gloves can be very helpful, especially if you’re working with multiple colors or dipping several items.
- Newspaper or Drop Cloth: Protect your workspace from potential spills or drips by laying down several layers of newspaper, an old towel, or a plastic drop cloth.
- Nail Polish Remover/Acetone: Keep some nail polish remover and cotton balls or paper towels handy for quick cleanups of any accidental drips or for correcting mistakes on your glass items before the polish fully dries.
- Clear Spray Sealant (Optional): If you want to make your marbled items more durable and resistant to scratches or moisture, especially if they will be frequently handled or gently washed, a clear acrylic spray sealant can be applied after the polish has thoroughly dried.
Step-by-Step Guide: How to Marble Glass with Nail Polish
Now that you have all your supplies ready, it’s time for the exciting part – creating your beautiful marbled glass! Follow these simple steps to achieve stunning results:
- Prepare Your Workspace: Lay down newspaper or a drop cloth to protect your table or floor. Put on your gloves if you’re using them. Ensure your glass object is thoroughly clean and dry. Any dust or residue can prevent the nail polish from adhering properly.
- Set Up Your Water Bath: Fill your disposable container with lukewarm water. The water level should be high enough to allow you to fully submerge the part of your glass object you wish to marble.
- Drip the Nail Polish: Open your chosen nail polish bottles. Hold one bottle close to the surface of the water and let a few drops fall directly onto the water. The polish should spread out to form a thin film on the surface. Immediately add drops of other colors you want to use, allowing them to spread and layer on top of each other. Work relatively quickly, as nail polish can start to dry on the water’s surface. Don’t add too much polish initially; you can always add more if needed.
- Create Your Marble Design: Take your toothpick or stirring stick and gently swirl through the layers of nail polish on the water’s surface. Create patterns, lines, or abstract designs. Be careful not to mix the colors too much, as this can result in a muddy appearance. A few gentle swirls are usually enough to create a beautiful marble effect.
- Dip Your Glass Object: Slowly and carefully dip your glass object into the water, at a slight angle. Rotate the object as you submerge it, allowing the nail polish film to adhere to its surface. Ensure all desired areas are covered. Once dipped, pull the object straight out of the water.
- Clean the Water Surface: Before dipping another item, use your toothpick or a spare piece of paper to “scoop” up any remaining nail polish film from the water’s surface. This prevents transferring old, partially dried polish onto your next item.
- Allow to Dry: Place your newly marbled glass object upside down (or on a protected surface where it won’t smudge) to dry. Nail polish dries relatively quickly, but allow at least 1-2 hours for it to fully cure. For best results and durability, let it dry overnight before handling extensively or applying a sealant.
- Apply Sealant (Optional): Once completely dry, if desired, take your item to a well-ventilated area and apply a clear acrylic spray sealant according to the product instructions. This will protect your beautiful marbled design from chipping or fading.
Pro Tips for Perfect Marbled Glass
To ensure your nail polish marbling projects are always a success, keep these expert tips in mind:
- Experiment with Water Temperature: While lukewarm water is generally recommended, slightly cooler or warmer water can sometimes affect how the polish spreads. Experiment to find what works best with your specific brand of nail polish.
- Work Quickly: Nail polish dries rapidly when exposed to air. Have all your colors open and ready before you start dripping to maximize your working time on the water’s surface.
- Less is More: Don’t overload the water with too much polish. A thinner layer of polish will spread more effectively and create more intricate patterns. If the polish sinks, your water might be too cold, or you might be adding too much polish at once.
- Practice Makes Perfect: If you’re new to this, consider practicing on a less important item or even a small piece of scrap glass first to get a feel for the technique and how the polish behaves.
- Vary Your Dipping Angle: Dipping your object at different angles or twisting it as you pull it out can create unique variations in your marble pattern.
- Color Combinations: Choose colors that either complement each other beautifully or provide a striking contrast. Metallics and glitter polishes can add an extra dimension of sparkle and sophistication to your designs.
- Cleaning Up Excess Polish: After each dip, use your toothpick to gather and remove the leftover “skin” of dried polish from the water’s surface. This keeps your water clean for subsequent dips and prevents undesirable clumps on your next item.
- Layering Techniques: For a multi-dimensional look, allow one marbled layer to dry completely, then carefully dip the item again into a new set of colors.
Endless Possibilities: Creative Uses for Your Marbled Creations
Once you start marbling, you’ll find it hard to stop! The personalized beauty of nail polish marbled glass makes it suitable for countless applications:
- Stunning Home Decor: Elevate any room with marbled vases holding fresh flowers, unique candle holders casting a warm glow, or decorative bottles adding a splash of color to shelves and mantels. They can also serve as stylish succulent planters.
- Party and Event Enhancers: Marbled mason jars make enchanting table centerpieces for weddings, baby showers, or birthday parties. Fill them with fairy lights, small bouquets, or even party favors for an unforgettable touch. Tailor colors for holiday decor like festive Christmas jars, spooky Halloween votives, or pastel Easter displays.
- Thoughtful Handmade Gifts: Nothing says “I care” like a personalized, handmade gift. Fill a marbled jar with homemade cookies, bath salts, or a collection of small treats for a truly special present for birthdays, holidays, or teacher appreciation.
- Chic Organization Solutions: Bring elegance to your everyday organization. Use marbled jars or glasses as sophisticated holders for makeup brushes, cotton swabs, or jewelry on your vanity. On your desk, they’re perfect for neatly storing pens, pencils, scissors, and other office supplies.
- Functional Kitchen Accents: Turn ordinary kitchen utensils into decorative statements by storing them in a beautifully marbled jar on your countertop.
- Personalized Drinkware: While not dishwasher safe, marbled glasses can be used for special occasions (hand-wash only) or purely for decorative purposes, adding a unique flair to your drinkware collection.
With this simple yet incredibly rewarding DIY project, you’re not just creating marbled glass; you’re transforming everyday objects into personalized works of art. The ease, affordability, and sheer joy of seeing your unique designs come to life are truly addictive. So gather your supplies, pick your favorite nail polish colors, and prepare to embark on a creative journey that will have you marbling everything in sight!