
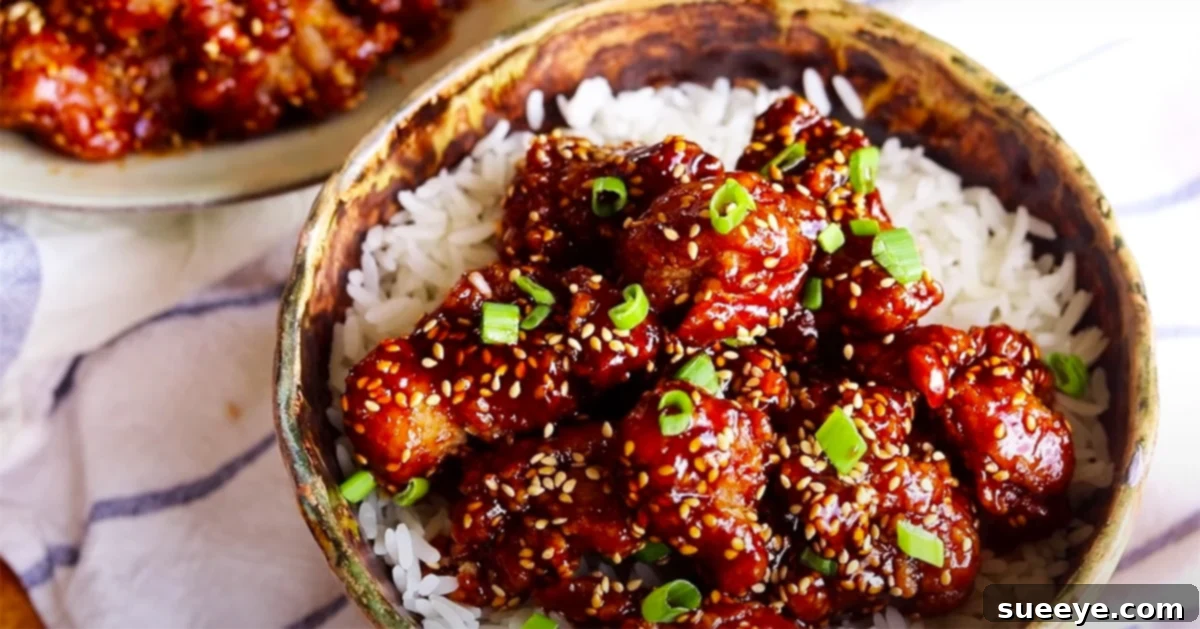
Craving the rich, savory, and perfectly sweet flavors of Chinese takeout but finding authentic options scarce in your area? You’re not alone! For many, especially in places like Tennessee where traditional Chinese eateries might be a drive away, the dream of a delicious homemade meal becomes a reality. This guide will walk you through creating an absolutely irresistible homemade crispy sesame chicken that rivals your favorite restaurant dish. Imagine golden-fried chicken pieces, coated in a glistening, sticky, and aromatic sesame sauce, ready to be devoured right in your kitchen. Not only will you satisfy those takeout cravings, but you’ll also likely end up with fantastic leftovers that taste just as good, if not better, the next day. This recipe is also incredibly versatile; consider it a foundational technique. If sesame chicken isn’t your primary craving, you can easily adapt the crispy chicken base to other beloved sauces like tangy orange chicken, savory General Tso’s, or even a zesty lemon chicken sauce. We’ll draw inspiration and foundational techniques from helpful resources, such as the Souped Up Recipes tutorial on YouTube, known for its clear, detailed instructions that make home cooking accessible and enjoyable.
Mastering Homemade Crispy Sesame Chicken: Your Ultimate Guide
There’s a unique satisfaction that comes from recreating beloved restaurant dishes in your own home. Beyond the incredible flavor, making sesame chicken from scratch offers several advantages, from ensuring the freshest ingredients to customizing the taste to your exact preferences. Say goodbye to guesswork about what goes into your food and embrace the joy of a truly homemade masterpiece.
Why Choose Homemade Sesame Chicken?
- Unbeatable Freshness and Quality: When you cook at home, you control every ingredient. This means using fresh chicken, high-quality sauces, and avoiding any preservatives or artificial flavors often found in takeout.
- Customization at Your Fingertips: Love your sauce a little sweeter? Prefer more garlic? Crave an extra kick of spice? Making sesame chicken at home allows you to adjust the flavors to perfectly suit your palate. You can even control the amount of oil used for frying or opt for baking the chicken for a lighter alternative.
- Cost-Effective Dining: Enjoying restaurant-quality Chinese food doesn’t have to break the bank. Preparing sesame chicken at home is significantly more economical than ordering takeout for the whole family, especially when you factor in generous portion sizes and potential leftovers.
- The Joy of Cooking: There’s immense satisfaction in learning a new recipe and seeing your culinary efforts come to fruition. This recipe, while delivering impressive results, is surprisingly approachable for home cooks of all skill levels.
- Dietary Control: If you have dietary restrictions or preferences, cooking at home gives you complete control. You can choose gluten-free soy sauce, reduce sugar content, or substitute ingredients as needed.
Essential Ingredients for Your Crispy Sesame Chicken
Achieving that perfect balance of crispy chicken and rich, flavorful sauce starts with selecting the right ingredients. Pay attention to the details, as each component plays a crucial role in creating a truly authentic and delicious dish.
For the Crispy Chicken:
- 1 lb Chicken Thigh: Boneless and skinless chicken thighs are highly recommended for their juiciness and flavor, which holds up well to frying. Cut them into approximately 1 to 1.5-inch cubes for even cooking.
- 2 Cloves of Garlic: Freshly grated or finely minced garlic infuses the chicken with essential aromatic flavor during the marination process.
- Black Pepper: To taste, providing a subtle warmth and depth.
- 1.5 tsp of Soy Sauce: A foundational savory element for the marinade. Use low-sodium if preferred.
- 1/2 tsp of Salt: Balances the flavors and seasons the chicken from within.
- 3/8 tsp of Baking Soda: This is a secret weapon! Baking soda helps tenderize the chicken, resulting in a wonderfully soft and moist interior even after frying.
- 1 Egg White: Acts as a binder, helping the starch adhere to the chicken, contributing to a crispier coating.
- 1/2 tbsp of Starch (e.g., potato starch or cornstarch): Added directly to the marinade, this helps create a thin, initial coating that protects the chicken and aids in developing a crispy crust.
- 1 cup of Potato Starch: This is your primary coating agent. Potato starch is renowned for creating an exceptionally crispy, light, and airy crust on fried foods. It’s often superior to cornstarch for this purpose in Chinese cuisine.
- 2 cups of Oil for Frying: A neutral oil with a high smoke point, such as vegetable oil, canola oil, or peanut oil, is ideal for deep-frying the chicken to a golden crisp.
For the Irresistible Sesame Sauce:
The sauce is the heart of sesame chicken, offering a harmonious blend of sweet, savory, and tangy notes. Preparing it correctly is key to a truly memorable dish.
- 2 tbsp of Honey: Adds natural sweetness and a lovely glaze.
- 3 tbsp of Brown Sugar: Contributes a deeper, more caramel-like sweetness compared to white sugar.
- 2.5 tbsp of Soy Sauce: The main savory component, providing umami and depth.
- 3 tbsp of Water: Helps to thin the sauce slightly and ensure a smooth consistency.
- 2.5 tbsp of Ketchup: Surprisingly, ketchup adds a touch of acidity, sweetness, and a vibrant color, which is common in many takeout-style sauces.
- 1 tbsp of Vinegar: Rice vinegar or white vinegar will provide the necessary tanginess to balance the sweetness.
- Sweet Potato Starch Water (Slurry): Made by mixing 2 tsp of potato starch with 2 tsp of cold water. This slurry is essential for thickening the sauce to its desired, glossy consistency.
- 1 tbsp of Sesame Oil: Added towards the end, sesame oil provides that unmistakable aromatic, nutty flavor characteristic of sesame chicken.
- 1.5 tbsp of Toasted Sesame Seeds: Both for flavor and as a visual garnish, they add a delightful texture.
- Diced Scallion: As a fresh and vibrant garnish, adding a mild oniony bite and bright green color.
Step-by-Step Directions: Crafting Your Perfect Sesame Chicken
Follow these detailed instructions to create restaurant-quality sesame chicken right in your own kitchen. Precision and timing are key to achieving that coveted crispy texture and perfectly balanced flavor.
1. Prepare and Marinate the Chicken
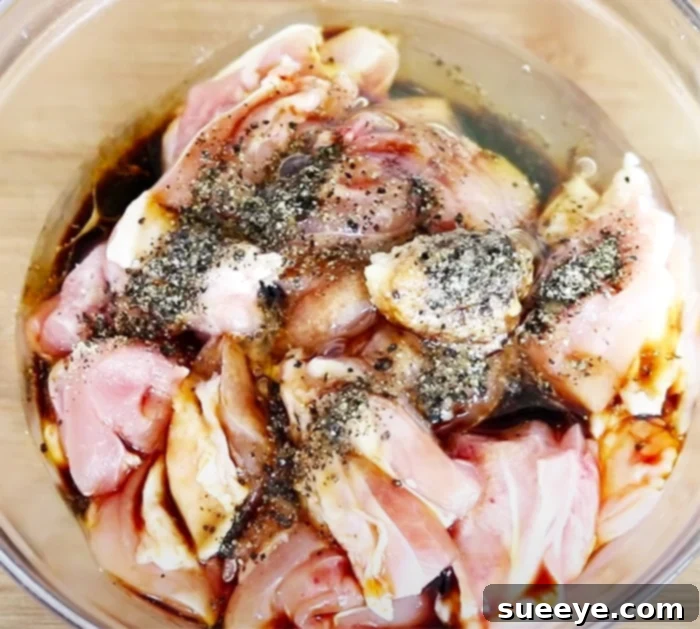
Start by preparing your chicken. Cut the boneless, skinless chicken thighs into uniform 1 to 1.5-inch pieces. This ensures even cooking. In a medium bowl, combine the chicken pieces with the grated garlic, soy sauce, salt, black pepper, baking soda, egg white, and 1/2 tablespoon of starch (potato starch or cornstarch). Mix everything thoroughly until the chicken pieces are well coated. The baking soda will work its magic to tenderize the meat, and the egg white and starch will begin forming a preliminary coating. Cover the bowl and let it marinate at room temperature for about 30-40 minutes. This marination time is crucial for both flavor and texture.
2. Prepare the Sesame Sauce
While the chicken is marinating, prepare your sauce. In a small saucepan or bowl, whisk together the honey, brown sugar, soy sauce, water, ketchup, and vinegar. Set this aside. Prepare your starch slurry by mixing 2 teaspoons of potato starch with 2 teaspoons of cold water in a separate small bowl until smooth. This will be used to thicken the sauce later. Ensure all your sauce ingredients are measured and ready, as the cooking process will move quickly once you start frying the chicken.
3. Coat and Fry the Chicken
Once the chicken has marinated, it’s time to create that signature crispy crust. Place the 1 cup of potato starch into a shallow dish or a large resealable bag. Take a few pieces of marinated chicken at a time and dredge them thoroughly in the potato starch, ensuring they are completely coated. Shake off any excess starch. Repeat with all chicken pieces. It’s often beneficial to let the coated chicken rest for 5-10 minutes, allowing the starch to hydrate slightly and adhere better, leading to an even crispier result.
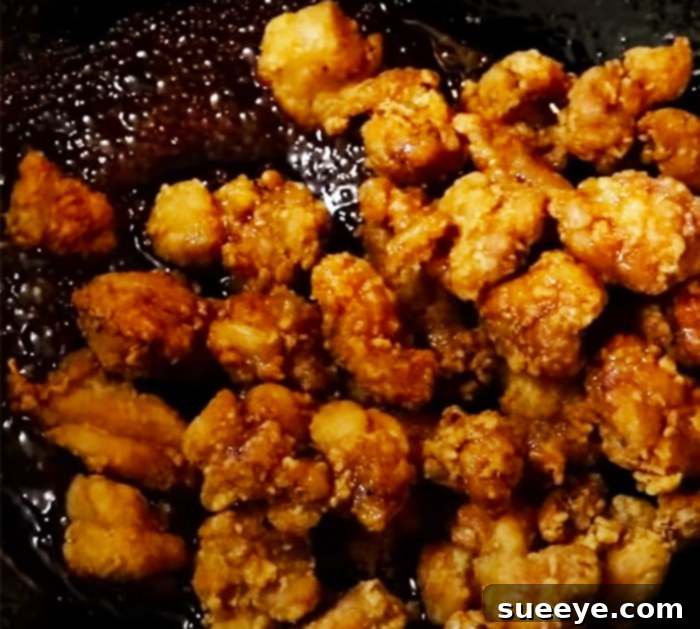
Heat your 2 cups of frying oil in a wok or a deep heavy-bottomed pot over medium-high heat until it reaches approximately 350-375°F (175-190°C). If you don’t have a thermometer, you can test the oil by dropping a tiny piece of coated chicken in; it should sizzle vigorously and float to the surface within a few seconds. Fry the chicken in batches, ensuring not to overcrowd the pan. Overcrowding will lower the oil temperature and result in soggy chicken. Fry each batch for about 3-4 minutes until golden brown and cooked through. For extra crispiness, you can perform a second fry: once all the chicken is fried once, increase the oil temperature slightly (to about 375-400°F or 190-200°C) and quickly re-fry the chicken in batches for another 60-90 seconds until they are deeply golden and exceptionally crunchy. Remove the chicken with a slotted spoon and place it on a wire rack set over a paper towel-lined baking sheet to drain any excess oil.
4. Combine Chicken and Sauce
With your crispy chicken ready, it’s time to bring everything together. Discard most of the frying oil from your wok, leaving just a tablespoon or two. Heat the wok over medium heat. Pour in your prepared sauce mixture. Bring the sauce to a gentle simmer, stirring constantly. Once it begins to bubble, give your potato starch slurry a quick stir (it separates easily) and slowly pour it into the simmering sauce while stirring continuously. The sauce will thicken rapidly, becoming glossy and sticky. Once it reaches your desired consistency, remove it from the heat.
Immediately add the freshly fried chicken pieces into the wok with the hot sauce. Toss quickly and gently to ensure all chicken pieces are evenly coated in the rich, glossy sauce. This step should be done swiftly to maintain the chicken’s crispiness. Stir in the 1 tablespoon of sesame oil at this stage; adding it at the end preserves its delicate aroma and flavor. Finally, sprinkle in 1.5 tablespoons of toasted sesame seeds, tossing once more to distribute.
Pro Tips for the Ultimate Homemade Sesame Chicken
- Don’t Skip the Baking Soda: It’s a game-changer for tender chicken.
- Use Potato Starch: For the crispiest coating, potato starch truly makes a difference compared to cornstarch.
- Oil Temperature is Key: Invest in a good thermometer. Maintaining the correct oil temperature prevents greasy chicken and ensures even cooking.
- Fry in Batches: Always fry chicken in small batches to keep the oil temperature stable and ensure maximum crispiness.
- Double Fry for Extra Crunch: If you love your chicken extra crispy, the second fry at a slightly higher temperature is worth the extra step.
- Taste and Adjust the Sauce: Before adding the starch slurry, taste your sauce and adjust the sweetness, saltiness, or tanginess to your liking.
- Fresh Garnishes: Diced scallions and extra toasted sesame seeds add both visual appeal and a burst of fresh flavor.
Serving Suggestions for Your Feast
Your homemade crispy sesame chicken is best enjoyed immediately while the chicken is at its crispiest and the sauce is perfectly warm and sticky. It pairs wonderfully with a variety of sides to complete your takeout experience.
- Jasmine White Rice: The classic pairing, perfect for soaking up every drop of that incredible sauce.
- Fried Rice: For a heartier meal, serve alongside a homemade vegetable or egg fried rice.
- Steamed Vegetables: A side of steamed broccoli, snap peas, or blanched bok choy adds freshness and a healthy balance to the rich chicken.
- Noodles: Consider serving it with simple lo mein noodles tossed in a light soy sauce and sesame oil dressing.
If you’re a sauce lover, don’t hesitate to double the sauce recipe! This way, you’ll have plenty of extra to spoon generously over your rice or vegetables, ensuring every bite is packed with flavor.
Beyond Sesame Chicken: Exploring Variations
The beauty of mastering this crispy chicken technique is its adaptability. Once you have the perfect fried chicken, the culinary possibilities are endless!
- Orange Chicken: Swap out the sesame sauce for a vibrant, citrusy orange sauce.
- General Tso’s Chicken: For a spicier and more complex flavor, prepare a General Tso’s sauce.
- Lemon Chicken: A lighter, tangy lemon sauce offers a refreshing alternative.
- Vegetarian Options: Apply the same coating and frying method to firm tofu or cauliflower florets for a delicious plant-based alternative.
Storing and Reheating Leftovers
If you’re lucky enough to have leftovers, store them in an airtight container in the refrigerator for up to 3 days. To reheat, the best method for maintaining some crispiness is to spread the chicken on a baking sheet and heat in a preheated oven or toaster oven at 350°F (175°C) for 10-15 minutes, or until heated through. The microwave is quicker but will soften the chicken’s texture.
Overall, this homemade sesame chicken recipe promises to be a delightful culinary adventure and a fantastic way to bring the authentic flavors of Chinese takeout into your home. The sight of the glistening, perfectly coated chicken, especially when served with a steaming side of jasmine white rice, is incredibly satisfying. Don’t be shy about making extra sauce to pour over your rice – it truly elevates the entire dish! By following these detailed steps, you’ll be able to create a meal that is not only delicious but also a testament to your newfound cooking prowess. Enjoy the process, savor the flavors, and prepare to impress your taste buds with this incredible dish!