
Our mattresses are silent partners in our daily lives, supporting us through countless hours of rest and rejuvenation. Given that we spend roughly a third of our lives sleeping, it’s no surprise that our mattresses endure significant wear and tear. Over time, they become silent collectors of sweat, dead skin cells, dust mites, and even pet dander, leading to unpleasant odors and potential allergens. While cleaning a mattress might seem like an overwhelming task, fraught with the fear of irreversible damage or complex procedures, a surprisingly simple and highly effective method exists to restore its freshness. This guide unveils a game-changing approach, inspired by insights from Clean My Space on YouTube, demonstrating how you can deep clean your mattress, eliminate odors, and tackle stains without ever getting it excessively wet – a crucial factor in preventing mold and mildew.
Imagine a mattress free from lingering smells, feeling as fresh as the day you bought it. This isn’t just about superficial cleanliness; it’s about creating a healthier sleep environment, extending the life of your investment, and ultimately, improving the quality of your rest. By utilizing common household items like baking soda and a vacuum cleaner, along with targeted stain removers, you can achieve remarkable results. This comprehensive method is designed for everyone, from the most meticulous sleepers to those who simply haven’t known where to begin. It’s an easy, water-free solution that addresses common concerns and leaves your mattress revitalized.
Deep Clean Your Mattress: Eliminate Odors & Stains for a Healthier Sleep
Maintaining a clean mattress is more than just good hygiene; it’s a vital component of a healthy lifestyle. A dirty mattress can harbor allergens like dust mites, exacerbate respiratory issues, and disrupt your sleep with stale odors. Regularly cleaning your mattress can significantly improve your indoor air quality and contribute to a more restful night’s sleep. This detailed guide will walk you through a powerful, no-fuss method that focuses on dry cleaning techniques, ensuring your mattress remains pristine without the risks associated with excessive moisture.
Why Regular Mattress Cleaning Is Essential for Your Health and Well-being
Many of us meticulously clean our sheets and pillowcases, yet the mattress underneath often goes overlooked. However, understanding what accumulates within its layers highlights the critical importance of regular deep cleaning:
- Allergen Accumulation: Mattresses are a prime breeding ground for dust mites, microscopic creatures that feed on dead skin cells. Their waste products are common allergens that can trigger asthma, eczema, and allergic reactions.
- Odor Build-Up: Human bodies naturally sweat during sleep, and over time, this moisture can lead to a stale, unpleasant odor trapped within the mattress fibers. Pets, spills, and general environmental factors can also contribute to this problem.
- Skin Cell Shedding: An adult sheds millions of skin cells every day, many of which end up on and within the mattress, providing a continuous food source for dust mites.
- Moisture and Bacteria: While this method focuses on dry cleaning, any accumulated moisture from sweat or spills can encourage bacterial growth and even mold, which poses serious health risks.
- Extending Mattress Lifespan: Regular cleaning and maintenance not only keep your mattress hygienic but also help preserve its structural integrity, extending its lifespan and protecting your investment.
By taking proactive steps to clean your mattress, you’re not just tackling dirt; you’re actively working to create a healthier, more refreshing sanctuary for sleep.
The Power of Baking Soda: Your Natural Ally Against Mattress Odors
Baking soda, or sodium bicarbonate, is a household staple renowned for its versatility, and it truly shines in its ability to neutralize odors. Its effectiveness stems from its chemical properties: baking soda is an amphoteric compound, meaning it can react with both acidic and basic odor molecules, bringing them to a neutral pH and effectively absorbing them rather than just masking them. When applied to a mattress, it draws out moisture and traps volatile organic compounds (VOCs) that cause smells, leaving behind a fresh, clean scent. This natural, non-toxic, and affordable solution makes it an ideal choice for mattress revitalization, especially for those sensitive to harsh chemical cleaners.
Materials Needed to Deep Clean Your Mattress Effectively
Gathering your supplies beforehand will make the cleaning process seamless and efficient. Here’s what you’ll need:
- A Sieve or Sifter: Essential for evenly distributing baking soda across the mattress surface.
- A Powerful Vacuum Cleaner with Upholstery Attachments: A crucial tool for removing dust, debris, and, most importantly, all the baking soda once it has done its work. Make sure your vacuum has strong suction.
- Enzyme Cleaner (e.g., Bac-Out): For targeting and breaking down organic stains like sweat, urine, blood, or pet accidents. Bac-Out is a popular choice known for its natural enzymes.
- An Old Toothbrush or Soft Scrub Brush: Perfect for gently working the enzyme cleaner into stained areas without damaging the fabric.
- Clean Cloths or Microfiber Towels: For blotting stains and absorbing excess moisture.
- Optional: Essential Oils (e.g., Lavender, Tea Tree): A few drops can be added to the baking soda for an extra burst of freshness and their natural antibacterial properties.
Comprehensive Directions: Your Step-by-Step Guide to a Spotless Mattress
Follow these detailed steps to thoroughly clean your mattress, eliminate odors, and tackle any lingering stains, ensuring a pristine and inviting sleep surface.
Step 1: Prepare Your Mattress and Ventilate the Space
Before you begin the cleaning process, preparation is key. This initial stage sets the foundation for an effective deep clean.
- Strip the Bed Completely: Remove all bedding – sheets, pillowcases, mattress protectors, and blankets. This allows full access to the mattress surface. Now is also a great time to wash all your bedding on a hot cycle to kill any dust mites.
- Open Windows and Doors: Ensure the room is well-ventilated. Fresh air circulation is vital, especially when dealing with odors and allowing any treated areas to dry naturally. Good ventilation also helps to air out the mattress itself, a beneficial practice on its own.

Step 2: Initial Vacuuming – Removing Surface Dust and Debris
A thorough initial vacuuming is crucial to remove loose dirt, dust mites, skin cells, and any other surface debris before applying cleaners. This prevents you from simply rubbing dirt deeper into the fabric.
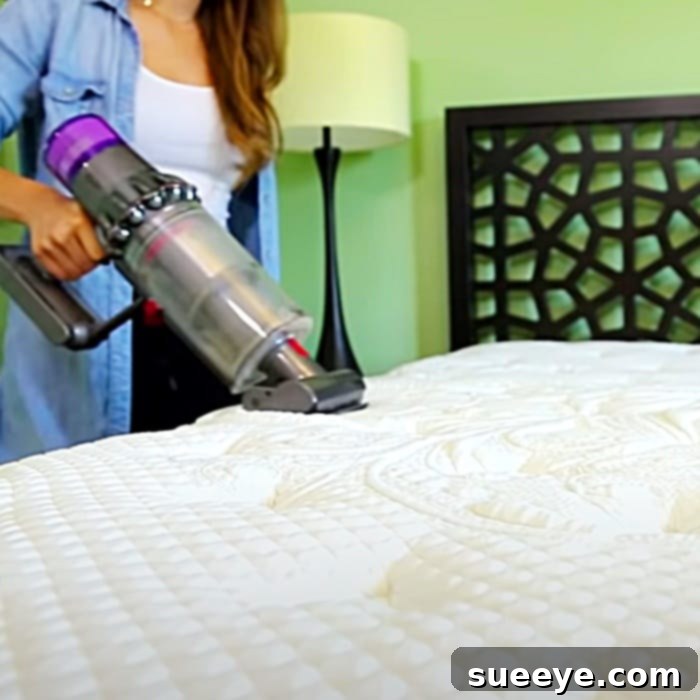
- Vacuum the Entire Surface: Attach the upholstery tool to your vacuum cleaner. Methodically vacuum the entire top surface of the mattress, working in overlapping strokes. Pay extra attention to seams, crevices, and any tufted areas where dust tends to accumulate.
- Clean All Sides: Don’t forget the sides of the mattress! Vacuum all four sides thoroughly. If your mattress is flippable, you might consider vacuuming the bottom side as well, or plan to do so after flipping it later.
Step 3: Tackling Stains – Spot Treatment Before Odor Removal
Addressing stains before the baking soda application is vital. Baking soda can set certain stains if applied directly, making them harder to remove.
- Identify Stains: Carefully examine your mattress for any visible stains, whether from sweat, spills, pet accidents, or other sources.
- Apply Enzyme Cleaner: For organic stains (like sweat, urine, blood, or food), an enzyme cleaner like Bac-Out is highly effective. Lightly spray or dab the cleaner onto the stain. Avoid oversaturating the fabric, as excessive moisture can lead to bigger problems like mold.
- Gently Scrub: Use an old toothbrush or a soft-bristled brush to gently work the enzyme cleaner into the stain. Work from the outside of the stain inwards to prevent spreading.
- Blot and Dry: After scrubbing, use a clean, dry cloth to blot the area, absorbing as much of the cleaner and lifted stain as possible. Repeat if necessary. Allow the treated area to air dry completely before proceeding to the next step. You can use a fan to speed up the drying process.
Important Note: For non-organic stains, or if you don’t have an enzyme cleaner, a mild solution of dish soap and water (very sparingly applied and immediately blotted) can sometimes work. Always patch test in an inconspicuous area first.
Step 4: The Baking Soda Treatment – Odor Elimination Masterclass
This is where the magic happens for odor removal. Baking soda will draw out and neutralize any lingering smells.
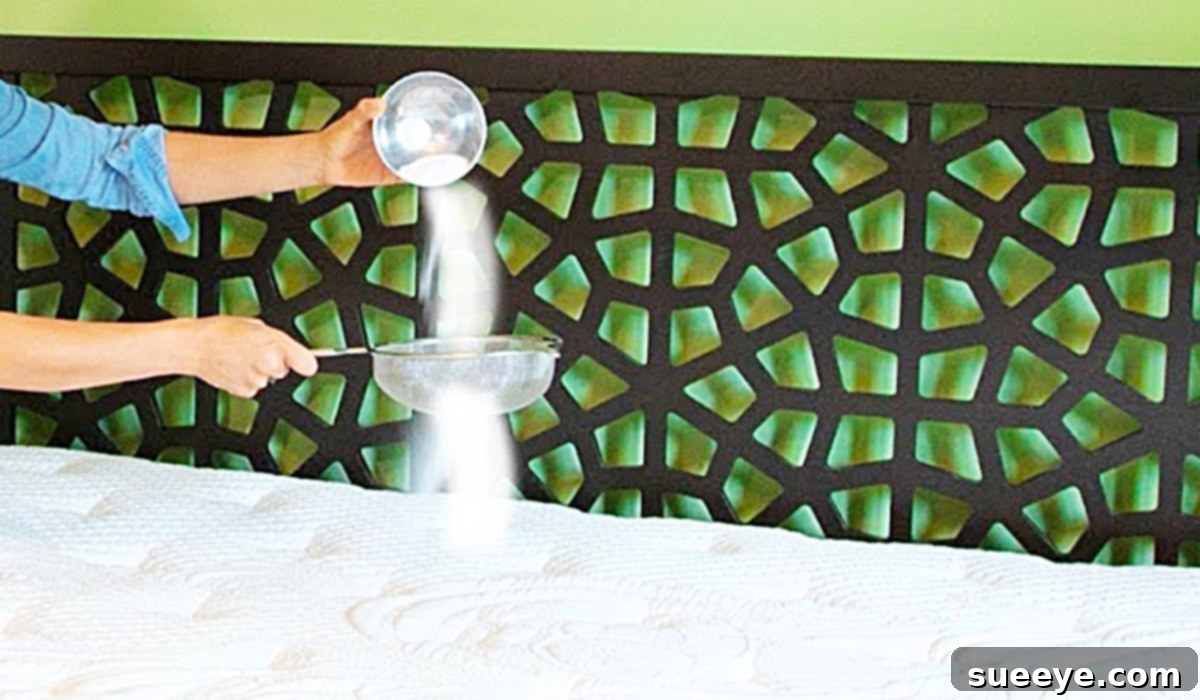
- Sift Baking Soda Liberally: Pour a generous amount of baking soda into your sieve or sifter. Begin sifting it evenly and liberally across the entire surface of the mattress. Don’t be shy; you want a visible, even layer. If desired, you can mix a few drops of your favorite essential oil (like lavender for relaxation or tea tree for its antibacterial properties) into the baking soda before sifting for an added aroma boost.
- Let It Dwell: This is the most crucial part of the odor removal process. The baking soda needs time to absorb odors and moisture. For best results, let it sit for several hours, ideally a minimum of 4-6 hours. For very strong odors, leaving it on for 8-24 hours (or even overnight) will yield superior results. During this time, keep the windows open to maintain good air circulation.
- Consider Flipping (Optional): If your mattress is flippable and you have the strength, consider repeating this process on the other side for a complete refresh.
Step 5: The Final Vacuum – Revealing a Fresh Mattress
Once the baking soda has had ample time to work its magic, it’s time to remove it, along with all the odors it has absorbed.
- Thoroughly Vacuum All Baking Soda: Re-attach your upholstery tool to your vacuum cleaner. Methodically vacuum every inch of the mattress surface, ensuring all the baking soda is completely removed. Take your time with this step, making multiple passes over each area to ensure no residue is left behind. The powerful suction will lift away the baking soda and the absorbed odors, leaving your mattress fresh.
- Check Seams and Crevices Again: Baking soda can settle into seams and crevices, so use a crevice tool attachment to get into these hard-to-reach areas and ensure complete removal.
Optional Step: Harness the Power of Sunlight for Natural Sanitization
If feasible, an extra step can provide natural sanitization and drying.
- Sun Exposure: If you have an outdoor space (like a balcony or yard) and the weather permits, carefully move your mattress outside for a few hours. Direct sunlight is a natural disinfectant, as its UV rays can kill bacteria and dust mites. It also aids in evaporating any residual moisture, ensuring your mattress is thoroughly dry.
Maintaining Mattress Freshness Between Deep Cleans
Deep cleaning your mattress every 3-6 months is ideal, but regular maintenance can keep it fresh and hygienic in between these larger efforts.
- Use a Mattress Protector: Invest in a high-quality, washable mattress protector. This acts as a barrier against spills, sweat, allergens, and dust mites, significantly reducing the amount of dirt that reaches your mattress. Wash it regularly with your sheets.
- Regular Vacuuming: Whenever you change your sheets (ideally weekly or bi-weekly), give your mattress a quick vacuum with the upholstery attachment. This helps to remove shed skin cells and dust before they accumulate.
- Air Out Your Mattress: When you change your sheets, leave the mattress uncovered for an hour or two with windows open. This allows moisture to evaporate and fresh air to circulate.
- Address Spills Immediately: Accidents happen. If a spill occurs, blot it immediately with a clean cloth. Refer to spot treatment methods if necessary, but act quickly to prevent the stain from setting.
- Flip or Rotate Your Mattress: Follow your mattress manufacturer’s guidelines for flipping or rotating. This ensures even wear and can help prevent body impressions, contributing to the mattress’s longevity.
Common Mattress Cleaning Mistakes to Avoid
To ensure you don’t inadvertently damage your mattress or create new problems, be aware of these common pitfalls:
- Over-wetting the Mattress: This is the biggest mistake. Excessive moisture can lead to mold and mildew growth, damage internal components, and be nearly impossible to dry completely. Stick to dry methods or very minimal, targeted moisture for stains.
- Using Harsh Chemical Cleaners: Strong detergents, bleach, or abrasive cleaners can damage mattress fabrics, void warranties, and leave behind irritating residues. Always opt for natural, gentle, or enzyme-based solutions.
- Not Allowing Adequate Drying Time: If you do use any liquid for stain treatment, ensure the area is completely dry before putting sheets back on. A damp mattress is an invitation for mold and bacteria.
- Ignoring Manufacturer’s Instructions: Some specialty mattresses (e.g., memory foam, latex) may have specific cleaning recommendations. Always check your mattress’s care label or warranty information.
- Neglecting Regular Maintenance: Waiting until odors are overwhelming or stains are numerous makes the job much harder. Consistent, small efforts prevent major issues.
Conclusion: Embrace a Fresher, Healthier Sleep Environment
Cleaning your mattress doesn’t have to be a daunting chore. With this simple, effective, and water-free baking soda method, combined with smart stain treatment techniques, you can easily maintain a fresh and hygienic sleep environment. By investing a little time and effort a few times a year, you’ll not only banish odors and stains but also extend the life of your mattress, significantly reduce allergens, and ultimately, enjoy a healthier, more restful night’s sleep. So, strip that bed, grab your baking soda, and transform your mattress into the clean, inviting sanctuary you deserve.