
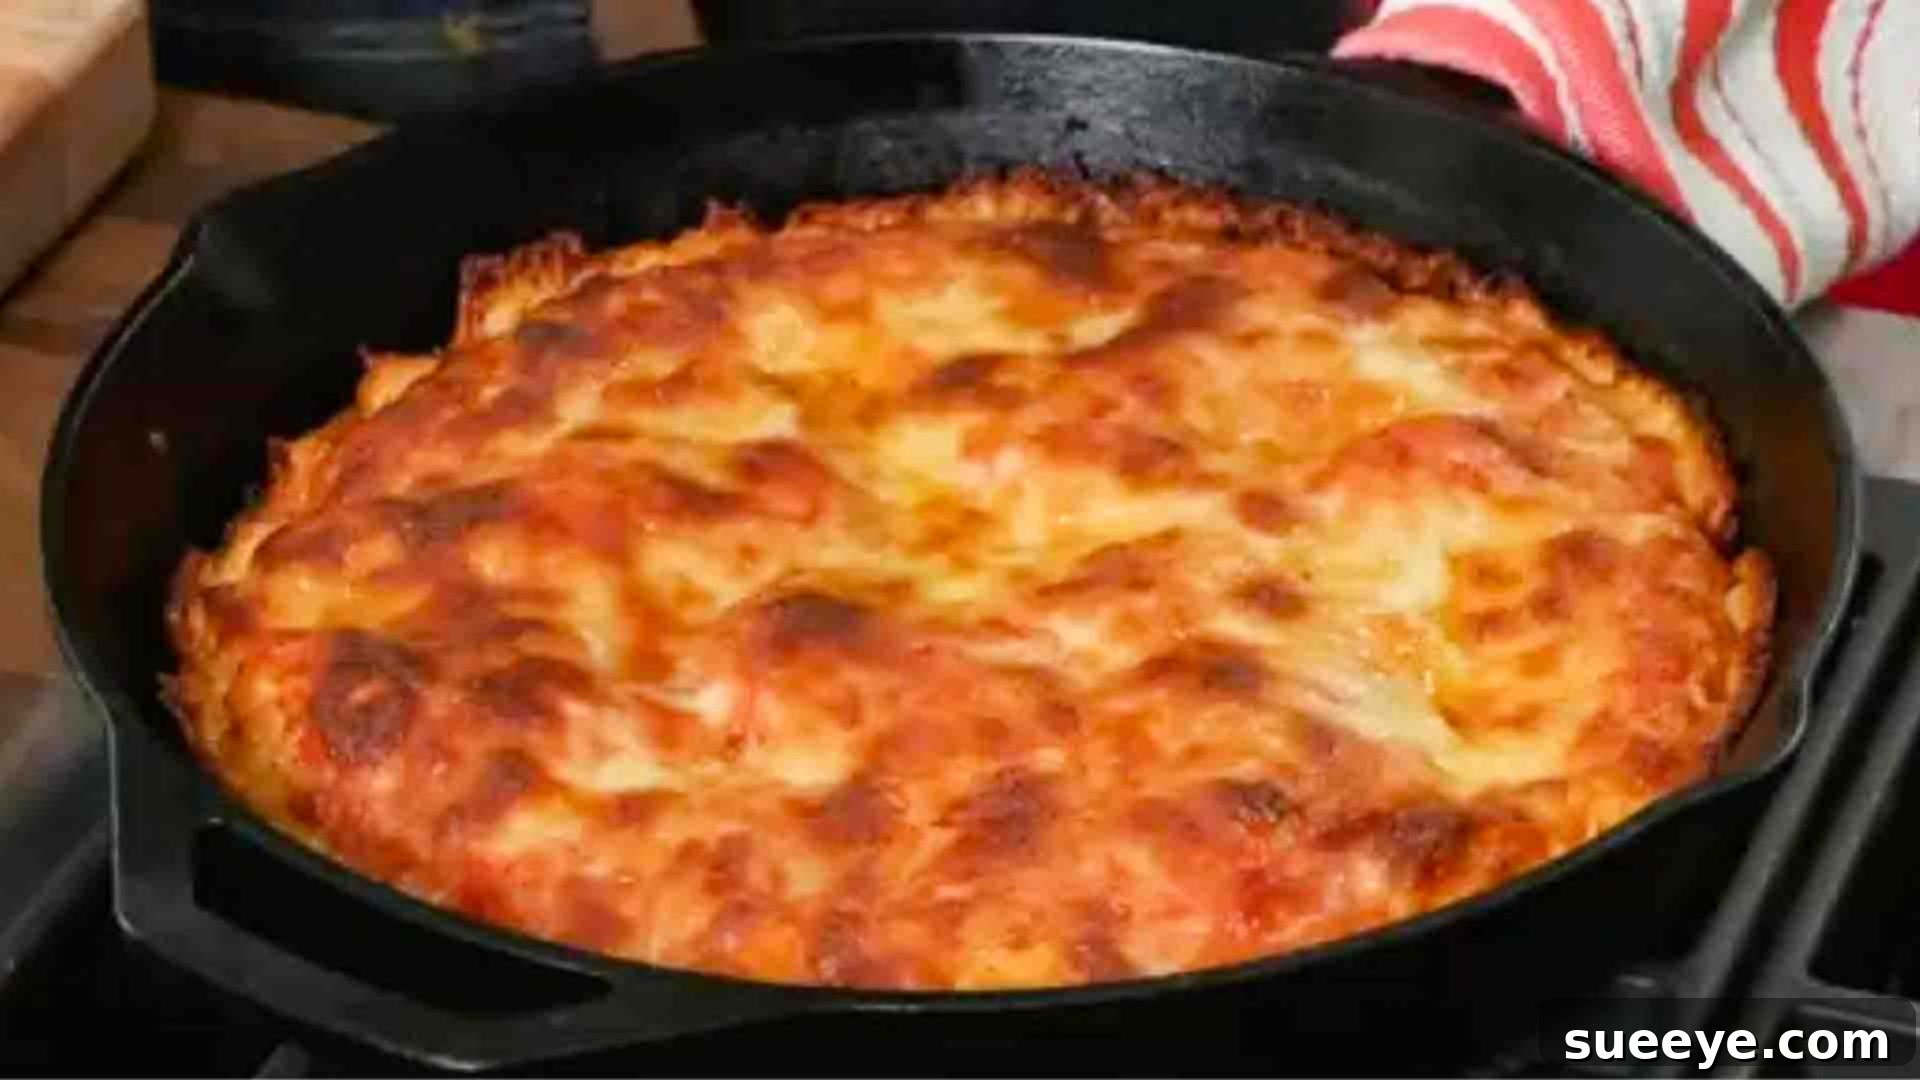
Are you craving the comforting taste of a perfectly crispy, incredibly cheesy pan pizza, all from the convenience of your own kitchen? Look no further! This remarkable recipe, brought to you by the culinary experts at America’s Test Kitchen, unveils the secrets to crafting a truly unforgettable homemade pan pizza. It’s an ideal after-school delight for hungry kids, a fantastic centerpiece for a casual dinner, or simply a delicious treat for any pizza lover. With straightforward steps and readily available ingredients, you’ll be amazed at how simple it is to bring this pizzeria-quality dish to life.
RELATED: 1-Hour Easy Pan Pizza Recipe
Before you dive into the hands-on process, consider watching the detailed video tutorial provided by America’s Test Kitchen for a visual guide. Alternatively, continue scrolling down for the comprehensive written instructions, meticulously broken down for clarity. We encourage you to share this incredible recipe with your friends and family, spreading the joy of homemade pizza one slice at a time!
The Ultimate Cheesy Pan Pizza: America’s Test Kitchen Recipe
The Ultimate Homemade Pan Pizza: A Culinary Journey with America’s Test Kitchen
There’s nothing quite like the aroma of freshly baked pizza filling your home, and with this America’s Test Kitchen recipe, you’re set to create a masterpiece. This method is specifically designed for success, ensuring a deep-dish style pizza with a uniquely crispy bottom crust, a tender, chewy interior, and that glorious, caramelized cheese wall around the edges. We’ll walk you through every step, from developing the perfect dough to assembling and baking your cheesy creation in a cast-iron skillet. Get ready to impress your taste buds and loved ones with a pan pizza that rivals your favorite take-out!
Ingredients for Your Perfect Pan Pizza
Gathering all your ingredients before you begin is a crucial first step, ensuring a smooth and enjoyable cooking process. Each component plays a vital role in achieving the signature taste and texture of this pan pizza.
For the Robust Pizza Dough:
- 2 cups bread flour: Essential for a chewy, airy crust, bread flour has a higher protein content than all-purpose flour, developing more gluten for that perfect texture.
- 1 tsp table salt: Balances the flavor of the dough and helps to control yeast activity.
- 1 tsp instant yeast: A convenient choice that doesn’t require proofing beforehand, allowing for a faster start to your dough.
- 1 cup warm water (105-115°F / 40-46°C): The ideal temperature to activate the instant yeast without killing it.
- Vegetable oil spray: Used to prevent sticking and keep the dough pliable during its initial rest.
For the Rich & Flavorful Pizza Sauce:
- 1 (14.5 oz) can whole peeled tomatoes: The foundation of a great sauce. Whole peeled tomatoes often have a fresher, less processed flavor than crushed or diced varieties, allowing you to build the flavor from scratch.
- 1 tsp extra-virgin olive oil: Adds richness and helps to sauté the garlic, releasing its aromatic compounds.
- 1 garlic clove, minced: Provides a pungent, savory depth that is classic in any good pizza sauce.
- 1/4 tsp sugar: A small amount helps to balance the acidity of the tomatoes, enhancing their natural sweetness.
- 1/4 tsp table salt: Seasons the sauce, bringing out all the vibrant flavors.
- 1/4 tsp dried oregano: A quintessential pizza herb, adding an earthy, slightly peppery note.
- A pinch of red pepper flakes: Offers a subtle kick of heat, enhancing the overall flavor profile without being overtly spicy. Adjust to your preference.
For the Pizza Topping & Assembly:
- 3 tbsp extra-virgin olive oil: Generously coats the cast-iron pan, contributing to the exceptionally crispy, golden-brown crust.
- 4 oz Monterey Jack cheese, shredded: Known for its excellent melting properties and mild, buttery flavor, Monterey Jack creates a beautifully gooey layer.
- 7 oz whole milk mozzarella cheese, shredded: The ultimate pizza cheese. Whole milk mozzarella melts perfectly, offering that classic stretch and creamy texture that makes every bite satisfying.
Step-by-Step Directions: Crafting Your Cast-Iron Skillet Pizza
Follow these detailed instructions carefully to achieve the perfect cast-iron skillet pizza, from the first mix to the last delightful slice.
Step 1: Mastering the Dough – From Mixing to Resting
Begin by combining 2 cups of bread flour, 1 teaspoon of table salt, and 1 teaspoon of instant yeast in a large mixing bowl. Use a sturdy spoon or your hands to quickly stir these dry ingredients together, ensuring they are well-distributed. Next, pour in 1 cup of warm water (aim for around 105-115°F or 40-46°C, which is comfortably warm to the touch but not hot). Mix everything until a shaggy dough forms, then knead it directly in the bowl for about 2-3 minutes until it comes together into a cohesive ball. This initial kneading helps to activate the gluten in the bread flour.
Once kneaded, transfer the dough to a lightly greased 9-inch pizza pan. Use your fingertips to gently pat and stretch the dough outwards, forming a 7-inch circle in the center of the pan. The dough might resist a bit, which is normal; just work with it patiently. Lightly spray the top surface of the dough with vegetable oil to prevent it from drying out. Cover the pan securely with plastic wrap, ensuring an airtight seal. Refrigerate the dough for a minimum of 12 hours and up to 24 hours. This extended cold fermentation is key to developing incredible flavor and a superior texture in the crust.
After its time in the refrigerator, remove the dough from the fridge and allow it to rest at room temperature for 30 minutes. This allows the dough to relax and become more pliable. While it rests, generously grease a 10-inch cast-iron skillet (or a similar heavy-bottomed, oven-safe pan) with 3 tablespoons of extra-virgin olive oil, making sure to coat the bottom and sides thoroughly. Carefully transfer the rested dough into the prepared cast-iron pan. Place the piece of plastic wrap right back on top of the dough in the skillet, covering it loosely. Let it sit at room temperature for another 1 ½ hours. During this final proofing stage, the dough will relax, rise, and become easier to press out, and the yeast will become more active. Use this waiting period to prepare your delicious sauce.
Step 2: Crafting the Irresistible Pizza Sauce
Now, let’s create the vibrant sauce that will perfectly complement your pizza. Open a 14.5 oz can of whole peeled tomatoes. Using your hands or a potato masher, firmly press the tomatoes against a fine-mesh sieve set over a bowl. This action breaks them down and extracts their flavorful juices, which are crucial for the sauce. Once you’ve squeezed out as much juice and pulp as possible, transfer the processed tomatoes to your food processor.
To the food processor, add one minced garlic clove, 1 teaspoon of extra-virgin olive oil, 1/4 teaspoon of table salt, 1/4 teaspoon of sugar, 1/4 teaspoon of dried oregano, and a pinch of red pepper flakes. These ingredients come together to create a balanced sauce with savory, sweet, and subtly spicy notes. Secure the lid on your food processor and process the mixture until it reaches a nice, smooth consistency. You want a sauce that is velvety and spreadable, without large chunks of tomato. Finally, transfer the freshly made sauce to a mixing bowl, cover it, and set it aside until you’re ready to assemble your pizza.
Step 3: Assembling and Baking Your Cheesy Masterpiece
With the dough relaxed and the sauce ready, it’s time for the exciting part: assembling your pizza! First, preheat your oven to 400 degrees F (200 degrees C). While the oven preheats, gently remove the plastic wrap from the dough in the cast-iron pan. Using your fingertips, carefully press the dough outwards to completely fill the bottom of the pan, extending all the way to the edges. It should be relatively easy to work with after its rest.
Next, spoon about 1/2 cup of your delicious homemade sauce over the dough, spreading it evenly but making sure to leave about half an inch of dough bare around the perimeter. This small border will become part of your crispy crust. Now, for the signature “cheese wall”: take your shredded Monterey Jack cheese and meticulously arrange it in a ring around the perimeter of the pan, right on that bare dough edge. Gently press the Monterey Jack cheese onto the edges of the pan, creating a half-inch tall cheese wall. This ingenious technique ensures that the edges of your pizza will be incredibly crispy and deliciously caramelized, also acting as a barrier to hold in the other toppings.
After forming the cheese wall, generously sprinkle the 7 ounces of shredded whole milk mozzarella cheese over the sauced area of the pizza. Ensure an even layer for maximum cheesiness. Carefully transfer the cast-iron skillet, with your assembled pizza, to the preheated 400-degree F oven. Bake for approximately 25 to 30 minutes, or until the crust is deeply golden brown and the cheese is bubbly, melted, and beautifully caramelized at the edges. Keep an eye on it during the last few minutes to prevent over-browning.
Once baked to perfection, carefully remove the hot skillet from the oven. Resist the urge to cut into it immediately! Allow the pizza to cool in the pan for at least three minutes. This brief resting period is vital: it allows the cheese to set slightly, making it easier to slice, and ensures that the crust crisps up further as it cools. After cooling, run a butter knife or a thin metal spatula around the edge of the pan to loosen any sticking. Then, using a thin, sturdy spatula, gently slide it under the pizza to remove it from the pan. Transfer it to a cutting board, slice into wedges, and serve your sensational homemade pan pizza immediately!
Expert Tips for Your Best Pan Pizza
To elevate your homemade pan pizza from good to absolutely phenomenal, consider these expert tips and tricks:
- The Importance of Cold Fermentation: Don’t skip the 12-24 hour refrigeration step for the dough. This slow rise develops complex flavors and a superior texture, making a huge difference in the final crust.
- Perfecting the Cast-Iron Crust: Ensure your cast-iron skillet is thoroughly coated with olive oil. This not only prevents sticking but also creates that signature crispy, golden-brown bottom crust that pan pizza is famous for. For an even crispier bottom, you can preheat the skillet in the oven for 5-10 minutes before placing the dough in it, though the recipe as written works wonderfully.
- Customize Your Cheese Wall: While Monterey Jack is excellent for the cheese wall due to its high fat content and great melt, you can experiment with other low-moisture, good-melting cheeses like provolone or even a sharp cheddar for a different flavor profile.
- Sauce It Up (or Down): The recipe calls for 1/2 cup of sauce, which is a great starting point. If you prefer a saucier pizza, you can add a little more, but be mindful not to overload it, which could make the crust soggy.
- Topping Variations: While this recipe focuses on a classic cheesy pizza, feel free to add your favorite toppings. Pepperoni, cooked sausage, mushrooms, bell peppers, or onions are all excellent choices. If adding vegetables, consider pre-cooking them slightly to avoid excess moisture. Distribute toppings evenly over the mozzarella.
- Even Baking: Ovens can have hot spots. For an even bake, rotate the pan halfway through the cooking time. The pizza is done when the crust is golden, the cheese is bubbly, and the cheese wall is beautifully caramelized.
- The Cooling Rest: The 3-minute cooling period is not just for preventing burns! It allows the molten cheese to set and the crust to firm up, making for cleaner slices and a better overall eating experience.
Frequently Asked Questions About Homemade Pan Pizza
Here are answers to some common questions you might have while making this delightful pan pizza:
- Q: Can I use all-purpose flour instead of bread flour?
A: While bread flour is recommended for its higher protein content, which results in a chewier crust, you can substitute it with all-purpose flour. The crust might be slightly less chewy, but it will still be delicious. - Q: How long can I keep the dough in the refrigerator?
A: The dough can be refrigerated for 12 to 24 hours as specified, which is optimal for flavor development. You might be able to stretch it to 48 hours, but longer than that might result in over-fermentation and a less desirable texture. - Q: What if I don’t have a cast-iron skillet? Can I use another pan?
A: A cast-iron skillet is highly recommended for its heat retention and ability to create a super crispy bottom crust. If you don’t have one, you can use another heavy, oven-safe pan, such as an oven-safe non-stick skillet or a sturdy round cake pan. Just ensure it’s well-oiled. The results might vary slightly in crispiness. - Q: How can I ensure a super crispy crust?
A: Generous olive oil in the pan, the hot oven temperature, and the cooling time outside the oven are key. For an extra boost of crispiness, some chefs lightly preheat their cast iron skillet in the oven before adding the dough, but ensure the oil doesn’t smoke. - Q: Can I make the sauce ahead of time?
A: Absolutely! The sauce can be made a day or two in advance and stored in an airtight container in the refrigerator. In fact, its flavors might even meld and improve over time. - Q: My dough isn’t spreading easily in the pan. What should I do?
A: Dough that resists stretching means the gluten needs more time to relax. If it’s too springy, cover it again with plastic wrap and let it rest for another 10-15 minutes at room temperature. This brief rest usually does the trick.
The Cheesiest Cast-Iron Skillet Pizza Recipe: A Concluding Delight
Congratulations! You’ve just unlocked the secrets to crafting an incredible cheesy pan pizza from scratch, following the expert guidance of America’s Test Kitchen. This recipe delivers a pizza experience unlike any other: a deep-dish delight with an unbelievably crispy, golden-brown crust, a rich, savory sauce, and an abundance of perfectly melted, gooey cheese that forms a delicious caramelized edge. Whether you’re making it for a family dinner, a fun gathering with friends, or simply to satisfy a personal craving, this cast-iron skillet pizza is guaranteed to be a hit. So go ahead, gather your ingredients, follow these steps, and savor the satisfaction of creating truly amazing homemade pizza. Happy baking!