
Transform Your Space with a DIY Cloth Chandelier: Bohemian & Shabby Chic Elegance Made Easy
Are you yearning to infuse your living space with a touch of dreamy romance, bohemian whimsy, or shabby chic elegance without breaking the bank? Look no further! This incredible DIY cloth chandelier project is an absolute game-changer, promising to transform any room into a serene sanctuary with its soft, intimate glow. It’s not just a decoration; it’s a statement piece, a conversation starter, and a testament to your personal style. I was instantly captivated by its exquisite charm and knew I had to create one for my own home. This truly stands out as one of my most cherished DIY creations to date, and I’m thrilled to share why you’ll love it too.
This project is highly recommended for anyone looking to elevate their interior decor to the next level. Whether you’re aiming for a cozy bedroom ambiance, a unique living room focal point, or an enchanting nursery accessory, this textile art piece delivers unparalleled style and warmth. Imagine the soft light filtering through layers of fabric, creating patterns and shadows that dance gracefully across your walls. The best part? You achieve this luxurious look without the hefty price tag often associated with high-end lighting fixtures. Prepare to be amazed by how a few simple materials can create such a profound impact on your environment.
Why a DIY Cloth Chandelier is Your Next Must-Try Project
Unmatched Aesthetic Appeal: Embrace Bohemian and Shabby Chic Styles
The beauty of a DIY fabric chandelier lies in its inherent ability to exude specific aesthetic vibes. For lovers of the Bohemian look, the flowing fabrics, natural textures, and handcrafted feel perfectly align with a free-spirited, eclectic aesthetic. If Shabby Chic is more your style, choose delicate laces, distressed fabrics, and pastel hues to create that perfectly imperfect, vintage-inspired charm. This versatile piece effortlessly bridges the gap between these beloved decor styles, offering a bespoke fixture that truly reflects your taste. It’s an artistic expression, a functional light source, and a unique sculptural element all rolled into one. The sheer variety of materials you can incorporate ensures that no two cloth chandeliers are ever exactly alike, guaranteeing a truly personalized decor item.
Budget-Friendly Elegance: Achieve Luxury for Less
One of the most compelling reasons to embark on this DIY journey is the incredible cost-effectiveness. Traditional chandeliers can be prohibitively expensive, often costing hundreds or even thousands of dollars. With a DIY cloth chandelier, you harness the power of creativity and readily available materials to achieve a similarly stunning visual impact for a fraction of the cost. By repurposing old fabrics, scarves, or purchasing inexpensive remnants, you can craft a luxurious-looking fixture that appears far more expensive than it actually is. This makes it an ideal solution for renters, students, or anyone on a tight budget who refuses to compromise on style. Furthermore, the satisfaction of creating something beautiful with your own hands adds immeasurable value that money simply cannot buy.
Versatility in Design: Endless Customization Opportunities
The creative potential of a fabric chandelier is truly boundless. Unlike rigid store-bought fixtures, a DIY version allows for complete personalization. You can experiment with an array of circular items to form the base from which your fabric and ribbon cascade. While some crafters opt for a rustic grapevine wreath, I personally chose a simple wire circle to ensure the base remained discreetly hidden, allowing the fabric to be the undisputed star of the show. However, don’t shy away from embracing the base as part of the design if it complements your vision! Beyond the base, consider:
- Fabric Choice: Think about lace for delicacy, chiffon for ethereal flow, cotton for rustic charm, or even silk for ultimate luxury. The possibilities extend to burlap, tulle, organza, and even recycled textiles, each contributing a unique texture and character.
- Color Palette: Match your existing decor or create a striking contrast. Imagine vibrant jewel tones for a Moroccan vibe or soft whites and creams for a minimalist Scandinavian feel. Seasonal themes can also be incorporated with color and fabric choices.
- Ombre Effect: For a truly unique touch, consider dyeing your fabric strips to create a beautiful gradient. This ombre effect adds depth, sophistication, and a modern twist to the traditional design, making your chandelier even more captivating. It’s a fantastic way to introduce a subtle color transition that catches the eye.
- Embellishments: Incorporate beads, pearls, small artificial flowers, delicate feathers, or even fairy lights for an added touch of sparkle and magic. These small details can significantly enhance the overall appeal and align the piece with a specific theme.
The Magic of Ambient Lighting: Transforming Any Room
We’ve often highlighted the transformative power of lighting in home decor, and this cloth chandelier is a prime example. It doesn’t just illuminate; it sets a mood. The layered fabrics soften and diffuse the light, creating a warm, inviting, and intimate glow that instantly transforms the atmosphere of any room. It’s perfect for creating a cozy reading nook, adding romance to a master bedroom, or even bringing a gentle, calming light to a child’s nursery. This isn’t harsh overhead lighting; it’s an embrace of soft illumination, making every moment feel a little more special. This ambient lighting solution can turn an ordinary space into an extraordinary haven, promoting relaxation and comfort.
Beyond Home Decor: The Perfect Wedding Accent
While an exceptional addition to any home, the DIY cloth chandelier truly shines as a glamorous and romantic accent for weddings and special events. Chandeliers, in general, are fundamental elements of wedding lighting and decoration, known for their ability to elevate any setting. They imbue celebrations with a sparkle, romance, and a timeless vintage charm. If you’re planning your big day, integrating several of these handmade beauties into your decor would look absolutely fabulous and leave a lasting impression on your guests. These unique fixtures can serve as magnificent focal points, drawing admiration and compliments from all who attend.
A Glamorous Touch for Your Big Day
Envision these exquisite fabric chandeliers suspended above reception tables, adorning the altar, or defining a charming photo booth backdrop. Their delicate yet grand presence adds an unparalleled sense of luxury and sophistication without the exorbitant rental costs of traditional crystal chandeliers. They provide a focal point that draws the eye, enhancing the overall aesthetic and capturing the essence of a truly special occasion. The soft glow they cast creates an ethereal ambiance, perfect for capturing those precious wedding day photographs and memories.
Adapting to Any Wedding Theme
One of the most remarkable qualities of the fabric chandelier is its adaptability. Whether your wedding theme leans towards rustic elegance, classic romance, bohemian chic, or even modern minimalism, this versatile fixture can be customized to fit perfectly. Use burlap and lace for a farmhouse wedding, crisp white and silk for a classic affair, or a medley of colorful prints for a vibrant boho celebration. The possibilities are endless, ensuring your lighting perfectly complements your chosen aesthetic. This flexibility means your DIY efforts will seamlessly blend with and enhance your vision, regardless of your specific bridal style.
Creating a Romantic and Dreamy Atmosphere
The soft, diffused light emitted by these chandeliers is ideal for crafting a romantic and dreamy atmosphere crucial for a wedding. They cast a gentle glow that enhances natural beauty, makes photographs stunning, and envelops guests in a warm, intimate embrace. This intimate lighting encourages connection and celebration, making every moment feel more magical and memorable. Such lighting can transform an ordinary venue into a fairytale setting, setting the perfect mood for love and celebration.
Cost-Effective Wedding Lighting Solutions
Wedding budgets can quickly spiral out of control, especially when it comes to decor and lighting. Opting for DIY fabric chandeliers offers a brilliant solution to achieve breathtaking visuals without significant financial strain. Not only do you save money, but you also add a deeply personal and handcrafted touch to your special day, making your wedding decor truly one-of-a-kind and meaningful. This personal investment in your wedding decor can become a cherished memory, reflecting your unique style and commitment.
Getting Started: What You’ll Need & Design Tips
Ready to create your own masterpiece? The process is surprisingly straightforward, requiring minimal tools and materials. Here’s a comprehensive breakdown to guide you:
Essential Materials for Your Fabric Chandelier
- Circular Base: A wire hoop, embroidery hoop, metal ring, or even a sturdy wreath (if you don’t mind it showing). Choose a size appropriate for your desired chandelier’s scale. The diameter will determine the overall footprint of your finished piece.
- Assorted Fabrics: This is where your creativity truly shines! Gather various types of fabric such as cotton, lace, chiffon, silk, organza, tulle, or even old scarves and tablecloths. Look for different textures and patterns to create visual depth and interest.
- Ribbon (Optional): Satin, grosgrain, or sheer ribbons can add extra layers of visual interest and texture, and can also be used to suspend the chandelier.
- Scissors: Sharp fabric scissors are a must for clean, precise cuts that prevent unnecessary fraying.
- Measuring Tape/Ruler: For consistent fabric strip lengths, especially if you’re aiming for a uniform look.
- Adhesive (Optional): Fabric glue or a hot glue gun can be useful for securing knots, adding embellishments, or preventing extreme fraying on certain fabrics.
- Light Kit (Optional): If you intend for it to be a functional light source, you’ll need a simple pendant light kit to suspend within the fabric layers. Ensure safety and proper installation by consulting an electrician if unsure.
- Yarn or String (Optional): For hanging the chandelier or securing certain elements.
Fabric Selection: Texture, Color, and Flow
The choice of fabric profoundly impacts the final look and feel of your chandelier. For a true Bohemian aesthetic, think about a mix of textures: raw cotton, intricate lace, and perhaps some macrame elements. For Shabby Chic, focus on delicate floral prints, soft pastels, and vintage lace. Consider how the fabric drapes and flows; lighter materials like chiffon and tulle will create an ethereal, airy look, while heavier cottons will offer a more structured, rustic feel. Don’t be afraid to combine different types for a rich, layered effect. A harmonious blend of sheer and opaque fabrics can create fascinating interplay when light passes through, adding dynamic visual interest to your piece. Testing small swatches beforehand can help visualize the final outcome.
Creative Base Options: Choosing Your Foundation
While a simple wire circle is excellent for a minimalist look where the fabric is the star, other bases offer different aesthetic opportunities. An embroidery hoop provides a natural, slightly rustic touch, especially if left in its natural wood finish. A sturdy metal ring can handle heavier fabrics and offers a more industrial edge. For an truly organic feel, a grapevine wreath can be incorporated, especially if you plan to weave fabric through it and have its texture complement your design. The key is to select a base that is strong enough to support the weight of your chosen fabrics and will not warp or bend over time. Consider painting your base to match or contrast with your fabric choices for an extra layer of customization.
Ombre & Dyeing Techniques for a Unique Touch
To achieve a stunning ombre effect, you’ll need fabric dye in your desired color palette. This technique involves dipping sections of your fabric strips into varying concentrations of dye or progressively dipping them for different durations to create a gradual color transition. Start with the lightest shade at one end and slowly introduce darker shades, allowing for blending in between. This personalized touch elevates your chandelier from beautiful to truly exceptional, offering a sophisticated visual gradient that captivates the eye. Experiment with natural dyes for an even more organic and eco-friendly approach. Remember to follow dye instructions carefully for best results and color fastness.
Placement Ideas for Your New Chandelier
Once your beautiful fabric chandelier is complete, the next exciting step is deciding where to hang it! Its versatile design allows it to enhance various spaces, bringing its unique charm and ambient lighting:
- Living Room: As a whimsical focal point above a coffee table or in a cozy reading nook, it can soften sharp lines and add warmth.
- Bedroom: To create a serene and romantic atmosphere, hung above the bed or in a quiet corner, providing a calming presence.
- Nursery: For a soft, comforting glow that adds a touch of dreaminess to a child’s room, perfect for soothing bedtime routines.
- Dining Area: A unique alternative to traditional dining room lighting, adding a relaxed yet elegant vibe for intimate meals.
- Entryway/Foyer: To make a memorable first impression, welcoming guests with its unique charm and handcrafted elegance.
- Outdoor Spaces (Covered): On a covered patio, porch, or gazebo for enchanting evening gatherings, adding a touch of bohemian magic to al fresco dining.
- Event Venues: At weddings, engagement parties, baby showers, or anniversary celebrations for an unforgettable decor element that personalizes the event.
Unleash Your Inner Crafter: A General Step-by-Step Guide
While specific techniques may vary depending on the chosen materials and desired complexity, the general process for constructing a DIY fabric chandelier is wonderfully intuitive and enjoyable. This guide provides a framework to help you get started on creating your own unique lighting fixture:
Step 1: Gather and Prepare Your Materials
Collect all your chosen fabrics, ribbons, your circular base, sharp scissors, and any optional embellishments or light kits. Lay out your fabrics and decide on your color scheme, texture combinations, and layering strategy. It’s helpful to visualize the final look before you start cutting. Ensure your workspace is clean, well-lit, and organized to facilitate a smooth crafting process.
Step 2: Cut Your Fabric Strips
Using your scissors and ruler, cut your fabrics into strips. The length and width are entirely up to you and will dictate the fullness and flow of your chandelier. Longer strips will create a dramatic cascade, while shorter ones will result in a denser, more layered look. Varying the lengths and widths of your strips adds significant visual interest and movement. Aim for a consistent width for a neater, more structured look, or deliberately vary it for a more organic, bohemian feel. Consider fraying the edges slightly for a rustic, lived-in touch, or leave them clean for a more refined appearance. Cutting strips on the bias can also create a beautiful drape.
Step 3: Attach Fabric to the Base
Begin tying or looping your fabric strips onto your circular base. There are several effective methods:
- Lark’s Head Knot: Fold a strip in half, place the loop end under the base, then thread the two raw ends through the loop and pull tight. This creates a neat, secure attachment that looks polished.
- Simple Knot: Simply tie a double knot around the base. This can be quicker and offers a slightly different, more informal look, especially if you want the knots to be visible as part of the texture.
- Weaving: For some bases like open-weave embroidery hoops or wireframes, you might weave the fabric strips through the structure rather than just tying them, creating an integrated design.
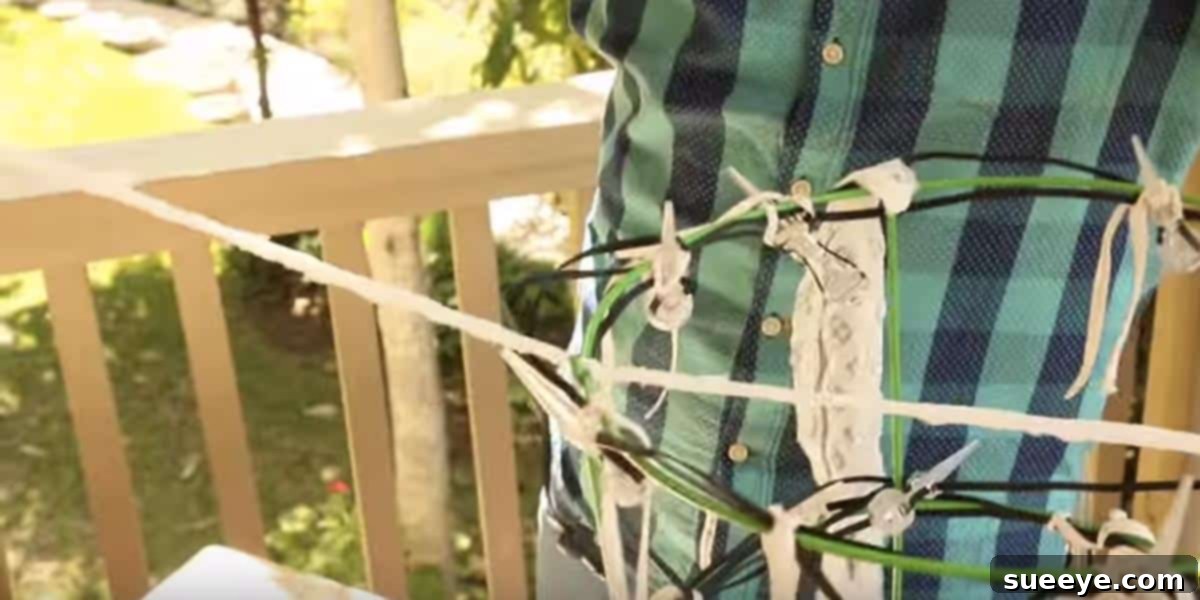
Continue adding strips, ensuring even distribution around the entire circumference of the base. For a fuller, more voluminous chandelier, pack the strips closely together. Alternate fabrics, colors, and textures according to your design plan. You can also create different tiers by attaching strips at varying heights or by using multiple hoops to build a multi-level fixture.
Step 4: Add Ribbons and Embellishments (Optional)
Once your fabric strips are in place, integrate any ribbons you wish to use. These can be tied in alongside the fabric for added color and texture, or used to hang individual decorative elements like charms, beads, or small artificial flowers. This is also the stage to attach any additional embellishments such as pearls, delicate feathers, or small strands of battery-operated fairy lights to truly personalize your chandelier and add sparkle. Hot glue can be helpful here for precise placement of smaller elements or for securing knots that might come undone. Experiment with different placements to see what creates the most visual impact.
Step 5: Install Your Light Kit (If Desired) and Hang Your Masterpiece
If you’re incorporating a light source, carefully suspend your pendant light kit within the center of the fabric layers, ensuring it’s securely fastened and the bulb doesn’t come into direct contact with the fabric to prevent any fire hazards. Always prioritize electrical safety; if you’re unsure, opt for battery-operated fairy lights woven through the fabric for a safer, non-wired option. Once everything is assembled and secure, choose your desired location and proudly hang your stunning DIY cloth chandelier. Step back and admire the soft, enchanting glow and the transformative effect it has on your space!
Final Thoughts: Elevate Your Decor with a Personal Touch
The DIY cloth chandelier is more than just a craft project; it’s an opportunity to inject personality, warmth, and bespoke beauty into your surroundings. It’s a testament to the idea that stunning decor doesn’t require a massive budget, only a little creativity and willingness to try. Whether it becomes a cherished piece in your home, a romantic highlight at your wedding, or a thoughtful handmade gift, its impact is undeniable. Each fabric strip, every carefully tied knot, contributes to a unique piece of art that tells a story and brings a distinct character to its environment.
For those who prefer a visual guide, witnessing the creation process firsthand can be incredibly helpful and inspiring. We highly recommend watching the step-by-step tutorial by Mark Montano of Make Your Mark. His clear instructions will guide you through each stage, ensuring your DIY cloth chandelier project is a resounding success. Get ready to unleash your creativity and craft something truly beautiful and unique that will captivate and charm for years to come!