
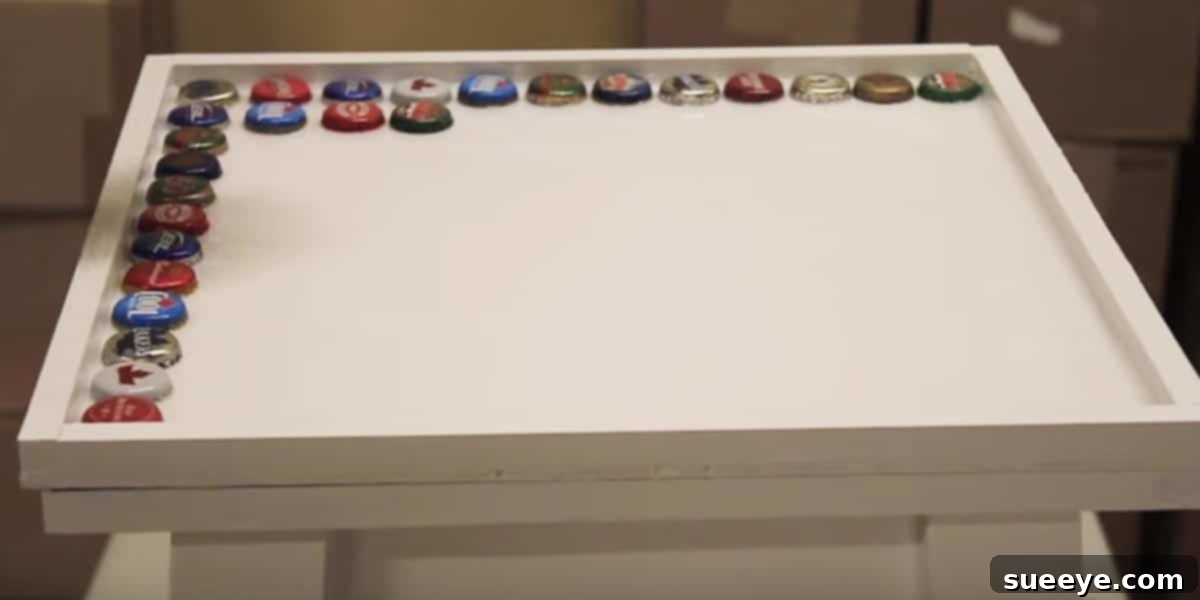
Transform Your Home: The Ultimate Guide to DIY Bottle Cap Tables and Upcycled Decor
Are you searching for a unique way to infuse personality and sustainable charm into your home decor? Look no further than the humble bottle cap! Often discarded without a second thought, these small metallic treasures hold immense potential for creative upcycling. Imagine transforming your collected bottle caps into a stunning, one-of-a-kind piece of furniture that not only serves a practical purpose but also sparks endless conversations. This isn’t just about crafting; it’s about embracing eco-friendly living and showcasing your individuality through a truly remarkable DIY project.
For too long, the fate of countless bottle caps has been the bottom of a trash bag, waiting for a grander purpose. The good news is, that purpose has arrived! A bottle cap table is an incredibly chic, budget-friendly, and profoundly engaging piece that can revitalize any space. I’ve personally experienced the joy of having such a vibrant and story-rich item in my den, and it never fails to capture attention and admiration. It’s a testament to the power of upcycling – taking something destined for the landfill and giving it a dazzling new life.
Unleashing Creativity: A World of Bottle Cap Inspiration
The beauty of bottle cap crafts lies in their versatility. While a table is a fantastic starting point, the possibilities extend far beyond. Many crafters have ingeniously repurposed various table bases, from inexpensive IKEA tables to sturdy metal outdoor tables, and even charming vintage pieces. The core idea remains the same: create a captivating surface using an array of colorful caps. But how do you achieve that polished, finished look?
One popular method, frequently showcased on platforms like Pinterest, involves using a sturdy base and adding a decorative trim. Picture this: an IKEA table is fitted with a central piece of plywood, perhaps glued securely in place, to create a stable foundation for the caps. The trim around the edges is then painted a bold, eye-catching color – perhaps a vibrant red – adding a professional and stylish border to the forthcoming mosaic. The bottle caps are meticulously glued down, forming intricate patterns or a random, eclectic mix of colors. The final touch involves applying white grout, much like you would for a tile mosaic. The result is a tactile, artful surface with a distinct mosaic feel. This method offers a classic, rustic charm that many adore.
Alternatively, another highly favored technique utilizes resin. Resin provides a smooth, glossy, and highly durable finish that encapsulates the bottle caps, creating a mesmerizing depth and shine. While the grout method offers a beautiful textured mosaic, resin delivers a sleek, glass-like surface that truly makes the colors pop. Both approaches have their unique appeal, and choosing between them often comes down to personal aesthetic preference. Having personally used resin for my project, I can attest to its awesome results – a flawless, gleaming tabletop that instantly elevates the room’s ambiance.
Beyond Tables: Expanding Your Bottle Cap Horizons
The ingenuity of crafters doesn’t stop at tables. As you delve deeper into the world of bottle cap artistry, you’ll discover a myriad of other applications. People are not only adorning tables but also transforming everyday objects into extraordinary decorative pieces. Imagine a mundane mirror frame suddenly bursting with character, encircled by a glittering mosaic of bottle caps. Picture frames can be similarly embellished, turning simple photographs into true works of art. Festive wreaths, dynamic wall art, and even decorative trays can all be brought to life with this simple yet effective material.
One particularly enchanting idea involved a small vintage table, not with bottle caps, but with an array of colorful buttons embedded into its surface. This demonstrates the broader concept of using small, repetitive objects to create stunning textural and visual effects on furniture and decor. The possibilities truly are endless, and your mind will undoubtedly begin to race with creative ideas once you start exploring this inspiring realm of upcycling. Get ready to turn your home into a gallery of unique, handmade treasures!
The Environmental & Aesthetic Rewards of Upcycling
Embracing DIY bottle cap projects is more than just a creative pastime; it’s a conscious step towards sustainability. Every bottle cap you rescue from the waste stream is one less item contributing to our ever-growing landfills. By choosing to upcycle, you become an active participant in reducing waste and promoting a greener planet. This commitment to eco-friendliness doesn’t mean sacrificing style; in fact, quite the opposite. Your colorful, handcrafted bottle cap table will be a vibrant testament to both your creativity and your environmental values.
Furthermore, these projects are incredibly cost-effective. The primary “material” – bottle caps – is essentially free, collected over time from everyday consumption. The additional supplies like adhesive, grout, or resin are relatively inexpensive, making this an accessible hobby for almost any budget. The true value lies in the personalization and the unique story each piece tells. Unlike mass-produced furniture, your bottle cap creation will possess an unparalleled charm and character, reflecting your effort and artistic vision. It’s a piece that you will truly enjoy for years to come, not just for its beauty but for the meaningful process behind its creation.
Your Step-by-Step Guide to Crafting a Dazzling Bottle Cap Table
Ready to turn those long-saved bottle caps into something truly spectacular? This step-by-step tutorial will guide you through the process, ensuring your project turns out awesome! Remember, safety first – always work in a well-ventilated area and wear appropriate protective gear, especially when working with resin.
Materials You’ll Need:
- A sturdy table base (old coffee table, side table, outdoor metal table, IKEA table, etc.)
- Plenty of clean, dry bottle caps (start collecting them now!)
- Strong adhesive (E6000 or similar craft glue)
- Option A (Grout Method): Non-sanded grout (white, grey, or a color of your choice), grout float, sponge, bucket, old cloths, grout sealer.
- Option B (Resin Method): Two-part epoxy resin kit (art or casting resin), mixing cups, stirring sticks, gloves, safety glasses, level, heat gun or small torch (for bubbles).
- Optional: Plywood cut to size (if your table base isn’t solid), wood trim for edges, paint for trim, sandpaper.
Step 1: Prepare Your Table Base
First, ensure your chosen table base is clean, dry, and stable. If your table has an uneven or unsuitable surface for caps, consider cutting a piece of plywood to fit the tabletop. Securely glue or screw this plywood onto the table. If you want a finished edge, attach wood trim around the perimeter of your tabletop. Sand any rough edges and paint the trim in a color that complements your caps or your room’s decor.
Step 2: Clean and Sort Your Bottle Caps
This is crucial! Thoroughly clean all your bottle caps with soap and water, ensuring no residue remains. Dry them completely. This is also a great time to sort them by color or design if you plan to create a specific pattern. Laying them out beforehand allows you to visualize your design and ensure you have enough caps.
Step 3: Arrange and Adhere the Bottle Caps
Before gluing, arrange your bottle caps on the table to finalize your design. Experiment with patterns – spirals, stripes, checkerboards, or a random collage. Once you’re happy with the layout, start gluing them down one by one using strong adhesive. Apply a small dot of glue to the back of each cap and press it firmly into place. Ensure they are as level as possible, especially if you plan to use resin. Allow the glue to dry completely according to the manufacturer’s instructions, typically 24 hours.
Step 4A: The Grout Method (For a Mosaic Look)
Once the caps are securely glued, it’s time to grout. Mix your non-sanded grout according to the package directions to a peanut butter-like consistency. Using a grout float, spread the grout over the entire surface, pushing it into all the crevices between the bottle caps. Work in small sections. Once the caps are covered, use the edge of the float to scrape off excess grout from the top of the caps, moving diagonally to avoid pulling out caps. After about 15-30 minutes (check manufacturer’s drying time), use a damp sponge to carefully wipe away grout haze from the bottle caps. Rinse your sponge frequently. Allow the grout to cure for 24-48 hours, then apply a grout sealer to protect it from moisture and stains. Buff the caps with a clean cloth for extra shine.
Step 4B: The Resin Method (For a Smooth, Glossy Finish)
Ensure your table is perfectly level before starting, as resin will self-level. Read your epoxy resin kit instructions carefully. Mix equal parts of Part A and Part B thoroughly in a clean container, typically for 3-5 minutes, scraping the sides and bottom. Pour the mixed resin evenly over your bottle cap surface, starting from the center and allowing it to spread. Use a stirring stick or gloved hand to gently guide the resin to the edges. Don’t overwork it. Immediately after pouring, use a heat gun or small torch (held a few inches away and constantly moving) to pop any air bubbles that rise to the surface. Work quickly but carefully. Cover your table to protect it from dust and allow the resin to cure in a dust-free environment for 24-72 hours, as per product instructions. The result will be a stunning, durable, glass-like finish.
Step 5: Finishing Touches & Enjoyment
Once your chosen finish is fully cured, inspect your new bottle cap table. You can polish any exposed trim or legs, or simply admire your handiwork. Your unique, eye-catching, and eco-friendly piece is now ready to take center stage in your home! It’s a wonderful conversation starter and a constant reminder of your creative spirit and commitment to sustainable living.
Embrace Your Inner Artist: Customizing Your Creation
Don’t be afraid to experiment with your designs. Consider creating patterns with caps of specific brands or colors to tell a story. You could integrate small photos, pressed flowers, or even flat pebbles among the caps if using the resin method, adding another layer of personalization. Think about the overall aesthetic of your room – do you want a vibrant, chaotic explosion of color, or a more subdued, organized pattern? The beauty of DIY is that there are no strict rules, only endless possibilities for expression. Let your imagination guide you!
Long-Term Care for Your Bottle Cap Masterpiece
To ensure your bottle cap table remains a cherished item for years to come, a little care goes a long way. For grout-finished tables, regularly wipe spills promptly and reapply grout sealer annually to maintain its protection. For resin-finished tables, simply wipe with a soft, damp cloth and mild soap. Avoid harsh chemicals or abrasive cleaners, which can dull the surface. With proper care, your bottle cap table will continue to be a source of joy and admiration, proving that sustainable style can indeed be timeless.
Your Next Inspiring Project Awaits!
This bottle cap table project was not just fun to make; it yielded a piece that I genuinely adore. It seamlessly blends into my home while adding a powerful burst of unique character. The sense of accomplishment that comes from transforming ordinary waste into something extraordinary is truly rewarding. So, gather those bottle caps, get inspired by the myriad of creative possibilities, and embark on your own journey to craft something dynamite for your home. You’ll not only spiff up your living space with a colorful, personalized table but also contribute to keeping landfills down – a win-win for both your home and the planet!