
The Ultimate Guide to Deep Cleaning Your Oven with Natural Ingredients
A well-maintained oven is the heart of a happy kitchen, yet its interior often bears the brunt of our culinary adventures. Regular use inevitably leads to an accumulation of grease, food spills, and stubborn baked-on stains that not only look unsightly but can also affect your oven’s performance and even the taste of your food. While commercial oven cleaners are available, many contain harsh chemicals that are unpleasant to use and can be harmful to your health and the environment. This comprehensive guide introduces an incredibly effective, budget-friendly, and non-toxic DIY oven cleaning hack that leverages common household items you likely already have. This method, inspired by expert tips, promises a sparkling clean oven without the chemical fumes. Be advised: this deep-cleaning process requires an overnight soak, so plan to undertake it when your oven won’t be needed for at least 8 to 10 hours.
Why Choose This DIY Oven Cleaning Method?
Opting for a homemade oven cleaner offers numerous advantages over conventional chemical-laden products. Firstly, it’s remarkably cost-effective, utilizing everyday staples like baking soda and vinegar that are significantly cheaper than specialized cleaners. Secondly, and perhaps most importantly, it’s safer. Commercial oven cleaners often emit strong fumes and require careful handling due to their corrosive nature. This DIY approach eliminates exposure to harsh chemicals, making it a healthier choice for your home, your family, and your pets. Furthermore, it’s environmentally friendlier, reducing the release of synthetic compounds into our ecosystem. Beyond these benefits, the method is incredibly effective, harnessing the natural cleaning power of baking soda to tackle even the most challenging baked-on grime.
The Science Behind the Sparkle: Baking Soda and Vinegar
Understanding how these simple ingredients work together illuminates the effectiveness of this cleaning hack. Baking soda, or sodium bicarbonate, is a mild alkali and a gentle abrasive. When mixed with water, it forms a paste that adheres to grease and grime. Its alkaline properties help to break down fatty acids in burnt-on food, transforming them into a more soluble substance that is easier to wipe away. The abrasive texture also provides a gentle scrubbing action without scratching your oven’s surfaces.
Vinegar, primarily acetic acid, comes into play after the baking soda has done its initial work. When vinegar is sprayed onto the baking soda residue, a chemical reaction occurs. The acid in the vinegar reacts with the alkaline baking soda, producing carbon dioxide gas. This reaction causes fizzing and bubbling, which helps to further loosen and lift any remaining stubborn grime and baking soda residue. Additionally, vinegar is an excellent natural degreaser and deodorizer, cutting through any lingering grease films and neutralizing unpleasant odors, leaving your oven smelling fresh and clean.
Materials You’ll Need
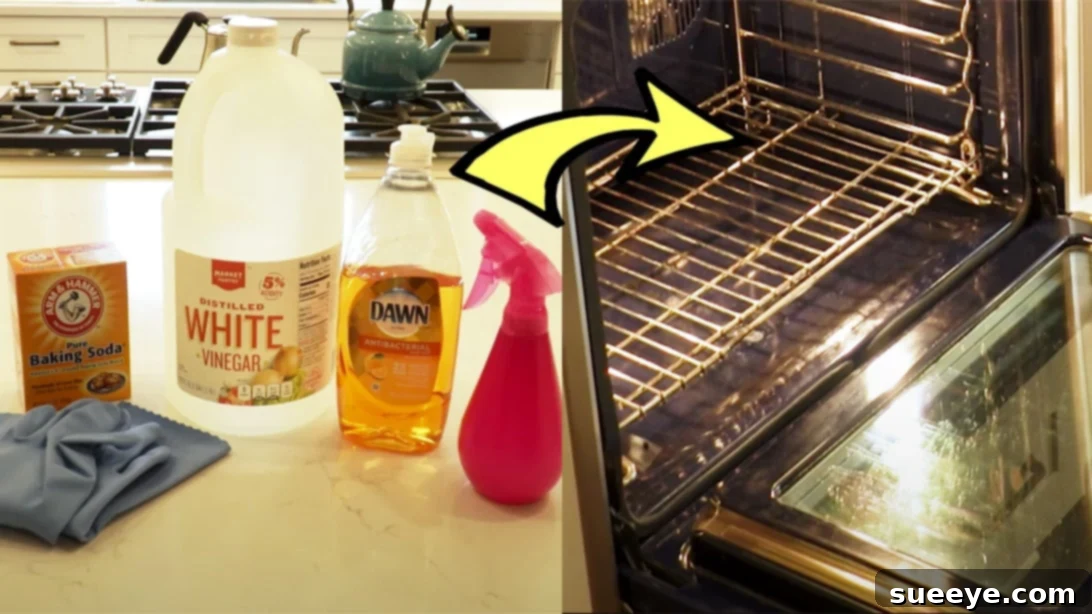
To embark on your oven transformation journey, gather these simple yet powerful materials:
- Dish Gloves: Essential for protecting your hands from the grime and ensuring a comfortable cleaning experience.
- Baking Soda: The star of our cleaning solution, acting as a powerful abrasive and degreaser.
- White Vinegar: Your indispensable partner for neutralizing baking soda, cutting grease, and leaving a streak-free shine.
- Dishwashing Soap (Optional but Recommended): Useful for pre-cleaning oven racks and wiping away initial loose debris.
- Spray Bottle: For evenly distributing the vinegar solution inside your oven.
- Sponge or Microfiber Cloths: For applying the baking soda paste and wiping down surfaces. Keep a few on hand for different stages.
- Rubber Spatula or Plastic Scraper: Invaluable for gently scraping off stubborn, dried baking soda paste without damaging surfaces.
- Large Mixing Bowl: To prepare your baking soda paste.
- Warm Water: For mixing the paste and rinsing.
Detailed Directions: A Step-by-Step Guide to a Spotless Oven
Follow these instructions carefully to achieve a sparkling clean oven. Remember, patience is key with this overnight method.
Step 1: Initial Preparation and Safety First
Before you begin, ensure your oven is completely cool. For added safety, it’s a good practice to unplug your oven from the wall socket or switch off the circuit breaker to prevent accidental activation. Gather all your materials so they are within easy reach. This preparation phase is crucial for a smooth cleaning process.
Step 2: Remove Racks and Loose Debris
Carefully remove all oven racks, baking sheets, and any other removable accessories from the oven interior. These items often accumulate just as much grime as the oven walls and require separate attention. Check your oven’s manual to determine if your racks are dishwasher safe. If they are, you can place them in the dishwasher for an easy clean. For extremely greasy or stained racks, or if handwashing is necessary, soak them in a tub or large sink filled with very hot, soapy water (using a good quality dishwashing soap) for at least an hour. This will loosen the grime, making them much easier to scrub clean with a stiff brush or scouring pad. Rinse thoroughly and set them aside to dry completely.
Next, use a damp sponge or paper towel to wipe out any loose food particles, crumbs, or ash from the bottom of your oven. This step prevents these loose bits from turning into muddy clumps when the baking soda paste is applied, allowing the cleaning solution to work more effectively on the baked-on stains.
Step 3: Create the Baking Soda Cleaning Paste
In your large mixing bowl, combine approximately 3 parts baking soda with 1 part warm water. For example, if you start with 1 cup of baking soda, add about 1/3 cup of water. Stir the mixture thoroughly using a spoon or your gloved hand until it forms a thick, spreadable paste. The consistency should be similar to toothpaste – firm enough to cling to surfaces without being too runny. Adjust the ratio by adding more baking soda if it’s too watery, or a tiny bit more water if it’s too dry and crumbly. You’ll likely need more paste than you think, especially for a heavily soiled oven.
Step 4: Apply the Baking Soda Paste
Wearing your dish gloves, use a sponge, an old paintbrush, or your hands to liberally apply the baking soda paste to the interior surfaces of your oven. Spread an even layer over the walls, bottom, and inside of the oven door. Pay particular attention to areas with heavy grease buildup and tough, baked-on stains, applying a thicker layer to these spots. Gently rub the paste into the grime where possible. It’s crucial to avoid applying the paste directly to the heating elements, fan vents, or any openings for electrical components. If your oven has a self-cleaning function, check your manual regarding cleaning around the vent areas.
Step 5: The Overnight Soak (The Waiting Game)
Once the paste is applied, close your oven door and let the baking soda work its magic. This is the most critical step and requires patience. The paste needs to sit and break down the grease and grime for a minimum of 8 to 10 hours, but for heavily soiled ovens, leaving it overnight or even for 12-16 hours will yield the best results. During this time, the alkaline baking soda will chemically react with the acidic food residues, softening them and making them much easier to remove.
Step 6: Remove the Baking Soda Residue
After the waiting period, put your gloves back on. Take a clean, damp sponge or microfiber cloth soaked in warm water and begin to wipe away the dried baking soda paste. You’ll notice that much of the grime will come off with the paste. Rinse your sponge frequently in a bucket of clean warm water or under a running tap as it becomes dirty, ensuring you’re wiping with a clean surface each time.
For any stubborn, caked-on residue or dried paste that doesn’t easily wipe away, grab your rubber spatula or plastic scraper. Gently scrape off the larger clumps, being careful not to scratch the oven’s enamel. Follow up by wiping again with a damp sponge. Continue this process until the majority of the baking soda and loosened grime has been removed from all interior surfaces.
Step 7: The Vinegar Finish for a Sparkling Shine
Now it’s time for the vinegar to complete the cleaning process. In your spray bottle, create a solution by mixing equal parts white vinegar and water (e.g., 1 cup vinegar to 1 cup water). Shake well. Lightly spray the entire interior of your oven with this vinegar solution, focusing on any areas where baking soda residue might still be present. You’ll likely observe a gentle fizzing reaction as the vinegar reacts with any remaining baking soda – this is perfectly normal and helps to lift away final particles. Let the solution sit for a few minutes (2-5 minutes). Then, take a clean, damp sponge or microfiber cloth and wipe down the oven interior thoroughly. The vinegar will not only neutralize any leftover baking soda but also act as a natural degreaser and leave your oven sparkling clean and streak-free. The vinegar smell will dissipate quickly as it dries.
Step 8: Final Touches and Reassembly
Once you’re satisfied that all surfaces are clean and residue-free, take a dry cloth to give the interior one final wipe, ensuring it’s completely dry. Now, you can reinsert your sparkling clean oven racks back into their designated slots. Plug your oven back in or flip the circuit breaker. Your oven is now pristine, fresh, and ready for your next culinary adventure!
Tips for Oven Maintenance and Preventing Future Buildup
Keeping your oven clean doesn’t have to be an arduous task if you adopt a few preventative measures and regular maintenance habits:
- Wipe Spills Immediately: The moment a spill occurs, and once the oven has cooled down, wipe it up. Fresh spills are much easier to clean than baked-on ones.
- Use Oven Liners: Place an oven liner (silicone or aluminum foil) on the bottom rack to catch drips and spills. Ensure it doesn’t block any vents.
- Cover Food: When baking or roasting, use covered dishes or aluminum foil to prevent splatters.
- Regular Spot Cleaning: Don’t wait for a full deep clean. Address small stains as they appear with a quick wipe using a damp cloth or a dab of baking soda paste.
- Ventilation: Always ensure good ventilation in your kitchen when cooking, especially if you experience smoking due to minor spills.
Conclusion: Embrace a Cleaner, Healthier Kitchen
Cleaning your oven might seem like a daunting chore, but with this simple, natural, and highly effective DIY method, you can transform a grimy appliance into a gleaming centerpiece of your kitchen. By utilizing the power of baking soda and vinegar, you’re not only saving money but also making a conscious choice for a healthier home environment, free from harsh chemical fumes. The overnight soak ensures that even the toughest baked-on grease and food residues are loosened and effortlessly removed, leaving you with a fresh, odor-free, and hygienically clean oven. Invest a little time and patience, and you’ll be rewarded with an oven that looks and performs like new. Give this hack a try, and enjoy the satisfaction of a sparkling clean oven, ready for all your future culinary creations.