
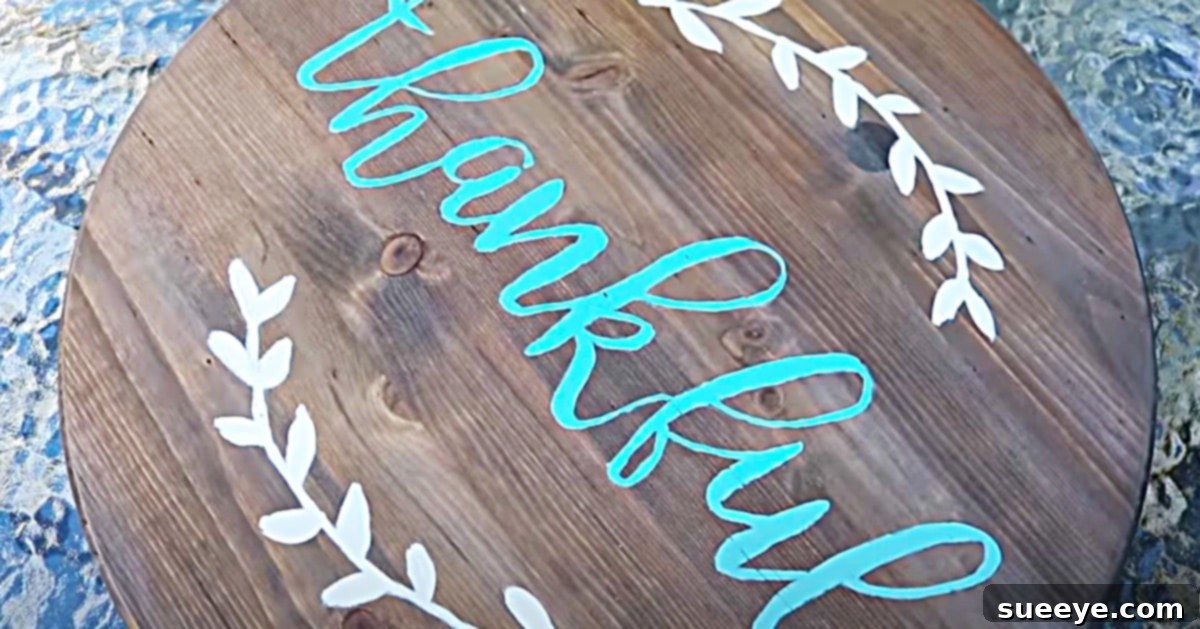
The Lazy Susan, a simple yet ingenious invention, has graced dining tables and kitchen pantries for generations, making shared meals and organized spaces effortless. For many, its charm lies not just in its utility but also in its nostalgic appeal, reminiscent of bustling family gatherings and efficient home organization. My own journey to create a custom Lazy Susan began with a profound sense of nostalgia. I spent years meticulously searching through thrift stores and yard sales, hoping to unearth a vintage Lazy Susan from the seventies, a tangible link to a bygone era. Despite countless searches, the perfect one remained elusive.
However, the memory of my father’s craftsmanship always lingered. He used to spend hours in our garage, lovingly creating what he called “meal wheels.” We had a truly impressive collection of these rotating trays, stacked high in every imaginable color, each one a testament to his dedication and skill. His legacy inspired me to embark on my own DIY project, to revive the tradition and create a Lazy Susan that would not only be functional but also deeply personal.
Driven by this inspiration, I turned to the internet in search of guidance. I discovered an excellent tutorial by “Do It On A Dime” on YouTube. Her step-by-step instructions made the entire process seem incredibly straightforward and achievable, even for a crafting novice. A key component, the Lazy Susan mechanism itself, is readily available at most craft stores, including Michael’s. A handy tip for saving money is to utilize the coupons often found on the Michael’s app, which can offer significant discounts on almost any item in the store, making this project even more budget-friendly.
Crafting Your Own DIY Lazy Susan: A Personalized Guide to Functional Home Decor
A custom-made Lazy Susan is more than just a spinning tray; it’s a versatile piece of home decor that enhances functionality and adds a touch of personalized charm to any space. Whether you’re looking to streamline your dining experience, organize your pantry, or create a unique gift, this DIY project offers immense satisfaction and practical benefits.
Why Choose to DIY Your Lazy Susan? Unlocking Customization and Value
While store-bought Lazy Susans are an option, crafting your own opens up a world of possibilities that pre-made items simply can’t match. The ability to choose your own materials, finishes, and designs means your Lazy Susan will perfectly complement your home’s aesthetic and serve your specific needs.
Unrivaled Customization
- Size and Shape: You’re not limited to standard sizes. Create a Lazy Susan that fits your dining table, cabinet, or counter space exactly.
- Material Choice: From rustic wood to sleek acrylic, the base material can be chosen to suit your taste and durability requirements.
- Personalized Finishes: Stain it to match your existing furniture, paint it a vibrant color, or apply a unique pattern. The creative possibilities are endless.
- Unique Designs: Add monograms, family mottos, decorative motifs, or even hand-painted artwork to make it truly one-of-a-kind.
Cost-Effectiveness and Quality
Often, making a Lazy Susan yourself can be more economical than purchasing a high-quality, pre-made version, especially when you factor in sales and coupons on materials. Furthermore, by selecting durable components, you can ensure your DIY Lazy Susan is built to last, offering superior quality compared to some mass-produced alternatives.
The Joy of Creation and Sentimental Value
There’s immense satisfaction in creating something with your own hands. A DIY Lazy Susan can become a cherished item in your home, carrying with it the story of its creation. It also makes for an incredibly thoughtful and personal gift for weddings, housewarmings, or holidays, imbued with the care and effort you put into it.
Essential Materials for Your DIY Lazy Susan Project
Gathering the right materials is the first step towards a successful and beautiful Lazy Susan. The beauty of this project lies in its flexibility; you can often find what you need at local craft stores, hardware stores, or even online.
- Round Wooden Board: This will form the base of your Lazy Susan. Michael’s Craft Store is an excellent source for various sizes. Consider pine for a classic look or MDF for a smoother finish. Ensure the board is sanded smoothly for optimal stain or paint application.
- Lazy Susan Mechanism: The rotating hardware is crucial. Look for a ball-bearing mechanism for smooth, quiet rotation. Michael’s typically carries these, and don’t forget those coupon savings! Consider the weight capacity if you plan to place heavy items on your Lazy Susan.
- Minwax Stain (or your preferred wood stain/paint): Minwax offers a wide range of colors to match any decor. Alternatively, you might opt for acrylic paints if you prefer a solid color or a painted design.
- A Drill and Screws: Essential for securely attaching the mechanism to the wooden board. Ensure you have appropriate drill bits for pilot holes and screws that are short enough not to pierce through the top of your board.
- Free Font Download: If you plan to add custom lettering, a beautiful font can make all the difference. Websites like DaFont offer countless free options.
- Stencils: An alternative to freehand drawing or printing a font, stencils offer an easy way to achieve crisp, clean letters or decorative patterns.
- Protective Finish (e.g., Polyurethane or Sealer): Crucial for protecting your finished design and the wood itself, especially if the Lazy Susan will be used for food service.
- Brushes, Rags, Sandpaper (fine-grit), Safety Goggles, Gloves: These essential tools and protective gear will ensure a smooth, safe, and professional finish.
Step-by-Step Directions: Bringing Your Custom Lazy Susan to Life
Creating your personalized Lazy Susan is a rewarding process. Follow these detailed steps to ensure a beautiful and functional outcome.
Step 1: Prepare and Stain Your Wooden Base
Begin by preparing your round wooden board. Even if it feels smooth, a light sanding with fine-grit sandpaper (around 220-grit) will ensure excellent adhesion for your stain or paint. Wipe off any dust thoroughly with a damp cloth and allow it to dry completely.
Next, it’s time to stain your wooden round. If using Minwax or any wood stain, apply it evenly with a brush or a clean rag, following the wood grain. Allow the stain to penetrate for the recommended time (check product instructions), then wipe off any excess. For a deeper color, apply a second coat after the first has dried. Always work in a well-ventilventilated area and wear gloves to protect your hands. If you prefer a painted finish, apply a primer first, followed by two thin coats of your chosen paint, allowing ample drying time between coats.
Step 2: Secure the Lazy Susan Mechanism
Once your stained or painted board is completely dry, carefully flip it over to attach the Lazy Susan mechanism. The key here is proper centering to ensure smooth, balanced rotation. Measure the diameter of your board and find its exact center. Then, align the center of your Lazy Susan mechanism with this point.
Mark the screw holes on the board using a pencil. Before screwing, it’s highly recommended to drill small pilot holes. This prevents the wood from splitting and makes screwing easier. Choose a drill bit slightly smaller than the diameter of your screws. Once pilot holes are drilled, position the mechanism, and securely fasten it with screws. Double-check that the screws are not too long and won’t protrude through the top surface of your Lazy Susan. Test the rotation to ensure it spins freely and smoothly.
Step 3: Personalize Your Lazy Susan with a Message or Design
Now comes the creative part: adding your personalized message or design! This is where your Lazy Susan truly becomes unique.
-
Using a Downloaded Font: If you’ve downloaded a specific font (like the one suggested from DaFont), you can print out your desired text to the correct size. There are several methods to transfer the design:
- Carbon Paper Method: Place carbon paper face down on your Lazy Susan, then lay your printed text over it. Trace the outline of the letters with a pencil, transferring the design onto the wood.
- Pencil Rubbing Method: Heavily shade the back of your printed text with a soft pencil. Then, place the text face up on your Lazy Susan and trace the letters, pressing firmly. The pencil lead from the back will transfer onto the wood.
- Projection Method: If you have access to a projector, you can project your design directly onto the Lazy Susan and trace it with a pencil.
- Using Stencils: Stencils are a fantastic option for neat and consistent lettering, especially if freehand painting isn’t your strength. Position your stencils carefully, securing them with painter’s tape to prevent movement. Apply paint (acrylics work well for this) with a stencil brush or sponge, using an up-and-down dabbing motion to prevent bleeding under the stencil. Remove the stencil slowly while the paint is still slightly wet for crisp lines.
- Freehand Painting: For those with artistic flair, freehand painting offers complete freedom. Use acrylic paints and fine brushes to create your unique design directly onto the stained or painted surface.
Allow your painted letters or design to dry completely before proceeding.
Step 4: Apply a Protective Topcoat
To ensure the longevity of your beautiful Lazy Susan and protect its surface from spills and wear, apply a clear protective topcoat. A water-based polyurethane or a food-safe sealer is an excellent choice. Apply thin, even coats with a brush, allowing ample drying time between each coat, and lightly sanding with very fine-grit sandpaper (e.g., 400-grit) between coats for an ultra-smooth finish. This step is crucial, especially if your Lazy Susan will be used for serving food.
Tips for a Flawless Finish and Long-Lasting Use
- Patience is Key: Rushing the drying process between coats of stain, paint, or sealer can lead to a sticky, uneven, or damaged finish. Always allow ample time for each layer to cure.
- Work in a Clean, Ventilated Area: This not only protects your health from fumes but also prevents dust particles from settling on wet finishes.
- Test Everything: If unsure about a stain color or paint technique, test it on a scrap piece of wood or an inconspicuous area on the underside of your Lazy Susan.
- Care and Maintenance: To clean your Lazy Susan, simply wipe it with a damp cloth. Avoid harsh chemicals or abrasive scrubbers that could damage the finish.
- Troubleshooting: If your Lazy Susan doesn’t spin smoothly, check if the mechanism is properly centered and all screws are tight. Sometimes, a little silicone spray lubricant on the mechanism can help.
Creative Ideas and Variations for Your DIY Lazy Susan
Beyond the basic design, there are countless ways to adapt and enhance your DIY Lazy Susan:
- Themed Designs: Create seasonal Lazy Susans (e.g., “Happy Fall,” “Merry Christmas”), or ones tailored for specific family events.
- Handles and Edges: Add decorative handles for easy lifting or a raised edge to prevent items from sliding off.
- Non-Kitchen Uses: A Lazy Susan can be incredibly useful in a craft room for organizing supplies, on a vanity for makeup, in a bathroom for toiletries, or even in a workshop for tools.
- Different Materials: Experiment with acrylic, slate, or even repurpose an old cutting board for a unique look.
- Double-Decker Design: For even more storage, consider attaching two boards with a central support rod and two mechanisms for a tiered Lazy Susan.
A Cherished Creation: The Enduring Legacy of the Lazy Susan
Completing this DIY Lazy Susan project has been more than just a craft; it has been a heartfelt journey back through time, evoking cherished memories of my dad and his “meal wheels.” The process of creating something functional and beautiful with my own hands, just as he did, fills me with immense satisfaction and a profound sense of connection. I am confident that as I place this new Lazy Susan on my table, serving friends and family, it will not only bring convenience but also a quiet pride, knowing my dad is watching from Heaven, proud of the legacy I continue.
This project is a testament to the power of DIY – not just to save money or customize items, but to create tangible links to our past, express our creativity, and infuse our homes with personal meaning. I eagerly anticipate making many more, each one a unique blend of utility, beauty, and heartfelt memories. I encourage you to embark on your own Lazy Susan adventure; you might just create a cherished heirloom for generations to come.