
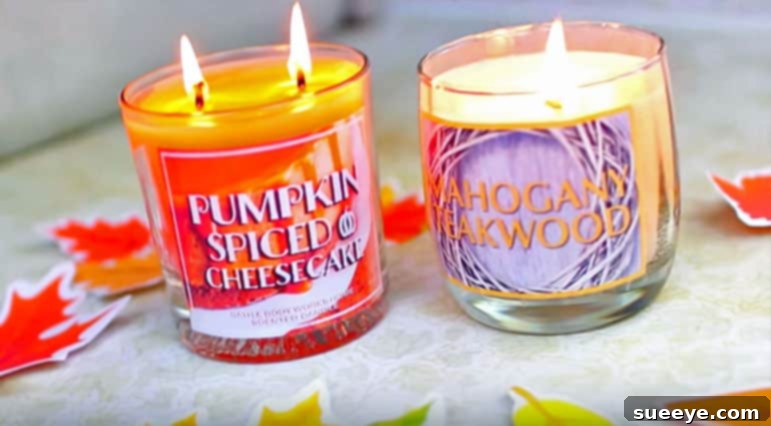
Craft Your Own Luxury: The Ultimate Guide to DIY Bath & Body Works Style Candles
There’s an undeniable allure to Bath & Body Works candles. Their enchanting fragrances fill every corner of a room, transforming ordinary spaces into cozy havens. With their charming labels and iconic three-wick design, they effortlessly blend into any decor, promising an experience of warmth, comfort, and delightful aromas. From the moment you light one, a sense of tranquility washes over you, making them a staple for countless homes worldwide. However, this premium experience often comes with a premium price tag, with many of their sought-after candles costing upwards of $30.
For those who adore the Bath & Body Works ambiance but find the price a barrier, a brilliant solution exists: crafting your own! Imagine capturing that coveted scent throw and beautiful aesthetic, all while significantly cutting down on costs. This comprehensive guide will empower you to create candles that not only rival the originals but also offer the immense satisfaction of a handmade product. Inspired by the ingenuity of creators like Jennifer from JENerationDIY, you can achieve stunning results for a fraction of the retail price, often costing as little as $8 per candle.
Why Go DIY? The Irresistible Benefits of Homemade Candles
Embracing the world of DIY candle making offers a multitude of advantages beyond just saving money. It’s a journey into creativity, customization, and conscious consumption. Here’s why making your own candles is an incredibly rewarding endeavor:
- Significant Cost Savings: This is arguably the biggest draw. By sourcing raw materials, you bypass the brand markup, packaging costs, and marketing expenses, leading to substantial savings. You can enjoy premium-quality candles more frequently without breaking the bank.
- Unleash Your Creativity: Unlike purchasing pre-made candles, DIY allows for limitless customization. You choose the wax, the wick, the color, and most importantly, the exact fragrance blend. Want a unique scent not found in stores? Mix and match your favorite fragrance oils to create a signature aroma that perfectly suits your mood or home.
- Quality Control and Ingredient Awareness: When you make your own candles, you know exactly what goes into them. You can select high-quality, eco-friendly waxes like soy or coconut wax, opt for lead-free wicks, and choose phthalate-free fragrance oils. This control is invaluable for those concerned about allergens or wanting to avoid certain chemicals found in some commercial candles.
- Therapeutic and Relaxing Hobby: The process of candle making itself can be incredibly calming and meditative. From melting the wax to carefully blending oils, it’s a mindful activity that offers a wonderful break from daily stresses.
- Perfect Personalized Gifts: Handmade candles make thoughtful and unique gifts for friends and family. A personalized scent in a beautifully decorated jar shows care and effort that a store-bought item simply can’t match.
- Eco-Friendly Option: You can reuse existing jars or purchase recyclable containers, minimizing waste. Choosing natural waxes and sustainable wicks further enhances the eco-friendliness of your craft.
Gathering Your Candle Making Arsenal: Essential Materials & Tools
To embark on your candle-making adventure, you’ll need a few key ingredients and tools. While the original inspiration from JENerationDIY suggested using an unscented candle to melt down and crayons for color, we’ll delve into more professional-grade materials for a truly high-quality result, while still acknowledging those simpler starting points for beginners.
Core Ingredients:
- Candle Wax: This is the heart of your candle.
- Soy Wax: A popular choice for its clean burn, excellent scent throw, and renewable source. It’s easy to work with and produces a creamy, smooth finish.
- Paraffin Wax: Traditionally used, offers good scent throw and vibrant colors.
- Beeswax: Natural and clean-burning, often has a subtle honey scent.
- Coconut Wax: Another natural option, known for a very clean burn and slow melt.
(For a beginner, soy wax flakes are highly recommended due to their ease of use.)
If you’re following Jennifer’s initial approach, an existing unscented candle (or candles, depending on your desired finished product size) can serve as your wax source. - Fragrance Oil: This is where the magic happens! Choose high-quality, candle-specific fragrance oils for the best scent throw and safety. Essential oils can also be used, but require careful research into flash points and safe usage rates for candles. Select scents that mimic your favorite Bath & Body Works varieties or create unique blends.
- Wicks: The engine of your candle.
- Pre-tabbed Wicks: These come with a metal base for easy attachment to the jar.
- Wick Size: Crucial for an even burn. The size of the wick needs to match the diameter of your container and the type of wax you’re using. Too small, and your candle will tunnel; too large, and it will burn too quickly with a large flame.
Look for cotton or wood wicks, ensuring they are lead-free.
- Colorants (Optional): To give your candles a visual appeal.
- Liquid Candle Dye or Dye Chips: Specifically designed for candle making, offering vibrant and consistent colors.
- Crayons (as per JENerationDIY): While possible for basic coloring, crayons don’t always burn cleanly and can clog wicks, leading to an inconsistent burn. For best results, dedicated candle dyes are recommended.
- Containers: Heat-safe jars are essential. Glass jars, ceramic containers, or even repurposed Bath & Body Works jars (cleaned thoroughly) work perfectly. Ensure they can withstand heat.
Essential Tools:
- Double Boiler Setup: This is a must for safely melting wax. You can use a dedicated double boiler or create one with a large pot (for water) and a smaller, heat-safe pouring pitcher or metal bowl (for wax).
- Candle Thermometer: Absolutely critical for monitoring wax temperature. Adding fragrance oil at the correct temperature ensures optimal scent throw and prevents the oil from burning off.
- Wick Clips or Holders: These ingenious tools keep your wick centered and upright while the wax sets. Alternatively, a clothespin or a pencil wrapped with the wick can achieve a similar result, as Jennifer demonstrated.
- Heat-Resistant Stirring Utensil: A metal spoon or wooden stick for mixing wax, fragrance, and color.
- Hot Glue Gun or Super Glue: For securely attaching the wick to the bottom of your container.
- Scissors or Wick Trimmer: For trimming wicks to the proper length after the candle has set.
- Digital Scale (Optional but Recommended): For precise measurement of wax and fragrance oil, ensuring consistent results.
Step-by-Step: Crafting Your Signature Scented Candle
Once you have all your materials, the candle-making process is straightforward and incredibly rewarding. Follow these detailed steps to create beautiful, aromatic candles:
Step 1: Prepare Your Workspace and Containers
Find a clean, flat surface that can tolerate potential wax spills. Lay down some newspaper or a silicone mat for easy cleanup. Ensure your containers are sparkling clean and dry. Any moisture can negatively affect the candle’s quality.
Step 2: Secure Your Wick
Take one of your pre-tabbed wicks. Apply a small dab of hot glue or super glue to the metal tab at the bottom of the wick. Carefully center the wick at the very bottom of your clean jar and press firmly. Allow the glue to dry completely to ensure the wick stays put. Once dried, use a wick clip or holder to keep the top of the wick upright and centered over the jar opening. If you don’t have a clip, wrapping the wick around a pencil or paintbrush resting across the jar’s rim, as Jennifer suggests, works wonderfully.
Step 3: Melt the Wax Safely
Measure out the appropriate amount of wax flakes. A good rule of thumb is that 1 pound of wax fills roughly 2 cups of volume. Place your wax into the pouring pitcher or smaller pot, then set it into your double boiler. Fill the larger pot with a few inches of water, ensuring the water level doesn’t reach the top of the pouring pitcher. Heat the water over medium heat. The wax will slowly melt. Stir occasionally to help it melt evenly. Use your thermometer to monitor the wax temperature; most waxes have a target pouring temperature, usually between 160-185°F (71-85°C).
(If you’re using Jennifer’s method of melting an existing unscented candle, ensure you remove any old wicks before melting the wax.)
Step 4: Add Color and Fragrance Oil
Once your wax is fully melted and has reached the recommended temperature (typically slightly higher than the pouring temperature, around 180-185°F for soy wax), remove it from the heat. This is the ideal time to add your colorant and fragrance oil.
- Colorant: If using dye chips, add a small amount and stir until dissolved and the desired hue is achieved. For liquid dyes, add a few drops at a time until you reach your preferred shade. Remember, the color will appear lighter when melted than when solid.
- Fragrance Oil: Measure your fragrance oil. A common fragrance load is 6-10% of the wax weight. For example, if you have 10 ounces of wax, you would add 0.6 to 1 ounce of fragrance oil. Pour the oil into the melted wax and stir gently but thoroughly for at least two minutes to ensure the fragrance oil binds effectively with the wax. This is critical for a good “hot throw” (how well the scent diffuses when burning). Adding fragrance at the right temperature prevents it from evaporating too quickly or clumping in the wax.
Step 5: Pour the Wax
Allow the wax to cool slightly to its pouring temperature (check your wax manufacturer’s recommendations, usually around 135-150°F / 57-65°C for soy wax). Slowly and steadily pour the wax mixture into your prepared container, making sure not to disturb the centered wick. Fill the jar, leaving about half an inch of space from the top.
Step 6: The Waiting Game: Curing and Hardening
This step requires patience! Place your freshly poured candle on a level, stable surface in a cool, draft-free area. Allow the wax to harden completely, which can take several hours to overnight, depending on the size of your candle. You’ll notice the wax change from a translucent liquid to an opaque solid. For optimal scent throw and a cleaner burn, most homemade candles benefit from a “curing” period of 24-48 hours (or even up to two weeks for best results with some waxes). This allows the fragrance oil to fully bind with the wax.
Step 7: Trim the Wick
Once the wax has fully hardened, remove any wick holders. Using scissors or a specialized wick trimmer, trim the wick to about 1/4 inch (0.6 cm) above the wax surface. A properly trimmed wick ensures a clean burn and prevents excessive soot.
Personalization and Finishing Touches: Making It Truly Yours
Now that your candle is set and cured, it’s time to add those delightful finishing touches that make it look just like a high-end store-bought candle – or even better!
- Custom Labels: To truly capture the Bath & Body Works aesthetic, design your own label. You can print a copy of one of their iconic labels (matching your scent profile, of course!) or create a completely unique design. Print it on adhesive paper or regular paper. For added durability and a professional look, cover your printed label with clear packing tape before carefully sticking it to your container. This also gives it a glossy, protected finish.
- Decorative Elements (Use with Caution): Some crafters add decorative elements like dried flowers, coffee beans, or glitter. If you choose to do this, ensure any additions are placed away from the wick and are non-flammable to prevent fire hazards. It’s generally safer to stick to decorative elements on the exterior of the jar or embedded very shallowly, avoiding the immediate burn pool.
- Gift Packaging: If you’re making these as gifts, consider wrapping them with ribbons, placing them in small boxes, or adding a personalized tag.
Light It Up! Enjoy Your Masterpiece
Your beautiful, handcrafted candle is now ready to light! Find a safe spot, trim the wick one last time if needed, and ignite it. Watch as your room fills with the captivating aroma you’ve created, all while enjoying the satisfaction of knowing you made it yourself for a fraction of the cost.
Inspired by JENerationDIY: A Nod to the Original Creator
We extend our gratitude to Jennifer from JENerationDIY for inspiring countless individuals to embrace the joy of candle making. Her practical approach and demonstration of how to achieve results that “rival the originals” on a budget have shown us all that luxury can indeed be DIY. If you’re a visual learner or wish to see Jennifer’s original, simpler method in action, be sure to watch her tutorial online for even more detailed insights and encouragement!
Embrace the warmth, the fragrance, and the incredible feeling of accomplishment that comes with creating your very own Bath & Body Works style candles. Happy crafting!