
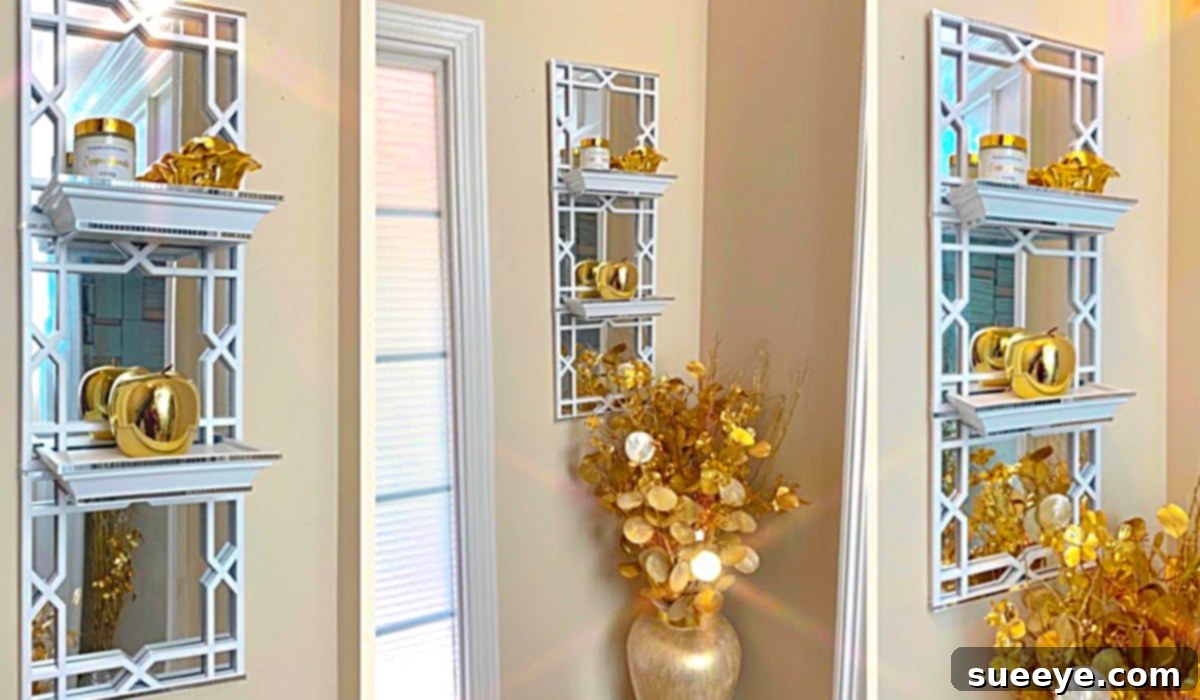
DIY Elegant Shelves: Craft Stunning Floating Shelving for Just $5
Transforming your home decor doesn’t have to break the bank. With a dash of creativity and a budget-friendly approach, you can create impressive pieces that look far more expensive than they actually are. One such incredible project that recently caught my eye is this brilliant $5 shelving idea, originally shared by the talented Dazzling Designs by Denise on YouTube. Her ingenious method allows anyone to craft elegant, vintage-inspired floating shelves that exude a chic Seventies rattan aesthetic – all for an astonishingly low cost.
The moment I saw these shelves, I was captivated by their sophisticated appearance and classic charm. They promised to be the perfect addition to my new entryway, complementing its upscale style without the hefty price tag often associated with high-end decor. What truly sets this project apart is its simplicity. The assembly process is remarkably straightforward, making it an ideal weekend (or even afternoon) craft. I instantly envisioned surprising my husband with our stunning new shelving system upon his return from work. The finished product genuinely boasts that coveted vintage rattan look, making it hard to believe these beautiful shelves cost only five dollars. It’s truly a testament to clever DIY design and incredible savings!
Why Choose This $5 Dollar Shelving Project?
Beyond the undeniable visual appeal and the shockingly low cost, this DIY shelving project offers numerous benefits for any homeowner or decor enthusiast looking to enhance their living space:
- Unbeatable Affordability: In an era where home decor can be expensive, creating elegant shelves for just $5 is a game-changer. It demonstrates that exquisite style doesn’t require a large investment, making sophisticated design accessible to everyone.
- Customizable Aesthetics: While the original design features a vintage rattan look, the core concept is highly adaptable. You can easily customize the paint colors, finishes, and mirror accents to match your existing home decor, whether it’s modern, bohemian, farmhouse, industrial, or minimalist. This flexibility ensures your shelves perfectly blend with your personal style.
- Easy to Build: Dazzling Designs by Denise has streamlined this project into a few simple steps, making it accessible even for beginner DIYers. No complex tools, advanced carpentry skills, or extensive experience with power tools are required, making it a perfect entry point into home crafting.
- Versatile Use: These elegant shelves aren’t just for entryways. Their clean lines and customizable finish allow them to enhance living rooms, bedrooms, bathrooms, kitchens, or even home offices. They provide stylish storage or display space for a myriad of items, including plants, cherished books, decorative ornaments, toiletries, or small framed photos.
- Personalized Touch: There’s immense satisfaction in creating something beautiful and functional with your own hands. These shelves will not only serve a practical purpose but also add a unique, personal touch and a sense of accomplishment to your living space, making your home feel more uniquely yours.
Materials For Your Elegant $5 Shelving System:
One of the beauties of this project lies in its minimal and easily sourced material list. Remember, the $5 budget primarily refers to the core decorative elements, assuming you might have basic tools or shelf brackets already on hand. Here’s a detailed breakdown of what you’ll need to gather:
- Floating Shelves: These form the structural base of your project. Look for small, lightweight floating shelves. You can often find incredibly affordable options at dollar stores, discount retailers, thrift stores, or even repurpose existing shelves you no longer use. The size and quantity will depend on your desired shelf configuration and available wall space. Opt for materials like MDF, lightweight wood, or sturdy plastic that are easy to paint and modify.
- Mirrored Tiles: These are absolutely key to achieving the “elegant” and “vintage” feel. Peel-and-stick mirrored tiles are ideal for their ease of application, eliminating the need for messy glues (though a bit of extra adhesive can enhance longevity). You can find these in various sizes and shapes, often sold in convenient packs, at craft stores, dollar stores, or online. Consider mosaic tiles for a more intricate effect, or larger single tiles for a bolder statement, depending on your design vision.
- Decorative Wall Mirror (approx. 9.75 inches): While the original inspiration mentioned a specific size, this refers to a smaller, decorative mirror that will serve as a central accent or a backing element. This could be a round, square, or uniquely shaped mirror. Dollar stores are a fantastic source for small, inexpensive decorative mirrors that are perfect for this purpose. It contributes significantly to the “elegant” and “vintage” appeal, especially when strategically combined with the other elements to create focal points.
- Paint (and primer, if needed): To achieve the desired “rattan look” or any other elegant finish, paint is essential for transforming the ordinary into extraordinary.
- Color: For a convincing rattan or vintage aesthetic, earthy tones like cream, beige, light brown, soft off-white, or even muted pastels are excellent choices. A matte, eggshell, or semi-gloss finish often works best to mimic natural textures.
- Type: All-purpose spray paint offers a smooth, even finish quickly and is great for covering large areas. Craft acrylic paints can be used for detailed work, dry brushing, or if you prefer a brush-on application. Chalk paint is another excellent option for a soft, matte, vintage look.
- Primer: If your shelves are a dark color, made of a glossy laminate, or a material that doesn’t hold paint well, a coat of appropriate primer will ensure superior adhesion, better color vibrancy, and a more durable, long-lasting finish.
- Strong Adhesive/Construction Glue: For securely attaching the mirrored tiles and any other decorative elements to your shelves, especially if the peel-and-stick adhesive isn’t robust enough. A clear-drying, strong adhesive formulated for multiple surfaces (wood, plastic, glass) is highly recommended for longevity.
- Basic Tools:
- Measuring tape and pencil: For precise measurements and marking.
- Level: Absolutely crucial for ensuring your shelves are mounted perfectly straight on the wall.
- Screwdriver or drill: For installing the floating shelf brackets.
- Fine-grit sandpaper: For prepping the shelf surfaces for optimal paint adhesion.
- Clean cloths or paper towels: For cleaning and wiping dust.
- Protective drop cloth or newspaper: To protect your workspace from paint spills.
- Safety glasses and gloves: Especially important when using spray paint or strong adhesives.
Directions For Crafting Your Elegant $5 Shelves:
Creating these elegant shelves is a rewarding process that comes together in just a few straightforward steps. Follow this detailed guide to bring Dazzling Designs by Denise’s vision to life in your own home, transforming simple materials into a chic decor statement.
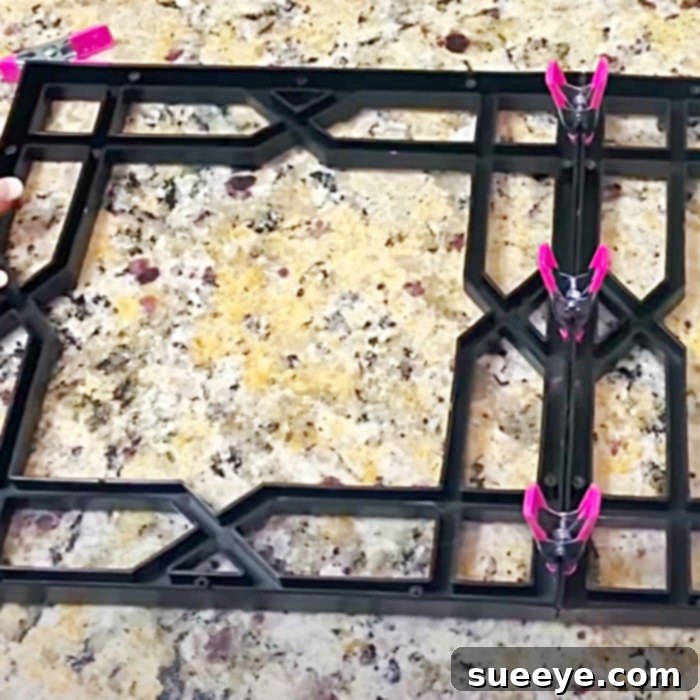
Step 1: Preparation is Key
Before you dive into the creative process, ensure your workspace is clean, well-ventilated, and protected from paint splatters with a drop cloth or old newspapers. Lay out all your gathered materials and tools within easy reach. If your floating shelves have a smooth, glossy, or laminated surface, it’s crucial to gently scuff them with fine-grit sandpaper. This vital step creates a slightly roughened surface, allowing the primer and paint to adhere much better, ensuring a more durable and professional finish. After sanding, thoroughly wipe away any dust with a clean, slightly damp cloth and allow the shelves to dry completely before proceeding.
Step 2: Priming and Initial Painting
If your shelves require it (as determined in Step 1), apply a thin, even coat of primer according to the manufacturer’s instructions. Primer provides a consistent base and improves paint longevity. Once the primer is fully dry, it’s time for the first coat of paint. If you’re aiming for the vintage rattan look, choose a base color like a light beige, cream, a soft, warm brown, or a muted off-white. Apply the paint in thin, even coats, moving in a consistent direction. Avoid applying thick coats, as this can lead to drips and an uneven finish. Allow each coat to dry completely as recommended by the paint manufacturer before applying the next. Depending on your chosen paint type and the shelf material, two to three coats may be necessary to achieve full, opaque coverage and your desired base color.
Step 3: Creating the Elegant “Rattan-Look” or Vintage Finish
This is where the transformation truly happens and you infuse your shelves with their unique character and charm. For a convincing faux rattan look, you can try these popular techniques:
- Dry Brushing: Once your base coat is fully dry, take a slightly darker or lighter shade of your base color (or even a contrasting earthy tone like a muted gold or deeper tan). Dip a dry brush (a stiff-bristled brush works best) into a very small amount of paint, then blot most of it off onto a paper towel until the brush is almost dry. Lightly drag the brush across the shelves in short, irregular, feathery strokes, mimicking the texture of woven rattan. This technique adds incredible depth, dimension, and a natural, textured appearance without being overtly patterned.
- Sponge Painting: For a more subtle, mottled effect, dab a sea sponge or a regular kitchen sponge lightly with a contrasting paint color. Gently pat it onto the shelves, building up the texture gradually. This can create an organic, weathered appearance that complements a vintage aesthetic.
- Strategic Mirror Placement: The mirrored tiles and the decorative wall mirror are crucial elements for enhancing the “elegant” aspect of this project. Plan their placement carefully before adhering. You might use the larger decorative mirror as a central element on the shelf’s back panel, creating a focal point and reflecting light to brighten the space. Smaller mirrored tiles can be applied around the edges of the shelf, in a geometric pattern on the shelf surface itself, or as an accent along the front lip. The contrast between the painted “rattan-look” texture and the reflective mirrors creates visual interest, adds a touch of glam, and gives the shelves an undeniably upscale feel.
Use your strong adhesive to securely attach the mirrored tiles and the larger decorative mirror. Apply a small, even amount of glue to the back of each mirror piece (especially for peel-and-stick tiles for extra security) and press firmly into place for several seconds. Allow ample drying time as specified by your adhesive’s instructions before moving the shelves or handling them vigorously.
Step 4: Assembling and Securing Components
Once all paint is completely dry and the mirrors are firmly set in place, take a moment to double-check the stability and integrity of your floating shelves. Ensure all mounting brackets are securely fastened to the shelves themselves, following the manufacturer’s instructions for the specific type of floating shelf you’re using. This step is critical to guarantee that once mounted, your shelves can safely bear the weight of your chosen decor items without any risk of wobbling or detachment.
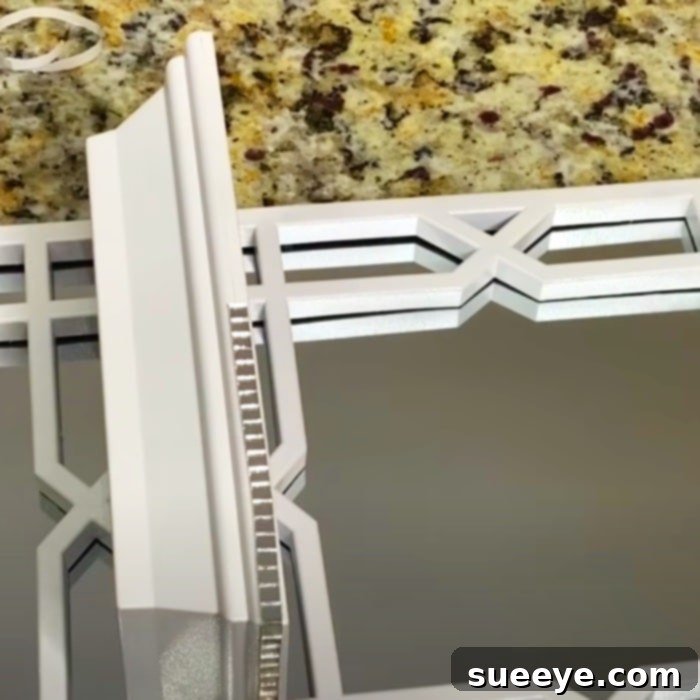
Step 5: Wall Installation and Leveling
Now it’s time to mount your beautiful, custom-made shelves! Choose the desired location on your wall, considering both aesthetics and functionality. Use a measuring tape and pencil to accurately mark the exact spots where your floating shelf brackets will be installed. This precision is important for a professional look. Crucially, use a level to ensure your marks are perfectly straight and horizontal. This small detail makes all the difference in the final appearance and stability of your shelves. Drill pilot holes if necessary, then securely attach the shelf brackets to the wall using appropriate screws and wall anchors (especially important if drilling into drywall for added strength). Carefully slide your decorated floating shelves onto their brackets. Double-check with the level one last time to ensure everything is perfectly aligned and firmly in place.
Step 6: Final Touches and Styling
With your shelves securely mounted and gleaming, take a moment to admire your handiwork! Perform any final touch-ups to the paint if needed, and gently clean any smudges from the mirrors. Once everything is dry and stable, the fun part begins: styling! These elegant, budget-friendly shelves are perfect for showcasing a variety of items. Consider small potted plants that add a touch of greenery, cherished photographs that personalize the space, small collections of books, aromatic candles, or other decorative ornaments that complement your home’s aesthetic. The reflective mirror elements will naturally catch and disperse light, further enhancing the ambiance of your space and making your decor truly shine. Step back and enjoy the sophisticated new look you’ve created for just five dollars!
Customization Ideas for Your $5 Dollar Shelves
The true beauty of DIY lies in its infinite possibilities for personalization. While the original idea inspires a vintage rattan look, don’t hesitate to put your unique spin on this project and make it truly your own:
- Color Palette Exploration: Experiment with bold, vibrant colors for a modern and eclectic look, soft pastels for a more whimsical and gentle touch, or even metallics (gold, silver, copper) for an extra touch of contemporary glam and luxury.
- Mirror Variations: Instead of traditional square tiles, consider using round mirrors for a softer aesthetic, irregular-shaped mirror pieces for an artistic mosaic effect (with careful handling and safety precautions), or even distressed antique-look mirrors for an authentic vintage vibe.
- Added Textures: Go beyond paint! Consider gluing on thin strips of actual rattan webbing for a more authentic texture, wrapping jute rope around the shelf edges for a rustic touch, or even applying textured wallpaper scraps to the back panel for a unique visual interest.
- Functional Additions: Enhance practicality by integrating small hooks underneath the shelves. These can be perfect for hanging keys, lightweight bags, scarves, small towels, or even decorative garlands to add seasonal flair.
- Layering Techniques: Use the shelves to create a dynamic layered look on your wall. Combine them with framed art, gallery walls, wall tapestries, or other wall decor items to build a rich and engaging visual narrative.
- Room-Specific Adaptations: Adapt the design for different rooms. In a bathroom, use moisture-resistant paint and style with small plants and elegant toiletries. In a child’s room, use brighter colors and display beloved toys or picture books.
Conclusion: Elegant Design on a Shoestring Budget
This remarkable DIY project from Dazzling Designs by Denise stands as compelling proof that you don’t need a lavish budget to infuse your home with elegance, style, and personal charm. For merely $5, you can create a stunning set of shelves that not only serve a practical purpose but also act as a beautiful focal point, sparking conversation and admiration in any room.
The satisfaction derived from crafting something so chic and high-end looking from such affordable, accessible materials is truly immense. It empowers you to take control of your home decor, showcasing your creativity and resourcefulness. So, gather your materials, set aside an afternoon, and embark on this incredibly rewarding DIY journey. Prepare to be amazed by the transformation and enjoy the compliments on your sophisticated new home decor. These shelves truly look so amazing, and I still can’t quite believe they only cost $5 – a testament to smart design and savvy crafting!