
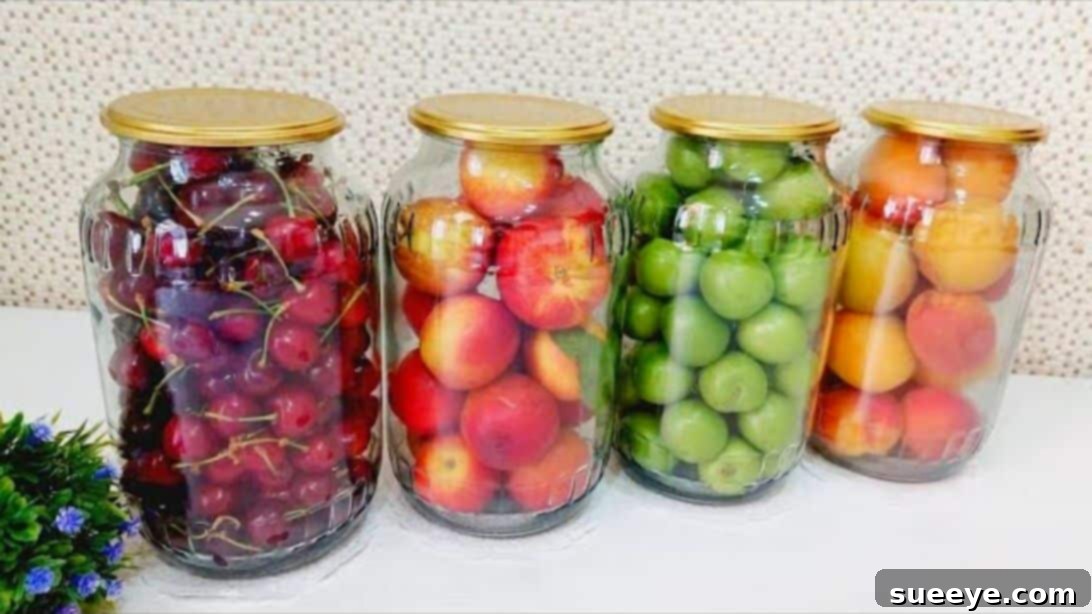
Mastering Fruit Preservation: Keep Your Fruits Fresh for 12 Months with This Easy Canning Method
Imagine enjoying the sweet taste of summer berries or crisp autumn apples in the dead of winter, knowing they’re just as fresh as the day they were picked. Buying fruits in bulk, especially when they’re in season and on sale, is an excellent way to save money and stock up on healthy produce. However, this savvy shopping strategy can quickly turn into wasted effort and spoiled food if you can’t consume everything before it goes bad. The good news is, you don’t have to let your valuable produce rot!
There are numerous traditional and modern techniques for food preservation, but one method stands out for its simplicity, effectiveness, and the fantastic results it yields: home canning. We’re excited to share a remarkable and straightforward technique demonstrated by Melissa Mir. In this comprehensive guide, you will unlock the secret to keeping your fruits wonderfully fresh for an entire year. This DIY method is incredibly easy to follow and utilizes basic materials and ingredients you likely already have in your kitchen, making it accessible for everyone. Say goodbye to food waste and hello to a pantry full of perfectly preserved fruits!
Why Preserve Fruits? The Benefits of Long-Term Storage
Before diving into the “how-to,” let’s explore the compelling reasons why fruit preservation, particularly through canning, is such a valuable skill for every household:
- Economic Savings: Fruits are often cheapest and most abundant during their peak season. Buying in bulk when prices are low and preserving them allows you to enjoy them year-round without paying off-season premiums. This significantly reduces your grocery bill in the long run.
- Reduced Food Waste: A staggering amount of food is wasted globally, contributing to environmental issues and economic losses. By preserving surplus fruits, you’re actively contributing to reducing food waste at home, ensuring that delicious produce doesn’t end up in the bin.
- Healthier Eating Habits: Having readily available, preserved fruits encourages healthier snacking and meal preparation. They’re perfect for quick breakfasts, smoothies, desserts, or as a healthy addition to your main meals, providing essential vitamins and fiber even when fresh options are scarce or expensive.
- Year-Round Enjoyment of Seasonal Favorites: Imagine the joy of tasting ripe strawberries in December or juicy peaches in March. Canning allows you to capture the essence and peak flavor of seasonal fruits, extending their enjoyment far beyond their natural growing season.
- Control Over Ingredients: When you preserve fruits at home, you know exactly what goes into your jars. You can control the amount of sugar, avoid artificial preservatives, and ensure the highest quality ingredients, providing peace of mind for you and your family.
This particular method, highlighted by Melissa Mir, leverages the power of heat sterilization and a simple sugar syrup to create an environment where fruits can thrive without spoilage for up to 12 months. It’s a fantastic entry point for anyone interested in home food preservation.
Essential Materials for Fruit Preservation
The beauty of this method lies in its simplicity and the everyday nature of the materials required. Gather these items before you begin:
- Glass Jars with Lids (Approx. 52 oz or various suitable sizes): Choose high-quality canning jars designed for heat processing. Ensure they are clean, sterilized, and free from chips or cracks. The lids should be new for each canning session to ensure a proper seal. While 52 oz jars are mentioned, feel free to use smaller, more manageable sizes like pint or quart jars, depending on your family’s needs and the quantity of fruit you’re preserving.
- Clean Water: You’ll need a substantial amount of clean, potable water for rinsing fruits and for the canning process itself.
- Kettle or Large Pot: Essential for boiling water efficiently. A large stockpot for the stove or an electric kettle will work perfectly.
- Granulated Sugar: Sugar not only enhances the flavor of the preserved fruits but also acts as a mild preservative and helps maintain the fruit’s texture.
- Clean Kitchen Towels: These are crucial for handling hot jars safely, providing insulation during the cooling process, and ensuring a clean workspace.
With these basic supplies on hand, you’re well-equipped to embark on your fruit preservation journey.
Step-by-Step Guide to Preserving Fruits for 12 Months
Follow these detailed instructions carefully to ensure the best results and safely preserve your fruits:
Step 1: Selecting and Inspecting Your Fruits
The foundation of successful preservation begins with the quality of your produce. Make sure that all fruits are fresh, ripe, and completely unblemished. Avoid any fruits with soft spots, mold, or signs of decay, as these can compromise the entire batch. Select firm, flavorful fruits at their peak. This method works beautifully for a variety of fruits such as berries, cherries, peaches, plums, and apricots.
Step 2: Thorough Washing and Preparation
Place your chosen fruits in a large clean container or colander. Fill it with cool water and rinse them thoroughly several times. This step is critical for removing any dirt, pesticides, or surface contaminants. For larger fruits, you might want to gently rub their skin. While the original method implies whole fruits, for fruits like peaches or plums, you might consider pitting them or slicing them into manageable pieces at this stage, depending on how you intend to use them later. Ensure all stems and leaves are removed.
Step 3: Sterilizing and Packing the Jars
Get your clean and dry glass jars ready. Sterilize them by either running them through a hot cycle in your dishwasher, boiling them in water for 10 minutes, or heating them in a clean oven. This step eliminates any bacteria that could cause spoilage. Carefully separate the prepared fruits and pack them into each of the sterile glass jars. Gently shake the jars to settle the fruit, but avoid compacting them too tightly. Leave about an inch of headspace from the rim of the jar.
Step 4: The First Hot Water Treatment (Blanching)
Boil a kettle full of water or heat a pot of water on the stove until it reaches a rolling boil. Carefully fill each of the packed jars with this boiling water. The hot water helps to pre-heat the fruits, release trapped air, and begin the sterilization process within the jar. Be cautious while pouring to avoid burns.
Step 5: Resting Period for Heat Penetration
Once the jars are filled with hot water, lightly place the lids on top, but do not seal them tightly. Allow the jars to rest for approximately 10 minutes. This resting period allows the heat to fully penetrate the fruits and jars, preparing them for the next crucial steps in the preservation process. It also helps to further expel any remaining air.
Step 6: Draining and Preparing for Syrup
After the 10-minute rest, carefully strain the hot water from all of the jars. You can use a jar lifter and a colander or simply hold the lid slightly askew to drain the water. This step is essential to make room for the sugar syrup that will provide further preservation and flavor.
Step 7: Adding Sugar and the Second Hot Water Treatment
While you’re waiting for another batch of water to boil, add 2 tablespoons of granulated sugar to each of the jars containing the drained fruits. The sugar will dissolve in the subsequent hot water, creating a light syrup. Once your water is boiling again, carefully refill each jar with this fresh boiling water, ensuring the sugar dissolves and the fruit is completely submerged. The sugar syrup adds to the preservative effect and enhances the fruit’s natural sweetness.
Step 8: Sealing the Jars and Creating a Vacuum
Now, it’s time for the critical sealing step. Place the lids firmly on each jar and close them tightly. Be extremely careful when doing this, as the jars and lids will be very hot. Use oven mitts or a clean towel for protection. Once sealed, cover all the hot jars completely with clean towels. This slow-cooling method is vital for creating a strong vacuum seal. Leave them undisturbed to cool for about 20 to 24 hours. During this time, as the jars cool, a vacuum will form, pulling the lids down and creating an airtight seal. You might hear a “pop” sound as the seals engage. Ensure that all the jar lids are tightly closed and sealed; no air should be able to enter the jars.
Step 9: Checking Seals and Proper Storage
After 20-24 hours, remove the towels and carefully check the seals of each jar. A properly sealed jar lid will be concave (curved inwards) and will not flex when pressed. If any lid is loose or pops up, the seal is compromised, and that jar should be refrigerated and consumed within a few days, not stored long-term. Store all properly sealed jars in a cool, dark, and dry room. The ideal temperature should not exceed 64.4°F (approximately 18°C). Keeping them away from direct sunlight and extreme temperature fluctuations will ensure they remain fresh and delicious for about one year. Make sure to label your jars with the fruit type and the date of preservation.
The Secret of Keeping Fruits Fresh for 12 Months: Understanding the Science
The “secret” to keeping fruits fresh for 12 months using this method lies in a combination of simple scientific principles:
- Sterilization: The repeated application of boiling water kills microorganisms (bacteria, yeasts, molds) that cause spoilage, both on the fruit and inside the jars.
- Vacuum Seal: As the jars cool after being filled with hot liquid and tightly sealed, the air inside contracts, creating a vacuum. This vacuum pulls the lid down, forming an airtight barrier that prevents new microorganisms from entering the jar and oxygen from reaching the food. Oxygen is a primary contributor to spoilage and enzymatic browning.
- Sugar’s Role: While not the primary preservative in this method (heat and vacuum are), sugar acts as a secondary preservative. In higher concentrations (as in jams), sugar uses osmosis to draw water out of microbial cells, dehydrating and killing them. In lighter syrups, it primarily enhances flavor and helps maintain the fruit’s texture and color, though it still contributes a mild preservative effect.
- Cool, Dark Storage: Once sealed, storing the jars in a cool, dark place further inhibits any potential microbial growth and degradation of nutrients and color that can be caused by light and heat.
By diligently following these steps, you create a sterile, oxygen-free environment that allows your fruits to remain stable and delicious for an extended period, making it a powerful and rewarding skill to master.
Tips for Success and Troubleshooting Common Issues
To ensure your fruit preservation efforts are always a success, keep these additional tips in mind:
- Sterilization is Key: Never skip or rush the sterilization process for your jars and lids. Any lingering bacteria can jeopardize your entire batch.
- Inspect Jars and Lids: Always use jars specifically designed for canning. Discard any jars with nicks, cracks, or imperfections, especially around the rim. Use new lids for each canning cycle to guarantee a proper seal.
- Don’t Overpack: Leave adequate headspace in the jars. Overpacking can prevent a proper seal and may cause jars to break during processing.
- Check Seals Thoroughly: After the cooling period, always verify that each jar has a strong, concave seal. A lid that is still convex or can be pressed down indicates a failed seal. These jars should be refrigerated immediately and consumed within a few days.
- Label Your Jars: Write the date of preservation and the type of fruit on each jar. This helps with inventory management and ensures you consume older batches first.
- Safety First: Always handle hot jars and boiling water with extreme caution. Use jar lifters, oven mitts, and stable surfaces to prevent accidents.
- Experiment with Fruits: While this method is versatile, different fruits might react slightly differently. Begin with fruits known for good canning results like berries, stone fruits, and cherries.
Embracing home fruit preservation is not just about extending shelf life; it’s about connecting with your food, reducing waste, and enjoying the abundance of nature throughout the year. With Melissa Mir’s simple yet effective method, you now have the tools to keep your pantry stocked with healthy, delicious fruits for an entire year.
Conclusion: Enjoy Fresh Fruits All Year Round
Say goodbye to the disappointment of spoiled produce and the high costs of out-of-season fruits. This incredible, easy-to-follow method from Melissa Mir offers a practical and rewarding way to preserve your fruits, keeping them wonderfully fresh and flavorful for up to 12 months. With just a few common household items and a little bit of time, you can transform your bulk fruit purchases into a year-long supply of healthy, delicious treats.
Imagine the convenience of having peaches for a winter cobbler, cherries for a spring pie, or berries for your daily smoothie, all from your own pantry. This technique not only saves you money and reduces food waste but also empowers you to enjoy the peak flavors of your favorite fruits whenever you desire. Don’t let another season’s bounty go to waste – embrace the art of home fruit preservation today and savor the taste of freshness all year long!