
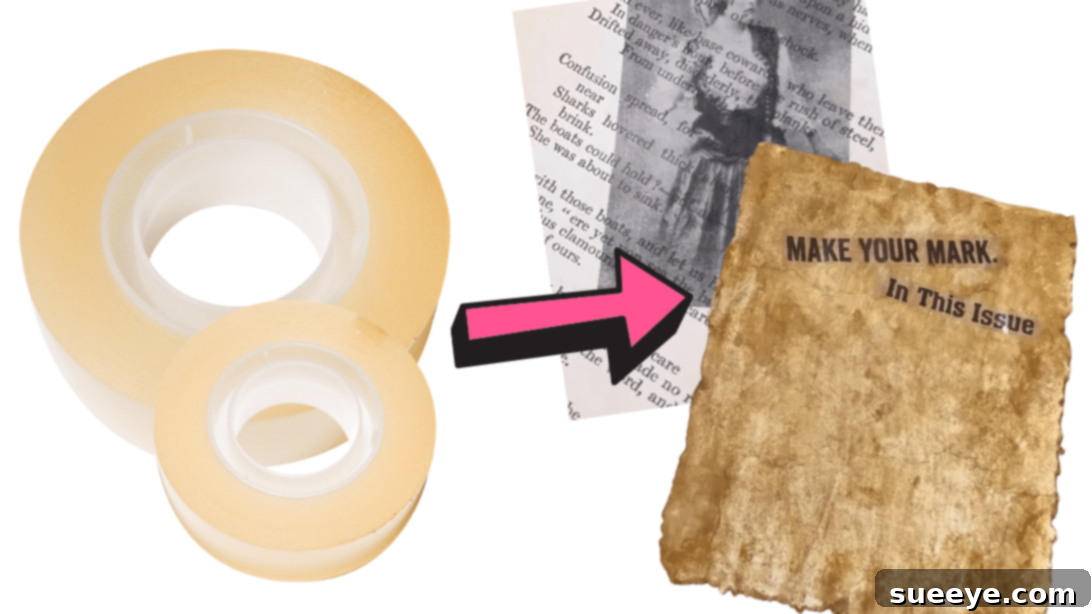
Unlock Transparent Creativity: The Ultimate Packing Tape Transfer Hack for DIY & Journaling
Are you a passionate crafter, an avid junk journal enthusiast, or someone who loves to infuse personality into everyday items with a touch of DIY magic? If so, prepare to discover a game-changing technique that will revolutionize your creative projects: the packing tape transfer hack! This ingenious method, beautifully demonstrated by Our Upcycled Life, allows you to effortlessly transform graphics from various sources into stunning, transparent decals. Imagine taking your favorite illustrations from old magazines, delicate patterns from napkins, nostalgic pages from antique books, cherished printed photos, or vibrant scrapbook papers, and giving them a new life as a crisp, clear transfer – all with the humble aid of regular packing tape.
This simple yet powerful hack is a treasure trove for anyone looking to add unique visual elements to their crafts. Whether you’re embellishing a junk journal with a perfectly aged, coffee-stained backing paper, creating personalized greeting cards, decorating upcycled furniture, or adding bespoke touches to your mixed-media art, the transparent finish achieved with this technique is truly remarkable. The results are not just visually appealing; they offer a professional, integrated look that can elevate any project. This guide will walk you through the entire process, providing detailed steps, essential tips, and creative inspiration to ensure your tape transfer journey is a resounding success. Get ready to transform ordinary materials into extraordinary artistic statements!
Essential Materials for Your Tape Transfer Project
Gathering the right tools is the first step towards a successful tape transfer. Fortunately, most of these items are readily available, perhaps even lying around your home or craft space. Here’s a breakdown of what you’ll need and why:
- Regular Packing Tape: This is the star of our show! Opt for standard, clear packing tape. While most brands work, some tapes might have stronger adhesive or release properties than others. Experimentation might be key to finding your favorite. The wider the tape, the larger the images you can transfer.
- Container for Water: A shallow dish, bowl, or even a small baking pan will work perfectly. It just needs to be large enough to fully submerge your taped images.
- Warm Water: The warmth helps to soften the paper fibers and loosen the ink, making it easier to rub away the paper backing later. Avoid scorching hot water, as it might affect the tape’s adhesive; lukewarm to warm is ideal.
- Scissors: Sharp scissors are essential for precise cutting of your chosen images and trimming any excess tape around them. Precision here contributes to a cleaner final transfer.
- Card or Smoothing Tool: An old credit card, a gift card, a squeegee, or even the edge of a ruler can be used. This tool is crucial for pressing the tape firmly onto your image, eliminating air bubbles, and ensuring maximum adhesion between the tape and the print.
- Source Materials for Graphics: This is where your creativity truly comes into play!
- Old Magazines: Offer a vast array of vibrant images, intriguing typography, and diverse graphics.
- Lovely Napkins: Ideal for delicate patterns and floral designs. Remember to separate them into a single ply before use.
- Old Book Pages: Perfect for vintage aesthetics, text-based art, or subtle background textures.
- Scrapbook Paper: Provides pre-designed patterns, textures, and illustrations tailored for crafting.
- Printed Photos: Allows for personalized transfers of cherished memories or custom designs.
Important Note on Printed Photos: For optimal results when transferring printed images, it is absolutely crucial to use prints from a laserjet printer. The toner used in laserjet printers is heat-fused to the paper and adheres well to the packing tape during the transfer process. Inkjet printers will not work for this technique, as the ink used in them is water-soluble and will simply wash away when submerged in water, leaving no image on the tape. Always double-check your print source for the best outcome.
Having all these items ready before you begin will ensure a smooth and enjoyable crafting experience.
Step-by-Step Guide: Mastering the Tape Transfer Technique
Now that you have all your materials ready, let’s dive into the fascinating process of transforming your chosen graphics into beautiful, transparent transfers. Follow these detailed steps for a flawless execution:
Step 1: Prepare Your Graphics and Apply the Tape
This initial stage is critical for ensuring a crisp and clear transfer. Begin by carefully selecting the images, quotes, or patterns you wish to transfer from your chosen source materials. Use your scissors to cut them out, aiming for a clean edge around your design. Consider the size of your packing tape when selecting images; wider tape allows for larger transfers. If you have a delicate design, leave a small border to make handling easier.
- For Magazines, Old Book Pages, Scrapbook Paper, and Laserjet Printed Photos: Once your image is cut, take a strip of packing tape that is slightly larger than your graphic. Carefully place the sticky side of the tape directly over your chosen image. Press down gently at first to position it, then use your card or smoothing tool to press the tape firmly onto the graphic. Start from the center and work your way outwards, applying even pressure to eliminate any air bubbles and ensure complete adhesion. The goal is to make sure every millimeter of the image is in direct contact with the tape’s adhesive. Once pressed, trim any excess tape around the edges of your image, leaving a small border if desired, or cutting precisely to the edge of the graphic.
- For Napkins: Napkins are often multi-ply. For a successful transfer, you must carefully separate the napkin until you have only a single ply of the printed design. This ensures that the delicate fibers are thin enough to transfer properly. Once you have a single ply, follow the same steps as above: carefully stick the packing tape over the design, press firmly with your card to remove air bubbles, and trim any extra tape.
This meticulous application of tape is what allows the ink or toner to bond with the adhesive, setting the stage for the transparent reveal.
Step 2: The Warm Water Immersion
With your graphics securely taped, it’s time for the “magic” to happen! Fill your container with warm water. The water should be warm enough to be comfortable to the touch, but not scalding hot, as excessive heat can sometimes compromise the tape’s adhesive.
Carefully place your taped magazine pages (or other taped graphics) into the dish, ensuring they are fully submerged. Let them soak in the warm water for approximately 30 to 40 seconds. This soaking time allows the water to penetrate the paper fibers, softening them and loosening the bond between the paper and the ink/toner. The adhesive on the packing tape, however, is designed to be water-resistant, so it will hold onto the image while the paper backing prepares to be removed. You might notice the paper starting to wrinkle or become slightly translucent as it absorbs the water.
After the recommended soaking time, gently remove the taped graphics from the water. They will be soft and pliable, ready for the next crucial step.
Step 3: Reveal Your Transparent Transfer
This is arguably the most satisfying part of the process! Once you’ve removed the taped graphics from the water, immediately flip them over so the tape side is facing down and the wet paper backing is facing up. Now, using your fingers, gently but firmly begin to rub off the wet paper. You’ll notice the paper fibers starting to roll away, revealing the image or text adhered to the packing tape underneath.
Continue rubbing until all the paper pulp has been removed. You can rub under a gentle stream of running water to help rinse away the paper debris, but be careful not to rub too aggressively, as this might damage the delicate transferred image or peel off the tape. The goal is to remove all white paper residue, leaving only the transparent tape with your graphic perfectly adhered to it.
Once you’ve removed all the paper, you will be left with a beautiful, clear transfer! The graphic will now be permanently bonded to the tape, creating a transparent sticker-like embellishment. You might find that some transfers retain their stickiness, allowing you to use them immediately as transparent stickers in your journals or craft projects. However, depending on the brand and type of packing tape you use, or the extent of rubbing and water exposure, the stickiness might be reduced or completely removed during this process. Don’t worry if it loses its tack; you can always apply a thin layer of glue stick or clear adhesive to the back when you’re ready to use it. Gently pat dry with a soft cloth or allow it to air dry completely before application.
Congratulations! You’ve successfully created your very own transparent tape transfers. Now, let your imagination take flight as you incorporate these unique elements into your creative endeavors.
Why Master the Packing Tape Transfer Hack?
Beyond its sheer novelty, the tape transfer hack offers a multitude of benefits that make it a must-try for any crafter or DIY enthusiast. Here’s why you should embrace this versatile technique:
- Unleash Unlimited Creativity: The ability to transfer almost any graphic opens up an endless world of design possibilities. From vintage advertisements to contemporary illustrations, personal photos to intricate patterns, your creative canvas expands dramatically.
- Cost-Effective Crafting: This hack utilizes readily available and inexpensive materials like packing tape and old magazines. It’s a fantastic way to create unique embellishments without breaking the bank, making high-end custom looks accessible to everyone.
- Achieve a Unique Transparent Finish: Unlike opaque stickers or cut-outs, these transfers are transparent, allowing the background to show through. This creates a seamless, integrated look that appears as if the image was printed directly onto your surface, adding depth and sophistication to your projects.
- Versatility Across Projects: The applications are vast! Whether you’re into junk journaling, decoupaging, scrapbooking, card making, upcycling furniture, or creating mixed-media art, these transparent graphics can elevate any craft.
- Upcycling and Sustainability: It’s an excellent way to give new life to old magazines, books, and scraps of paper that might otherwise be discarded. Embrace sustainable crafting by turning potential waste into beautiful art.
- Personalization Made Easy: Transferring personal photos allows you to customize gifts, journals, and decor with a deeply personal touch, making your creations truly one-of-a-kind.
Unleashing Your Creativity: Applications for Tape Transfers
Now that you’ve successfully created your transparent tape transfers, the exciting part begins: incorporating them into your projects! The versatility of this hack means the possibilities are truly endless. Here are just a few ideas to spark your imagination:
- Junk Journals and Scrapbooks: This is where tape transfers truly shine! Use them to add decorative elements, titles, quotes, or small images to your journal pages. Their transparency allows them to blend seamlessly with distressed papers, fabric scraps, and mixed media layers, enhancing the vintage or eclectic aesthetic without covering up beautiful backgrounds.
- Greeting Cards and Invitations: Create bespoke cards for any occasion. Transfer intricate floral designs, whimsical illustrations, or personalized messages to add a unique, handmade touch that will surely impress.
- Upcycled Home Decor: Give old items a fresh lease on life. Transfer designs onto glass jars, wooden boxes, ceramic tiles, or even small pieces of furniture to create custom decor pieces that reflect your style. Imagine a clear transfer of an old botanical print on a plain glass vase!
- Mixed Media Art: Incorporate these transparent elements into your paintings, collages, and mixed media canvases. They can serve as intriguing layers, adding texture and visual interest without overwhelming other elements.
- Personalized Gifts: Elevate simple gifts by adding a custom tape transfer. Use them on gift tags, bookmarks, or directly onto plain gift boxes for a thoughtful and unique presentation.
- DIY Stickers: If your transfers retain their stickiness, you’ve essentially created your own custom, transparent stickers! These are perfect for planners, notebooks, or any surface where you want a temporary or subtle embellishment.
- Altered Art Projects: Apply transfers to altered books, bottle caps, or other small found objects to transform them into miniature works of art.
Don’t be afraid to experiment with different surfaces and combinations. The beauty of this technique lies in its adaptability and the unique effect it brings to any creative endeavor.
Expert Tips for Flawless Tape Transfers
While the packing tape transfer hack is relatively straightforward, a few expert tips can help you achieve consistently perfect results and avoid common pitfalls:
- Choose Your Images Wisely: Images with high contrast and clear lines tend to transfer best. Very light or faded images might result in a less vibrant transfer. Keep in mind that the image will be reversed once transferred, which is important for text.
- Press, Press, Press!: The success of your transfer heavily relies on how well the tape adheres to the graphic in Step 1. Use firm, even pressure with your card. Work out every single air bubble to ensure maximum contact between the tape’s adhesive and the ink/toner. Any area not firmly adhered will likely not transfer.
- Optimal Soaking Time: While 30-40 seconds is a good starting point, some papers might require slightly longer soaking. If you’re having trouble rubbing off the paper, try soaking for another 10-15 seconds. However, avoid over-soaking, as prolonged exposure to water can sometimes weaken the tape’s adhesive or cause the image to bleed if the ink isn’t truly water-resistant.
- Gentle Rubbing is Key: When rubbing off the paper in Step 3, start gently. If the paper isn’t coming off easily, re-submerge it for a few more seconds. Don’t use abrasive tools or rub too harshly, as this can scratch the transferred image or tear the tape. Your fingertips are usually the best tools for this.
- Dealing with Stickiness: If your transfer loses its stickiness, don’t despair! It’s still a perfectly usable embellishment. Simply apply a thin, even layer of a clear-drying craft glue (like a glue stick or Mod Podge) to the back of the transfer when you’re ready to adhere it to your project.
- Test, Test, Test!: Especially when using a new brand of tape or an unfamiliar paper source, it’s always a good idea to perform a small test transfer. This helps you gauge the optimal soaking time and rubbing technique for your specific materials.
- Clean Your Transfers: After rubbing off the paper, there might be a slight cloudy residue left on the transfer from the paper fibers. You can gently rinse it under cool water and lightly rub with your finger one last time to ensure it’s completely clear. Allow it to air dry fully.
- Storage: Store your completed transfers flat between sheets of wax paper or parchment paper if they retain their stickiness, to prevent them from adhering to each other or other surfaces prematurely.
Beyond the Basics: Exploring New Possibilities with Tape Transfers
Once you’ve mastered the fundamental technique, don’t hesitate to push the boundaries and experiment further:
- Layering Transfers: Create intricate designs by layering multiple transparent transfers on top of each other. This can add depth and complexity to your artwork.
- Distressing Transfers: For a truly vintage look, gently distress the edges of your finished transfers with ink or a sanding block before applying them to your project.
- Combining with Other Mediums: Integrate your tape transfers with stenciling, stamping, painting, or collage techniques. For example, transfer a floral image and then paint highlights onto it, or stamp a border around a transferred quote.
- Colored Tapes: While clear packing tape is standard, experiment with translucent colored tapes (if you can find them) for unique effects. Note that this might change the final transparency of your image.
- Textural Backgrounds: Try transferring images onto textured paper or light fabric (ensure it’s thin enough) before applying the tape. The texture of the original paper might subtly transfer, adding another dimension.
Embrace the Art of Transparent Transfer
The packing tape transfer hack is more than just a clever trick; it’s a gateway to unlocking new levels of creativity and personalization in your DIY projects. From the simple act of selecting an image to the satisfying reveal of a transparent graphic, each step of this process is an opportunity for artistic expression. It’s an accessible, cost-effective, and incredibly versatile technique that empowers you to transform ordinary materials into extraordinary embellishments.
Whether you’re looking to add vintage charm to a junk journal, create bespoke gifts, or simply explore a new crafting method, this hack is a fantastic addition to your creative toolkit. So, gather your materials, select your favorite graphics, and dive into the wonderful world of transparent transfers. The only limit is your imagination!