
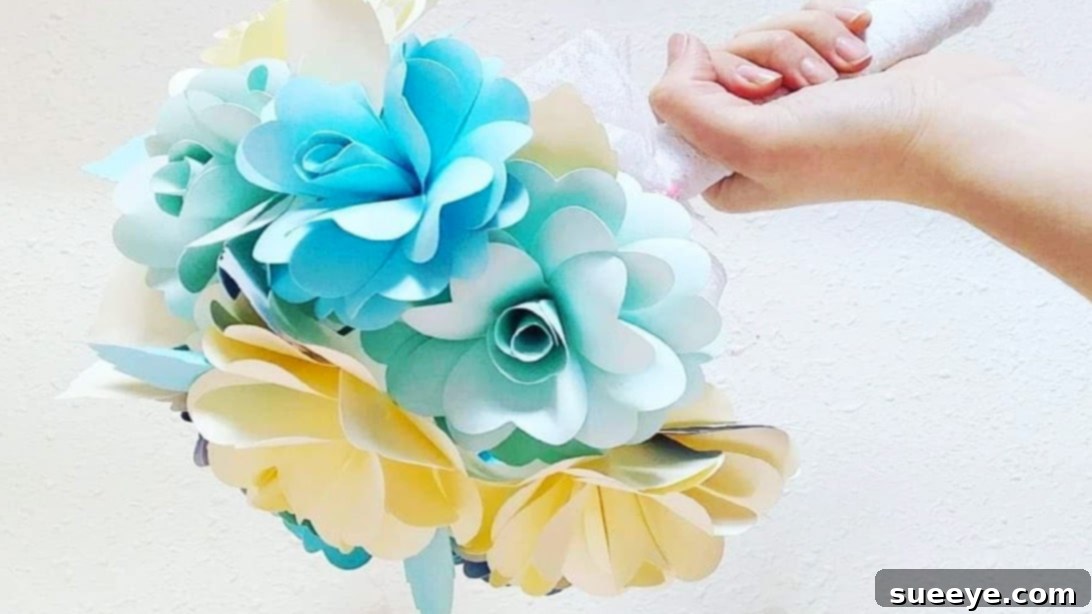
Master the Art of DIY Paper Roses: An Easy Step-by-Step Tutorial
Welcome to a delightful journey into the world of paper crafting, where you’ll discover the simple secret to creating breathtaking paper roses. For anyone who has admired the intricate beauty of paper flowers and thought they were too complicated to make, this tutorial is about to change your mind. We were absolutely thrilled to find inspiration from the fantastic work of Let’s Get Craftin’ with Supreet Kaur, whose clear instructions unveil just how accessible this beautiful art form truly is. What might seem like a complex endeavor at first glance quickly transforms into an enjoyable and incredibly rewarding process once you begin. You’ll soon realize that with just a few fundamental folds and cuts, repeated with slight variations, you can bring these delicate floral wonders to life.
Imagine adorning your living space with everlasting blooms, crafting unique gifts for loved ones, or adding a charming, handmade touch to a child’s nursery or a special event. Paper roses offer an endless array of possibilities, combining the elegance of real flowers with the durability and versatility of paper. This guide breaks down each step into an easy-to-understand format, ensuring a smooth and enjoyable crafting experience for beginners and seasoned crafters alike. So, gather your materials, prepare your workspace, and get ready to transform simple sheets of paper into a stunning bouquet of handmade roses that will never wilt.
Materials You Will Need
Before diving into the creative process, let’s ensure you have all the necessary tools and supplies at hand. The beauty of this craft lies in its simplicity, requiring only a few basic items you likely already have around your home. However, understanding the best choices for each material can significantly enhance the quality and appearance of your final paper roses.
- Square Sheets of Paper (4): We recommend starting with four square sheets, ideally around 4.1 inches by 4.1 inches (approximately 10.4 cm x 10.4 cm). The size of your paper directly determines the size of your finished rose, so feel free to experiment with larger squares for more substantial blooms or smaller ones for delicate accents. Cardstock or construction paper works wonderfully for its durability and ability to hold shape, but even regular printer paper can be used for a softer look. Don’t hesitate to explore various colors and patterns to create a truly unique bouquet.
- Glue: A reliable adhesive is crucial for securing your petals. Craft glue, white school glue, or a glue stick are all excellent choices. For quicker drying times and a strong bond, a fast-drying craft glue is often preferred. Ensure it dries clear to avoid any visible marks on your beautiful petals.
- Scissors: A sharp pair of scissors will make precise cuts much easier, leading to cleaner petal edges and a more professional finish. Small, sharp craft scissors can offer greater control, especially when cutting intricate curves.
- Pencil: A standard pencil is indispensable for sketching your petal guides and for shaping the edges of your finished petals. A light pencil will ensure marks are easily hidden or erased.
- Optional Materials for Enhancement:
- Ruler: For ensuring perfectly square paper and precise measurements during folding.
- Bone Folder: Can create crisp folds, though your fingers work just as well.
- Floral Wire/Stem: To create a stem for your rose, allowing it to be placed in a vase or incorporated into a bouquet.
- Glitter or Embellishments: For adding a touch of sparkle or unique detail.
- A Craft Mat: To protect your work surface while cutting.
Step-by-Step Directions for Crafting Your Paper Roses
Now that you have all your materials ready, let’s begin the exciting process of transforming flat sheets of paper into captivating three-dimensional roses. Follow these detailed instructions carefully, and you’ll be amazed at what you can create.
Step 1: Preparing Your Petal Base – The Initial Fold
Take one of your four square sheets of paper. Begin by folding it diagonally, corner to corner, to form a perfect triangle. Ensure the edges align neatly for a clean fold. Next, take this newly formed triangle and fold it diagonally once more, bringing the two acute angles together to create a smaller triangle. For the third and final fold in this sequence, fold the triangle diagonally again. This compact, multi-layered triangle will serve as the foundation for your petals, ensuring symmetry and multiple layers once cut.
Step 2: Designing and Cutting Your Petals
With your paper folded into a small, thick triangle, identify the side that has open, loose edges (as opposed to the folded spine). On this open side, use your pencil to lightly draw a curved line. This line will define the shape of your rose petals. You can experiment with different curves—a gentle curve for classic rounded petals, or a slightly more pointed curve for a sharper, more defined look. Once you’re happy with your design, carefully cut along the pencil line. After cutting, gently unfold the paper. You will reveal a beautiful, multi-petaled flower shape. Before proceeding, refold the flower and snip a very small portion off the pointed, closed edge (the tip of your initial triangle). This creates a tiny hole in the center, which will be crucial for assembling the rose.
Step 3: Replicating the Petal Base for All Sheets
Repeat the entire process described in Steps 1 and 2 for each of your remaining three square sheets of paper. By the end of this step, you should have four identical paper flower shapes, each with a small hole in its center, ready for the next stage of transformation. Consistency in your folds and cuts will contribute to a more harmonious final rose, but remember that slight variations can also add to its organic charm.
Step 4: Customizing Petal Counts for Depth
This step is essential for creating the layered, dimensional effect of a real rose. Take one of your four paper flowers and cut along one of its folded lines, detaching a single petal segment. Set this single petal aside. With another paper flower, cut along two adjacent folded lines, removing two petal segments. For the third flower, cut off three petals. Finally, from the fourth flower, cut off four petals. You will now have four main flower pieces with varying numbers of petals removed, plus several individual petal cut-outs. These different segments are key to building the rose’s natural gradient from outer, larger petals to inner, tighter ones.
Step 5: Forming the Initial Petal Cones
Let’s begin shaping the main body of your rose. Pick up the flower shape that has one petal missing. Apply a small dot of glue to the edge of one of the remaining petals. Carefully bring the opposite edge of the adjacent petal over to meet and overlap the glued edge, forming a cone shape. Gently press the glued edges together until secure. To give this cone a more natural, outward curl, gently pinch and shape the edges outwards. Repeat this cone-forming process for all the remaining main flower pieces (the ones from which you removed 2, 3, and 4 petals), ensuring you pinch and shape each one outwards to create a subtle, realistic curl. These will form the larger, outer layers of your rose.
Step 6: Crafting Smaller Petal Cones from Cut-Outs
Now, turn your attention to the individual petal pieces you cut off in Step 4. Each of these segments, from single petals to groups of two or three, will also be transformed into small cone shapes. For each segment, apply a tiny amount of glue to one edge and carefully curl it around to meet the opposite edge, forming a miniature cone. These smaller cones will become the dense, tightly packed inner core of your rose, adding depth and authenticity to its appearance. Just like with the larger cones, a gentle outward pinch can enhance their natural look.
Step 7: Adding Realistic Curls and Texture
To give your paper rose an even more lifelike quality, use your pencil to gently curl the outer edges of all your formed petal cones. Place the pencil under the tip of a petal and gently roll the paper around it, or simply flick the edges with your finger, curling them slightly outwards. This subtle detail mimics the soft, undulating edges of real rose petals, adding movement and organic texture to your creation. Experiment with varying degrees of curl to achieve your desired effect.
Step 8: Final Assembly – Building Your Rose
This is where your paper rose truly comes to life! You will now assemble all your cone-shaped petals, starting from the largest and working your way to the smallest. Apply glue to the bottom (the flat, cut edge) of the largest petal cone you created (the one from the flower with one petal missing). Carefully insert and secure the next largest cone inside it, pressing firmly to ensure a good bond. Continue this process, progressively layering smaller petal cones inside larger ones. The smallest cone shapes, crafted from your individual cut-out petals, should form the very center of your rose. Ensure each layer is centered and glued securely, creating a dense, volumetric core. Take your time to arrange the petals aesthetically, making sure they overlap naturally to form a beautiful, full bloom.
Congratulations! You have successfully crafted a stunning paper rose. Each layer, from the broad outer petals to the delicate inner core, contributes to a remarkably realistic and enchanting flower. This repeatable process allows for endless creativity and a sense of accomplishment with every bloom you create.
Customization and Enhancement Ideas
While the basic tutorial provides a beautiful rose, there are countless ways to personalize and enhance your creations, making each one truly unique.
- Varying Sizes: To make larger roses, simply use larger square sheets of paper. For smaller, delicate buds, use smaller squares. Experiment with different sizes to create a diverse and dynamic bouquet.
- Paper Choice: Explore different types of paper. Lightweight origami paper creates softer, more translucent petals, while textured cardstock can add a rustic feel. Patterned paper can introduce unique designs, or you can even hand-paint plain paper with watercolors for custom gradients.
- Color Palettes: Don’t limit yourself to single-color roses. Create ombre effects by using shades of the same color, or combine contrasting colors for a vibrant, artistic statement. Green paper can be used to make leaves for a more complete look.
- Adding Stems: To create a more traditional rose, attach a floral wire or a thin green paper-wrapped stick to the base of your finished rose with hot glue. You can then wrap the wire with floral tape and add paper leaves.
- Scented Roses: For a subtle sensory experience, lightly spritz your finished paper roses with a floral essential oil or perfume.
- Sparkle and Shine: Apply a light dusting of glitter or paint a thin line of glitter glue along the petal edges for a touch of glamour.
- Distress the Edges: For a vintage or rustic look, gently tear or distress the edges of your petals before assembly.
Creative Applications for Your Paper Roses
Once you’ve mastered the art of making paper roses, a world of creative possibilities opens up. These versatile blooms can be used in numerous ways to decorate, gift, and celebrate.
- Home Decor: Arrange a bouquet of paper roses in a vase for a permanent centerpiece that requires no watering. Use them to adorn wreaths, garlands, or decorative wall hangings. They can add a touch of elegance to any room, from living spaces to bedrooms.
- Special Events: Paper roses are perfect for weddings, birthdays, baby showers, and anniversaries. Create unique table centerpieces, boutonnières, corsages, or even a stunning backdrop. They are a beautiful and budget-friendly alternative to fresh flowers.
- Thoughtful Gifts: Present a handmade paper rose bouquet as a heartfelt gift that truly shows you care. Attach them to gift wrapping, handmade cards, or incorporate them into personalized scrapbooks and memory albums.
- Nursery Decorations: As mentioned, these durable and charming flowers are ideal for a child’s nursery, adding a whimsical and safe decorative element. They won’t trigger allergies and are easy to clean.
- Fashion and Accessories: Transform smaller paper roses into unique hairpins, brooches, or embellishments for hats and bags.
Tips for Success
To ensure your paper rose crafting experience is enjoyable and yields beautiful results, consider these helpful tips:
- Patience is Key: Don’t rush the process, especially when gluing and shaping. Allowing glue to dry properly will prevent your rose from falling apart.
- Sharp Scissors Make a Difference: Clean cuts lead to cleaner-looking petals. If your scissors start to dull, consider sharpening them or using a fresh pair.
- Practice Makes Perfect: Your first rose might not be flawless, but with each attempt, your technique will improve. Don’t be afraid to experiment with different petal shapes and curling methods.
- Less is More with Glue: Use small, precise amounts of glue. Too much glue can make the paper soggy and messy.
- Secure the Base: Ensure the bottom of your rose, where all the cones meet, is well-glued for stability.
- Personalize: Let your creativity shine! Don’t be afraid to deviate from the instructions to create a rose that reflects your personal style.
Craft Your Own Everlasting Blooms
Crafting paper roses is more than just a hobby; it’s an opportunity to create something beautiful, lasting, and truly your own. This tutorial, inspired by the wonderful guidance of Let’s Get Craftin’ with Supreet Kaur, has hopefully demystified the process, showing you that gorgeous paper flowers are well within your reach. The satisfaction of holding a bloom you’ve created with your own hands is immense, and the possibilities for decorating, gifting, and personalizing are limitless.
So, whether you’re looking for a relaxing craft, a unique gift idea, or a way to add an everlasting touch of floral beauty to your home, these DIY paper roses are the perfect project. Grab your paper and scissors, unleash your inner artist, and start crafting your very own garden of paper perfection today!