
Completing a quilting project brings immense satisfaction, but often the final step – binding – can feel daunting or time-consuming. What if there was a method that not only sped up the process but also delivered a consistently professional finish? This comprehensive guide delves into a remarkably quick and efficient quilt binding technique, popularized by the experts at Jordan Fabrics on YouTube. Whether you’re facing a tight deadline or simply wish to streamline your workflow, this method is designed to significantly reduce your working time, helping you meet your commitments with ease. Many quilters who adopt this technique find themselves never returning to their old processes due to its unparalleled efficiency and beautiful results. Prepare to transform your approach to quilt binding and achieve impeccable edges every time. For a visual demonstration, make sure to watch the full video tutorial.
Master Quilt Binding: A Quick and Easy Method for Flawless Finishes
Binding is the frame of your quilt, providing a clean, durable edge that protects the raw fabric from fraying and wear. A well-executed binding enhances the beauty and longevity of your quilt, giving it that polished, ready-for-display look. This guide focuses on a machine-binding method that is both fast and beginner-friendly, ensuring you can tackle even your largest quilt projects with confidence and achieve stunning results without the endless hours of hand-stitching.
Essential Materials for Quick Quilt Binding
Gathering your tools before you begin is key to a smooth and efficient binding process. Here’s what you’ll need for this quick method:
- Quilting Ruler: A sturdy ruler, preferably 6 x 24 inches or similar, is crucial for making accurate, straight cuts for your binding strips. Precision here ensures your binding lays flat and evenly.
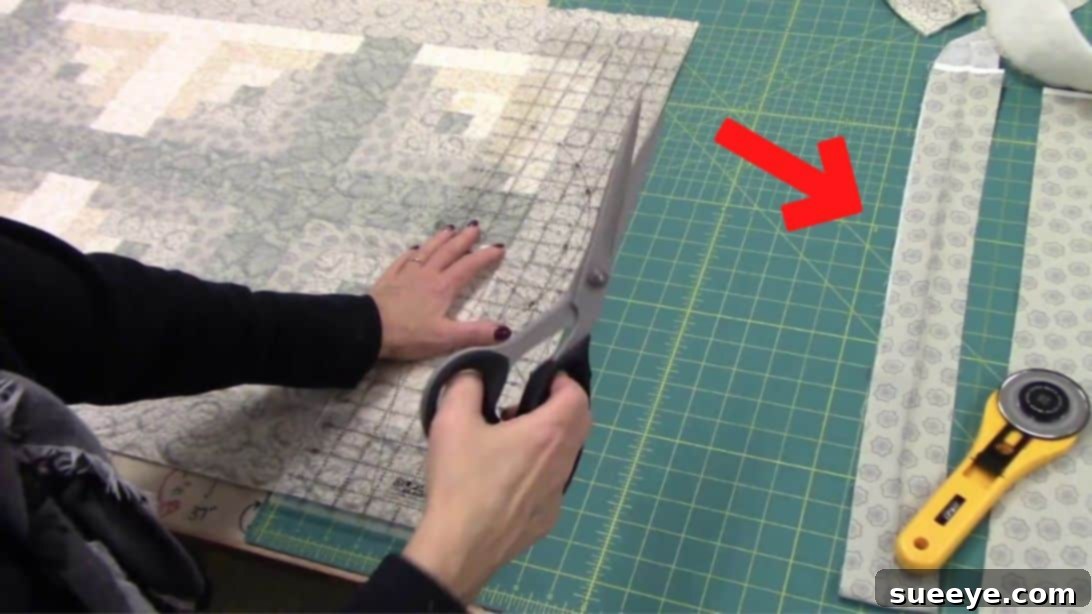
- Rotary Cutter: Paired with your ruler, a sharp rotary cutter will allow you to quickly and effortlessly cut multiple layers of fabric, ensuring clean edges without the strain of scissors. Always use a cutting mat underneath to protect your work surface.
- Fabric for Binding: Choose a fabric that complements your quilt’s design. Typically, 100% quilting cotton is recommended for its durability and ease of handling. Ensure you have enough fabric to create continuous strips long enough to go around the entire perimeter of your quilt, plus extra for joining. A good rule of thumb is to measure the perimeter of your quilt, add about 10-12 inches for seam allowances and overlap, then divide by the width of your fabric (usually 42 inches) to determine how many strips you’ll need.
- Sewing Machine: A reliable sewing machine with a fresh needle and good quality thread is essential.
- Iron and Ironing Board: Crucial for pressing seams open and folding binding strips, ensuring crisp, professional finishes.
- Matching Thread: Choose a thread color that blends well with your binding fabric for an invisible finish, or a contrasting color if you prefer a decorative look.
- Fabric Clips or Pins: While not strictly necessary for every step, these can be helpful for securing binding in place, especially on larger quilts.
Step-by-Step Guide to Quick Quilt Binding
Follow these detailed steps to master the quick quilt binding method and give your projects a professional, durable edge.
Step 1: Prepare Your Binding Strips
The foundation of a great binding lies in accurately prepared strips. Begin by cutting your binding fabric into 2 ½-inch wide strips. You can cut these strips either along the width of the fabric (WOF) or on the bias, depending on the desired drape and stretch. For most straight-edged quilts and this quick method, WOF strips are perfectly adequate and simpler to manage.
To create one continuous, long strip for binding, you will need to join your individual 2 ½-inch strips. Lay two strips right sides together at a 90-degree angle. Draw a diagonal line from one corner to the opposite corner where the strips overlap. Stitch along this diagonal line. Using a small seam allowance (e.g., ¼ inch) and a small stitch length (around 2.0-2.2) will create a strong, less bulky join. After sewing, trim the excess fabric from the seam, leaving a ¼-inch seam allowance. Then, iron these seams open. Pressing seams open helps to distribute the bulk, resulting in a flatter, less noticeable join in your finished binding. Repeat this process until all your strips are sewn together into one continuous length, ensuring it’s long enough to encompass the entire perimeter of your quilt with a few inches to spare.
Step 2: Iron Your Binding in Half
Once your long binding strip is prepared, take it to your ironing board. Carefully fold the entire strip in half lengthwise, wrong sides together, and press it firmly. This creates a crisp fold that will serve as the top edge of your binding. This pre-folding step is crucial for efficiency, as it eliminates the need to fold as you sew, saving considerable time and ensuring a consistent width for your binding throughout the quilt.
Step 3: Attach the Binding to the Quilt – Initial Sew
Now, it’s time to attach the binding to the raw edge of your quilt. Place your quilt sandwich (top, batting, backing) right side up. Take your folded binding strip and align its raw edges with the raw edge of your quilt. Begin sewing approximately 6 to 8 inches from one of the corners, leaving a generous tail of unstitched binding at the beginning. This tail will be used later to join the ends of your binding seamlessly.
Start stitching with a seam allowance slightly larger than a typical quarter-inch – perhaps 3/8 of an inch, or even a bit wider. The exact measurement can be adjusted based on your preference for how much binding you want to show on the front. The critical instruction here is to “set the binding” without stretching it. Allow the binding to lay naturally against the quilt edge. Stretching the binding can lead to wavy edges and an uneven finish, so maintain a relaxed tension as you sew along the first edge.
Step 4: Navigate the Corners with Precision
Approaching the corners requires specific attention to detail to achieve clean, mitered results. As you stitch along an edge, stop sewing when you are approximately a quarter of an inch away from the bottom edge of the quilt’s corner. Backstitch a few stitches to secure the seam. Lift your presser foot and needle, and remove your quilt from under the machine.
Now, turn your quilt. Take the binding strip you were just sewing and fold it upwards, away from the quilt, at a perfect 45-degree angle. This creates a neat triangular fold at the corner. Ensure the raw edge of the binding aligns with the raw edge of the quilt along the next side. Bring your quilt back to the machine, align the raw edges of the folded binding with the raw edge of the quilt along the new side, and resume stitching from the very edge of the quilt, using the same seam allowance. Repeat this cornering technique for all four corners of your quilt until you are sewing along the final edge and approaching your starting point.
Step 5: Join the Binding Ends Seamlessly
As you approach where you started sewing, you will have two unstitched tails of binding. This is where you will create a seamless, professional join. Stop stitching about 10-12 inches before reaching your starting point, leaving both tails free. Lay your quilt flat and overlap the two binding tails. Trim one end so it overlaps the other by exactly the width of your binding strip (2 ½ inches). For example, if your starting tail is on the bottom, trim the top tail so it extends 2 ½ inches past the bottom tail. This creates a perfect overlap for a diagonal join.
To join them, open up the folded binding on both tails. Place the ends right sides together at a 90-degree angle, similar to how you joined your initial binding strips. Mark a diagonal line from corner to corner across the overlapping ends. Stitch along this line, then trim the excess fabric, leaving a ¼-inch seam. Press the seam open. Refold the joined binding strip in half, aligning it with the raw edge of your quilt. Now, stitch down this remaining section to fully secure the binding to the front of your quilt, enclosing the raw edges neatly.
Step 6: Finish by Stitching in the Ditch
With the binding now fully attached to the front of your quilt, the final step is to secure it to the back. Pull the binding seam open and gently turn the entire binding strip over to the back of the quilt, encasing the raw edges. The goal is for the folded edge of the binding to extend just beyond the stitching line on the back of the quilt. You can secure it temporarily with clips or pins if needed.
The technique here is called “stitching in the ditch.” This means you will stitch from the front of your quilt, precisely in the seam line where your quilt top fabric meets the binding. As you stitch along this “ditch,” your needle should catch the folded edge of the binding on the back of the quilt. This creates an invisible stitch line on the front and a secure, neat finish on the back. For the corners, ensure the binding on the back is folded into a neat 45-degree mitered angle, mirroring the front. Take your time, adjusting your quilt as you go, to ensure your stitches are consistently within the ditch and securely catching the back of the binding. This step can be done with a walking foot for better fabric feeding.
Tips for a Flawless Quilt Binding Finish
Achieving a professional binding is easier with a few expert tips in mind:
- Press, Press, Press: Regular pressing at each stage (joining strips, folding binding, pressing seams) is paramount for sharp edges and flat binding.
- Consistent Seam Allowance: Strive for a consistent seam allowance throughout the initial attachment phase. This directly impacts how much binding shows on the front and how easily it wraps to the back.
- Use a Walking Foot: A walking foot on your sewing machine can significantly help in feeding multiple layers of fabric (quilt and binding) evenly, preventing puckering and stretching, especially during the “stitch in the ditch” step.
- Sharp Tools are Key: Always use a sharp rotary cutter blade and a fresh needle in your sewing machine. Dull tools can lead to inaccurate cuts and skipped stitches, affecting the final look.
- Don’t Rush the Corners: While this is a quick method, the corners require careful attention. Take your time with the 45-degree folds to ensure crisp, attractive miters.
- Test Your Stitch: Before starting, test your stitch length and tension on a scrap piece of fabric to ensure it’s optimal for your binding material.
- Consider Thread Color: Choose a thread color that either matches your binding fabric precisely or blends with your quilt top for the “stitch in the ditch” step, making your stitches practically invisible.
Benefits of This Quick Binding Method
This technique offers several distinct advantages that make it a favorite among many quilters:
- Significant Time Savings: By machine-sewing both sides of the binding, you eliminate the often time-consuming hand-stitching step, drastically cutting down project completion time.
- Professional Finish: When executed correctly, this method yields a remarkably clean, durable, and professional-looking edge, rivaling the appearance of hand-bound quilts.
- Increased Durability: Machine stitches are generally stronger than hand stitches, making the binding more resistant to wear and tear, especially important for frequently used or laundered quilts.
- Consistency: The machine ensures uniform stitch length and tension, leading to a consistent and even binding width around the entire quilt.
- Reduced Frustration: Many quilters find hand-binding tedious. This method offers a satisfying alternative that allows you to move on to your next project faster.
Common Binding Challenges and Solutions
Even with the best instructions, you might encounter minor hurdles. Here are a few common issues and how to address them:
- Wavy Binding: This usually occurs if you stretched the binding fabric while attaching it. Solution: Ensure you “set” the binding without stretching in Step 3. Let it lay naturally.
- Bulky Corners: If your corners feel thick, it might be due to not trimming enough seam allowance or not pressing properly. Solution: Trim excess fabric carefully at joins and corners, and press seams open thoroughly.
- Stitches Miss the Back of the Binding: When stitching in the ditch, sometimes your needle doesn’t catch the binding on the back. Solution: Adjust your needle position slightly, use a walking foot, and ensure the binding is extended just past the ditch on the back. Take it slow and check your progress periodically.
- Uneven Binding Width: This can stem from an inconsistent seam allowance when attaching the binding. Solution: Practice maintaining a precise seam allowance. You might consider using a seam guide or masking tape on your machine bed as a visual aid.
Conclusion: Embrace the Efficiency of Machine Binding
The Jordan Fabrics quick method for quilt binding is a game-changer for anyone looking to finish their quilting projects efficiently without compromising on quality. By following these detailed steps, from preparing your binding strips to perfecting your corners and executing a flawless “stitch in the ditch,” you will develop a skill that brings confidence and speed to all your future quilting endeavors. This technique not only saves valuable time but also delivers a durable, clean, and professional edge that will protect and enhance your beautiful quilts for years to come. Don’t be afraid to practice on a smaller project first to get the hang of it. Once you’ve mastered this approach, you’ll wonder why you ever bound a quilt any other way. Enjoy the satisfaction of quickly and beautifully finishing your quilting masterpieces!