
Ultimate Guide to Cleaning Your Hair Dryer: Extend Its Life & Prevent Burning Smells
Your hair dryer is an indispensable tool in your daily routine, helping you achieve perfect hair days with speed and efficiency. Yet, like any frequently used appliance, it requires a little tender loving care to maintain its performance and longevity. Over time, hair dryers can become surprisingly clogged with dust, lint, and stray hairs, often without you even realizing it. This accumulation not only reduces its effectiveness but can also pose significant safety risks, including the notorious burning smell that signals potential trouble.
Many users overlook the simple, yet crucial, task of cleaning their hair dryer. I was thrilled to discover an insightful video tutorial by Beat The Bush on YouTube, which vividly demonstrates how to clean your hair dryer safely and efficiently in just a few easy steps. This guide builds upon those excellent principles, offering a comprehensive approach to hair dryer maintenance that will ensure your appliance runs smoothly and safely for years to come.
Regularly cleaning the intake vent is not just a recommendation; it’s a necessity. It’s a straightforward process that can prevent a host of problems, from sluggish airflow to potential fire hazards. Let’s delve into why this maintenance is so critical and how you can master the art of hair dryer cleaning.
Why Regular Hair Dryer Cleaning is Absolutely Crucial
Neglecting to clean your hair dryer can lead to several undesirable outcomes. Understanding these potential issues highlights the importance of incorporating routine maintenance into your beauty appliance care:
- Reduced Performance: A clogged intake vent restricts airflow, forcing the motor to work harder and the heating element to become less efficient. This results in longer drying times and less powerful styling.
- Shortened Lifespan: When a hair dryer overheats due to restricted airflow, it puts immense strain on the internal motor and heating coils. This excessive stress can lead to premature wear and tear, significantly shortening the overall life of your appliance.
- Safety Hazards: Perhaps the most critical reason for cleaning is safety. Accumulated lint and hair inside the dryer are highly flammable. Overheating can cause these debris to ignite, or lead to melting plastic components and electrical short circuits, posing a serious fire risk. A burning smell is often the first warning sign of this danger.
- Overheating and Burning Smell: This is a common complaint and a direct result of neglected cleaning. When dust and hair collect around the heating element, they can begin to burn, producing an unpleasant and alarming odor. This indicates severe overheating and an immediate need for intervention.
- Energy Inefficiency: A struggling hair dryer motor consumes more electricity as it tries to compensate for restricted airflow. Regular cleaning helps your appliance operate at peak efficiency, potentially saving you a bit on your energy bill.
- Hygiene Concerns: Hair dryers can harbor a surprising amount of dust, skin flakes, and hair product residue, which can be less than hygienic. A clean dryer ensures that you’re only circulating clean air around your hair.
Essential Materials for Cleaning Your Hair Dryer
Gathering the right tools beforehand makes the cleaning process swift and seamless. Most of these items are likely already in your home:
- A Small Screwdriver: Depending on your hair dryer model, you might need a Phillips or flathead screwdriver to remove the intake vent cover. Some models feature a twist-off design that doesn’t require tools.
- Clean Running Tap Water: Ideal for rinsing detachable filter screens.
- A Vacuum Cleaner with Brush Attachment: This is indispensable for safely removing lint and dust from the deeper interior of the dryer without causing damage.
- A Small Brush: An old toothbrush, a clean makeup brush, or a specialized cleaning brush can effectively dislodge stubborn hair and dust from the filter screen and internal grilles.
- Cotton Swabs (Optional but Recommended): Excellent for reaching into small crevices and tight spaces within the dryer.
- Microfiber Cloth (Optional): For wiping down the exterior and ensuring parts are thoroughly dry.
- Compressed Air Can (Optional): Can be very effective for blasting dust out of hard-to-reach areas, especially around the heating element.
Step-by-Step Directions for a Thorough Hair Dryer Clean
Following these detailed steps will ensure your hair dryer is cleaned effectively and safely, addressing common issues like decreased performance and burning smells.
1. Safety First: Unplug Your Hair Dryer
This is the most critical step. Always ensure your hair dryer is completely unplugged from the power outlet before beginning any cleaning. This eliminates the risk of electric shock or accidental activation.
2. Initial Inspection and Disassembly of the Intake Filter
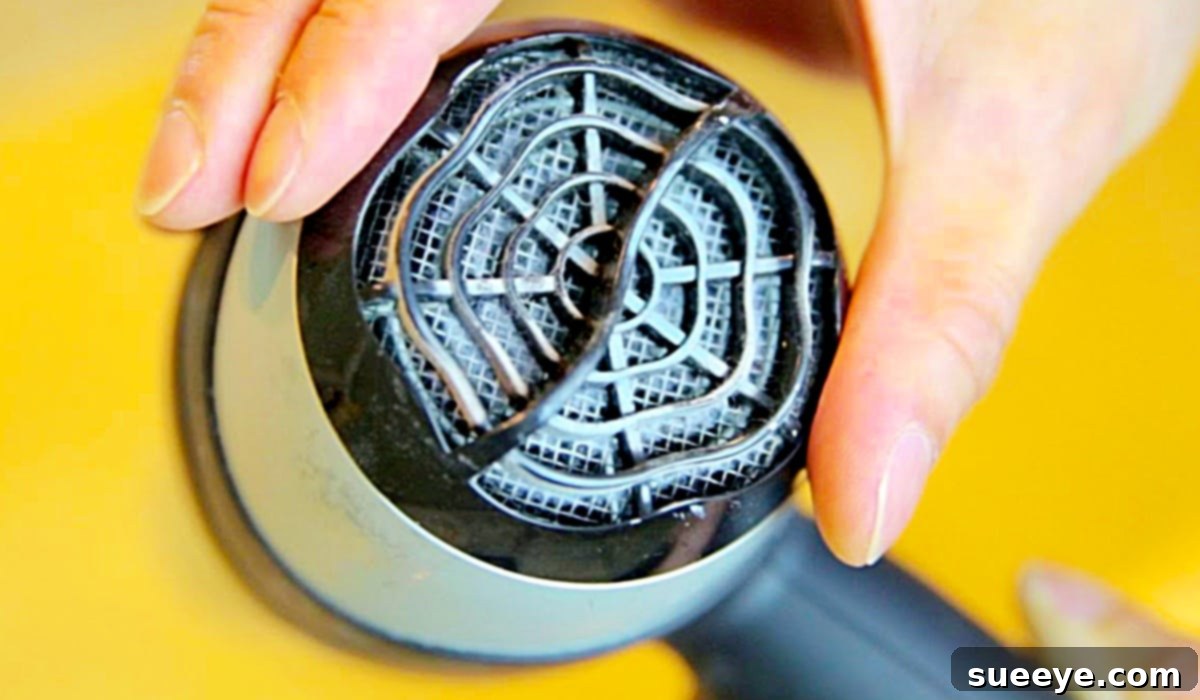
Start by examining the rear of your hair dryer, where the air intake vent is located. This is typically a mesh screen or grille. Depending on your model, the filter cover can usually be removed by:
- Twisting: Many models have a filter cap that twists counter-clockwise to unlock and remove.
- Prying: Some have a cover that can be gently pried off with a small, flat tool or your fingernail.
- Screws: For more robust designs, you might need a small screwdriver to remove one or two screws holding the cover in place. Carefully store any removed screws so they don’t get lost.
Once the cover is off, you’ll likely see a build-up of lint, dust bunnies, and hair. This is the primary culprit behind poor performance and burning smells.
3. Cleaning the Filter Screen
This part is often detachable and can be thoroughly cleaned:
- Dry Cleaning: Use your small brush (an old toothbrush works wonders) to gently brush away all the visible hair and lint from both sides of the filter screen. Get into every crevice.
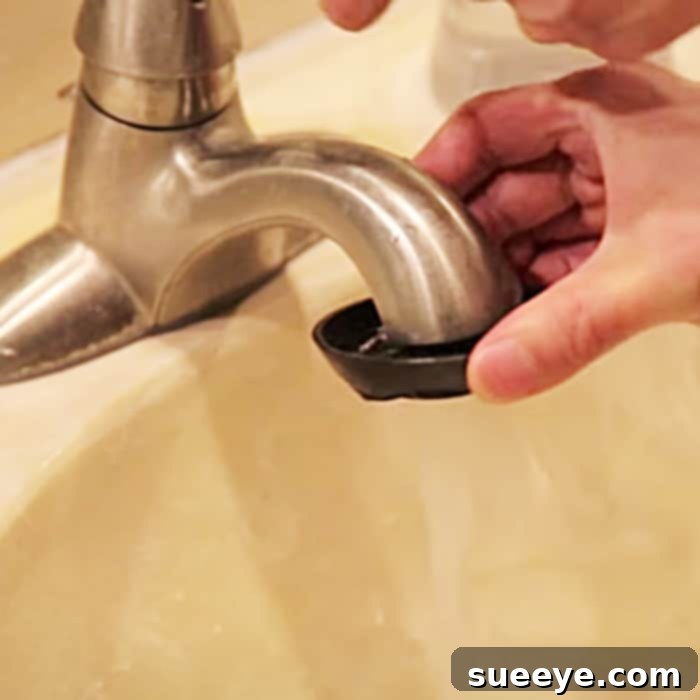
- Wet Cleaning (If Detachable and Safe): If your filter screen is heavily soiled and made of plastic or metal, you can rinse it under clean running tap water, as demonstrated in the Beat The Bush tutorial. Ensure you use a brush to scrub off any stubborn residue. After rinsing, shake off excess water and allow the filter to air dry completely on a clean towel. It is absolutely crucial that the filter is bone dry before reassembly to prevent moisture from entering the electrical components.
4. Cleaning the Interior Airway
With the filter screen removed, you’ll have access to the interior of the hair dryer. This is where finer dust particles accumulate and can cause trouble:
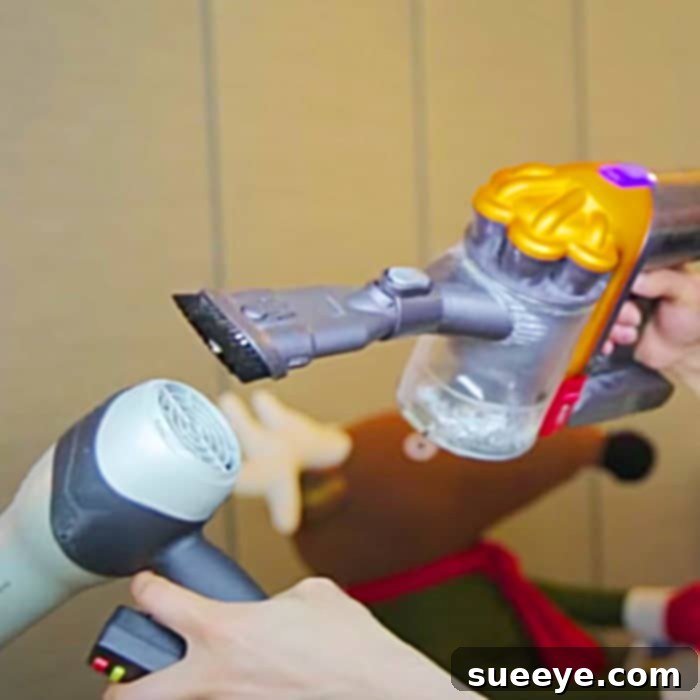
- Vacuuming: Attach the brush attachment to your vacuum cleaner and gently vacuum the exposed interior of the dryer. Focus on the intake grille and any visible areas where dust and lint have collected. Be careful not to press too hard or touch any internal wires or components directly.
- Using Compressed Air (Optional): For very stubborn dust or areas the vacuum can’t reach, a can of compressed air can be effective. Hold the can upright and use short bursts to dislodge dust, directing it away from the internal components.
- Cotton Swabs (Optional): For intricate grilles or tight corners, cotton swabs can be dipped lightly in rubbing alcohol (ensure it’s completely dry before use) or used dry to pick up grime.
5. Reassembly
Once you are confident that all internal and external components are clean and completely dry, it’s time to reassemble your hair dryer:
- Carefully place the clean and dry filter screen back into its position.
- Replace the intake vent cover, securing it by twisting it clockwise or reattaching any screws. Ensure it’s firmly in place.
- Give the entire appliance a quick wipe down with a microfiber cloth to remove any fingerprints or external dust.
Your hair dryer is now clean, revitalized, and ready for optimal performance. I absolutely love this simple yet effective maintenance routine and plan on keeping my hair dryer spotless from now on!
How To Fix A Hair Dryer That Smells Like It’s Burning
The smell of something burning from your hair dryer is a clear warning sign that should never be ignored. While cleaning the dryer often resolves this issue, it’s essential to understand the potential causes and what steps to take if the smell persists.
Common Causes of a Burning Smell:
- Accumulated Dust and Hair: This is the most frequent culprit. When lint and hair collect around the heating element, they literally burn or scorch, producing a distinct burning odor.
- Overheated Motor: Restricted airflow causes the motor to overwork and overheat, which can also emit a burning smell, often likened to burning plastic or electronics.
- Failing Electrical Components: Less commonly, an internal electrical short, a faulty wire, or a failing heating element can produce a burning odor. This is a more serious issue.
- New Dryer Smell: Sometimes, a brand new hair dryer might emit a slight burning plastic smell during its first few uses. This is usually due to the factory oils and coatings burning off and typically subsides quickly. If it persists, it’s a concern.
Troubleshooting Steps for a Burning Smell:
- Immediate Action: Unplug! As soon as you detect a burning smell, turn off and immediately unplug your hair dryer. Do not continue to use it.
- Let It Cool Down: Allow the dryer to cool down completely, ideally for at least 30 minutes.
- Perform a Thorough Cleaning: Follow the step-by-step cleaning guide detailed above. This is the most common and effective solution for a burning smell. Pay extra attention to removing all debris from the intake filter and the internal air pathways.
- Inspect for Visible Damage: After cleaning and while the dryer is unplugged, carefully inspect the intake and exhaust vents. Look for any melted plastic, discolored wires, or signs of charring around the heating coils. If you see any such damage, discontinue use.
- Test Cautiously: If you’ve cleaned the dryer thoroughly and found no visible damage, plug it back in and turn it on to a low heat setting in a well-ventilated area. Listen for unusual noises and watch for smoke. If the burning smell returns or you see sparks, unplug it immediately.
- When to Consider Replacement: If the burning smell persists after a thorough cleaning, or if you notice any visible damage, sparks, or unusual noises, it’s a strong indicator of a more serious internal malfunction. In such cases, for your safety, it is best to replace the hair dryer rather than risk electrical hazards or fire. Do not attempt to repair complex internal electrical issues yourself unless you are a qualified professional.
Tips for Ongoing Hair Dryer Maintenance
Preventative measures can significantly extend the life and safety of your hair dryer, reducing the need for intensive cleaning and troubleshooting:
- Regular Quick Clean: Every few uses, give the intake vent a quick wipe or brush with your fingers to remove surface lint and hair. This prevents major build-up.
- Avoid Wrapping the Cord Tightly: Repeatedly wrapping the power cord tightly around the dryer can cause the cord to fray and break internally, leading to electrical issues. Instead, loosely coil the cord.
- Do Not Block Vents During Use: Ensure both the intake (back) and exhaust (front) vents are clear during operation. Blocking either can lead to rapid overheating.
- Store Properly: Keep your hair dryer in a clean, dry place where it won’t accumulate dust or be subjected to accidental impacts.
- Handle with Care: Avoid dropping your hair dryer, as this can damage internal components or break the casing, compromising its safety and function.
- Clean Before Trouble Starts: Don’t wait for reduced performance or a burning smell to prompt a cleaning. Make it a routine, perhaps once a month for frequent users, or every few months for occasional use.
The Benefits of a Well-Maintained Hair Dryer
Investing a few minutes in cleaning and maintaining your hair dryer offers a multitude of benefits:
- Consistent Performance: Enjoy powerful, efficient drying every time, ensuring your styling routine is quick and effective.
- Extended Lifespan: A well-cared-for appliance will last much longer, saving you the cost and inconvenience of premature replacement.
- Enhanced Safety: Significantly reduce the risk of overheating, electrical faults, and potential fires, protecting both your home and your peace of mind.
- Better Hair Health: Efficient drying means less exposure to excessive heat, which is better for your hair’s overall health and reduces the risk of heat damage.
- Cost Savings: Longevity means fewer replacements, and efficiency means lower energy consumption.
Conclusion
Keeping your hair dryer clean is one of the simplest yet most impactful ways to ensure its longevity, optimal performance, and most importantly, your safety. The process is quick, requires minimal tools, and can be easily incorporated into your routine. By following this comprehensive guide, you can eliminate common problems like reduced airflow and the alarming burning smell, transforming your hair dryer from a potential hazard into a reliable styling companion.
Don’t underestimate the power of proactive maintenance. Adopt these habits today, and enjoy a hair dryer that performs like new, every single day.