
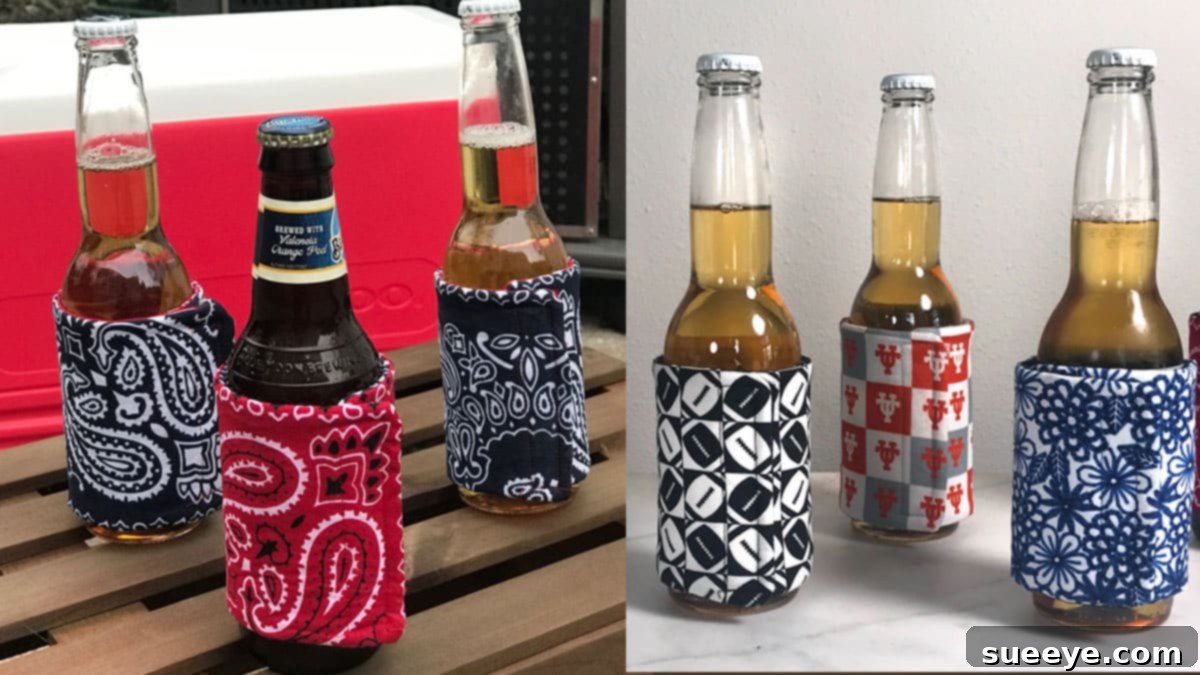
Are you a passionate sewist always on the lookout for practical yet adorable projects to brighten up your kitchen and daily life? While hot pads and oven mitts are staple kitchen sewing items, a truly versatile and often overlooked gem is the DIY fabric koozie. These ingenious little insulators, often called drink cozies, are not just incredibly cute; they’re also remarkably functional. Imagine keeping your beverages perfectly chilled (or warm!) while adding a touch of personalized style to your gatherings. Our comprehensive guide will walk you through creating reversible fabric koozies using just a few key materials: two complementary fabrics, Insulbright, iron-on lining, and Velcro. Get ready to transform your drink experience with this simple, rewarding sewing adventure!
Why Sew Your Own Fabric Koozies? Unveiling the Benefits
Beyond the sheer joy of a handmade creation, DIY fabric koozies offer a plethora of advantages over their store-bought counterparts. First and foremost is the unmatched opportunity for **personalization**. With an endless array of fabrics, patterns, and colors at your fingertips, you can craft koozies that perfectly match your decor, reflect your personality, or even serve as unique, thoughtful gifts. Think themed koozies for holidays, sporting events, or personalized designs for each family member to prevent drink mix-ups at parties.
Secondly, these homemade treasures are a fantastic step towards **sustainability**. By choosing reusable fabric koozies, you reduce the need for disposable alternatives, contributing to a greener lifestyle. They are durable, washable, and built to last, making them an eco-conscious choice you can feel good about.
Another key benefit is their **reversibility**. This design feature essentially gives you two koozies in one! Simply flip it inside out to reveal a different fabric design, offering versatility and extending their use. This also adds another layer of fun to the crafting process, as you get to choose two fabrics that complement each other or offer a stark, exciting contrast.
Finally, the **cost-effectiveness** of sewing your own cannot be overstated. With a small investment in materials, you can create multiple koozies, often for less than the price of a single mass-produced item. This makes them ideal for party favors, thoughtful hostess gifts, or simply stocking up your own kitchen with a collection of charming drink insulators.
Unleash Your Creativity: Fabric Choices for Your DIY Koozies
One of the most exciting aspects of this project is the freedom to experiment with different fabrics. While cotton is often the go-to for its ease of use and wide variety of prints, don’t hesitate to explore other options!
- Quilting Cotton: A fantastic choice for beginners due to its stability, wide selection of patterns, and affordability. It’s easy to cut, sew, and press, making your crafting experience smooth and enjoyable.
- Flannel: Adds extra softness and warmth, ideal for hot beverages or a cozy aesthetic.
- Linen Blends: Offer a sophisticated, textured look, perfect for more elegant occasions.
- Novelty Fabrics: Think themed prints for holidays (pumpkins for Halloween, snowflakes for winter), sports teams, or even personalized photo fabrics for truly unique gifts.
- Scraps: This project is a wonderful way to utilize smaller fabric scraps from previous projects, helping you declutter your sewing stash while creating something beautiful and functional.
The key is to select fabrics that are washable and complement each other, especially since your koozies will be reversible. Don’t be afraid to mix bold patterns with subtle solids, or vibrant colors with more muted tones. The possibilities are truly endless, allowing each koozie to be a unique expression of your style.
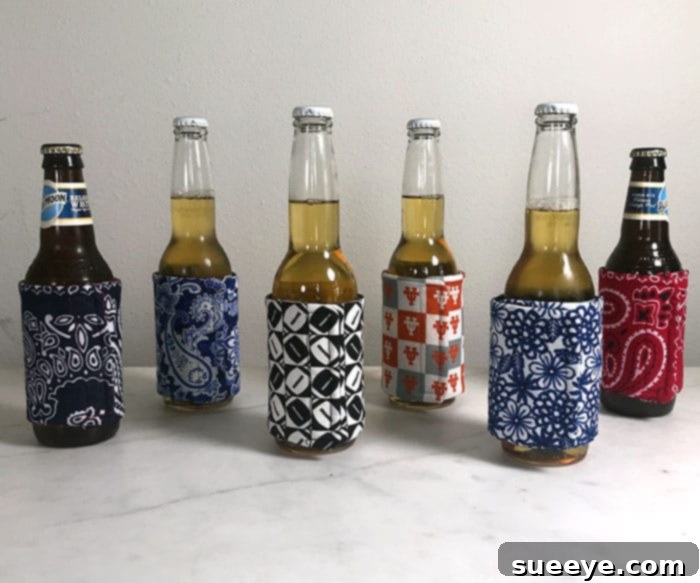
How to Make Fabric Koozies: A Step-by-Step Sewing Tutorial
Creating your own fabric koozies is a surprisingly straightforward process, making it an ideal project for sewers of all skill levels, from absolute beginners to seasoned crafters. There are no complex patterns or intricate techniques involved; primarily, you’ll be working with rectangles and straight seams. Most individuals can complete one koozie in about 30 minutes, and with a bit of practice, you’ll find your speed increasing exponentially, allowing you to whip up a batch in no time!
Materials You’ll Need:
- Main Fabric (Fabric A): Approximately 9″ x 9″ rectangle (for one koozie)
- Lining Fabric (Fabric B): Approximately 9″ x 9″ rectangle (for one koozie) – choose a complementary or contrasting print for reversibility
- Insulbright Insulated Lining: Approximately 9″ x 9″ rectangle (for one koozie). This material is crucial for insulation, keeping your drinks hot or cold.
- Iron-on Fusible Fleece (or similar iron-on lining): Approximately 9″ x 9″ rectangle (for one koozie). This adds body and stability to your koozie.
- Velcro (hook and loop tape): A strip about 2-3 inches long, 3/4″ wide.
- Basic sewing supplies: sewing machine, thread, scissors, rotary cutter and mat (optional but recommended), ruler, iron, pins or fabric clips.
Detailed Sewing Instructions:
Step 1: Prepare Your Materials and Cut Your Rectangles
The foundation of this project lies in precise cutting. Begin by ironing all your fabrics to remove any wrinkles. Then, using your rotary cutter and mat (or sharp fabric scissors), cut four rectangular pieces of the same size. For a standard can or bottle koozie, a rectangle approximately 8.5 inches wide by 9 inches tall is a good starting point. Adjust dimensions if you’re aiming for larger cups or specific bottles.
- One rectangle from your Main Fabric (Fabric A)
- One rectangle from your Lining Fabric (Fabric B)
- One rectangle from Insulbright
- One rectangle from Iron-on Fusible Fleece
Pro Tip: Ensure all your pieces are cut as accurately as possible. Precision in cutting leads to precision in sewing, which will result in a much tidier finished product.
Step 2: Fuse the Interfacings
This step adds structure and insulation.
- Take your Main Fabric (Fabric A) rectangle and place it right side down on your ironing board.
- Position the Iron-on Fusible Fleece, adhesive side down, onto the wrong side of Fabric A. Follow the manufacturer’s instructions to fuse it securely with your iron. This will give your outer fabric a nice body and crispness.
- Next, take your Lining Fabric (Fabric B) rectangle. Place the Insulbright layer on the wrong side of Fabric B. While Insulbright typically isn’t fusible, you can use a few dots of fabric glue or temporary spray adhesive to hold it in place during the next steps, or simply pin carefully. The metallic side of Insulbright should ideally face inwards for maximum thermal efficiency.
Step 3: Assemble the Koozie Layers
Now you’ll layer your prepared fabrics for sewing.
- Lay Fabric A (with fusible fleece attached) right side up on your workspace.
- Take Fabric B (with Insulbright attached) and place it right side down on top of Fabric A. This means the right sides of your two main fabrics are facing each other, with the Insulbright and fusible fleece on the outside. This is a crucial step for achieving that clean, reversible finish.
- Pin or clip all four layers together securely around all four edges.
Step 4: Sew the Sides and Bottom
Using your sewing machine, sew around three sides of your layered rectangle, leaving one of the shorter ends open.
- Start sewing along one long edge, using a 1/4-inch to 3/8-inch seam allowance (depending on your preference and desired koozie snugness).
- Pivot at the corner and sew along the bottom short edge.
- Pivot again and sew along the second long edge.
- **Important:** Backstitch at the beginning and end of your seams to secure them. Leave the top short edge completely open for turning.
Beginner Tip: Take your time when sewing, especially through multiple layers. Use a walking foot if you have one, as it helps feed thick layers evenly. Otherwise, increase your stitch length slightly.
Step 5: Trim Seams and Clip Corners
To ensure neat corners and a smooth turn, trim your seam allowances down to about 1/8-inch, and carefully clip the corners diagonally without cutting through your stitching. This reduces bulk when you turn the koozie right side out.
Step 6: Turn Right Side Out and Press
Carefully reach into the open end of your sewn rectangle and gently pull the fabric right side out. Use a point turner or a dull pencil to push out the corners from the inside, creating crisp, sharp points. Once turned, press the entire koozie flat with an iron. This helps to set the seams and make the koozie look professionally finished.
Step 7: Prepare and Attach the Velcro
Now it’s time to add the closure.
- Take your strip of Velcro and separate the “hook” side from the “loop” side.
- On one of the shorter, unsewn ends of your koozie, fold the raw edge inwards by about 1/2 inch and press. Repeat for the other unsewn edge.
- Place one piece of Velcro (e.g., the “hook” side) on the wrong side of one folded edge, centered horizontally. Stitch it securely in place, sewing around all four edges of the Velcro strip.
- Place the other piece of Velcro (the “loop” side) on the right side of the other folded edge, making sure it aligns perfectly with the first piece when the koozie is wrapped around a can. Stitch this piece securely as well.
Alternative: If you prefer, you can attach the Velcro to the *right* side of one folded edge and the *wrong* side of the other, allowing the koozie to wrap around and overlap slightly. Test the placement before sewing to ensure a good fit.
Step 8: Topstitch (Optional but Recommended)
For a truly polished look and added durability, consider topstitching along the top and bottom edges of your koozie. This also helps to keep the layers of fabric and interfacing securely in place. Use a slightly longer stitch length and thread that matches or contrasts nicely with your fabric.
Step 9: Enjoy Your New Reversible Fabric Koozie!
And just like that, you’ve created a fantastic, custom-made fabric koozie! Repeat the process to create a whole collection in various prints and sizes. These make wonderful gifts for friends, family, teachers, or as unique party favors.
Beyond the Can: Creative Uses for Your Fabric Koozies
While primarily designed for keeping beverages cool or warm, the versatility of these fabric koozies extends far beyond a simple can holder.
- Bottle Insulator: Adjust the dimensions slightly, and you have a perfect insulator for water bottles, baby bottles, or even small wine bottles.
- Snack Pouch: Use them to keep a small snack or fruit protected and insulated in your bag.
- Small Gift Bag: Fill them with candy, small toiletries, or other trinkets for a creative and reusable gift presentation.
- Craft Supply Holder: Organize small sewing notions, art supplies, or pens and pencils in a charming, insulated pouch.
- Picnic Essential: Pack them for picnics, beach trips, or camping to ensure your drinks stay at the ideal temperature.
Their reversible nature means you can switch up the look to match the occasion or your mood, making them a truly dynamic accessory.
Caring for Your Handmade Koozies
One of the best features of fabric koozies is their ease of care. Most cotton fabrics and Insulbright are machine washable. Simply toss your koozie into the washing machine on a gentle cycle with cold water. Tumble dry on low or air dry for best results and longevity. Avoid high heat as it can affect the Insulbright’s reflective properties and the integrity of your fusible fleece.
Embark on Your Next Sewing Adventure
Sewing your own fabric koozies is more than just a craft project; it’s an opportunity to create functional art, practice your sewing skills, and embrace a more sustainable lifestyle. The process is enjoyable, the results are incredibly satisfying, and the utility of these reversible insulators will surprise you. So, gather your favorite fabrics, fire up your sewing machine, and start crafting a collection of beautiful, custom koozies today. You’ll be amazed at how quickly you can create these charming and practical accessories, adding a personal touch to every sip!