
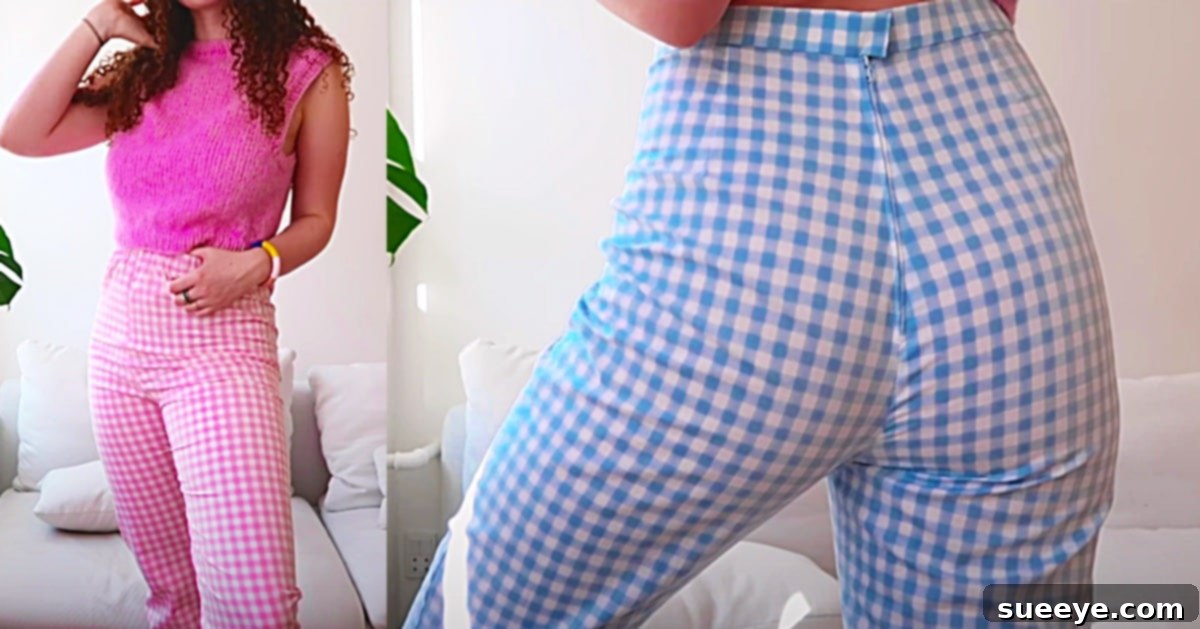
DIY Gingham Pants: Crafting Stylish Vintage Pedal Pushers Without a Pattern
There’s an undeniable charm and timeless elegance about vintage fashion, and few garments capture that iconic appeal quite like a well-tailored pair of lightweight stovepipe pants. Often known by affectionate names like pedal pushers, clam diggers, or simply classic capri slacks, this style harks back to an era of effortless chic. They were, in many ways, the original comfortable yet stylish legwear long before modern leggings became a wardrobe staple.
Imagine owning a pair of these incredibly comfortable and versatile lightweight cotton slacks, perfect for almost any occasion – from a casual brunch to a sophisticated evening out. The best part? They are surprisingly simple to make yourself, especially with the right guidance. When I discovered this fantastic gingham pants video tutorial by Amanda Wright on YouTube, I was thrilled. Her method allows you to craft these beautiful retro pants using a pair of your existing slacks as a template, eliminating the need for complex patterns. All you’ll need are a few basic sewing notions, and you’ll be well on your way to creating your very own easy, old-school pedal pusher pants.
The Enduring Allure of Vintage Pedal Pushers
What makes pedal pushers so captivating? Their allure lies in a blend of history, comfort, and sheer versatility. Originating in the 1950s, these mid-calf length trousers quickly became a symbol of casual elegance and liberation for women. They offered a practical yet stylish alternative to skirts and longer trousers, perfect for activities like cycling (hence “pedal pushers”) or simply enjoying a sunny day.
From Hollywood icons to television personalities, these pants graced many influential figures. I’m often reminded of the impeccable style of Mary Tyler Moore, who frequently wore similar sleek retro designs during her time on The Dick Van Dyke Show, perfectly embodying the sophisticated yet accessible look these pants offer. The gingham print, in particular, adds a delightful touch of classic Americana, making these pants a cheerful and fashionable statement piece.
Beyond their historical significance, pedal pushers remain a relevant and beloved item in contemporary fashion. Their ability to effortlessly transition from a relaxed, everyday outfit to a more polished ensemble makes them a valuable addition to any wardrobe. And when you sew them yourself, you get the added bonus of a custom fit and the unique satisfaction of wearing something you created.
Why Sew Your Own Custom-Fit Pants?
In a world of mass-produced clothing, the act of sewing your own garments offers numerous benefits. Crafting your own pedal pushers, especially using a “no pattern” method like Amanda Wright’s, opens up a world of possibilities:
- Perfect Custom Fit: Store-bought pants rarely fit perfectly off the rack. By using your own well-fitting pants as a template, you ensure that your DIY gingham pedal pushers will flatter your unique body shape, providing unparalleled comfort and style.
- Unique Style & Personalization: You get to choose your fabric, color, and print. Want classic black gingham? Or perhaps a bold red? The choice is yours, allowing you to create a truly one-of-a-kind garment that reflects your personal aesthetic.
- Cost-Effectiveness: High-quality, vintage-inspired clothing can be expensive. Sewing your own can significantly reduce costs, especially if you source fabrics wisely.
- Learning & Skill Development: This project is an excellent way to hone your sewing skills, from pattern drafting basics to zipper or elastic waistband installation. It’s rewarding to see your abilities grow with each completed project.
- Sustainability: Embracing DIY fashion is a step towards a more sustainable wardrobe. You reduce reliance on fast fashion and gain a deeper appreciation for the effort involved in garment creation.
- Satisfaction of Creation: There’s immense pride in saying, “I made this!” Wearing something you’ve crafted with your own hands brings a special sense of accomplishment and connection to your clothing.
Essential Materials for Your DIY Gingham Pants
Before you begin your sewing adventure, gathering all the necessary materials is crucial. This project is accessible even for those new to garment sewing, as it doesn’t require an extensive list of specialized tools. Here’s what you’ll need to create your beautiful lightweight cotton slacks:
Materials List:
- 1 to 2 yards of cotton fabric: The exact amount will depend on your size and the desired length of your pedal pushers. Cotton gingham is ideal for that classic retro look, but any lightweight, non-stretch cotton fabric will work beautifully. Pre-wash and dry your fabric before cutting to prevent shrinkage later.
- 1 Zipper (7-9 inches): If you opt for a structured waistband with a zipper closure. Choose a zipper color that complements your fabric.
- 1 piece of Elastic (approx. 1 inch wide): If you prefer a more comfortable, gathered elastic waistband. The length will depend on your waist measurement.
- Matching Thread: High-quality polyester thread that matches or subtly contrasts with your fabric.
- A pair of your old pants: This will serve as your pattern! Choose a pair that fits you well and has the desired leg width and rise.
- Sewing Machine: A basic home sewing machine is perfectly adequate.
- Fabric Scissors or Rotary Cutter: Sharp tools are essential for clean cuts.
- Pins: To hold fabric layers together and mark lines.
- Measuring Tape: For accurate measurements.
- Fabric Chalk or Washable Fabric Marker: To trace your pattern onto the fabric.
- Iron and Ironing Board: Crucial for pressing seams, which gives your finished garment a professional look.
- Large piece of paper (optional): For creating a reusable paper pattern from your template pants, though you can also mark directly on fabric.
Mastering the “No Pattern” Technique: Cloning Your Favorite Pants
The beauty of this project, as taught by Amanda Wright, is its innovative “no pattern” approach. Instead of buying or drafting a complex pattern, you’ll simply use a pair of your existing, well-fitting pants as a template. This method is incredibly empowering, especially for beginners, as it takes the guesswork out of sizing and shaping.
Here’s how you’ll approach creating your pattern and constructing your pants, following the spirit of Amanda’s clear instructions:
Step-by-Step Guide to Crafting Your Pedal Pushers:
Step 1: Preparing Your Fabric and Template Pants
First, pre-wash and dry your cotton fabric to pre-shrink it. This prevents your finished pants from shrinking after the first wash. Press the fabric thoroughly to remove any wrinkles. Lay your fabric out flat on a large surface, folded in half lengthwise with selvages aligned. Ensure the fold is perfectly straight.
Next, take your chosen template pants. Fold them in half lengthwise, aligning the front and back seams as much as possible. Place these folded pants onto your folded fabric, making sure the grainline of your template pants runs parallel to the selvage or folded edge of your fabric. This is crucial for how the pants will hang and wear.
Step 2: Drawing and Cutting Your Pattern Pieces
Using your fabric chalk or marker, carefully trace around the edges of your template pants. Pay close attention to the crotch curve, the side seam, the inner leg seam, and the waistline. Remember, you are tracing half of the pant leg. Extend the tracing to your desired pedal pusher length, which typically falls mid-calf or just below the knee.
Once you’ve traced the outline, add seam allowances. A standard seam allowance is typically 1/2 to 5/8 inch (1.25 to 1.5 cm) around all edges, except for the hem and waistband. For the hem, add about 1.5 to 2 inches (4-5 cm) for a neat finish, and for the waist, add about 1 inch (2.5 cm) for casing or waistband attachment. Carefully cut out your fabric pieces. Since your fabric is folded, you will end up with two mirrored pant leg pieces.
Step 3: Sewing the Leg Seams
Unfold one of your pant leg pieces. With right sides together, match the inner leg seams of the two pant leg pieces. Pin them together carefully, making sure the edges align. Stitch these seams using your chosen seam allowance. Repeat this for the outer leg seams. Press your seams open or towards the back for a clean finish.
Step 4: Joining the Crotch Seam
Now, with your pant legs stitched, turn one pant leg right side out and slip it inside the other pant leg, which should remain wrong side out. This will bring the crotch curves together, with right sides facing each other. Align the inner leg seams and pin the entire crotch curve. Stitch this curve carefully, starting and ending with a backstitch for reinforcement. Press the crotch seam open or to one side.
Step 5: Crafting the Waistband – Your Choice of Style
This is where you decide between a structured zippered waistband or a comfortable elastic one.
- Option A: Zippered Waistband
Measure your waistline and cut a fabric strip for your waistband (e.g., 2.5 inches wide by your waist measurement plus seam allowances). You will also need a waistband facing. Install your zipper into the side seam or front/back seam (depending on your template pants style) as desired. Then, attach the waistband and its facing, encasing the raw edge of the pants’ waistline. Topstitch for a professional finish. - Option B: Elastic Waistband
Fold the top edge of your pants down by 1/4 inch and press. Fold it down again by approximately 1.25 inches (or slightly more than the width of your elastic) and press again. Stitch close to the inner folded edge, leaving a small opening (about 1-2 inches) at the back. Thread your elastic through this casing using a safety pin. Overlap the ends of the elastic and stitch them securely. Then, stitch the opening closed.
Step 6: Perfecting the Hem
Try on your pants to determine the exact length you want. Mark your desired hemline. For a simple hem, fold the raw edge up by 1/4 inch and press, then fold it up again by 1 inch and press. Stitch in place. For a cuffed look, you might fold up a larger amount (e.g., 2 inches) and secure the fold. Press the hems crisply for a polished look.
Step 7: Final Touches
Give your newly sewn gingham pedal pushers a final press. Trim any loose threads. Admire your handiwork! These pants are the perfect sleek retro design, embodying classic fifties rockabilly style and retro slacks elegance. They remind me of the ones Mary Tyler Moore used to wear on the Dick Van Dyke Show, exuding an effortless charm.
Tips for a Flawless Finish
To ensure your DIY gingham pants look as professional as possible, keep these tips in mind:
- Press As You Go: Don’t underestimate the power of an iron. Pressing seams after each step makes a huge difference in the final appearance and ensures cleaner stitching lines.
- Use Quality Fabric: While the “no pattern” method simplifies construction, good quality fabric will elevate your finished garment. Lightweight cotton, linen blends, or even a light stretch denim can work.
- Take Your Time: Rushing can lead to mistakes. Enjoy the process of creation.
- Pin Generously: Use plenty of pins to keep fabric layers aligned, especially on curves like the crotch seam.
- Test Stitches: Before sewing on your actual garment, test your stitch length and tension on a scrap piece of your fabric.
- Don’t Be Afraid to Unpick: Even experienced sewers make mistakes. A seam ripper is your best friend! It’s better to unpick and re-sew than to settle for a flawed finish.
Styling Your New Retro Gingham Pants
Once your beautiful new gingham pedal pushers are complete, the fun of styling begins! Their versatile retro design makes them easy to incorporate into various outfits:
- Casual Chic: Pair them with a simple white t-shirt or a fitted knit top, a pair of classic ballet flats or canvas sneakers, and a cute bandana for a relaxed yet stylish everyday look.
- Vintage Inspired: Embrace the 1950s aesthetic by pairing them with a tucked-in button-down blouse, a fitted cardigan, and wedges or low heels. Add a wide belt to cinch the waist and accentuate your silhouette.
- Modern Twist: Combine your pedal pushers with contemporary pieces. Think an off-the-shoulder top, a denim jacket, and ankle boots for a fresh, updated vibe.
- Seasonal Versatility: These lightweight cotton slacks are perfect for spring and summer. In cooler weather, layer them with tights underneath and pair them with knee-high boots and a cozy sweater.
Embark on Your DIY Gingham Pants Journey!
Making your own custom-fit gingham pedal pushers without a traditional pattern is a rewarding project that combines the joy of sewing with the timeless appeal of vintage fashion. Amanda Wright’s tutorial offers an incredibly accessible pathway to creating these comfortable, stylish stovepipe pants. Whether you call them pedal pushers, clam diggers, or simply your new favorite slacks, you’ll love the feeling of wearing a unique garment made by your own hands.
So, gather your materials, dust off your sewing machine, and prepare to add a touch of retro charm to your wardrobe. The satisfaction of crafting your own perfect pair of vintage-inspired pants is just a few stitches away. Happy sewing!