
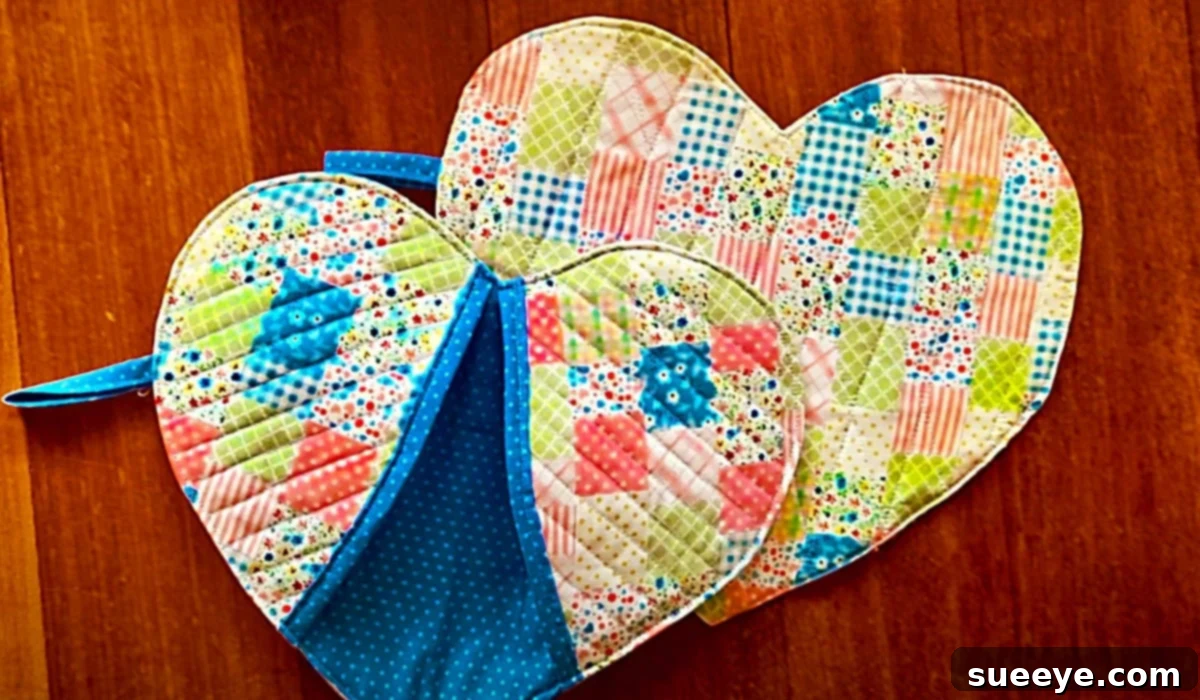
There’s an undeniable charm that homemade items bring to a kitchen, transforming it from a mere functional space into a warm, inviting heart of the home. Among these comforting touches, custom-sewn oven mitts stand out, offering both practicality and a delightful splash of personality. If you’ve been searching for an easy yet incredibly rewarding sewing project, look no further than these adorable heart-shaped oven mitts. We recently stumbled upon a brilliant video tutorial by Emel’s Handicraft on YouTube, and it truly represents one of the simplest and most ingenious potholder designs we’ve ever encountered.
What makes this project truly special is its dual functionality and charming aesthetic. Not only do these creations serve as highly effective oven mitts, but their clever design also incorporates neat, built-in pockets for your hands, making them incredibly practical. The result is a unique hybrid – part oven mitt, part potholder – crafted with an ingenious simplicity that belies its sophisticated utility. With a delightful down-home quilting style, these heart-shaped kitchen essentials instantly infuse any kitchen with a touch of farmhouse cuteness and rustic elegance, making them perfect for adding a personal touch or gifting to a loved one. Plus, they are an excellent way to use up those smaller fabric scraps you’ve been saving!
How To Make A Heart-Shaped Oven Mitts: Your Complete DIY Guide
Crafting your own oven mitts is a fantastic way to personalize your kitchen decor or create thoughtful handmade gifts. This heart-shaped design from Emel’s Handicraft offers an accessible entry point for beginners and a satisfying quick project for experienced sewers alike. Let’s delve into what you’ll need and how to bring these charming and functional pieces to life.
Essential Materials for Your DIY Heart-Shaped Oven Mitts
Gathering your materials is the first exciting step in any sewing project. For these heart-shaped oven mitts, you’ll need a few common sewing supplies, along with some specialized items to ensure optimal heat protection and durability. The beauty of this project lies in its flexibility, allowing you to choose fabrics that match your kitchen’s aesthetic or repurpose cherished scraps.
- Fabric: The heart of your project! You’ll need various pieces, according to the specific instructions provided in Emel’s Handicraft video tutorial. Consider using cotton fabrics for the outer layers due to their heat resistance and washability. This is an excellent opportunity to use up fabric scraps you have lying around, making each mitt truly unique. Think about complementing patterns and colors for a cohesive look. For one oven mitt, you’ll typically need several pieces for the front, back, and inner pocket layers.
- Batting (or Insul-Bright): This is crucial for heat protection. While regular cotton batting can offer some insulation, for true oven mitt functionality, it’s highly recommended to use Insul-Bright thermal batting. Insul-Bright contains metalized polyester film that reflects heat, providing superior protection against hot surfaces. If using regular batting, you might consider layering two pieces for enhanced safety.
- A Sewing Machine: Any standard sewing machine capable of a straight stitch will work wonderfully for this project. Ensure it’s in good working order and you have the correct needle for your fabric type (universal 80/12 is usually a good starting point for cottons).
- Thread: All-purpose polyester thread in a color that complements your fabric is ideal. You might want a contrasting color if you plan on decorative topstitching.
- A Pair of Fabric Scissors: Sharp fabric scissors are essential for clean, precise cuts, especially when working with curves.
- A Rotary Cutter: While optional, a rotary cutter makes cutting multiple layers of fabric and batting much quicker and more accurate, especially when paired with a cutting mat and ruler. It’s particularly useful for cutting straight lines and larger pieces.
- A Cutting Mat: Protects your work surface and provides a grid for accurate measurements when using a rotary cutter.
- An Iron: Pressing seams and fabric at various stages is vital for a professional-looking finish. It helps to set stitches, flatten seams, and give your project crisp edges.
- An Ironing Board: Provides a stable, heat-resistant surface for all your pressing needs.
Step-by-Step Directions: Crafting Your Heart-Shaped Oven Mitts
The beauty of Emel’s Handicraft tutorial lies in its clear, concise instructions, making this project accessible to sewers of all skill levels. While we encourage you to watch the full video for the most comprehensive guidance, here’s an expanded overview of the steps involved in creating these delightful heart-shaped oven mitts:
Preparation and Cutting Your Fabric
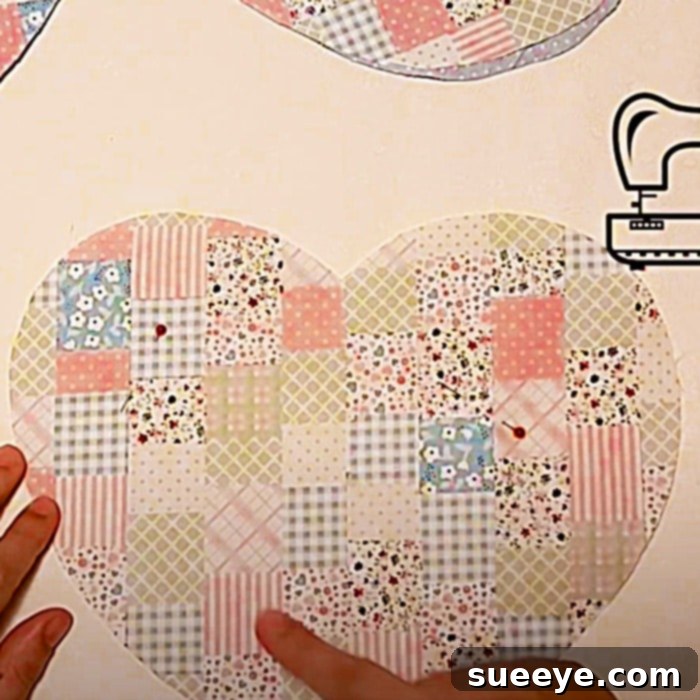
The journey begins with meticulous preparation. Firstly, ensure all your fabrics are pre-washed and ironed. This step is crucial to prevent shrinkage after your mitt is sewn, maintaining its shape and size. Once your fabric is ready, you will move on to the heart of the design: cutting. The tutorial by Emel’s Handicraft on YouTube will provide you with the exact dimensions and pattern pieces needed. You’ll be cutting out several heart shapes from your main fabric, lining fabric, and importantly, from your batting or Insul-Bright. Precision here is key, as it will affect the final shape and neatness of your oven mitt. Using a rotary cutter and mat can greatly aid in achieving clean, accurate curves for your heart shapes.
Assembling the Layers and Creating the Pockets
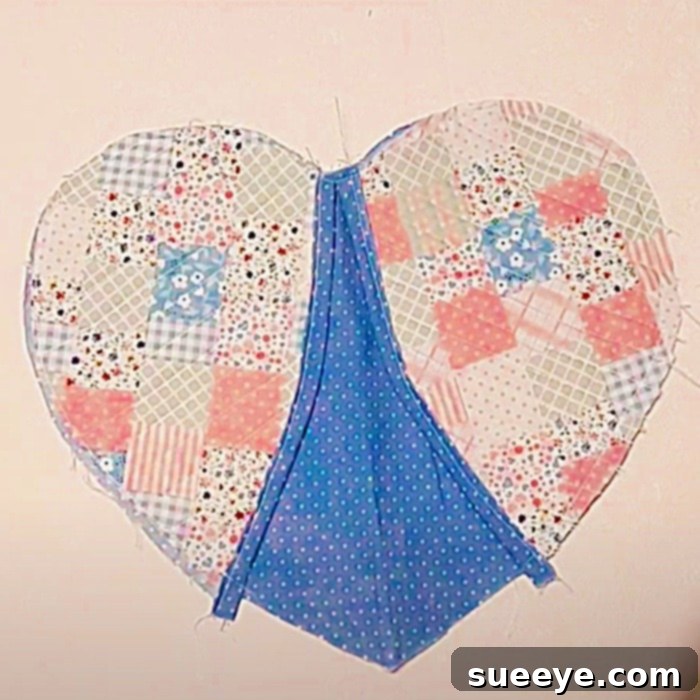
Once all your heart shapes are precisely cut, you’ll begin the assembly process. This project distinguishes itself with its clever built-in pockets, which enhance both functionality and comfort. According to the video instructions, you will meticulously layer your fabric pieces with the batting/Insul-Bright. Typically, this involves a main fabric layer, a batting layer for insulation, and a lining fabric layer. The magic happens as you create the pocket elements, which often involve folding and stitching specific fabric pieces to form the openings for your hands. This thoughtful design ensures your hands are securely protected from heat while providing a comfortable grip on hot pots and pans. Pay close attention to the video for the exact order and orientation of these layers to ensure the pockets are correctly formed and face the right way.
Stitching and Finishing Your Oven Mitt
With your layers correctly assembled and pinned, it’s time to head to the sewing machine. You’ll stitch around the perimeter of your heart shapes, carefully following the designated seam allowances. The video tutorial will guide you on where to leave openings for turning the mitt right side out. After stitching, clip any curves and corners to ensure a smooth, professional finish once turned. Pressing your seams flat with an iron at this stage is crucial for crisp edges. Once turned right side out, you’ll likely close the opening with a topstitch or by hand-stitching, which also serves to reinforce the edges and give your oven mitt a polished look. You might also want to add a small fabric loop for hanging, making it convenient to store in your kitchen.
Tips for a Perfect Homemade Oven Mitt
To ensure your heart-shaped oven mitts turn out beautifully and function effectively, here are a few additional tips:
- Choose Your Fabric Wisely: Opt for 100% cotton for all fabric layers. Synthetic fabrics can melt under high heat, posing a safety risk. For a durable and charming finish, consider quilting cottons, which come in an endless array of patterns.
- Don’t Skimp on Insulation: As mentioned, Insul-Bright is a game-changer for oven mitts. If you only have regular batting, use two layers, and consider adding a layer of flannel or cotton batting on either side of the Insul-Bright for added comfort and heat reflection.
- Press, Press, Press: This cannot be overstated. Pressing your fabric before cutting and pressing your seams at each step will make a significant difference in the final appearance and professionalism of your oven mitt.
- Use Good Quality Thread: A strong, all-purpose polyester thread will hold up well to heat, washing, and general use.
- Experiment with Quilting: If you enjoy quilting, consider adding some simple quilting stitches to your assembled layers before sewing the final pieces together. This can add a lovely texture, enhance the “down-home quilting style,” and further secure the batting in place.
- Personalize It: Once you’ve mastered the basic technique, don’t hesitate to get creative! Embroider initials, add decorative topstitching, or experiment with different fabric combinations to make each mitt truly your own or perfectly suited for a gift recipient.
- Safety First: Always test your new oven mitt with a moderately warm item first to gauge its heat protection before using it with very hot dishes directly from a high-temperature oven.
The Joy of Handmade Kitchen Essentials
The satisfaction of creating something beautiful and functional with your own hands is truly immense. These heart-shaped oven mitts are more than just practical kitchen tools; they are a testament to your creativity and care. They make thoughtful, personalized gifts for housewarmings, weddings, or any occasion, conveying warmth and affection in every stitch. Imagine the delight of pulling a freshly baked loaf from the oven, safely cradled by your own lovingly crafted oven mitts, adding a touch of rustic charm to your daily routines.
This project is not only quick and easy to follow, making it ideal for beginners, but it’s also incredibly rewarding. The entire process, from cutting to the final stitch, can often be completed in about an hour, earning it the moniker “60-minute pot holder.” We highly recommend giving this project a try. Dive into the tutorial by Emel’s Handicraft, gather your materials, and prepare to add a generous sprinkle of homemade charm to your kitchen or to delight someone special with a truly unique gift. Happy sewing!