
Unleashing Creativity: My Favorite Furniture Makeover with a Stenciled Cork Top
There’s an undeniable joy that comes from transforming something old and forgotten into a vibrant, functional piece for your home. As an avid DIY enthusiast, I’ve tackled my fair share of stenciling projects – from giving my pantry a personalized touch to sprucing up a toy box and even an old end table. Each project has its unique charm, but my latest venture, stenciling over rolled cork, has truly stolen my heart. This isn’t just a simple craft; it’s a complete furniture metamorphosis that resulted in one of my favorite pieces of decor to date!
I must admit, the idea of stenciling on cork initially came with a few reservations. How would the paint adhere? Would the texture interfere with the crispness of the design? Yet, armed with a fantastic tutorial and a dash of optimism, I dove in. The process, surprisingly, was incredibly straightforward, and the outcome? Nothing short of spectacular. This coffee table isn’t just a piece of furniture; it’s a conversation starter, a testament to the power of repurposing, and a proud centerpiece in my living room. I’m absolutely thrilled with its unique aesthetic and the refreshing vibe it brings to the entire space.
Why Choose Cork for Your Coffee Table Top? Beyond Aesthetics
The decision to use rolled cork for the coffee table top was a game-changer, not only for its distinct visual appeal but also for its myriad practical benefits. Cork is an incredible natural material that brings a unique texture and warmth to any surface. It’s eco-friendly, sustainable, and relatively easy to work with, making it an ideal choice for DIY furniture projects. But the advantages extend far beyond its natural beauty and environmental credentials.
One of the most remarkable features of a cork tabletop, and what truly makes this project a standout, is its inherent ability to act as a “built-in coaster” across its entire surface. Say goodbye to the endless quest for a coaster when guests arrive, or the worry of unsightly rings left by condensation-laden glasses. Cork is naturally absorbent and resistant to moisture, making it incredibly forgiving. Hot mugs and cold drinks can rest directly on the surface without causing damage or leaving marks, which is a dream come true for any busy household. This practical aspect alone elevates the stenciled cork coffee table from a mere decorative item to a highly functional and durable piece of everyday furniture.
Furthermore, cork offers excellent sound absorption, contributing to a quieter and more serene living environment. Its soft, yielding nature means it’s less likely to scratch delicate items placed upon it, offering a protective surface that hard wood or glass often cannot. It also provides a slight grip, reducing the chances of items sliding off accidentally. The natural insulation properties of cork mean it won’t get excessively cold or hot to the touch, making it comfortable to rest your arms or even feet on. All these attributes combined make a stenciled cork coffee table not just a beautiful decor choice, but a smart, functional, and long-lasting addition to your home.
The Transformation Journey: From Drab to Fab in Simple Steps
Step 1: Selecting Your Canvas and Gathering Materials
Every great furniture makeover begins with the perfect “canvas.” For this project, I chose an old, beat-up coffee table that had seen better days. Don’t underestimate the potential of a forgotten piece; with a little creativity, even the most worn-out furniture can be reborn. Once you have your table, it’s time to gather your supplies. You’ll need:
- An old coffee table (ensure it’s sturdy enough for a new top).
- Rolled cork (measure your tabletop and add a little extra for trimming).
- Strong adhesive (contact cement or heavy-duty spray adhesive is recommended for a secure bond).
- A sharp utility knife or craft knife.
- Measuring tape and a straight edge.
- Fine-grit sandpaper (for table preparation, if needed).
- Cleaning supplies (mild soap, water, cloth).
- Your chosen stencil (I recommend exploring the wide variety from Royal Design Studio Stencils for quality designs).
- A stencil brush.
- Acrylic or chalk paint for stenciling (choose colors that complement your decor).
- Painter’s tape or masking tape (to secure the stencil).
- Paint for the table legs (primer and topcoat, if desired).
- Optional: A clear sealant for the cork surface for extra durability, though not strictly necessary due to cork’s natural properties.
Step 2: Preparing the Tabletop and Applying the Cork
Preparation is key to a professional finish. Start by thoroughly cleaning your old coffee table’s top surface. Remove any dirt, grime, or old finishes. If the surface is particularly glossy or uneven, a light sanding with fine-grit sandpaper will create a better adhesion surface for the cork. Ensure the table is completely dry before proceeding.
Next, carefully measure your tabletop and cut the rolled cork to size. Precision here is crucial for a seamless look. Use a sharp utility knife and a straight edge for clean, crisp cuts. Once cut, apply your adhesive evenly to both the tabletop and the back of the cork (if using contact cement, follow manufacturer instructions for application and drying time). Carefully lay the cork onto the table, starting from one edge and slowly rolling it out, smoothing out any air bubbles with a roller or a clean cloth as you go. Apply firm pressure across the entire surface to ensure a strong bond. Allow the adhesive to cure completely, typically for 24 hours, before moving on to the stenciling.
Step 3: The Art of Stenciling – My Secret for a Flawless Finish
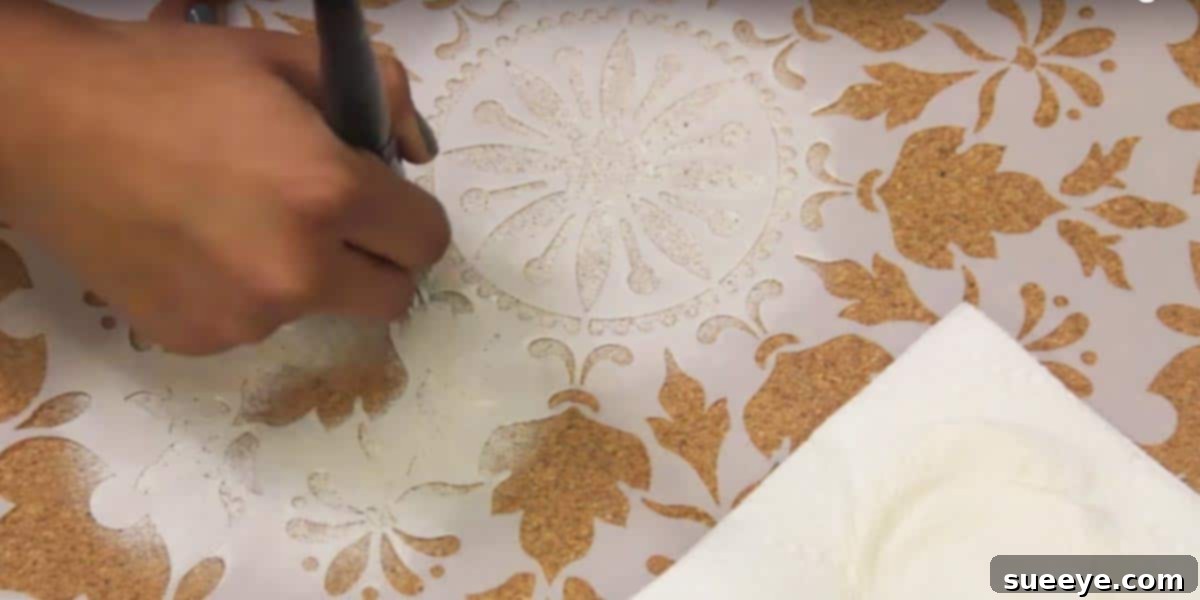
With the cork securely in place, it’s time for the truly artistic part: stenciling. This is where your coffee table transforms into a personalized masterpiece. Choose a stencil pattern that resonates with your personal style and complements your home’s aesthetic. Lay the stencil on the cork surface, positioning it exactly where you want the design to appear. Secure it firmly with painter’s tape to prevent any shifting during painting.
Now, for the “secret” to achieving a professional-looking stencil transfer, a tip I’ve learned from countless projects: always dab most of the paint off your stencil brush before applying it to the surface. “Less is more” is the golden rule here. Load your stencil brush with a small amount of paint, then firmly dab off the excess onto a paper towel or a piece of scrap cardboard until the brush is almost dry. Apply the paint to the stencil using a gentle, vertical dabbing motion. Building up thin layers of paint rather than applying a thick coat all at once prevents the paint from bleeding under the stencil, resulting in crisp, clean lines. Patience pays off here. Once your design is complete, carefully peel off the stencil to reveal your stunning work. Allow the paint to dry thoroughly.
Beyond the Top: The Importance of a Holistic Furniture Makeover
As I admired my newly stenciled cork top, I couldn’t help but feel immense pride. It was unique, beautiful, and so distinctly “me.” However, my eyes kept drifting to the coffee table’s legs. They just looked… blah. Dull, uninspired, and frankly, a bit tired. They were inadvertently detracting from the magnificence of the stenciled top, creating an imbalance in the overall aesthetic. This realization was a crucial moment in the project, reminding me that a true furniture makeover considers every element of the piece.
I decided then and there that the legs needed their own transformation. A fresh coat of paint was in order. I opted for a crisp, clean white, knowing it would provide a striking contrast against the warm, earthy tones of the cork and the intricate stencil pattern. The process was simple: a quick clean, a light sanding to ensure paint adhesion, and then two even coats of high-quality white paint. The difference was astonishing. The white legs didn’t just look good; they made the stenciled cork top absolutely pop! The entire table instantly looked cohesive, modern, and incredibly chic. This small additional step elevated the entire project from a good DIY to an extraordinary one, proving that attention to detail across the whole piece can truly make all the difference.
The Grand Reveal: A Functional Masterpiece for Your Home
The satisfaction of stepping back and beholding the completed stenciled cork coffee table was immense. It wasn’t just a revamped piece of furniture; it was a reflection of creativity, effort, and a keen eye for design. This table has genuinely changed the whole look and feel of my living room, injecting a personalized charm that store-bought furniture rarely achieves. Repurposing a piece of furniture truly has that transformative effect on a room, doesn’t it?
And as I mentioned before, the practicality of having a built-in coaster across the entire tabletop is an absolute game-changer. No more worrying about condensation rings or heat marks – the cork naturally handles it all, adding another layer of functionality to its already impressive aesthetic. This project isn’t just about creating a beautiful object; it’s about crafting a smart, sustainable, and unique solution for everyday living.
Unleash Your Inner DIYer: Tips for Your Own Stenciled Cork Table
If my journey has inspired you to embark on your own stenciled cork coffee table adventure, here are a few tips to ensure your success:
- Patience is Your Best Tool: Don’t rush any step, especially the adhesive drying and paint application.
- Practice Makes Perfect: If you’re new to stenciling, practice on a scrap piece of cork or cardboard first to get a feel for the brush and paint consistency.
- Choose Your Stencil Wisely: Select a design that complements your home’s existing decor and the size of your coffee table. Royal Design Studio Stencils offers an excellent selection to get you started.
- Ventilation is Key: Work in a well-ventilated area when using adhesives and paints.
- Clean Your Tools Immediately: This makes cleanup much easier and preserves your brushes for future projects.
This fabulous transformation showcases how accessible and rewarding DIY furniture makeovers can be. Whether you’re looking to add a touch of personal flair to your home, save money, or embrace a more sustainable lifestyle, a project like this offers it all. Watch how Royal Design Studio Stencils provides step-by-step guidance in their tutorials, empowering you to create your very own unique piece. So, gather your materials, trust the process, and prepare to fall in love with your own beautifully transformed, stenciled cork coffee table!