
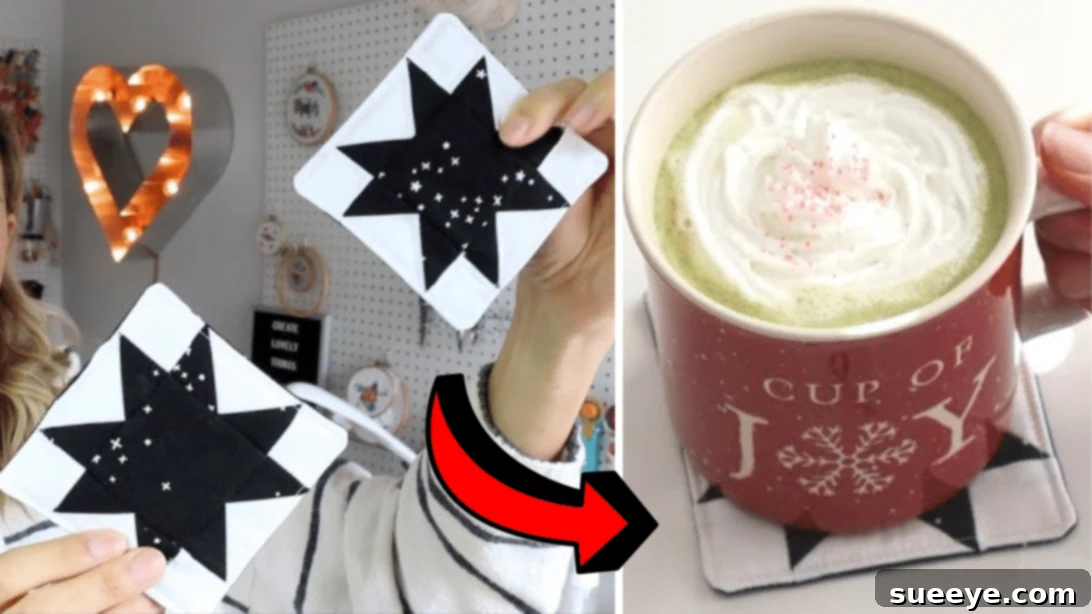
Easy Star Coaster Sewing Tutorial for Beginners
The art of quilting is truly captivating. There’s a unique satisfaction that comes from taking disparate pieces of fabric, often small scraps, and meticulously joining them to form a cohesive, intricate design. This process isn’t just about creating beautiful patterns; it’s about transforming those humble fabric bits into something entirely new and functional. From grand blankets and throws to charming table toppers and runners, the possibilities are endless. And among these wonderful creations, one of the most rewarding and accessible projects for beginners is the humble coaster.
Imagine the joy of turning your favorite quilt block, no matter how simple or complex, into a practical and adorable coaster. This project is not only incredibly beginner-friendly but also an excellent way to utilize those leftover fabric pieces that are too precious to discard. With just a few basic supplies like batting and backing fabric (which can absolutely be sourced from your scrap bin!), you can create a set of stunning coasters. This guide will walk you through the process, drawing inspiration from the fantastic video tutorial by Melanie Ham on YouTube, ensuring you have all the information you need to succeed.
Coasters are more than just protectors for your furniture; they are miniature works of art that add a touch of handmade charm to any space. They make thoughtful gifts, allow you to experiment with new quilting patterns on a small scale, and are a perfect way to practice your precision sewing. Whether you’re a seasoned quilter looking for a quick project or a complete novice eager to try your hand at sewing, this star coaster tutorial is designed to be straightforward and enjoyable.
RELATED: Easy Candy Corn Coaster Sewing Tutorial
Why Make Star Coasters?
Star quilt blocks are iconic for a reason. Their classic appeal, versatility in design, and the striking visual impact they create make them a beloved choice for quilters of all levels. When miniaturized into a coaster, the star design becomes a focal point, bringing a touch of traditional elegance or modern flair, depending on your fabric choices. This project serves as an excellent introduction to piecing together smaller units like “flying geese” and assembling them into a larger block, a fundamental skill in quilting.
Furthermore, coasters are quick projects. You can often complete one or a set in just a few hours, providing instant gratification and a tangible sense of accomplishment. They’re also incredibly practical, safeguarding your tables from unsightly water rings and heat marks while adding a personalized decorative element to your home. And perhaps best of all, they are perfect for using up those beautiful fabric scraps you’ve been hoarding, making them a sustainable and budget-friendly craft.
Materials for Your Star Coaster Project:
Gathering your materials before you begin is a key step to a smooth and enjoyable sewing experience. Most of these items are standard in any quilter’s toolkit, and many can be found in your existing stash.
- Quilt Topper (or Quilt Block): This is the decorative top layer of your coaster, featuring your chosen design, such as a star block. You can create this using various fabric pieces, often cotton, that are sewn together. If you already have a small quilt block ready, this project is perfect for giving it a new purpose. For a star block, you’ll typically use a center square, four flying geese units, and four corner squares.
- Backing Fabric: This will be the bottom layer of your coaster. Choose a fabric that complements your quilt topper, keeping in mind it will be visible. Cotton is usually preferred for its ease of use and durability. This is an excellent opportunity to use a larger scrap piece.
- Batting Fabric: Nestled between your quilt topper and backing, batting provides structure, insulation, and a soft, plush feel to your coaster. It’s what gives quilted items their characteristic texture. Cotton or a cotton-poly blend batting is ideal for coasters, as it’s heat-resistant and washable. You’ll only need a small square.
- Marking Pen, Pencil, or Chalk: Essential for transferring patterns, drawing sewing lines, or marking trimming guides onto your fabric. Choose a tool that is easily visible on your fabric and can be removed or washes out cleanly.
- Ruler: A clear acrylic quilting ruler with precise measurements is invaluable for accurate cutting and squaring up your quilt block. Precision is key in quilting, even for small projects.
- Scissors or Rotary Cutter and a Cutting Mat: While sharp fabric scissors will work, a rotary cutter combined with a self-healing cutting mat offers unparalleled precision and speed, especially for straight lines and squaring up blocks. This combination is highly recommended for quilters.
- Fabric Pins or Clips: Used to hold your fabric layers securely together before and during sewing. This prevents shifting and ensures your seams align perfectly.
- Needle and Thread: All-purpose polyester thread is suitable for most quilting projects. Choose a color that matches or blends with your fabrics, or a neutral shade like white or light gray. Ensure your sewing machine needle is appropriate for the fabric weight you are using.
- Iron, for Pressing: An iron is non-negotiable in quilting. Pressing seams open or to one side at each stage of construction helps create flat, crisp blocks and a professional finish. It also helps to eliminate bulk in certain areas.
- Sewing Machine: While hand sewing is possible, a sewing machine will make this project much faster and more enjoyable. Ensure your machine is in good working order and you have bobbins wound with your chosen thread.
How to Make a Star Coaster: A Step-by-Step Guide
Now that you have all your materials ready, let’s dive into the fun part: assembling your beautiful star coaster. Remember to press after each sewing step for the best results.
Step 1: Prepare Your Quilt Topper (The Star Block)
The first and most crucial element is your quilt topper. While you can certainly adapt any small quilt block for this purpose, a star design is particularly charming. To create a classic star block, you’ll typically need several components: a central fabric square, four “flying geese” units, and four background fabric squares for the corners. Flying geese units are rectangular units made of a larger rectangle and two smaller squares sewn at an angle to create a triangular shape. Once these individual components are created, you’ll arrange them in a grid formation, with the central square in the middle, the flying geese pointing outwards from it, and the background squares filling the four corners to complete the star shape.
Begin by stitching these units together row by row. For example, sew the first background square, a flying geese unit, and another background square to form the top row. Repeat for the bottom row. For the middle row, sew a flying geese unit, the center square, and another flying geese unit. Once your three rows are complete, carefully align them and stitch the rows to each other. After assembling your block, it’s vital to square it up to your desired coaster size (e.g., 4.5 or 5 inches square), using your ruler and rotary cutter. This ensures perfectly straight edges. Finally, give your finished quilt block a good press with an iron, flattening all the seams for a crisp and professional appearance.
Step 2: Layering for Quilting
With your quilt topper complete and pressed, it’s time to create the “quilt sandwich.” This involves layering your three main components: backing fabric, quilt topper, and batting. Start by laying your backing fabric down on a clean, flat work surface. Ensure its right side (the side you want to be visible) is facing upwards. This is important because once turned, this will be the exterior bottom of your coaster.
Next, take your prepared quilt topper (the star block) and place it directly on top of the backing fabric. Crucially, make sure the right sides of both the backing and the quilt topper are facing each other. This means the decorative side of your star block should be facing down, against the right side of your backing fabric. Finally, place a piece of batting on the very top of this stack. The batting does not have a “right” or “wrong” side, so simply center it over your stacked fabrics. Smooth out all layers, removing any wrinkles, and secure them with fabric pins, placing them about an inch from the edges to prevent shifting during sewing.
Step 3: Stitching, Trimming, and Turning
Now, take your pinned quilt sandwich to your sewing machine. Using your sewing machine, stitch all the way around the edges of the square. Maintain a consistent ¼ inch seam allowance from the edge, which is a standard measurement in quilting and helps create neat, strong seams. As you stitch, remember to leave a gap of about 2-3 inches unstitched along one side. This opening is absolutely essential for turning your coaster right side out later.
Once you’ve stitched around, secure your stitches at the beginning and end of your seam, and clip your threads. Before turning, it’s beneficial to trim the corners at an angle, very close to your seam line but without clipping the stitches. This step is critical because it removes bulk from the corners, ensuring they will lie flat and pointy when the coaster is turned right side out. Now, reach into the unstitched gap and carefully pull the entire coaster through, turning it right side out. Take your time with this step to avoid stressing the seams.
Step 4: Poking, Pressing, and Topstitching
After turning your coaster right side out, the next step is to refine its shape. Use a point turner, a chopstick, or even the blunt end of a pencil to gently poke out all four corners from the inside. Be careful not to push too hard, which could damage your stitching. This action will give your corners a crisp, well-defined appearance. Once the corners are nicely shaped, take your coaster to the ironing board and press the entire piece down thoroughly. This will flatten the seams and edges, giving your coaster a professional, finished look. Pay special attention to the opening you left for turning.
For the opening, carefully tuck the raw edges of the fabric inside so that they align with the rest of the stitched seam. Press this folded edge down firmly. To secure this opening and add a decorative touch, you’ll now topstitch all the way around the perimeter of the coaster. Set your sewing machine to a slightly longer stitch length (e.g., 2.5mm to 3.0mm) and sew really close to the very edge of the coaster (about 1/8th of an inch). This topstitching will close the opening, reinforce the edges, and give your coaster a neat, polished finish. Your beautiful star coaster is now complete and ready to protect your surfaces and impress your guests!
Tips for Beginner Quilters:
- Practice Makes Perfect: Don’t be discouraged if your first attempt isn’t flawless. Every stitch is a learning experience.
- Accurate Cutting is Key: In quilting, even a slight inaccuracy in cutting can lead to misaligned blocks. Take your time with the ruler and rotary cutter.
- Press, Don’t Iron: When quilting, you “press” (lift and place the iron) rather than “iron” (slide the iron). This prevents distorting your fabric pieces.
- Use Good Quality Fabric: 100% cotton quilting fabric is recommended as it’s easy to work with, durable, and holds its shape well.
- Invest in Basic Tools: A good rotary cutter, mat, and ruler will significantly improve your quilting experience.
- Watch Tutorials: Videos like Melanie Ham’s are invaluable for visual learners. Don’t hesitate to pause and rewatch sections.
- Thread Color: When in doubt, a neutral light gray or off-white thread often blends well with a variety of fabrics for both piecing and topstitching.
Customization and Care:
This star coaster tutorial provides a fantastic foundation. Feel free to unleash your creativity! Experiment with different fabric combinations – bright and bold, subtle and sophisticated, or themed for holidays. You can use novelty prints, incorporate embroidery, or even add a small hanging loop if you wish. Once your coasters are complete, caring for them is simple. Most quilted coasters made with cotton fabrics can be gently hand-washed or machine-washed on a delicate cycle with cold water. Lay flat to dry or tumble dry on low. A light press with an iron can restore their crispness after washing.
Beyond Coasters: Expanding Your Skills
The techniques learned in making these star coasters are fundamental to many larger quilting projects. Once you’re comfortable with this process, you can easily scale up to create mug rugs (slightly larger placemats for a mug and a snack), placemats, pot holders, or even mini wall hangings. The satisfaction of turning small pieces of fabric into functional art is truly rewarding. Keep practicing, keep experimenting, and most importantly, enjoy every stitch of your quilting journey!
*All these images are credited to Melanie Ham via YouTube. We highly recommend visiting her channel and subscribing for more inspiring and educational quilting and sewing content! Her clear instructions make complex projects accessible to everyone.