
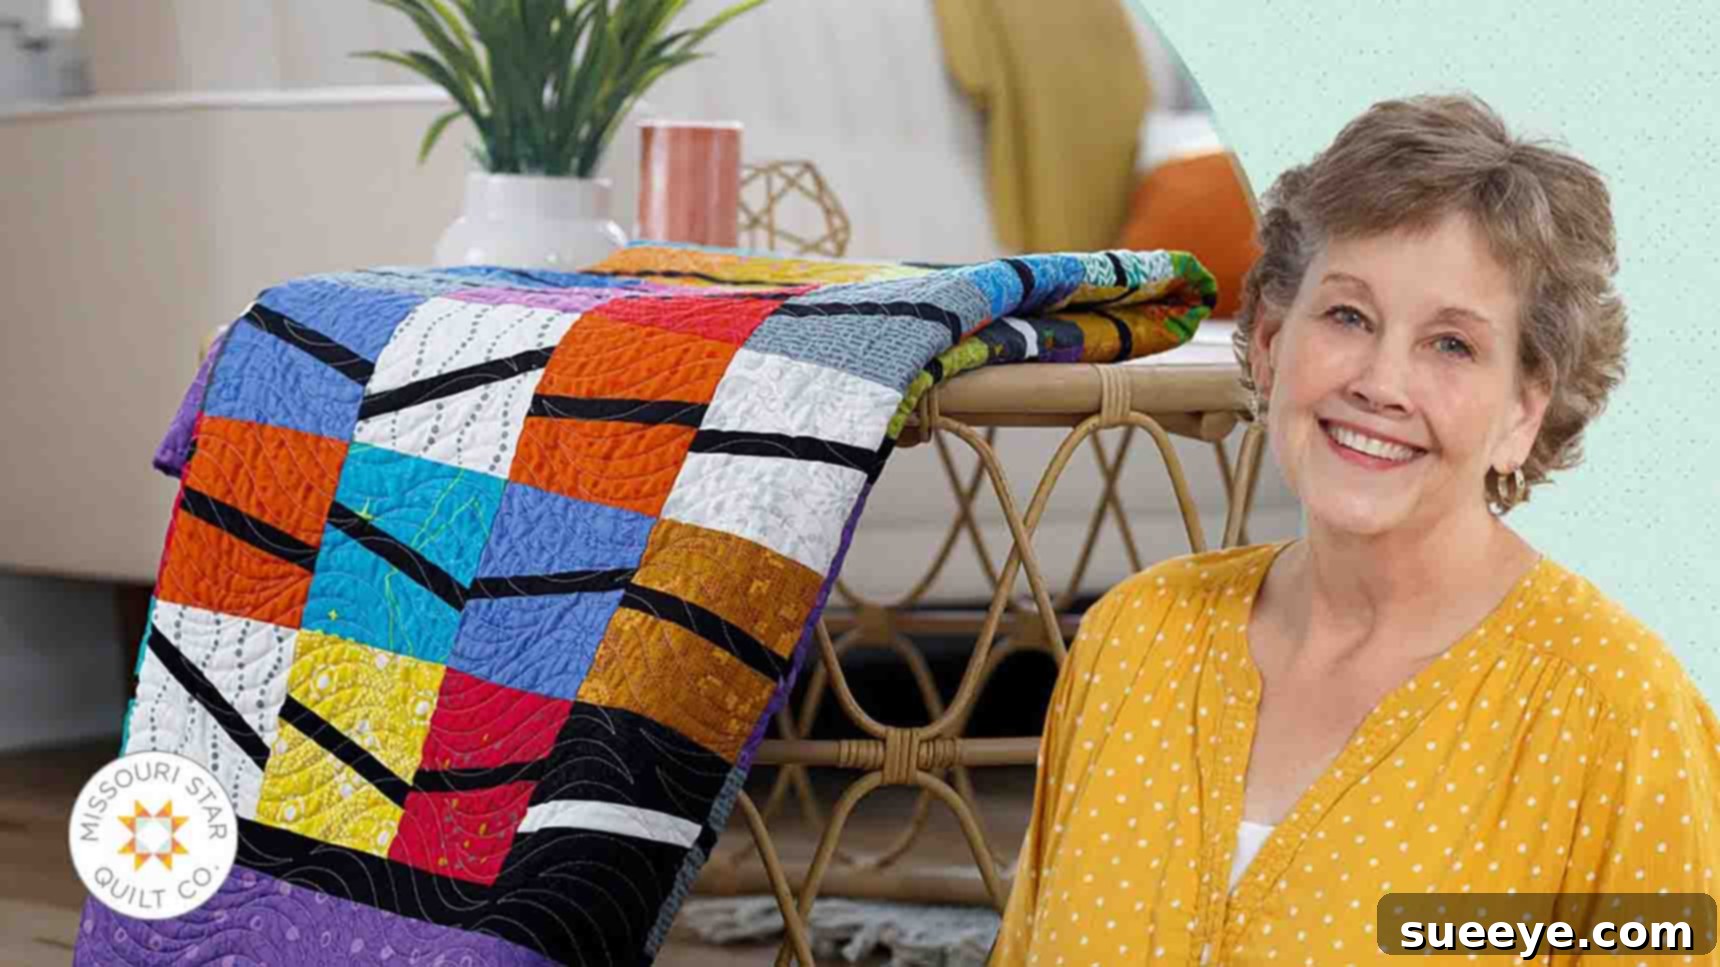
Master the Easy Pixie Stick Quilt: A Fun & Stunning Project for All Skill Levels
Are you searching for a quilting project that promises both ease and breathtaking beauty? Look no further than the captivating Pixie Stick Quilt! This delightful design, popularized by the quilting experts at Missouri Star Quilt Company and presented by the beloved Jenny Doan, might appear intricate at first glance, but it’s remarkably straightforward to construct. It’s the perfect weekend project to add a splash of color and unique pattern to your home, or to create a heartfelt gift for a loved one.
What makes the Pixie Stick Quilt truly special is its clever use of pre-cut fabric squares, commonly known as charm packs. These convenient 5-inch squares eliminate a significant amount of cutting time, allowing you to dive straight into the fun part: sewing! Whether you’re a complete novice eager to complete your first quilt or an experienced quilter seeking a quick and satisfying make, this tutorial is designed to guide you through every step. Prepare to be amazed by the fantastic visual effect you can achieve with just a few simple cuts and seams. Let’s gather our materials and embark on this enjoyable quilting journey!
Why You’ll Love Crafting the Pixie Stick Quilt
The Pixie Stick Quilt isn’t just another pattern; it’s an experience designed for quilters who appreciate efficiency and striking aesthetics. Here’s why this project is likely to become your next favorite:
- Effortless Elegance: Despite its sophisticated appearance, the construction technique is surprisingly simple. The “pixie stick” effect is created through clever angled cuts and strategic piecing, making the final design look far more complex than the process truly is.
- Perfect for Pre-Cuts: If you’re a fan of charm packs, this quilt is tailor-made for you. Utilizing pre-cut 5-inch squares not only saves valuable cutting time but also ensures a cohesive and coordinated fabric palette, as charm packs are typically curated fabric collections. This makes fabric selection a breeze!
- Beginner-Friendly: With clear instructions and manageable steps, even those new to quilting can confidently tackle this project. It introduces fundamental quilting skills like precise cutting, chain piecing, and pressing in an accessible way.
- Quick to Finish: Because of the use of pre-cuts and a relatively simple block construction, you can often complete the quilt top for the Pixie Stick Quilt in a single weekend. It’s incredibly rewarding to see your project come together so quickly.
- Versatile Design: The Pixie Stick pattern is incredibly adaptable. Experiment with vibrant, contrasting colors for a playful look, or choose more subdued tones for a sophisticated, modern aesthetic. The possibilities are endless, allowing your personal style to shine through.
Essential Materials for Your Pixie Stick Quilt Project
Before we begin, ensure you have all the necessary supplies. Having everything ready will make your quilting process smooth and enjoyable. This list covers not only the fabric requirements but also the essential tools that will facilitate precise cutting and sewing.
- 3 packs of 5″ print squares: These are your charm packs! Each pack typically contains 42 squares. Using three packs provides ample variety and ensures you have enough for the quilt top. Consider choosing packs from the same fabric line for a cohesive look, or mix and match for a scrappier, more eclectic design.
- 1/4 yard white solid fabric: This fabric will be used for a crucial contrasting strip within each block, helping to define the “pixie stick” shape. While white is classic, you can choose any solid color that provides good contrast with your print squares.
- 1 yard black solid fabric (includes inner border): Black offers a strong, dramatic contrast that truly makes the colorful pixie sticks pop. It’s used both within the blocks and for a crisp inner border, framing your quilt top beautifully.
- 1 1/4 yards outer border fabric: This fabric will create the larger, outer frame of your quilt. Choose a print or solid that complements your charm packs and ties the whole design together.
- 3/4 yard binding fabric: Binding is the finishing touch that encases the raw edges of your quilt. Select a fabric that coordinates well with your quilt top and borders.
- 4 1/4 yards backing fabric: The backing forms the underside of your quilt. You can use a single coordinating print, piece together several larger cuts, or even use a wide-back fabric to avoid seams.
- Quilter’s Ruler: A transparent acrylic ruler with clear markings is essential for accurate cuts. A 6.5 x 24-inch ruler is versatile for many quilting tasks.
- Rotary Cutter: A sharp rotary cutter (45mm or 60mm) will make quick work of cutting fabric precisely. Always use with a self-healing cutting mat.
- Self-Healing Cutting Mat: Protect your work surface and keep your rotary blade sharp.
- Sewing Machine: A reliable sewing machine with a good 1/4-inch seam allowance foot is key.
- Coordinating Thread: High-quality polyester or cotton thread that blends with your fabrics.
- Iron and Ironing Board/Mat: Pressing seams accurately is crucial for a flat quilt top.
- Pins or Fabric Clips: To hold fabric pieces together while sewing.
- Fabric Scissors: For clipping threads or making small cuts.
Step-by-Step Guide: Crafting Your Pixie Stick Quilt
Now that you have all your materials assembled, let’s dive into the creative process of piecing together your stunning Pixie Stick Quilt. Precision in cutting and pressing will be your best friends throughout this project.
Step 1: Preparing Your Fabric & Precision Cutting Your Charm Packs
Before you begin, ensure all your fabrics are pressed flat and free of wrinkles. This step is crucial for accurate cuts and seams.
Take four 5-inch print squares from your charm packs and stack them neatly, aligning all edges. Grab your quilter’s ruler and position it diagonally across the stack, anywhere you desire, as long as it creates a diagonal cut. Carefully cut through all four layers with your rotary cutter. This will create two sets of angled pieces from each charm square.
Next, take the white solid fabric and the black solid fabric. From both, cut 1-inch wide strips. These strips will form the “stick” part of your pixie stick design. For efficiency, you can chain piece these strips later.
Now, separate your cut charm pack pieces into two distinct stacks. Set one stack aside for now; you’ll work with it in the next step.
Step 2: Assembling Your Pixie Stick Units – Part 1
Move to your sewing machine. Take one of your 1-inch white strips and one of the angled print pieces from your active stack. Place the strip on top of the angled piece, right sides together, aligning one long edge. It’s important to leave an extra bit of the white strip extending past the top and bottom of the angled print piece. This extra length provides flexibility for trimming later and ensures your blocks will be precisely sized.
Sew along this edge using a consistent 1/4-inch seam allowance. Precision here is key to ensuring your blocks fit together perfectly.
Without breaking your thread, grab another angled print piece and slide it under your presser foot, aligning it with the next section of the white strip. Again, leave an extra space (about half an inch) before the next print piece to account for minor variations and allow for easy separation. Continue this “chain piecing” method until you have attached the white strip to four angled print pieces.
Once sewn, clip the chain apart and carefully press your seams open. Pressing seams open helps to reduce bulk, creating a flatter and smoother block.
Step 3: Assembling Your Pixie Stick Units – Part 2 & Trimming
Return to the sewing machine and repeat the chain piecing process using the black 1-inch strips and the second half of the angled print pieces (the stack you had set aside). As before, ensure you leave extra fabric at the top and bottom of each print piece. Sew with a 1/4-inch seam allowance.
After sewing, clip these units apart and press their seams open.
Now you have two sets of units: one with a white strip and one with a black strip. Take one unit with a white strip and one unit with a black strip. Place them right sides together, matching the white strip to the black strip, forming a complete square block with a “pixie stick” running through it. Sew these two halves together with a 1/4-inch seam allowance, creating your finished block. Repeat this process for all your units.
Once sewn, it’s time to trim. Lay each block on your cutting mat and use your ruler and rotary cutter to carefully trim off any excess strip fabric from the top and bottom edges, making sure your block is square and the “pixie stick” is centered. Squaring up each block to a consistent size (e.g., 4.5 inches or 5 inches, depending on your desired final block size after seam allowances) is crucial for a flat and even quilt top.
Step 4: Designing and Assembling the Quilt Top
This is where your quilt truly starts to take shape! Once all your pixie stick blocks are created and squared up, it’s time for layout. Lay out all your completed blocks on a design wall, floor, or large table. For the recommended quilt size, you will create a grid of 10 blocks across for each row and 12 blocks down for the length of the quilt top.
Experiment with the orientation of each block. Rotate them to create different patterns and visual flows. You can make all the pixie sticks go in the same direction, alternate directions, or even create pinwheel effects. Take your time with this step, as it determines the final look of your quilt.
Once you are satisfied with your layout, begin sewing the blocks together into rows. Start with the first row: sew block 1 to block 2, then add block 3, and so on, until you have a complete row of 10 blocks. Use a 1/4-inch seam allowance. When sewing blocks, it’s helpful to nest your seams (pressing them in opposite directions for adjoining blocks) to ensure they line up perfectly and reduce bulk.
Press the seams within each row in a consistent direction (e.g., all to the left for odd-numbered rows, and all to the right for even-numbered rows). This will make it easier to nest seams when joining the rows.
Repeat this process for all 12 rows. Once all rows are sewn, press the seams again. Finally, sew your 12 rows together, carefully aligning all intersections. Take your time, use pins generously, and ensure those 1/4-inch seams are accurate. Press the final row seams open or to one side to finish your beautiful quilt top.
Step 5: Adding Borders, Batting, and Backing
Adding borders frames your quilt top and can also help to square it up.
- Inner Border (Black Solid): Measure the length of your quilt top through the center. Cut two strips of your black solid fabric to this length (e.g., 2 inches wide). Attach one strip to each side of the quilt top, pressing seams towards the border. Then, measure the width of the quilt top (including the attached side borders) through the center. Cut two strips of black solid fabric to this width. Attach these strips to the top and bottom edges, pressing seams towards the border. This creates a crisp, thin frame around your pixie sticks.
- Outer Border (Outer Border Fabric): Repeat the process for the outer border, using your 1 1/4 yards of outer border fabric. Measure the length and width of the quilt top (now with the inner border), cut your border strips (e.g., 4-6 inches wide, depending on preference), and attach them in the same order (sides first, then top and bottom). Press seams towards the border. This wider border adds a substantial finish and allows your quilt top to truly shine.
Now, it’s time to create the “quilt sandwich.” Lay your backing fabric flat on a clean surface, wrong side up, smoothing out any wrinkles. Tape it down if needed. Next, lay your batting (quilt filling) on top of the backing, centering it. Finally, place your completed quilt top on top of the batting, right side up, again centering it. Ensure all layers are smooth and free of puckers. Baste the layers together using your preferred method—safety pins, spray basting adhesive, or hand basting stitches. This holds the layers in place during quilting.
Step 6: Quilting and Binding Your Masterpiece
With your quilt sandwich basted, you’re ready for the quilting stage! This is where you stitch through all three layers (quilt top, batting, and backing) to secure them and add texture.
- Quilting: You can choose simple straight-line quilting, stitch-in-the-ditch (quilting along the seams), or more elaborate free-motion quilting. For a beginner-friendly approach, straight lines or a grid pattern work beautifully with the geometric nature of the Pixie Stick Quilt. Use your walking foot if doing straight-line quilting to ensure all layers feed evenly through your machine. Take your time, and enjoy adding the texture that brings your quilt to life.
- Trimming and Squaring: Once quilting is complete, remove any basting pins. Trim the excess batting and backing fabric, squaring up the entire quilt to your desired final dimensions.
- Binding: The final step is to bind your quilt, which finishes the edges neatly. From your binding fabric, cut 2.5-inch wide strips. Sew these strips together end-to-end to create one long continuous strip. Press the strip in half lengthwise. Attach the raw edge of the binding to the raw edge of your quilt top, sewing with a 1/4-inch seam. Miter the corners for a professional finish. Once sewn to the front, fold the binding over to the back of the quilt and hand-stitch or machine-stitch it in place.
Tips for Quilting Success
To ensure your Pixie Stick Quilt project is a resounding success and an enjoyable experience, keep these helpful tips in mind:
- Pressing is Paramount: Never underestimate the power of a good press! Pressing seams after each step, and especially after joining units, ensures your blocks lay flat and square. This attention to detail will prevent puckers and make subsequent steps much easier.
- Accurate Seam Allowance: A consistent 1/4-inch seam allowance is the cornerstone of accurate quilting. If your seams are slightly off, it can lead to blocks that don’t fit together properly. Consider using a 1/4-inch foot for your sewing machine, or mark a guide on your machine bed.
- Use Quality Tools: Sharp rotary blades, a good quality cutting mat, and a reliable sewing machine will make a significant difference in your quilting journey. Investing in these tools will save you frustration and improve your results.
- Embrace Chain Piecing: As demonstrated in the instructions, chain piecing is a time-saving technique where you sew multiple pieces consecutively without lifting the presser foot or cutting threads in between. It speeds up the process and reduces thread waste.
- Don’t Fear Experimentation: While this tutorial provides a guide, feel free to experiment with different fabric combinations. The Pixie Stick Quilt looks fantastic with a wide variety of prints and solids. Trust your creative instincts!
- Pre-Wash Fabrics (Optional but Recommended): Some quilters prefer to pre-wash their fabrics to prevent shrinkage and color bleeding, especially if mixing different fabric types or very dark and light colors. If you pre-wash, remember to press them well before cutting.
- Enjoy the Process: Quilting is a journey, not just a destination. Allow yourself to enjoy each stitch, the tactile feel of the fabrics, and the satisfaction of watching your beautiful quilt come to life.
Watch the Video Tutorial with Jenny Doan
For a visual demonstration of these steps and to learn directly from the expert, Jenny Doan, we highly recommend watching the original tutorial by Missouri Star Quilt Company. Jenny’s clear explanations and engaging teaching style make even complex steps easy to understand. Click the link below to watch the full video and see the Pixie Stick Quilt come to life!
Watch the Easy Pixie Stick Quilt Tutorial by Missouri Star
Your Pixie Stick Quilt Awaits!
Congratulations! You’ve just explored the comprehensive guide to creating the magnificent Pixie Stick Quilt. From selecting your vibrant charm packs to the satisfying final stitches of the binding, this project offers a rewarding experience for quilters of all levels. The striking geometric design, born from simple cuts and careful piecing, will undoubtedly become a conversation starter and a cherished addition to any home.
Whether you chose bright, playful prints or sophisticated, subdued tones, your handmade Pixie Stick Quilt will be a testament to your creativity and dedication. So, gather your fabrics, fire up your sewing machine, and embark on this wonderful quilting adventure. Don’t forget to share your finished masterpieces with us – we love to see your beautiful creations! Happy quilting!