
Craft Your Own Eco-Friendly Garden Sprinkler from a Plastic Bottle: A Sustainable Watering Solution
Efficient garden watering is a cornerstone of lush, healthy landscapes, yet traditional sprinkler systems can often be costly, complex to install, and sometimes lead to unnecessary water waste. What if there was an ingenious, incredibly simple, and budget-friendly alternative right at your fingertips? For many gardening enthusiasts and those simply looking to maintain a vibrant lawn, the idea of a homemade sprinkler offers an appealing solution. My own journey into creating a more sustainable and economical watering system led me to a fascinating video tutorial by The Man With The Hat on YouTube. His clever approach to repurposing everyday items into functional garden tools immediately captivated my interest.
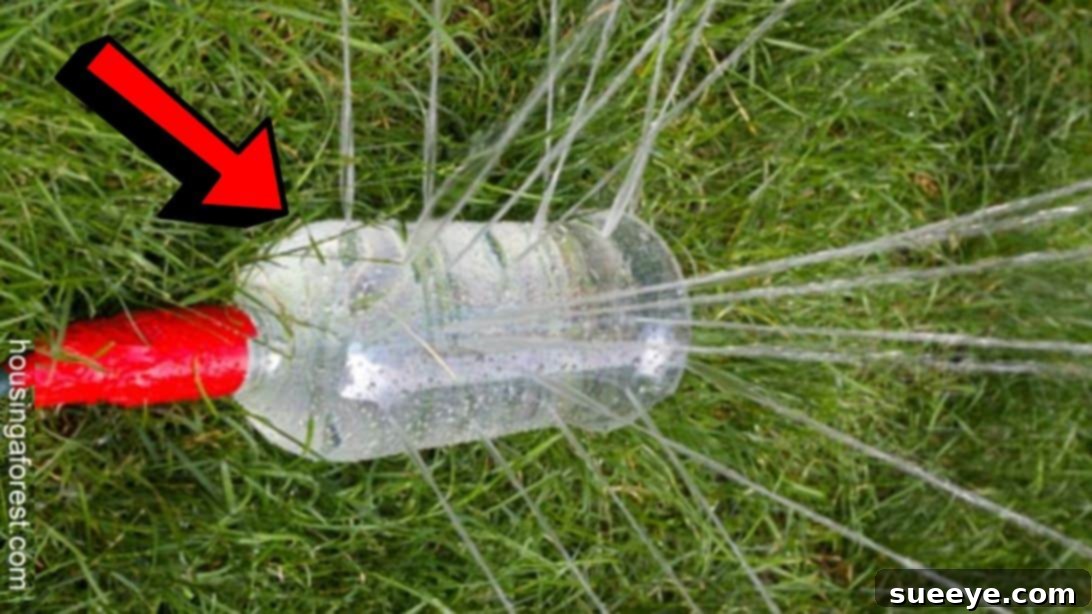
This project stood out not only for its sheer simplicity and rapid assembly but also because it brilliantly utilizes an item commonly found in every household: an empty plastic bottle. The concept of transforming something destined for the recycling bin into a valuable garden asset resonated deeply with my desire for practical, eco-conscious DIY solutions. Intrigued by the promise of an effective and virtually free watering device, I decided to put it to the test. The results were genuinely impressive. This DIY plastic bottle sprinkler performs its job remarkably well, delivering a steady and adjustable spray that effectively nourishes plants without requiring a significant investment. Having witnessed its efficiency firsthand in my garden, I am now enthusiastic about crafting several more for broader coverage across my yard. I am confident that you, too, will find this sustainable and innovative watering hack as beneficial and enjoyable to implement as I have.
Why Choose a DIY Plastic Bottle Sprinkler?
Beyond the immediate satisfaction of a successful DIY project, opting for a homemade plastic bottle sprinkler offers a multitude of benefits that extend to your wallet, your garden, and the environment. In an era where sustainability and resourcefulness are increasingly important, this simple innovation provides a powerful example of how creative thinking can lead to impactful solutions.
Cost-Effectiveness: Save Money, Grow More
Perhaps the most immediate and tangible benefit of this DIY project is its incredible cost-effectiveness. Traditional garden sprinklers, whether oscillating, pulsating, or rotating, can range from moderately priced to quite expensive, especially when considering systems designed for larger areas. Furthermore, their installation may sometimes require additional fittings or even professional assistance. In stark contrast, this plastic bottle sprinkler leverages items you likely already have or can acquire for mere pennies. By reusing empty plastic bottles, you eliminate the need to purchase new equipment, allowing you to allocate your gardening budget towards seeds, soil amendments, or other plant necessities.
Environmental Impact: Repurpose and Reduce Waste
In a world grappling with plastic waste, every effort to repurpose and recycle counts. This project offers a fantastic opportunity to give a second life to plastic bottles that might otherwise end up in landfills. By transforming them into functional garden tools, you actively participate in reducing waste and promoting a circular economy. It’s a small step that collectively contributes to a healthier planet. Moreover, when used thoughtfully, these DIY sprinklers can help in water conservation by allowing for more targeted watering, reducing runoff, and ensuring that water reaches plant roots where it’s most needed.
Customization and Versatility: Tailor to Your Garden’s Needs
One of the often-overlooked advantages of a DIY sprinkler is the unparalleled ability to customize it to your specific gardening requirements. Unlike rigid, pre-designed commercial sprinklers, you have complete control over the spray pattern and intensity. By strategically punching holes of varying sizes and arrangements, you can create a sprinkler that delivers a gentle mist for delicate seedlings, a wider spray for established garden beds, or a more concentrated stream for drought-tolerant plants. This adaptability ensures that your watering solution perfectly matches the diverse needs of your landscape, optimizing water delivery and promoting healthier plant growth.
Simplicity and Accessibility: A Project for Everyone
The beauty of this project lies in its simplicity. It doesn’t require specialized skills, complex tools, or extensive knowledge of irrigation systems. Anyone, from seasoned gardeners to absolute beginners and even children (with appropriate adult supervision for heated tools), can successfully assemble this sprinkler. The materials are readily available, and the steps are straightforward, making it an accessible and rewarding venture for individuals and families alike. It’s an excellent way to introduce practical DIY skills and environmental awareness.
Gathering Your Materials: What You’ll Need
The list of materials for this ingenious DIY sprinkler is impressively short and straightforward. Most items are likely already within your reach, highlighting the project’s accessibility and budget-friendly nature. Here’s a detailed look at what you’ll need to get started:
- 1 Plastic Bottle: The star of our show! Opt for a clean, empty plastic bottle, preferably a soda or water bottle (1.5L to 2L works well, but smaller bottles can also be used for more concentrated areas). Ensure it’s thoroughly rinsed and free of any labels or residue. The sturdier the plastic, the more durable your sprinkler will be.
- A Bradawl (or Alternative): This pointed tool is perfect for making precise holes. If you don’t have a bradawl, a small drill bit (1/16th to 1/8th inch, or 1.5mm to 3mm), a sharp nail, or even a sturdy sewing needle can serve as alternatives. The key is to create small, clean perforations.
- A Mini Blowtorch (or Heat Source): Essential for heating the bradawl (or alternative) to melt through the plastic cleanly. A mini blowtorch offers precise heat, but a candle, a lighter, or even the flame of a gas stove burner can be used with extreme caution. Safety is paramount when working with heat.
- Hose Lock Clip and Connector: This critical component ensures a secure, leak-free connection between your plastic bottle sprinkler and your garden hose. There are various types, including quick-connect systems or traditional screw-on clamps. Ensure the connector’s opening matches the diameter of your bottle’s mouth and that it’s compatible with your existing garden hose. You might need a hose clamp if your connector doesn’t have an integrated locking mechanism.
Safety Note: Always exercise caution when using heated tools and sharp objects. Ensure you are in a well-ventilated area and consider wearing protective gloves and eyewear.
Step-by-Step Guide: Crafting Your Plastic Bottle Sprinkler
Creating your plastic bottle sprinkler is a surprisingly quick and satisfying process. Follow these detailed steps to transform a simple bottle into an effective watering tool:
Step 1: Prepare Your Bottle and Tools
Begin by ensuring your plastic bottle is clean and dry. Remove any labels or adhesive residue. Gather all your materials in a safe, well-lit, and well-ventilated workspace. Lay out your bradawl, blowtorch, and the hose connector kit within easy reach. Having everything organized will make the process smoother and safer.
Step 2: Creating the Spray Holes
This is where you define your sprinkler’s spray pattern. The principle is simple: smaller holes create higher pressure and a finer, more forceful spray, while larger holes result in a gentler, wider arc. For optimal results:
- Heat the Bradawl: Carefully heat the metal tip of your bradawl (or alternative tool) using the mini blowtorch until it glows red or is sufficiently hot to melt plastic easily.
- Punching the First Row: Holding the plastic bottle securely, begin punching 3 to 4 holes in a straight line along the body of the bottle. Aim for the middle section, or slightly towards the bottom if you want more ground coverage. Ensure these holes are evenly spaced. Remember: the smaller the holes, the higher the pressure and the further the water will spray. Start small; you can always enlarge them later if needed.
- Adding Subsequent Rows (Offset Pattern): Rotate the bottle slightly, about an inch or two, and create another layer of holes. It’s often beneficial to offset these holes from the first row. This staggered pattern helps to ensure a more even and comprehensive spray coverage. You can add 2-3 rows depending on the desired coverage and the length of your bottle. Experiment with patterns – a spiral pattern, or holes clustered in specific areas, can yield different watering effects.
Pro Tip: Consider the thickness of your bottle. Thicker bottles might require more heat or pressure. Avoid punching holes too close to the bottle’s base or neck, as these areas might not provide the best spray angle once connected.
Step 3: Preparing the Bottle Mouth for Connection
A secure connection to your garden hose is crucial to prevent leaks and maintain water pressure. This step ensures a tight fit for the connector:
- Soften the Mouth: Gently heat the mouth (opening) of the plastic bottle with your mini blowtorch for a few seconds. The goal is to slightly soften the plastic, making it more pliable, not to melt it completely. Be careful not to deform the opening too much.
- Screw in the Hose Connector: Immediately after softening, take your hose lock clip and connector and screw it firmly into the mouth of the bottle. The softened plastic will conform to the threading of the connector, creating a snug, watertight seal. If your connector doesn’t have an integrated clip, now is the time to secure it with a separate hose clamp for extra reliability. Allow the plastic to cool and harden around the connector for a lasting bond.
Step 4: Connect, Position, and Water!
With the construction complete, it’s time to put your DIY sprinkler into action:
- Attach to Hose: Securely attach the assembled plastic bottle sprinkler to the end of your garden hose. Ensure the connection is tight to prevent any leaks.
- Position in Garden: Place your newly made DIY sprinkler in your garden or yard. Adjust its position and orientation so that the holes are facing the plants or areas you intend to water. You might need to prop it up with a small rock, or stake it into the ground, depending on its design and the desired spray height.
- Open the Faucet: Slowly open the garden faucet. Observe the spray pattern. If the pressure is too low, you might need to make one or two of the holes slightly larger, or ensure your hose is fully uncoiled to maximize water flow. If the spray is too narrow, consider adding more rows of holes or slightly widening existing ones.
Congratulations! You’ve successfully created an efficient, eco-friendly, and highly customizable watering device for your garden. Observe the spray and adjust its position as needed to ensure optimal coverage for all your plants.
Optimizing Your DIY Sprinkler for Best Results
While the basic construction of your plastic bottle sprinkler is straightforward, a few tips can help you get the most out of your new watering tool, ensuring maximum efficiency and plant health.
Consider Water Pressure
The performance of your DIY sprinkler is directly tied to your household’s water pressure. If you have low water pressure, you might need to make fewer and slightly larger holes to achieve a decent spray. Conversely, high water pressure allows for more numerous and smaller holes, resulting in a finer mist or more powerful jets. Experimentation is key to finding the perfect balance for your specific setup.
Strategic Placement for Coverage
Placement is crucial for effective watering. For broad coverage of a lawn or a large flower bed, position the sprinkler centrally or at an elevated point. If you’re targeting specific rows of vegetables or a localized area, place it closer to the plants. You can also experiment with propping the bottle at an angle to direct the spray more effectively. Remember, consistent and even watering is vital for plant growth, so observe the spray pattern and adjust as necessary.
Using Multiple Sprinklers
For larger gardens or lawns, a single plastic bottle sprinkler might not be sufficient. Consider creating several of them and connecting them in sequence using additional hose connectors and short lengths of hose. This allows you to cover a significantly wider area with a network of budget-friendly, customized sprinklers. Ensure your water pressure can handle multiple outlets effectively.
Maintenance and Longevity
To ensure your DIY sprinkler remains effective, occasional maintenance is recommended. Periodically check the holes for any clogs from debris or mineral buildup. A thin wire or a needle can be used to clear them. Also, inspect the hose connection for any signs of wear or leaks, and tighten the clip if necessary. When not in use, store your sprinkler in a shaded area to prevent the plastic from degrading due to prolonged sun exposure, which can prolong its lifespan.
Conclusion: Your Garden’s New Eco-Friendly Hero
The journey from an ordinary plastic bottle to a fully functional, efficient garden sprinkler is a testament to the power of creative reuse and simple engineering. This DIY project offers a compelling blend of environmental responsibility, economic savings, and practical utility. It transforms what would otherwise be waste into a valuable tool for maintaining a vibrant and healthy garden, proving that sustainable solutions don’t have to be complicated or expensive.
Inspired by the ingenious demonstration from The Man With The Hat via YouTube, this project empowers you to take control of your garden’s watering needs with minimal effort and maximum impact. You’ve not only created a personalized watering device tailored to your specific garden layout but also contributed positively to reducing plastic waste. We encourage you to try this incredibly easy and rewarding project. Experience the satisfaction of nurturing your plants with a sprinkler you crafted yourself, and perhaps even share your creations and tips with fellow gardening enthusiasts. Happy gardening!
*A special thank you to The Man With The Hat via YouTube for the inspiring tutorial and all images used here. His creativity is a wonderful resource for DIY enthusiasts, and we highly recommend visiting his channel for more brilliant ideas and subscribing to his content!