
Effortless Gas Burner Cleaning: The Ultimate White Vinegar & Stainless Steel Sponge Guide
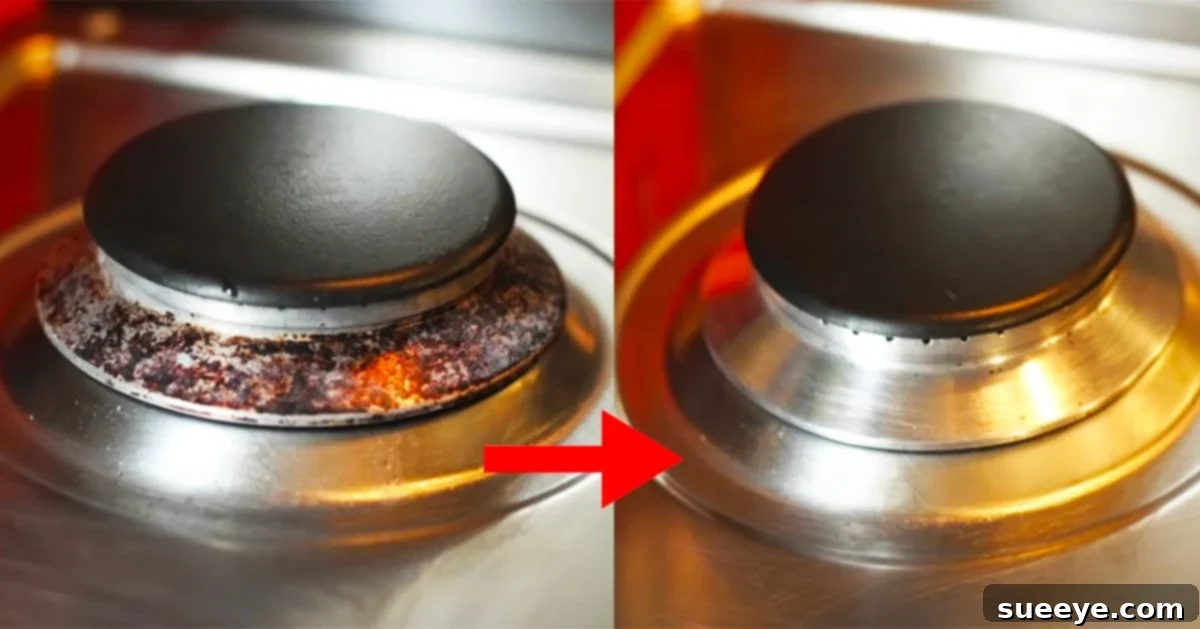
Gas stove burners are essential for every kitchen, yet they are notoriously challenging to keep spotless. Daily cooking inevitably leads to splatters, spills, and baked-on grime that can transform sparkling burners into greasy, unsightly messes. If left unchecked, this buildup doesn’t just look bad; it can also affect your stove’s efficiency and even pose hygiene concerns. While the task might seem daunting, achieving pristine gas burners doesn’t require harsh chemicals or hours of scrubbing. This comprehensive guide reveals a remarkably simple, effective, and eco-friendly method, popularized by Trop facile! on YouTube, that leverages the power of white vinegar and a stainless steel sponge to restore your burners’ shine. Get ready to transform your kitchen and simplify your cleaning routine with these tried-and-true techniques.
From personal experience, tackling a heavily soiled gas burner can feel like an endless battle. I recall the struggle of cleaning my parents’ old white gas stove, where every splash and stain seemed to cling with extra tenacity. That’s why discovering such practical and economical cleaning hacks is a game-changer. This tutorial provides straightforward, easy-to-follow steps that promise impressive results, proving that deep cleaning doesn’t have to be a chore but rather a satisfying transformation.
Why Deep Clean Your Gas Burners? More Than Just Aesthetics
Beyond the immediate visual improvement, regularly deep cleaning your gas burners offers a myriad of benefits that contribute to a healthier, more efficient, and enjoyable cooking environment. Understanding these advantages can provide the motivation needed to incorporate this simple task into your routine.
Enhanced Hygiene and Food Safety
Food particles, grease, and bacteria can accumulate on and around your burners. Over time, these residues can become breeding grounds for germs, potentially contaminating your food. A clean burner means a more hygienic cooking surface, reducing the risk of cross-contamination and promoting overall food safety in your home.
Improved Burner Efficiency
When burner ports are clogged with grime, the gas flow can be obstructed, leading to uneven flames and less efficient cooking. This means your food might cook slower, and your gas consumption could increase. Cleaning the burners ensures optimal gas distribution, allowing for a consistent, strong flame that cooks your meals effectively and efficiently.
Extended Appliance Lifespan
Built-up grease and carbon can cause corrosion or wear on burner components over time. Regular cleaning helps prevent this deterioration, preserving the integrity of your stove and potentially extending its operational lifespan. Protecting your investment ensures you get the most out out of your kitchen appliance.
A More Pleasant Cooking Experience
Cooking on a clean, sparkling stove is simply more enjoyable. A tidy kitchen environment contributes to a sense of calm and order, making meal preparation less stressful and more pleasurable. Plus, eliminating burnt food odors emanating from dirty burners creates a fresher atmosphere in your home.
The Power Duo: White Vinegar & Stainless Steel Sponge
At the heart of this highly effective cleaning method are two humble yet incredibly powerful tools: high-concentrated white vinegar and a durable stainless steel sponge. Understanding why these items are so effective will help you appreciate the chemistry and mechanics behind the cleaning process.
White Vinegar: Nature’s Acidic Cleaner
White vinegar is a natural powerhouse thanks to its acetic acid content. This mild acid works wonders by breaking down the molecular structure of grease, dissolving mineral deposits, and loosening baked-on food particles. It’s particularly effective against alkaline residues, which are common on stove surfaces. Beyond its cleaning prowess, vinegar is also a natural disinfectant, deodorizer, and a far safer, eco-friendly alternative to many harsh chemical cleaners. Its ability to penetrate and lift grime makes it an ideal soaking agent for heavily soiled burners.
Stainless Steel Sponge: The Gentle Scrubber
Often referred to as a metallic or scourer sponge, the stainless steel sponge provides the necessary abrasive action without damaging the robust material of most gas burners. Unlike plastic scrubbers that might struggle with tough, baked-on stains, the stainless steel sponge’s fine metallic strands are designed to scrape away stubborn residues effectively. Its durability ensures it won’t break down easily, even during vigorous scrubbing, making it a long-lasting and reliable cleaning companion for your kitchen.
Supplies You’ll Need
Gathering your materials before you begin will ensure a smooth and uninterrupted cleaning process. Luckily, the supplies are minimal, inexpensive, and likely already in your pantry or under your sink.
- High-concentrated white vinegar: This is the star of our cleaning show. The higher concentration ensures maximum effectiveness in breaking down grease and grime. Look for cleaning vinegar if available, or standard white vinegar works well too.
- Stainless steel sponge: Crucial for scrubbing off loosened debris. Ensure it’s a dedicated kitchen-cleaning sponge to avoid cross-contamination.
- Dish soap: Any standard liquid dish soap will do. It acts as a degreaser and helps emulsify the lifted grime.
- Universal stone cleaner (optional): For an extra polish and stubborn marks, a universal stone cleaner can provide a final touch, leaving a protective, sparkling finish.
- A large bowl or container: To safely soak your burners.
- Access to a sink with hot water: For rinsing and scrubbing.
- Gloves (recommended): To protect your hands from the vinegar and scrubbing.
Step-by-Step Guide: Deep Cleaning Your Gas Burners
Follow these detailed steps to transform your greasy gas burners into sparkling clean components, ensuring both efficiency and hygiene in your kitchen.
Step 1: Preparation and Safety First
Before you begin any cleaning, safety is paramount. Ensure your gas stove is completely turned off and cooled down. Never attempt to remove or clean burners while they are hot or the gas supply is active. Disconnect the stove from the gas supply if you feel uncomfortable or if your stove model allows for easy disconnection.
Step 2: Remove the Burners
Carefully lift each burner grate, cap, and head from the stove top. These are usually designed to be easily removable for cleaning. If you’re unsure how to remove them, consult your stove’s user manual. It’s often helpful to take a quick photo of their arrangement beforehand, especially if they vary in size or shape, to ensure correct reassembly later.
Step 3: The Overnight Vinegar Soak
This is the most crucial step that does the heavy lifting for you. Place the removed burner components into a large, sturdy bowl or container. Pour hot white vinegar over them, ensuring the burners are fully submerged. The heat helps activate the vinegar’s acetic acid, making it even more potent against baked-on residues. Let the burners soak overnight, or for at least 8-10 hours. Due to the strong scent of vinegar, especially when heated, it’s highly recommended to place the bowl outdoors in a well-ventilated area, such as a balcony, patio, or garage, to avoid overwhelming your indoor space with the smell.

Step 4: The Intensive Scrub Down
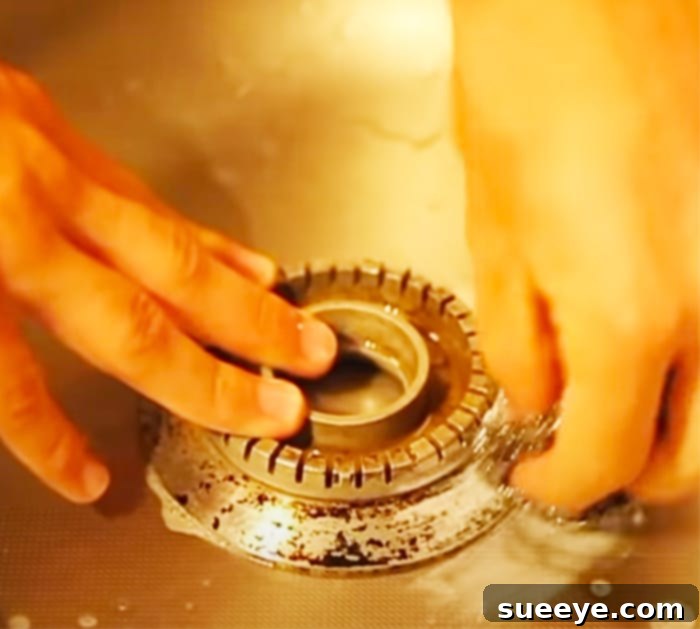
After the overnight soak, carefully drain the vinegar from the bowl. You’ll notice that much of the stubborn grime has softened and may even be peeling away. Place the soaked burner components at the bottom of your sink. Apply a generous amount of dish soap directly onto your stainless steel sponge. Now, begin scrubbing vigorously. Focus on areas with persistent black, greasy marks and baked-on food. The combination of the pre-softened grime from the vinegar soak and the abrasive power of the metallic sponge, aided by the degreasing action of dish soap, will work wonders. This process may require some elbow grease and patience, but you’ll witness satisfying progress as the dirt lifts away. Rinse the burner components periodically to check your progress and remove loosened debris, then continue scrubbing until clean.
Step 5: Thorough Rinsing and Inspection
Once you are satisfied with the scrubbing, rinse each burner component thoroughly under running water. Ensure all soap residue and loosened grime are completely washed away. Inspect each piece carefully for any missed spots. If you find particularly stubborn areas, you can repeat the scrubbing process or move to the optional step.
Step 6: Optional Boost: The Universal Stone Cleaner
For those looking for an extra level of polish or dealing with exceptionally tough stains, a universal stone cleaner can be a fantastic addition. As demonstrated by the original tutorial, these cleaners often contain fine abrasive particles and polishing agents that can tackle remaining marks and leave a protective, shiny layer. Apply a small amount to your damp stainless steel sponge or a separate soft cloth, scrub the burners gently, and then rinse thoroughly. This step can make your burners look professionally cleaned.
Step 7: Drying and Reassembly
Before reassembling your gas burners, it is absolutely critical to ensure they are completely dry. Moisture can interfere with ignition or cause rust. You can air dry them on a clean towel for several hours, or gently wipe them down with a dry cloth. For quicker drying, some people place them in a low-temperature oven for a short period (ensure the oven is off and cool before placing them, and keep the temperature very low, around 150-200°F, for just 10-15 minutes, monitoring closely). Once fully dry, carefully place each burner cap and head back onto the stove in their correct positions. If you took a photo in Step 2, now is the time to refer to it.
Maintaining Sparkle: Preventative Measures & Quick Tips
While deep cleaning is highly effective, consistent maintenance can significantly reduce the frequency and intensity of future cleaning sessions. Adopting a few simple habits will keep your gas burners looking great day-to-day.
- Wipe Spills Immediately: The easiest way to prevent baked-on grime is to address spills as soon as they happen, while the stove is cool. A quick wipe with a damp cloth can save you a lot of scrubbing later.
- Routine Light Cleaning: Incorporate a quick wipe-down of your burner grates and caps into your regular kitchen cleaning routine, perhaps once a week. This prevents minor splatters from becoming major challenges.
- Use Pan Lids: Covering your pots and pans while cooking significantly reduces splattering and keeps your stovetop cleaner.
- Consider Burner Covers: When the stove is not in use, decorative burner covers can protect them from dust and accidental spills.
Eco-Friendly and Budget-Friendly Cleaning at Its Best
One of the most appealing aspects of this cleaning method is its commitment to both your wallet and the environment. By utilizing readily available and inexpensive ingredients like white vinegar and dish soap, you eliminate the need for costly, chemical-laden cleaning products. This not only saves you money but also reduces your exposure to harsh fumes and minimizes your ecological footprint. It’s a testament to the power of simple solutions for common household problems.
Common Mistakes to Avoid When Cleaning Gas Burners
To ensure a safe and effective cleaning process, be aware of these common pitfalls:
- Using Abrasive Chemicals on Stainless Steel Parts: While vinegar is safe, strong bleaches or highly corrosive cleaners can discolor or damage stainless steel burner components.
- Not Soaking Long Enough: Rushing the soaking process will mean more manual scrubbing later. Allow adequate time for the vinegar to work its magic.
- Reassembling Wet Burners: As mentioned, this is a fire hazard and can lead to rust or ignition issues. Always ensure components are bone-dry.
- Ignoring Burner Ports: Make sure the small holes (ports) where the gas comes out are not clogged. If they are, a toothpick or a thin wire brush can carefully clear them, ensuring an even flame.
- Over-Scrubbing Delicate Parts: While the stainless steel sponge is great for the main burner parts, be cautious if your stove has very delicate or coated components. Always test a small, inconspicuous area first.
Conclusion: Enjoy Your Spotless Stove
Cleaning gas burners doesn’t have to be a dreaded chore. With the simple yet incredibly effective method of soaking in white vinegar followed by a good scrub with a stainless steel sponge, you can effortlessly banish baked-on food and grease. This approach is not only highly effective, as demonstrated by the Trop facile! tutorial, but also kind to your budget and the environment. Embrace these easy cleaning tips, and you’ll enjoy a cleaner, more efficient, and more aesthetically pleasing kitchen. Say goodbye to stubborn grime and hello to sparkling gas burners!