
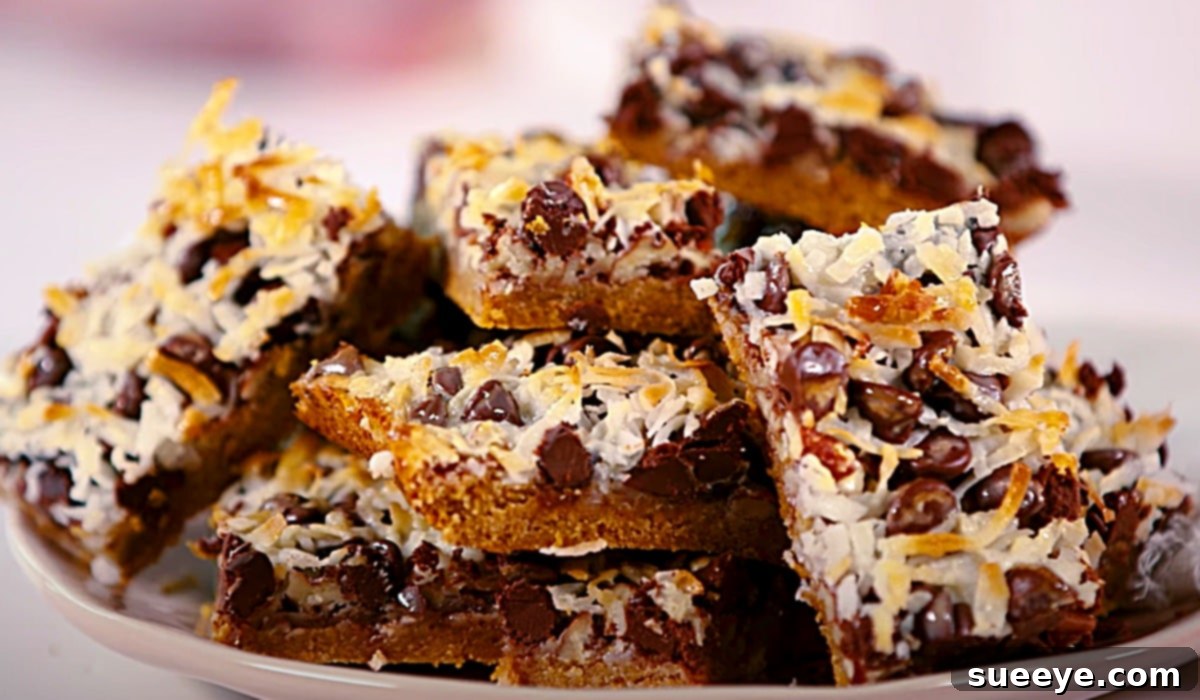
Easy Southern Hello Dolly Bars: The Ultimate Magic Bar Recipe
Step into the delightful world of Southern confectionery with a timeless classic: Hello Dolly Bars. Also affectionately known as Magic Bars, these incredibly simple yet utterly delicious treats hold a special place in the hearts (and stomachs!) of dessert lovers across the United States, particularly in the Deep South. Imagine a buttery graham cracker crust topped with layers of toasted pecans, shredded coconut, rich chocolate chips, all bound together by a luscious blanket of sweetened condensed milk. The result? A magical symphony of textures and flavors in every bite – chewy, crunchy, gooey, and impossibly satisfying.
For many, including myself, these bars evoke warm childhood memories. Growing up, they were a staple at potlucks, family gatherings, and holiday celebrations, always disappearing from the dessert table in record time. While some call them “Magic Bars” because of how effortlessly they come together and transform into pure deliciousness, the “Hello Dolly” moniker is widely used in the South. This name is often attributed to the famous Broadway musical and movie starring Ethel Merman and later Carol Channing, a nod to a golden era of entertainment that coincided with the bar’s rise to popularity. Regardless of what you call them, their charm is undeniable, much like Louis Armstrong’s iconic rendition of the “Hello Dolly” title track.
What makes this recipe truly extraordinary is its simplicity. Requiring just 7 readily available ingredients and a mere 20 minutes of baking time, it’s the perfect dessert for novice bakers and seasoned pros alike. You don’t need fancy equipment or intricate techniques to achieve bakery-quality results. Just a few steps stand between you and a pan of these irresistible bars. We recently discovered an excellent video tutorial by Southern Living on YouTube, which inspired us to share this revamped, SEO-friendly guide to mastering the Hello Dolly Bar. Prepare to fall in love with your new favorite easy dessert!
Gather Your Magical Ingredients
The beauty of Hello Dolly Bars lies in their minimal, yet perfectly balanced ingredient list. Each component plays a vital role in creating that signature flavor and texture profile. Here’s what you’ll need to whip up a batch of these delectable treats:
- 2 cups of crushed graham crackers: Forms the sweet, buttery foundation of our bars.
- 1/2 cup of melted butter: Binds the graham cracker crumbs and adds richness to the crust.
- 4 tablespoons of sugar: Enhances the sweetness of the crust, complementing the graham crackers.
- A parchment-lined baking dish: Essential for easy removal and cleanup. A 9×13-inch pan is typically recommended.
- 1 cup of pecans: Adds a delightful crunch and nutty flavor, a Southern staple.
- 1 cup of shredded coconut: Provides a chewy texture and tropical sweetness that pairs perfectly with chocolate.
- 1 cup of chocolate chips: The classic choice for melty pockets of chocolate goodness. Semi-sweet is common, but feel free to experiment.
- 1 can (14 ounces) of Eagle Brand Sweetened Condensed Milk: The “magic” ingredient that binds all the layers together into a wonderfully gooey, caramelized texture.
Step-by-Step Guide to Baking Perfection
Creating these Southern Hello Dolly Bars is an incredibly straightforward process. Follow these easy steps, and you’ll have a pan of warm, fragrant bars ready to impress in no time.
1. Prepare the Crust
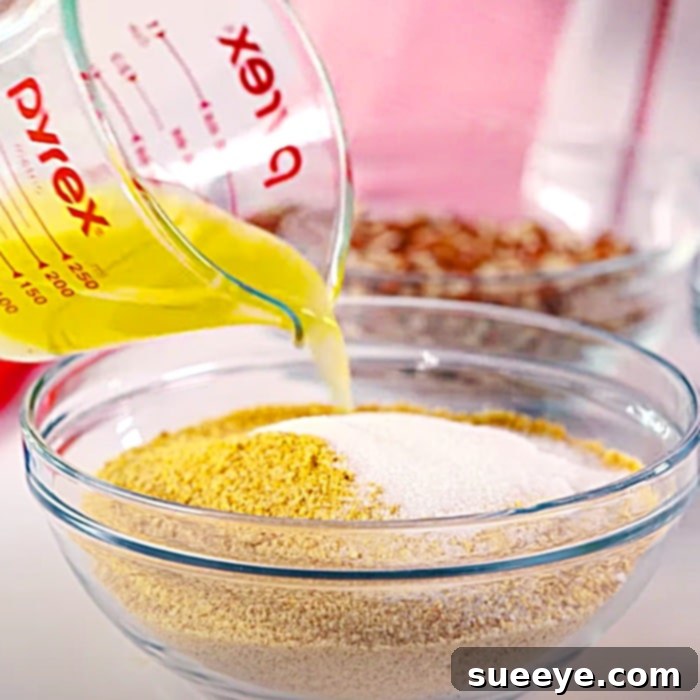
Begin by making the foundation for your bars. In a medium-sized bowl, combine the crushed graham cracker crumbs, granulated sugar, and melted butter. Mix thoroughly until the crumbs are evenly moistened and resemble wet sand. Press this mixture firmly and evenly into the bottom of your parchment-lined 9×13-inch baking dish. A glass or the bottom of a measuring cup can help you achieve a compact, smooth crust. This firm pressing is crucial for a stable base.
2. Pre-Bake the Crust (Optional but Recommended)
While some recipes skip this step, a quick pre-bake can make a difference. Place the prepared crust in an oven preheated to 350°F (175°C) for about 5-7 minutes. This light toasting helps to set the crust, making it less crumbly and adding a deeper, nuttier flavor. Keep a close eye on it to prevent burning.
3. Layer the Goodness
Once the crust is lightly toasted, remove the pan from the oven. Now comes the fun part: layering! Evenly sprinkle the pecans over the crust. Follow with a layer of shredded coconut, ensuring it’s distributed across the entire surface. Finally, scatter the chocolate chips generously over the coconut. The order of these toppings isn’t strictly rigid, but this sequence often helps them adhere nicely once the condensed milk is added.
4. Drizzle with Sweetened Condensed Milk
Carefully and evenly pour the entire can of sweetened condensed milk over all the layered ingredients. Try to cover as much of the surface as possible. This milk will seep down, caramelizing and binding everything together as it bakes, creating the signature gooey texture of Hello Dolly Bars.
5. Bake to Golden Perfection
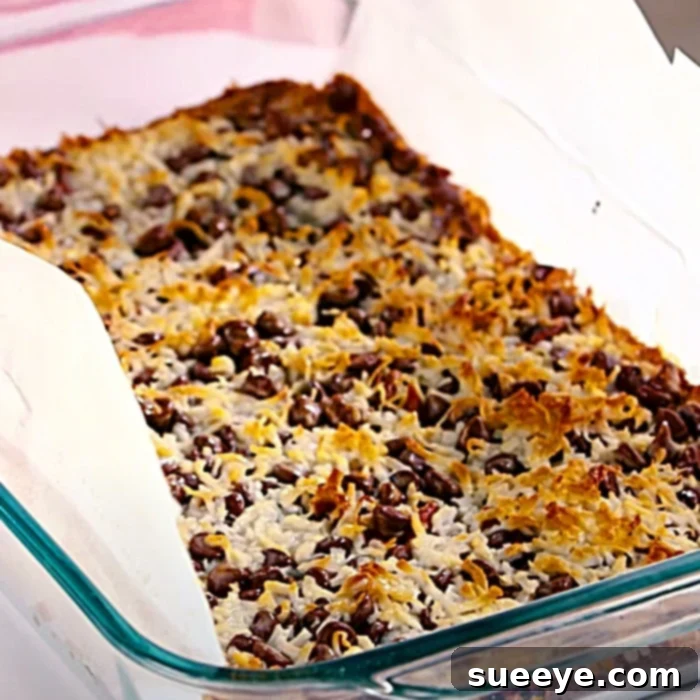
Return the baking dish to the preheated 350°F (175°C) oven and bake for approximately 20-25 minutes. The bars are ready when the edges are lightly golden brown, and the sweetened condensed milk is bubbling and set in the center. The coconut on top should also be nicely toasted. Avoid overbaking, as this can make the bars dry or too hard.
6. Cool Completely and Serve
Once baked, remove the pan from the oven and place it on a wire rack to cool completely at room temperature. This step is absolutely crucial! The bars will seem very gooey and loose when hot, but they will firm up significantly as they cool. For the cleanest cuts, you can even chill them in the refrigerator for an hour or two once they’ve reached room temperature. Once cooled and set, lift the bars out of the pan using the parchment paper, slice them into squares or rectangles, and get ready to enjoy these absolutely delicious dessert bars!
Tips for Crafting the Perfect Hello Dolly Bars
While the recipe is incredibly forgiving, a few pointers can elevate your Hello Dolly Bars from great to absolutely phenomenal:
- Don’t Skip the Parchment Paper: Seriously, this is your best friend for easy removal and cleanup. Leave an overhang on the sides to create “handles” for lifting.
- Pack the Crust Firmly: A well-packed crust ensures your bars hold together beautifully when sliced.
- Even Layers are Key: Distribute your toppings as evenly as possible so every bite gets a taste of everything.
- Avoid Overbaking: Keep an eye on the clock and the visual cues. Overbaked bars can become dry and crumbly instead of delightfully gooey. The edges should be golden, and the center just set.
- Cool Completely: Patience is a virtue here! Cutting hot bars will result in a messy, sticky situation. Let them cool fully, or even chill them for cleaner, sharper cuts.
- Quality Ingredients: While simple, the quality of your ingredients shines through. Good quality chocolate, fresh pecans, and a reliable brand of sweetened condensed milk make a difference.
Creative Variations and Customizations
The classic Hello Dolly Bar is perfect as is, but its versatility makes it an excellent candidate for creative twists. Don’t be afraid to experiment!
- Nutty Alternatives: Swap pecans for walnuts, almonds, macadamia nuts, or a combination for a different flavor profile. For a nut-free version, simply omit them.
- Chocolate Choices: Experiment with different types of chocolate chips – milk chocolate for extra sweetness, dark chocolate for a richer flavor, or even white chocolate chips for a creamier touch. Butterscotch or peanut butter chips are also fantastic additions.
- Crust Innovations: Instead of graham crackers, try crushed vanilla wafers, shortbread cookies, ginger snaps, or even pretzels for a salty-sweet crunch.
- Add Dried Fruits: Stir in a handful of dried cranberries, cherries, or raisins with your toppings for an extra burst of flavor and chewiness.
- Spiced Up: Add a pinch of cinnamon or nutmeg to your graham cracker crust for a warmer, cozier flavor.
- Caramel Drizzle: For an extra indulgent treat, lightly drizzle some store-bought or homemade caramel sauce over the bars immediately after they come out of the oven.
Storage and Serving Suggestions
Hello Dolly Bars are fantastic for meal prep or making ahead for events due to their excellent shelf life and portability.
- Storage: Store the cooled bars in an airtight container at room temperature for up to 3-4 days. For longer storage, keep them in the refrigerator for up to a week.
- Freezing: These bars freeze beautifully! Once completely cooled and cut, arrange them in a single layer on a baking sheet and freeze until solid. Then transfer them to an airtight freezer-safe container or bag, separating layers with parchment paper. They can be frozen for up to 3 months. Thaw at room temperature before serving.
- Serving: Hello Dolly Bars are best served at room temperature, allowing their gooey texture to shine. They’re perfect on their own, but a scoop of vanilla ice cream or a dollop of whipped cream can take them to the next level.
- Occasions: These bars are incredibly versatile. They’re ideal for potlucks, bake sales, holiday parties, lunchboxes, or simply as an easy weeknight treat with a cup of coffee or tea.
Frequently Asked Questions About Hello Dolly Bars
Got more questions? Here are answers to some common inquiries about these magical bars:
Q: Why are they called Magic Bars?
A: The “Magic Bar” name is often attributed to their seemingly effortless creation – you simply layer ingredients, and like magic, they transform into a delicious dessert. Another theory suggests the “magic” comes from the sweetened condensed milk binding all the disparate ingredients together.
Q: Can I use a different size pan?
A: Yes, but you might need to adjust baking times. A smaller pan (e.g., 8×8 inch) will result in thicker bars, which may require a longer baking time (an additional 5-10 minutes). Keep an eye on the edges and the set of the center. For a larger pan, you might need to slightly increase the ingredient quantities to maintain thickness.
Q: My bars are too crumbly. What went wrong?
A: This could be due to a few reasons: not enough melted butter in the crust, not pressing the crust firmly enough, or not cooling the bars completely before slicing. Ensure your crust is well-compacted and always allow ample cooling time.
Q: My bars are too sticky. How can I fix this?
A: If your bars are excessively sticky, they might have been underbaked. They should be golden around the edges and set in the middle. Also, ensure they are completely cooled. Chilling them in the refrigerator for an hour or two can help them firm up and reduce stickiness when cutting.
Q: Can I make Hello Dolly Bars gluten-free?
A: Absolutely! Simply substitute regular graham crackers with a gluten-free graham cracker alternative. Ensure all other ingredients you use are certified gluten-free.
Q: Is it okay to use sweetened condensed milk that is not Eagle Brand?
A: Yes, any brand of sweetened condensed milk will work! Eagle Brand is simply a popular and widely recognized brand often associated with this recipe due to its long history in American baking.
Conclusion: Your New Favorite Easy Dessert
The Southern Hello Dolly Bar is more than just a dessert; it’s a testament to the power of simple ingredients creating something truly extraordinary. Its effortless preparation, minimal baking time, and universally loved flavor profile make it a go-to recipe for any occasion. Whether you’re a seasoned baker or just starting your culinary journey, these “magic” bars promise a delightful experience from the first crumbly crust to the last gooey bite.
So, gather your ingredients, follow these straightforward steps, and prepare to create a batch of Hello Dolly Bars that will undoubtedly become a cherished favorite in your home. They are not just easy; they are absolutely delicious, and we promise you won’t be able to wait to make them again!