
Welcome, aspiring quilters and seasoned crafters alike, to a truly captivating project that promises both beauty and simplicity: the **Magic Carpet Quilt**. Crafted with ingenious ease by the quilting experts at Missouri Star, this stunning quilt design, featured on their popular YouTube channel, is a testament to how elegant results can be achieved with minimal effort. What makes this particular quilt project so remarkable is its reliance on just 10-inch fabric squares, making it an incredibly accessible and efficient endeavor, especially for those new to the world of quilting or looking for a quick, satisfying make.
The Magic Carpet Quilt boasts a pattern that is not only visually striking but also delightfully straightforward to construct. Its innovative design minimizes waste, leaving you with little to no fabric scraps – a dream come true for any thrifty crafter! Whether you’re a complete novice picking up a needle for the first time or an experienced quilter seeking a fresh, enjoyable challenge, you’ll find that this project guides you smoothly from start to finish. We’re confident that you can achieve a perfectly finished quilt on your very first attempt, thanks to the clear instructions and the forgiving nature of the design. Join us as we delve into the details of this enchanting quilt, exploring the materials, tools, and step-by-step process that will transform simple squares into a magnificent Magic Carpet Quilt.
RELATED: How to Make Triangles in a Square Quilt
The Magic Carpet Quilt Unveiled: Your Ultimate Guide to Easy Quilting
The allure of a handmade quilt lies in its warmth, its story, and the love sewn into every stitch. The Magic Carpet Quilt embodies all these qualities while adding an element of creative freedom and surprising simplicity. It quickly became one of our favorite recent quilt projects, primarily because it empowers you to unleash your imagination through an endless array of fabric combinations. Imagine a vibrant tapestry of colors and patterns, all coming together seamlessly to form a cohesive and breathtaking design. This quilt truly shines in its adaptability, allowing you to personalize it to match any decor or express any mood. But beyond its aesthetic appeal, its clever construction ensures that you maximize your fabric usage, turning pre-cut 10-inch squares into a masterpiece without the headache of excessive leftover fabric. Let’s embark on this quilting journey and discover the magic behind this delightful project.
Why the Magic Carpet Quilt is Perfect for Every Quilter
This project isn’t just another quilt; it’s a gateway to successful and enjoyable quilting, regardless of your skill level. Here’s why the Magic Carpet Quilt stands out as an exceptional choice:
Beginner-Friendly Design
If you’ve ever felt intimidated by complex patterns or intricate techniques, the Magic Carpet Quilt is your antidote. Its foundational element, the half-square triangle (HST), is one of the most versatile and easiest units in quilting. The Missouri Star method simplifies this even further, making the process intuitive and incredibly rewarding for beginners. You’ll learn essential quilting skills like accurate cutting, precise stitching, and effective pressing without feeling overwhelmed. This quilt is designed to build your confidence and set you up for future quilting adventures.
Maximizing Fabric with 10-Inch Squares
One of the most appealing aspects of this quilt is its intelligent use of 10-inch fabric squares. These pre-cut bundles, often known as “layer cakes,” are a quilter’s best friend. They offer a diverse collection of coordinating fabrics from a specific line, eliminating the need for extensive fabric shopping and painstaking color matching. By starting with uniform 10-inch squares, you drastically reduce your cutting time, allowing you to jump straight into the fun part: sewing! Moreover, the design is incredibly efficient, minimizing waste and ensuring you get the most out of every precious piece of fabric.
Versatility and Customization
The Magic Carpet Quilt truly comes alive with your unique fabric choices. Whether you prefer bold, contrasting colors that pop, or a subtle, harmonious blend of analogous shades, this pattern will beautifully showcase your selected fabrics. Imagine a quilt made from festive holiday prints, soft baby pastels, or rich autumnal tones. The possibilities are endless. The interplay between the “print” squares and “background” squares creates a dynamic visual effect, allowing you to dictate the overall mood and style of your finished quilt. This inherent versatility makes it a fantastic project for creating personalized gifts or designing a statement piece for your own home.
Materials for Your Magic Carpet Quilt: Essential Toolkit
Before you begin, gathering all your materials and tools will ensure a smooth and enjoyable quilting experience. The beauty of this project lies in its simplicity, requiring a relatively minimal yet effective set of supplies.
- 1 package of 10″ squares, print: These will be the focal point of your quilt, bringing color and pattern. Consider a pre-cut “layer cake” for a coordinated look and to save cutting time.
- 1 package of 10″ squares, for the background: This fabric will provide contrast and allow your print squares to truly shine. A solid, tone-on-tone, or subtly textured fabric often works best here.
- ¼ yard of fabric, for the border: This will be your inner border, framing the central quilt design and providing a transition to the outer border.
- 1⅝ yards of fabric, for the outer border: The wider outer border gives your quilt a finished, substantial look and offers another opportunity to incorporate a complementary fabric.
- 5¼ yards or 2½ yards of 108″ fabric, for backing: The amount needed depends on the width of your chosen backing fabric. A standard 44-inch wide fabric will require more yardage and potentially piecing, while a 108-inch wide backing fabric (often called “wide back”) offers a seamless solution.
- Marking pen, pencil, or chalk: Essential for drawing precise lines on your fabric, which is crucial for accurate half-square triangles.
- Ruler: A clear acrylic quilting ruler is invaluable for precise measuring and cutting. A 6.5-inch or 12.5-inch square ruler, along with a longer rectangular ruler, will be highly beneficial.
- Scissors or rotary cutter and a cutting mat: While scissors can work, a rotary cutter paired with a self-healing cutting mat will dramatically increase your cutting speed and accuracy, providing crisp, clean edges.
- Needle and thread: High-quality all-purpose polyester thread in a neutral color (like white, cream, or grey) is generally recommended.
- Iron, for pressing: Pressing seams flat and in the correct direction is paramount for a professional-looking quilt. A good iron is an indispensable tool.
- Sewing machine: A reliable sewing machine with a ¼-inch presser foot attachment will make stitching accurate and consistent seams much easier.
How to Make a Magic Carpet Quilt: Step-by-Step Tutorial
Creating your Magic Carpet Quilt is an incredibly rewarding process that unfolds in a few simple yet crucial steps. Follow these instructions carefully, and you’ll be amazed at how quickly your quilt comes to life.
Step 1: Preparing Your Fabric and Crafting Half-Square Triangles (HSTs)
Begin by ensuring all your fabrics are prepared. While the initial instruction mentions cutting fabrics to size as instructed in the video, a key advantage of this project is using pre-cut 10-inch squares, which minimizes this step. If you’re cutting from yardage, ensure all your print and background squares are accurately cut to 10×10 inches. Precision in cutting is the foundation of a successful quilt.
Once your squares are ready, take one print square and one background square. Place them right sides together, ensuring all edges are perfectly aligned. Using your marking pen, pencil, or chalk, draw a diagonal line from one corner to the opposite corner on the back (wrong side) of the top fabric. This line will serve as your cutting guide later.
Step 2: Stitching and Pressing Your Half-Square Triangles
With your marked squares still layered, take them to your sewing machine. Stitch a seam ¼ inch away from the drawn line on both sides. This means you will have two parallel stitch lines, one on each side of your drawn diagonal. A ¼-inch seam allowance is standard in quilting and is critical for accurate block construction.
After stitching, carefully cut the unit apart along the original drawn diagonal line. You will now have two raw half-square triangle units. Gently open each unit and press the seams. For best results and to prevent “shadowing” through lighter fabrics, always press your seams towards the darker fabric. This technique creates crisp, flat blocks that will lie smoothly when assembled. These two HSTs are the building blocks of your Magic Carpet pattern.
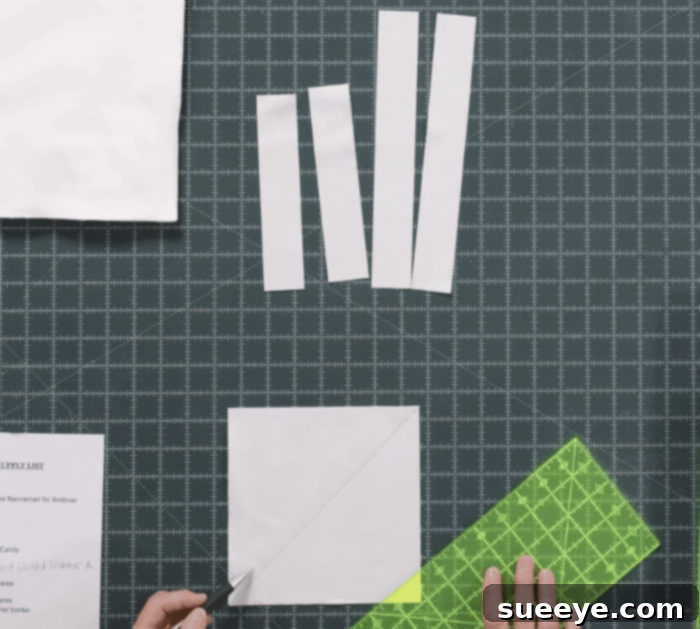
Now, take one of your freshly pressed half-square triangles. On the background fabric side of this HST, you will attach print border strips. The video tutorial provides specific measurements for these strips. Typically, these strips are cut from your border fabric yardage. Stitch one print border strip to the side of the background section and another to the bottom of the background section. Once stitched, carefully trim off any excess fabric, ensuring your block remains square and true to size. This step begins to build the “frame” around your HST, giving it the distinctive magic carpet look.
Step 3: Completing Your Quilt Blocks and Assembly
Next, flip your HST unit so that you are now working on the print fabric side. You will add background strips to the top and side of this print section of the half-square triangle. Again, follow the video’s cutting instructions for these background strips. Stitch these strips in place, mirroring the placement of the print strips in the previous step. After stitching, trim off any excess fabric and press the entire block nicely. The goal is to have a perfectly square, flat block that incorporates both your print and background fabrics with their respective added strips, creating a unique framed appearance.
Continue repeating Steps 1-3 until you have created all the necessary blocks for your quilt. The number of blocks will depend on your desired quilt size. Once all your blocks are complete, it’s time for the exciting part: arranging them! Lay out all your finished blocks on the floor or a design wall. Experiment with different orientations and positions to create a pattern you love. The Magic Carpet design offers various possibilities based on how you rotate each block, leading to unique visual effects.
When you are happy with your layout, carefully stitch the blocks together into rows, ensuring your ¼-inch seam allowance is consistent. Then, sew these rows together to form the main quilt top. Once the center is assembled, attach your inner border fabric, followed by your outer border fabric. Press all seams thoroughly as you go to maintain flatness and accuracy.
Finishing Your Magic Carpet Quilt: Quilting and Binding
With your quilt top complete, the final stages involve quilting and binding. You can choose to quilt your Magic Carpet in various ways:
- Hand Quilting: For a traditional, soft look and feel, hand quilting adds a beautiful texture and a personal touch.
- Machine Quilting (Domestic Machine): Use your home sewing machine to stitch straight lines, stippling, or simple free-motion designs.
- Longarm Quilting: For a professional finish and intricate designs, consider sending your quilt top to a professional longarmer.
After quilting, the final step is to bind your quilt. This involves attaching fabric strips around the raw edges of the quilt, encasing the batting and backing, and providing a clean, durable finish. There are many methods for binding, including machine binding or hand binding, allowing you to choose the technique that best suits your preference.
*All these amazing images are thanks to Missouri Star via YouTube. Do visit their channel to see more inspiring videos and tutorials like this!*
Tips for a Flawless Magic Carpet Quilt
- Accuracy is Paramount: A precise ¼-inch seam allowance is crucial for all quilt projects. Consider investing in a ¼-inch foot for your sewing machine.
- Pressing Power: Don’t underestimate the power of a good press. Pressing after each step ensures flat seams and perfectly square blocks, which leads to better alignment when assembling the quilt top.
- Chain Piecing: For efficiency, especially with repetitive units like HSTs, use chain piecing. This involves feeding multiple units through your sewing machine one after another without lifting the presser foot or cutting the thread in between.
- Test Block: If you’re new to the pattern, try making just one block first. This allows you to practice the steps and check your measurements before committing to all your fabric.
- Enjoy the Process: Quilting is a journey, not just a destination. Take your time, enjoy the creative process, and don’t be afraid to make it your own!
Conclusion: Your Beautiful Magic Carpet Awaits
The Magic Carpet Quilt project is truly a gem for its elegance, simplicity, and fabric efficiency. Through the clear guidance of Missouri Star, transforming 10-inch fabric squares into a stunning quilt becomes an accessible and thoroughly enjoyable experience for quilters of all levels. From selecting your perfect fabric combination to the final stitch of the binding, each step is designed to build your skills and ignite your passion for quilting.
We encourage you to gather your materials, watch the inspiring video tutorial by Missouri Star, and embark on this wonderful creative journey. The satisfaction of cuddling under a quilt you’ve made with your own hands is immeasurable. Your very own Magic Carpet Quilt is waiting to be brought to life, promising warmth, beauty, and a tangible expression of your creativity. Happy quilting!