
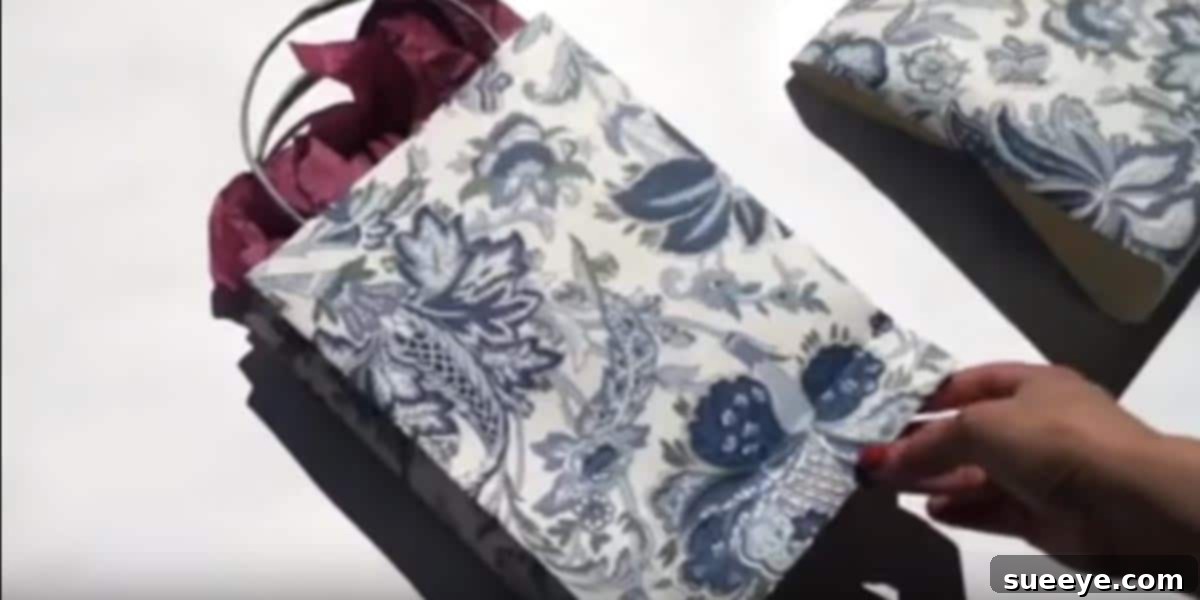
Master the Art of DIY Gift Bags: Your Ultimate Guide to Creative & Budget-Friendly Wrapping
Are you tired of spending a fortune on generic gift bags that don’t quite fit your vision or your oddly shaped gifts? Do you often find yourself scrambling for last-minute wrapping supplies, wishing you had a more personal and sustainable option? You’re not alone! Many of us have faced the dilemma of expensive, mass-produced gift packaging that often feels wasteful and lacks that special touch. What if we told you there’s a simple, cost-effective, and incredibly creative solution right at your fingertips?
Get ready to transform the way you present your gifts! This comprehensive guide will unveil the secrets to crafting stunning DIY gift bags from the comfort of your home. Whether it’s for the holidays, a birthday, or just because, learning how to make your own gift bags will not only save you money but also allow you to infuse every present with unparalleled thoughtfulness and charm. Say goodbye to the endless search for the perfect bag and hello to a world of endless customization and heartfelt giving!
Why DIY Gift Bags Are a Game-Changer for Every Giver
The appeal of handmade gift bags extends far beyond mere aesthetics. They offer a multitude of practical and personal benefits that elevate the entire gifting experience. Let’s delve into why embracing the DIY approach is one of the smartest decisions you can make for your gift-giving needs.
1. Unleash Your Creativity with Unmatched Customization
One of the most exciting aspects of making your own gift bags is the freedom to customize every detail. Store-bought bags come in limited designs, but with DIY, your imagination is the only limit. Have a beautiful roll of wrapping paper that perfectly matches the recipient’s personality or the party’s theme? Use it! Want to create a bag that reflects the occasion, from a whimsical birthday celebration to an elegant wedding shower? You absolutely can. You can choose any pattern, color, or texture you desire, ensuring your gift bag is as unique and special as the present it holds. This level of personalization shows an extra layer of care and effort, making your gift truly unforgettable.
2. Significant Cost Savings: A Budget-Friendly Alternative
Let’s be honest, the cost of gift bags can quickly add up, especially during peak gifting seasons like the holidays. A single decorative bag can cost several dollars, and when you have multiple gifts to wrap, your budget can take a hit. By utilizing wrapping paper you already own, or even inexpensive kraft paper that you can decorate yourself, you dramatically cut down on expenses. You’ll find that a roll of wrapping paper, often purchased for flat gifts, can now serve a dual purpose, offering incredible value. This money saved can then be put towards the gift itself or even saved for future crafting projects!
3. The Perfect Solution for Oddly Shaped Gifts
We’ve all been there: staring at a uniquely shaped item, wondering how on earth to wrap it gracefully. Bottles, toys with protruding parts, awkwardly sized trinkets – they can all be a nightmare to encase in traditional wrapping paper or fit into standard gift boxes. This is where DIY gift bags truly shine. Because you’re constructing the bag from scratch, you have complete control over its dimensions. You can tailor the size and shape to perfectly accommodate even the most challenging items, ensuring a neat and attractive presentation every time. No more lumpy, ill-fitting wrappers!
4. Embrace Sustainability: An Eco-Friendly Choice
In today’s world, being mindful of our environmental impact is more important than ever. Many store-bought gift bags are made from materials that are difficult to recycle, and their single-use nature contributes to waste. By making your own gift bags, especially from wrapping paper or kraft paper, you’re embracing a more sustainable approach. You can even encourage recipients to reuse these handmade bags, extending their lifecycle. It’s a small step, but a significant one, towards reducing consumption and promoting conscious gifting.
5. Be Prepared for Any Last-Minute Gifting Emergency
How many times have you found yourself rushing out the door to a party, only to realize you forgot to buy a gift bag? Or perhaps a spontaneous gift-giving opportunity arises, and you’re caught unprepared. Having the skill to quickly whip up a beautiful gift bag from materials you likely already have on hand is an absolute lifesaver. Keep a few rolls of versatile wrapping paper, some scissors, and glue handy, and you’ll never be caught off guard again. For those who like to be extra prepared, making a batch of various sized bags in advance means you’ll always have one ready for any occasion.
Essential Materials for Crafting Your Own Gift Bags
The beauty of this DIY project lies in its simplicity and the minimal tools required. You likely have most of these items around your house already!
- Wrapping Paper: The star of the show! Choose any pattern, color, or thickness you like. Thicker paper tends to hold its shape better.
- Scissors: Sharp scissors are crucial for clean cuts.
- Ruler: For accurate measurements, ensuring straight lines and a symmetrical bag.
- Pencil: To mark your cutting and folding lines.
- Glue Stick or Double-Sided Tape: For securing seams. A strong craft glue can also work for added durability.
- Optional Embellishments: Ribbons, gift tags, decorative stickers, glitter, stamps, or markers to add a personal flair.
A Conceptual Guide to Making Your DIY Gift Bag
While a video tutorial can offer visual guidance, understanding the fundamental steps will empower you to create gift bags of any size. The process is remarkably straightforward once you grasp the basic mechanics.
- Measure and Cut Your Paper: Start by determining the desired size of your bag. Measure the height, width, and depth of your gift. Add extra length and width for folding margins and the bag’s base. Cut your chosen wrapping paper to these specific dimensions. Remember, accuracy here is key for a professional finish.
- Create the Main Body: Fold the long edges of your paper inward and glue or tape them together to form a cylinder. This will be the main body of your bag. Ensure the seam is straight and strong.
- Form the Base: This is a crucial step for a sturdy bag. Fold up the bottom edge of your cylinder to create the desired depth for the base. Then, open up this fold and press the corners inward to form two triangular flaps on each side. Fold the top and bottom edges of this base section towards the center, overlapping slightly, and secure them with glue or tape. This creates a flat, reinforced bottom.
- Define the Sides: Gently push in the sides of your bag to create the characteristic rectangular shape. Crease the folds firmly to give the bag structure.
- Add the Top Fold & Handles (Optional): For a neat finish, fold down the top edge of the bag. If you wish to add handles, punch holes on either side and thread through ribbon or string, knotting them securely. Alternatively, you can leave it as a simple open-top bag.
- Decorate and Personalize: Now comes the fun part! Add ribbons, gift tags, stamps, or hand-drawn designs to make your bag truly unique.
Pro Tips for Professional-Looking Handmade Gift Bags
To ensure your DIY gift bags look as polished and professional as store-bought ones, keep these expert tips in mind:
- Choose Quality Paper: While any wrapping paper works, thicker, more durable paper (like craft paper or heavy-duty wrapping paper) will result in a sturdier bag that holds its shape better, especially for heavier gifts.
- Precision is Key: Take your time with measurements and folds. Even slight inaccuracies can lead to a crooked or uneven bag. A ruler and bone folder (or the edge of a credit card) can be your best friends for crisp lines.
- Reinforce the Base: For added strength, especially if you’re planning to put heavier items inside, consider cutting a piece of cardboard or thick cardstock to the exact size of your bag’s base and inserting it before filling.
- Experiment with Adhesives: A good quality glue stick or strong double-sided tape works wonders. Test it on a scrap piece of paper first to ensure it holds well without warping the paper.
- Batch Produce for Efficiency: If you know you’ll need multiple gift bags for an upcoming event, set aside some time to make several at once. This saves time in the long run and ensures you’re always prepared.
- Think Beyond Wrapping Paper: While wrapping paper is excellent, don’t limit yourself! Old maps, calendar pages, newspaper comics, or even painted kraft paper can be repurposed into unique and charming gift bags.
- Don’t Forget the Details: The small touches make a big difference. A beautiful ribbon, a handmade gift tag, or a sprig of dried flowers can elevate your bag from simple to spectacular.
DIY Gift Bags for Every Occasion
The versatility of handmade gift bags means they are suitable for virtually any event or celebration throughout the year. Here are just a few ideas:
- Holiday Gifting: Imagine custom Christmas gift bags matching your holiday decor, or festive bags for Hanukkah or Kwanzaa, perfectly tailored to your celebrations.
- Birthday Parties: Create themed bags for children’s parties (superheroes, princesses) or elegant bags for adult birthdays.
- Weddings & Anniversaries: Design sophisticated bags with metallic accents or delicate patterns for wedding favors or anniversary gifts.
- Baby Showers: Adorable bags adorned with pastel colors, baby animals, or tiny footprints add a sweet touch to baby shower gifts.
- Host/Hostess Gifts: Show your appreciation with a beautifully crafted bag for a dinner party host, perhaps filled with homemade treats or a bottle of wine.
- Teacher Appreciation: A thoughtful, handmade bag filled with school supplies or a small token of gratitude.
- Corporate Events: Even for business gifting, a custom-branded kraft paper bag can leave a lasting, positive impression.
Start Crafting Your Own Unique Gift Bags Today!
Gone are the days of last-minute stress over gift packaging or settling for generic store-bought options. With the knowledge and inspiration shared here, you are now equipped to create stunning, personalized, and eco-friendly gift bags for every occasion. This simple craft not only saves you money but also injects a priceless personal touch into every present you give.
So, gather your favorite wrapping paper, unearth your scissors, and let your creativity flow! Whether you’re making one for an immediate need or batching a few for future events, the joy of crafting your own gift bags is immense. Embrace this rewarding skill, share your creations, and watch as your thoughtful presentations bring even bigger smiles to the faces of your loved ones. Happy crafting!