
Clever & Inexpensive DIY Home Projects: Transform Your Space on a Budget
Embarking on a journey of home improvement doesn’t always require a hefty budget or complex tools. In fact, some of the most brilliant transformations can be achieved with simple, inexpensive items you might already have lying around your home. This guide explores a selection of ingenious DIY projects that promise to add character, enhance organization, and inject a fresh sense of style into your living space, all while being incredibly kind to your wallet. Get ready to unlock your inner crafter and discover how easy and rewarding it can be to personalize your home with a touch of handmade charm.
The Joy of Budget-Friendly DIY: Why Get Crafty?
There’s a unique satisfaction that comes from creating something beautiful and functional with your own hands. Beyond the immense personal gratification, engaging in DIY projects offers a multitude of benefits:
- Cost-Effectiveness: Save significant money by upcycling materials and avoiding pricey store-bought alternatives.
- Personalization: Infuse your home with unique pieces that reflect your individual style and taste, making your space truly your own.
- Sustainability: Give new life to old items, reducing waste and contributing to a more eco-friendly lifestyle.
- Skill Development: Learn new techniques and expand your creative horizons with each project you undertake.
- Stress Relief: Many find the process of crafting to be a meditative and therapeutic escape from daily stressors.
- Instant Gratification: Witnessing a quick transformation can provide an immediate sense of accomplishment and boost your confidence.
These projects are designed for accessibility, proving that you don’t need to be an experienced artisan to achieve impressive results. With a little time and creativity, you can elevate your home’s aesthetics and functionality effortlessly.
Project Spotlight 1: The Brilliant Bandana Bag with Embroidery Hoop Handles
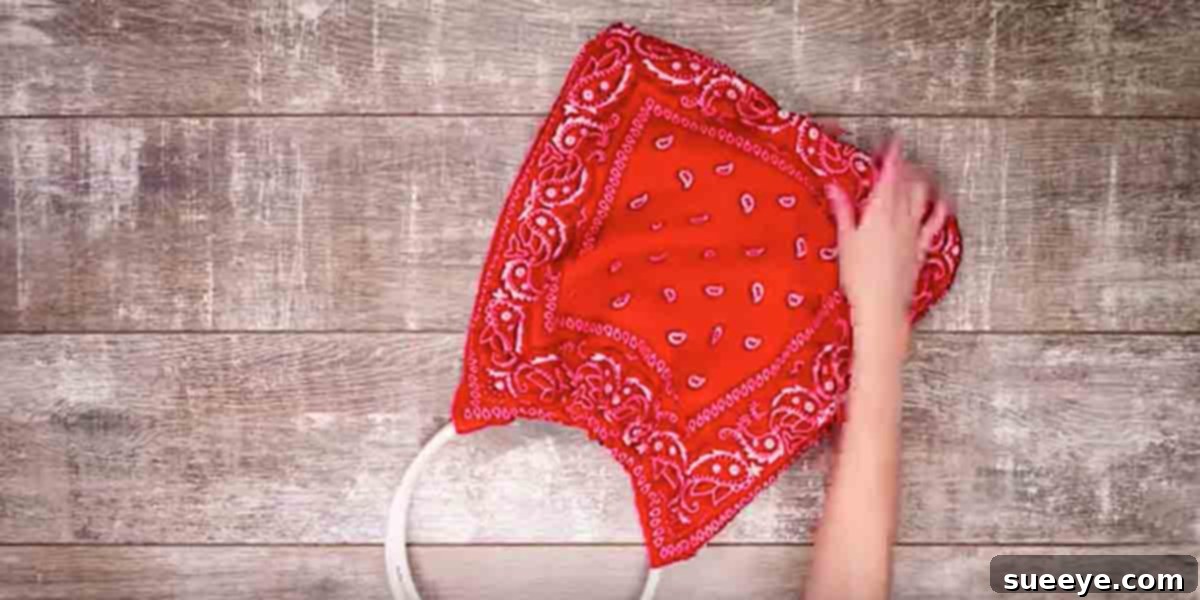
Imagine a chic, versatile bag that costs next to nothing to make and is absolutely brimming with personality. This bandana bag project is a true stroke of genius, particularly for its innovative use of an everyday craft item as a stylish handle. It’s an accessory that marries practicality with undeniable charm, making it perfect for a variety of uses.
Materials You’ll Need:
- 1-2 Large Bandanas (or fabric squares of similar size)
- 1 Embroidery Hoop (a larger size, like 8-10 inches, works best for comfortable handles)
- Matching Thread
- Sewing Machine (or needle for hand-sewing)
- Scissors
- Iron (optional, for crisp folds)
Step-by-Step Guide:
- Prepare Your Bandanas: Lay your bandana(s) flat. If using two bandanas for a lined bag, place them right sides together. If using one, simply fold it in half, ensuring the pattern aligns. Ironing the fabric can help achieve crisp, clean edges.
- Sew the Sides: Stitch along the two open sides of your folded bandana, leaving the top edge open. Use a straight stitch, about a 1/2-inch seam allowance. Reinforce the top few inches of the seam for added durability, as this area will bear the weight.
- Create the Bottom (Optional): For a flat-bottomed bag, you can “box” the corners. At each bottom corner, flatten the fabric so the side seam aligns with the bottom fold. Measure and mark a triangle from the corner, about 1-2 inches from the tip. Stitch across this line, then trim the excess fabric.
- Finish the Top Edge: Turn the bag right side out. Fold down the top raw edge about 1/4 inch, press, then fold again about 1 inch. Stitch this hem all the way around, creating a neat casing.
- Attach the Embroidery Hoop: Separate the two rings of your embroidery hoop. Insert the inner ring into the opening of your bag. Gather the fabric evenly around the hoop. Place the outer ring over the fabric and the inner ring, then tighten the screw on the outer ring to secure the fabric firmly in place. Ensure the fabric is taut and evenly distributed around the hoop for a professional finish.
Versatility and Styling:
This bandana bag isn’t just a pretty face; it’s incredibly versatile. Use it as a stylish shopping bag, a casual beach tote, a unique gift bag, or even as decorative storage for craft supplies or magazines in your home. The choice of bandana patterns and colors allows for endless personalization, letting you match it to your outfit or your home decor. Imagine a vibrant floral bandana for a summer outing or a classic paisley for an autumnal touch.
Project Spotlight 2: The Convenient Kitchen Hanging Rack
Is your kitchen cluttered with utensils, spices, or small gadgets taking up precious counter space? A convenient hanging rack can be a game-changer, providing instant organization and keeping essential items within arm’s reach. The beauty of this project lies in its simplicity and the speed with which you can transform a chaotic corner into an efficient workspace.
Materials You’ll Need:
- 1 Tension Rod (adjustable to fit your desired space – under cabinets, within a window frame, or across a small alcove)
- A selection of S-Hooks
- Small baskets or containers with handles (optional, for smaller items)
Step-by-Step Guide:
- Identify Your Location: Choose an area in your kitchen that could benefit from vertical storage. This could be under a wall cabinet, inside a pantry door, or even above your sink.
- Install the Tension Rod: Extend the tension rod to fit snugly between two opposing surfaces. Ensure it is level and secure enough to hold the weight of your items. No drilling required!
- Add S-Hooks: Distribute your S-hooks along the tension rod. You can space them out for larger items or group them for smaller ones.
- Hang Your Essentials: Hang frequently used utensils like spatulas, whisks, and ladles. For spices or smaller items, use the S-hooks to hang small baskets or containers. This system instantly clears counter space and makes cooking much more efficient.
Beyond the Kitchen:
The versatility of the tension rod and S-hook system extends far beyond the kitchen. Consider implementing this hack in other areas of your home:
- Bathroom: Hang towels, loofahs, or small caddies for toiletries.
- Craft Room: Organize ribbons, scissors, and other small tools.
- Entryway: Create a temporary hanging spot for keys, small bags, or dog leashes.
- Laundry Room: Hang delicate items to dry or organize cleaning supplies.
This clever solution demonstrates how a simple hardware store item can be repurposed into a highly functional organizational tool with minimal effort and cost.
Project Spotlight 3: The Pet-Friendly Bandana Sofa Cover
For pet owners, the battle against pet hair and dirt on furniture is a never-ending one. While throwing a plain sheet over your sofa might be practical, it rarely looks appealing. Enter the bandana sofa cover – a brilliant, stylish, and easily washable solution that protects your furniture while adding a pop of color and charm to your living room.
Materials You’ll Need:
- Multiple Bandanas (the number depends on the size of your sofa and how much coverage you desire; choose coordinating or contrasting patterns for a patchwork look)
- Sewing Machine (or needle and thread for hand-sewing)
- Scissors
- Iron (optional, for neat seams)
Step-by-Step Guide:
- Plan Your Layout: Lay your bandanas out on the floor or directly on your sofa to determine the best arrangement. Overlap them slightly to account for seams. Consider how much of your sofa you want to cover – just the seat, the back, or the arms too.
- Join the Bandanas: Using your sewing machine (or hand-sewing), stitch the bandanas together, creating a large, cohesive fabric panel. Use a straight stitch with about a 1/2-inch seam allowance. For a more durable finish, you can double stitch or serge the edges.
- Create the Cover: Once you have your desired size, you can simply drape the finished bandana panel over your sofa. For a more fitted look, you might want to hem the edges or add ties/elastic to secure it around the cushions, though simply tucking it in often works perfectly.
- Regular Maintenance: The beauty of this cover is its washability. When it gets dirty, simply remove the bandana cover and toss it into the washing machine. This is infinitely easier and faster than deep cleaning your entire sofa!
Aesthetic and Practical Benefits:
- Pet Hair & Dirt Barrier: Acts as a protective layer, catching pet hair, spills, and dirt before they reach your upholstery.
- Easy Cleaning: Unlike bulky sofa cushions, bandanas are lightweight and machine washable, simplifying your cleaning routine.
- Instant Style Update: Adds a casual, bohemian, or rustic chic vibe to your living room. The varied patterns and colors can introduce visual interest and warmth.
- Seasonal Decor: Easily swap out bandana covers to match different seasons or holidays, providing a quick and inexpensive decor refresh.
- Cost-Effective: A far more economical solution than professional sofa cleaning or investing in new furniture.
This bandana cover not only solves a common pet owner dilemma but also proves that practical solutions can be incredibly stylish and enhance your home’s overall aesthetic. It’s a wonderful alternative to less attractive coverings and showcases your creative flair.
Tips for Your DIY Journey: Embracing Creativity
Inspired by these clever projects, you might be eager to delve deeper into the world of DIY. Here are some general tips to make your crafting journey enjoyable and successful:
- Start Small: Begin with simple projects to build confidence and refine your skills before tackling more complex endeavors.
- Gather Inspiration: Platforms like Pinterest, YouTube (especially channels like “Tips & Tricks” mentioned in the original content), and craft blogs are treasure troves of ideas. Don’t be afraid to adapt ideas to fit your needs and resources.
- Repurpose & Upcycle: Always look at everyday objects with a new perspective. Can that old ladder become a bookshelf? Can those glass jars become chic storage?
- Don’t Fear Imperfection: Handmade items often have unique quirks that add to their charm. Embrace them as part of the creative process.
- Safety First: Always use appropriate safety measures when working with tools, even simple ones like scissors or sewing machines.
- Invest in Basic Supplies: A good pair of scissors, a sturdy needle, quality thread, and perhaps a sewing machine (if you plan on many fabric projects) are excellent foundational investments.
- Patience is Key: Some projects might take longer than expected, or require a do-over. Enjoy the process rather than rushing to the finish line.
The “gal with Tips & Tricks” often demonstrates how effortlessly these transformations can happen, making complex ideas seem approachable. Her step-by-step tutorials serve as a fantastic reminder that with clear guidance, anyone can achieve remarkable results.
Conclusion: Your Home, Your Masterpiece
These simple yet ingenious DIY projects demonstrate that creating a beautiful, organized, and personalized home doesn’t require a significant financial investment or expert skills. From a charming bandana bag that redefines accessory versatility, to a smart kitchen hanging rack that instantly declutters, and a practical bandana sofa cover that marries style with pet-friendly solutions, each idea empowers you to make meaningful improvements with items readily available. By embracing the spirit of clever reuse and simple craftsmanship, you can add color, charm, and impeccable organization to your decor. So, gather your materials, unleash your creativity, and start transforming your living space into a reflection of your unique personality and ingenuity. Happy crafting!